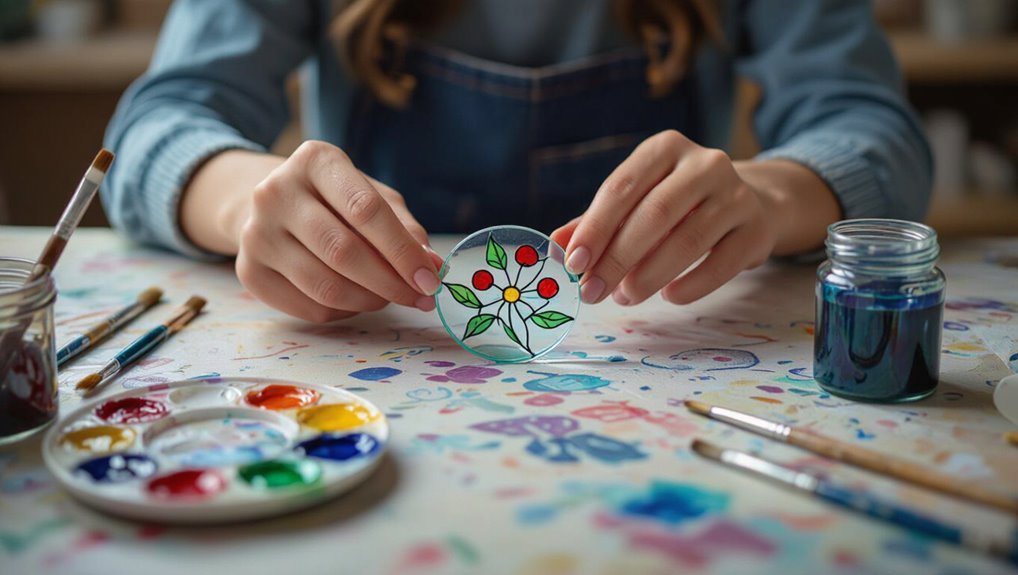
How to Paint on Stained Glass: Beginner-Friendly Guide
You can start painting on stained glass with simple, safe steps: clean and scuff the glass, pick suitable kiln-fired or acrylic enamel paints, and use fine applicators or brushes for lead-line relief and thin color layers. Tape and trace your design, build colors slowly for translucency, then cure or seal per manufacturer instructions for durability. Practice on scrap glass to master pressure and blending, and keep a tidy, ventilated workspace — continue to learn step-by-step techniques and project ideas.
Who This Guide Is For and What You’ll Learn
This guide is for hobbyists, crafters, and beginners who want to paint on stained glass with confidence.
You’ll adopt a beginner mindset, learn safe surface prep, basic tools, paint types, and simple techniques.
You’ll get troubleshooting tips, finishing and sealing advice, and project inspiration that encourages creative exploration.
Quick Project: Paint a Thrift-Store Window (Step-by-Step)
Grab a thrift-store window and set up a simple workstation—clean, well-lit, and ventilated—so you can turn a found piece into a painted focal point in a single afternoon.
Tape edges, sketch design with washable marker, prime glass if needed, then apply glass paint in thin layers.
Cure per product instructions, remove tape, add lead-line or faux leading for definition, and hang.
What You’ll Be Able to Paint Next (Projects & Skills)
Once you’ve mastered a thrift-store window, you’ll be ready to try simple sun catcher designs that teach color layering and light effects.
You can also add accents to functional glassware—think painted rims, stems, or small motifs—to practice detail work and durability.
Both projects build skills you’ll use on larger stained-glass pieces.
Simple Sun Catcher Designs
Start with a few easy sun catcher designs to build your confidence: think a single bold flower, a cluster of geometric shapes, or a simple stained-glass-style heart.
You’ll practice basic sun catcher techniques like outlining, filling, and layering. Try bold color combinations and translucent glazes to catch light.
These projects teach control, composition, and how colors interact on glass.
Functional Glassware Accents
Next you’ll move from decorative suncatchers to painting accents on functional glassware—think wine glasses, tumblers, and mason jars—so you can create pieces that look great and still get used.
You’ll learn durable paints, simple motifs, and how to balance functional design with color harmony for everyday use.
- Stem and rim accents
- Patterned bands
- Monograms and dates
- Opaque bases and gradients
Choose Paints for Stained-Glass Painting
You’ll want to pick between kiln-fired glass paints, acrylic enamels, and solvent-based glass colors based on your project.
Consider opacity and how much light you want to pass through each hue, since that changes the finished effect.
Also check surface prep requirements—some paints need cleaning, etching, or a primer before they’ll adhere properly.
Types Of Stained-Glass Paints
Although stained-glass painting uses many materials, the choice of paint determines durability, appearance, and firing method, so you’ll want to understand the main types before buying.
You’ll weigh acrylic versus enamel, and transparent versus opaque options for surface adhesion and heat tolerance.
Consider:
- Water-based acrylics: easy cleanup, low heat resistance
- Enamels: durable, require firing or solvent
- Stain-glass-specific frits
- Glass stains and washes
Opacity And Light Transmission
Now that you’ve compared paint types and their heat and handling needs, think about how much light you want your finished panel to let through.
Choose paints with varying opacity techniques—transparent washes for glowing light effects, translucent pigments for softened color, and opaque paints for bold blocking.
Test combinations on scrap glass to balance translucency, contrast, and the overall luminous quality before committing.
Surface Preparation Needs
1 step you can’t skip is proper surface preparation, because paint only adheres well to clean, dry, and slightly abraded glass.
You’ll assess surface types, remove oils, and prime edges so paint adhesion stays strong.
Follow these quick steps:
- Clean with alcohol or mild detergent
- Lightly scuff glossy panes
- Degrease fingerprints and residues
- Use appropriate primer for textured glass
Choose Brushes and Applicators for Crisp Lines
When you want crisp lines on stained glass, pick brushes and applicators that hold their shape and release paint evenly. Choose fine round sable or synthetic liners, flat shaders for edges, and foam-tipped applicators for dots. Practice applicator techniques to control flow.
| Tool | Best use |
|---|---|
| Liner brush | Fine outlines |
| Flat brush | Edges |
| Foam tip | Dots |
| Cotton swab | Corrections |
Essential Safety Gear and Workspace Setup
Before you start painting, make sure you’re wearing protective clothing and gloves to keep paint and solvents off your skin.
Set up in a well-ventilated area or use a fume extractor to avoid inhaling fumes.
Work on a stable, clean surface so your glass stays steady and your tools are organized.
Protective Clothing And Gloves
Paint fumes, glass shards, and solvent splashes can harm your skin and clothes, so suit up with the right protective clothing and gloves.
You’ll follow safety precautions by wearing durable sleeves, aprons, and gloves that resist solvents; protective gear keeps cuts and contamination away while you paint.
- Long-sleeve cotton shirt
- Chemical-resistant gloves
- Heavy-duty apron
- Closed-toe shoes
Well-Ventilated Work Area
Because solvents and airborne glass dust can build up quickly, you’ll want to work in a space with strong airflow and easy access to fresh air. Prioritize ventilation importance: open windows, use a fan, and position exhaust toward outdoors so air circulation removes fumes. Visualize setup:
| Window | Fan | Exhaust |
|---|---|---|
| Open | Oscillating | Ducted |
| Near | Portable | Outward |
Stable, Clean Work Surface
1 clear, flat work surface keeps your stained glass project steady and prevents chips, scratches, or accidental spills; set up on a sturdy table covered with a clean, non-slip mat and wipe it down before you begin.
Keep a clean workspace and organized tools nearby so you can work safely and efficiently.
- Good lighting
- Non-slip mat
- Tray for paint
- Rags and wipes
Clean and Prep Glass for Lasting Paint Adhesion
Before you lay down any color, make sure the glass is spotless and completely dry so the paint can bond properly.
Use appropriate cleaning techniques—mild detergent, isopropyl alcohol, or acetone—matched to glass types to remove oil, fingerprints, and residues.
Roughen slick factory finishes lightly with fine abrasive, then wipe again.
Handle edges with gloves to avoid recontamination before painting.
Transfer Your Pattern With Tracing Paper and Guides
Place your pattern where you want it on the glass and double-check alignment before you start.
Tape the tracing paper down so it won’t shift, then trace key outlines and reference points carefully.
Finally, transfer the guide lines onto the glass with a light pencil or marker to follow when you paint.
Positioning Your Pattern
Now you’ll transfer the pattern onto the glass using tracing paper and simple guides so your design sits exactly where you want it.
You’ll check pattern placement and tweak for precise design alignment before tracing. Use light marks and reference points to keep everything consistent.
- Align center marks with glass center
- Use tape as temporary guides
- Mark corners lightly
- Double-check symmetry before tracing
Securing Tracing Paper
Secure the tracing paper with a few small pieces of low-tack tape so your pattern won’t shift while you work. Hold edges gently and smooth wrinkles to maintain accuracy.
Use simple tracing paper techniques: light pencil strokes, consistent pressure, and short, controlled movements. Check alignment frequently and replace tape as needed.
Proper securing paper prevents smudges and keeps your design crisp for painting.
Transferring Guide Lines
1. You’ll transfer guide lines by aligning tracing paper, securing edges, then using light pressure to trace patterns onto glass.
Use steady transferring techniques to preserve guideline accuracy and avoid smudges. Follow these quick tips:
- Tape corners to prevent shifting
- Use a soft pencil for clear lines
- Check alignment with a backlight
- Reinforce faint lines with marker
Trace and Grid a Simple Stained-Glass Design on Glass
Start by positioning your cleaned glass over the paper pattern and aligning key reference points so everything sits square. Tape edges, then trace major shapes with a fine permanent marker.
Divide the design into a light grid to transfer proportions accurately, adjusting for design inspiration and pattern variations.
Number squares on paper and glass, then redraw details within each grid cell for precise placement.
Outline: Create Leadline Effects With Relief Paint
Now you’ll prepare relief paint for clean, raised lines that mimic traditional lead came.
Start with a steady bead—keep your bottle at a consistent angle and use smooth, continuous motion to avoid blobs.
Practice pressure control and pauses so your lines stay even and crisp.
Preparing Relief Paint Lines
Before you lay any relief paint, make sure your glass is spotless and completely dry so the raised lines will adhere cleanly and hold their shape.
Plan your design, tape guides, and choose a steady applicator. Practice relief paint techniques on scrap glass to master pressure for creating outlines.
- Choose applicator tip size
- Use stencil or tape guides
- Test bead height
- Keep rag and solvent ready
Techniques For Smooth Beads
With your relief lines planned and practiced, focus next on creating smooth, even beads that mimic lead came.
You’ll steady the bottle, squeeze gently, and move at a consistent pace. Use bead techniques like controlled pressure, wrist support, and short practice runs.
For smooth application, keep tip clean, pause only to adjust, and scrape small bumps before curing to maintain crisp, raised lines.
Fill Color: Opacity, Layering, and Blending Tips
Because stained glass paint behaves differently than acrylics or oils, you’ll want to think about opacity, layering, and blending from the first stroke.
Because stained glass paint differs from acrylics or oils, plan opacity, layering, and blending from your very first stroke.
You’ll control fill color by choosing opacity techniques, building thin layers, and using precise blending methods to preserve glass luminosity.
Practice gradual glazing and feathered joins for smooth shifts.
- Thin glazes
- Wet-on-dry layers
- Feathered blending
- Controlled opacity buildup
Add Texture: Glass Frits, Enamels, and Metallics
Once you’ve settled on opacity and smooth layering, you can add tactile and visual interest by incorporating glass frits, specialty enamels, and metallic accents.
You’ll sprinkle fine or coarse frit for varied glass textures, brush enamels for matte or glossy contrast, and apply metallic leaf or powders for highlights.
Plan placement, test compatibility, and use precise color layering to unify the design.
Cure Painted Glass: Heat-Set Safely
Finish curing your painted glass by heat-setting the paints to make them durable and dishwasher-safe. You’ll use recommended heat settings, preheat gradually, and avoid thermal shock to boost paint durability.
Follow manufacturer times and test a scrap piece first.
- Preheat oven or kiln slowly
- Use thermometer or controller
- Monitor peak temperature and hold time
- Cool gradually before handling
Seal Painted Glass for Outdoor Use and Hand-Wash Durability
Sealers lock in your paint’s durability and protect it from rain, sun, and repeated hand-washing, so choose one rated for outdoor use and glass surfaces.
Compare seal types (spray, brush-on, UV-curing) and pick protective coatings offering outdoor durability.
Test hand wash methods on a small area, avoid harsh abrasives, and reapply thin coats as needed to maintain protection without altering finish.
Fix Common Problems: Drips, Bubbles, and Uneven Coverage
Troubleshoot drips, bubbles, and uneven coverage by identifying their causes—too-thick paint, trapped air, or uneven application—and addressing each with the right technique.
Use drip prevention techniques, bubble elimination methods, uneven coverage solutions, and paint thickness adjustments to fix issues quickly.
- Thin paint slightly for smoother flow
- Work in thin layers for control
- Brush gently to release air
- Sand lightly between coats
Remove Mistakes and Prep for Repainting
Strip away mistakes before you paint again: carefully remove drips, runs, and smudges so the new layers will adhere and look clean.
Use a razor scraper or fine-grit sanding pad for mistake removal, then wipe with alcohol. Let the glass dry fully.
Revisit your design, plan color layers, and apply repainting techniques like thin coats and curing between layers to prevent repeats.
Quick Project: Personalize a Glass Jar or Vase
Pick a clean jar or vase and set up a small, well-lit workspace where you can move comfortably—this quick project will let you personalize a piece in under an hour.
Choose paints and brushes, sketch a simple motif, tape guidelines, and layer colors.
Pick paints and brushes, sketch a simple motif, use tape for clean lines, and build colors in layers.
For glass jar or vase personalization try:
- Monograms
- Geometric bands
- Floral accents
- Ombre washes
Care and Cleaning for Finished Painted Glass
Once your painted glass is fully cured, handle it gently and clean it with mild soap and lukewarm water—avoid hot water, abrasive pads, and harsh chemicals that can dull or lift the paint. Use gentle cleaning techniques and simple maintenance tips: wipe softly, air dry, and store safely.
| Calm | Care | Cherish |
|---|---|---|
| Soft | Slow | Safe |
| Warm | Mild | Dry |
| Gentle | Steady | Love |
| Protect | Respect | Enjoy |
Cost and Materials Checklist for Your First Kit
Budgeting for your first stained-glass painting kit helps you get exactly what you need without overspending.
Track a simple cost breakdown and prioritize material sourcing from trusted suppliers. You’ll need basics to start, plus small extras for finishing.
- Glass paints (opaque/transparent)
- Brushes and palette
- Surface cleaner and primers
- Sealant and gloves
Troubleshooting FAQ: Top Beginner Questions
Wondering where to start when paint won’t adhere, colors look muddy, or fine lines wobble? You can fix common issues fast: clean glass, thin paints, steady your hand, and follow curing steps. Practice stained glass techniques and adjust paint application for opacity and flow.
| Problem | Quick Fix |
|---|---|
| Paint won’t stick | Clean, prime, thin |
| Muddy color | Layer, cure properly |
| Wobbly lines | Use steady grip, finer brush |
Frequently Asked Questions
Can Stained-Glass Paint Be Used on Textured or Patterned Glass Surfaces?
Yes — you can paint on textured or patterned glass, but you’ll adapt textured glass techniques and accept patterned glass challenges; you’ll prep thoroughly, use flexible paints, work in layers, and test adhesion for lasting results and crisp detail.
How Long Before Painted Glass Is Safe to Handle After Heat Curing?
You can usually handle painted glass after 24–72 hours post-heat curing; full curing times vary by paint, and you’ll want to wait longer for maximum paint adhesion and durability before heavy use or washing.
Can I Mix Different Brands of Stained-Glass Paints Together?
About 60% of hobbyists report better results testing before mixing. You can mix different brands, but check paint brand compatibility and use cautious mixing techniques; you’ll test small batches, adjust ratios, and note curing differences before larger projects.
Will Painted Glass Colors Fade if Exposed to Sunlight?
Yes — painted glass can fade in sunlight, so you should use UV protection and fading prevention measures like UV-resistant paints, clear UV varnish, or mounting away from direct sun to preserve color intensity and longevity.
Are There Non-Toxic, Food-Safe Paints for Jars and Drinking Glasses?
Yes — you can — but choose carefully: eco friendly options like FDA-compliant ceramic or enamel paints exist, and when you cure them properly you’ll get lasting paint durability that’s non-toxic and safe for jars and drinking glasses.
Conclusion
You’ve got this—stained-glass painting is surprisingly reachable. About 60% of hobbyists say their first project boosts confidence enough to try something bigger, so expect quick wins. Start simple, keep tools and paints tidy, and practice steady lines. With each small piece you’ll build technique, patience, and style. Don’t worry about perfection; the fun’s in the learning. Ready to turn thrift finds into keepsakes? Go paint something you love.