
How to Paint Over Peeling Paint the Right Way
You can stop peeling paint from coming back by first removing loose flakes, sanding smooth edges, and cleaning off dirt and oils. Fix any moisture or substrate problems before you spot-prime bare areas with a compatible bonding or stain-blocking primer. Apply two thin, even topcoats, allowing proper dry time, and seal junctions and trim to avoid future failure. Take safety precautions for dust and possible lead; keep going to learn practical tools, techniques, and when to call a pro.
Quick Answer: Fix Peeling Paint for a Lasting Repair
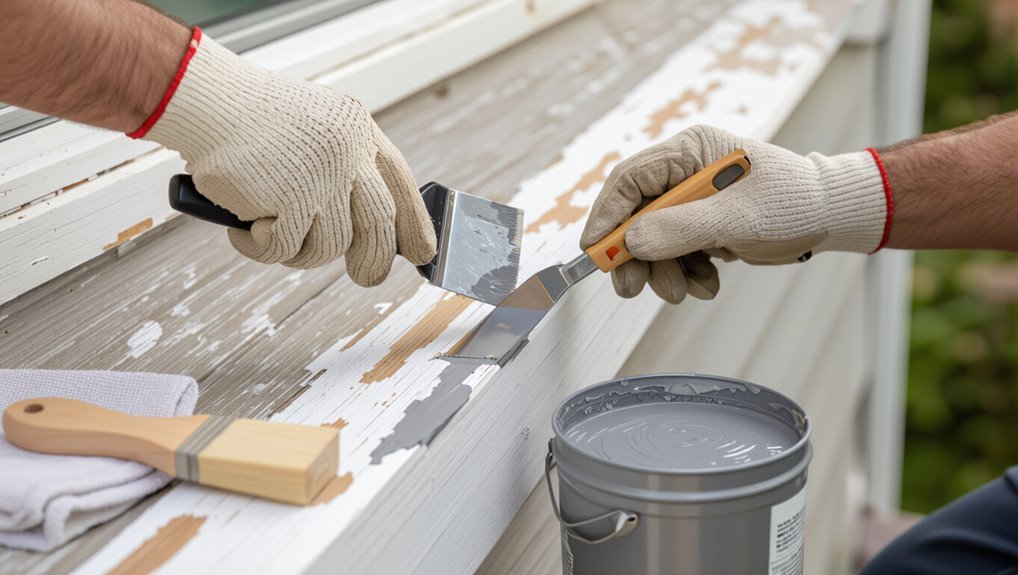
Start by removing loose paint, sanding the edges smooth, and cleaning the surface so new paint can adhere. You’ll then prime bare spots, use a compatible paint, and apply two thin coats for durability.
You’ll address peeling paint with simple repair techniques: scrape, sand, fill cracks, spot-prime, and finish with thin, even coats, letting proper dry time between layers.
Does This Peeling Need Repair or Full Replacement?
How can you tell whether peeling paint needs a simple repair or a full replacement? You’ll assess extent, substrate soundness, and moisture. Small, localized peeling usually calls for repair options; widespread adhesion loss or damaged substrate needs replacement. Use this quick guide:
| Issue | Likely action | Notes |
|---|---|---|
| Small flakes | Repair | Spot-sand, prime, paint |
| Large areas | Replace | Strip, fix substrate, repaint |
| Moisture | Replace | Address leak first |
| Hairline | Repair | Feather and paint |
Causes of Peeling Paint and What They Mean for Repairs
Because peeling has different triggers—moisture, poor prep, incompatible coatings, or structural movement—each one points to a specific repair approach.
You’ll diagnose moisture damage vs adhesion failure: fix leaks, dry surfaces, strip or sand failed layers, and use compatible primers.
For temperature fluctuations and movement, use flexible, breathable coatings and allow full cure time so new paint bonds and lasts.
Safety First: Dust Control, Lead Testing, and PPE
Before you start scraping or sanding, control dust by sealing the work area, using drop cloths, and running a HEPA air cleaner to keep particles contained.
Test for lead on older paint with an EPA-approved kit or hire a certified inspector so you know whether you need special containment and disposal.
Wear a fitted N95 or P100 respirator, gloves, and eye protection anytime you disturb painted surfaces.
Dust Control Measures
When you’re sanding or scraping old paint, control dust from the start to protect yourself and your home: contain the work area with plastic sheeting, seal vents and doorways, and use a HEPA-equipped vacuum to catch airborne particles as you go.
Use wet-sanding, local exhaust ventilation, and dust management techniques; wear PPE and follow effective cleanup strategies to minimize spread and exposure.
Lead Test Procedures
If your home was built before 1978 or you’re unsure about the paint’s age, test for lead before you scrape or sand—lead testing keeps you and your family safe and guides how much containment and PPE you’ll need.
Use EPA-approved lead paint kits for quick screening, or hire certified inspectors who use XRF or lab analysis.
Follow their recommendations for containment, cleanup, and respiratory protection.
Tools and Materials Checklist for Repairing Peeling Paint
Gathering the right tools and materials will make repairing peeling paint faster and give you a longer-lasting finish.
You’ll need drop cloths, scrapers, wire brushes, sandpaper (various grits), patching compound, and a quality brush or roller.
Choose paint types suited to the surface and confirm primer selection for adhesion.
Also have masking tape, a tack cloth, gloves, and safety goggles ready.
Spot-Prime vs Strip: A Quick Triage Guide
Now that you’ve got the right tools and materials, you’ll need to decide whether to spot-prime or strip — a quick assessment that saves time and prevents wasted effort.
Inspect adhesion: isolated chips with solid surrounding paint favor spot prime benefits like speed and less prep.
Inspect adhesion: isolated chips surrounded by sound paint make spot-priming faster and require far less prep.
Widespread delamination demands stripping techniques to reach sound substrate.
Choose based on extent, substrate, and future durability.
Remove Loose Paint: The Right Method
Start by tackling all the loose and flaking paint so you’re working on a stable surface. You’ll scrape, sand, and clean to reveal solid substrate, improving paint adhesion.
Use proper peeling techniques to avoid gouges and feather edges before priming.
Visualize steps:
- Scrape large flakes
- Sand feathered edges
- Vacuum and wipe dust
- Spot-prime bare spots
Lead Paint: Testing and Safe Containment
Because old paint can contain lead, test any surface built before 1978 before you scrape or sand, and contain the area if the test is positive.
If your home predates 1978, test for lead before sanding or scraping—and contain the area if positive.
You’ll use EPA-approved testing methods, wear PPE, and follow safety protocols.
Employ containment strategies like plastic sheeting, negative air, and HEPA vacuums.
Label and dispose of waste correctly, and keep children and pets away until clearance testing confirms safety.
Repair Rot, Rust, and Cracks Before Painting
Once you’ve confirmed there’s no lead hazard, inspect the surfaces for rot, rust, and cracks before you paint.
Address issues promptly: remove rotten wood, apply wood treatment, sand rust, and use metal protection primer.
Fill cracks with appropriate filler, then let cures fully.
Visualize repairs:
- Soft, rotted board removed
- Fiberglass patch filling gap
- Flaking rust wire-brushed
- Clean, primed metal surface
Sand Edges and Feather for Smooth Transitions
Match the old paint to the new by sanding the peeled edges until they blend smoothly into the surrounding surface; you want a gentle slope, not a sharp lip, so the new coat won’t show ridges. Use proper sanding techniques and focus on feathering edges for invisible changes. Be patient, check progress, and finish with light touch for seamless repainting.
| Hope | Care | Pride |
|---|---|---|
| Calm | Skill | Glow |
| Smooth | Steady | Joy |
| Finish | Trust | Beauty |
Clean and Degrease for Long-Lasting Adhesion
Start by brushing away loose debris so the new paint can grab the surface.
Use a degreasing cleaner to remove oils and stubborn residues that would block adhesion.
Rinse thoroughly and let the area dry completely before you prime or paint.
Remove Loose Debris
Scrape away loose flakes and dust with a stiff brush or putty knife, then wipe the surface with a cleaner to remove grease, mildew, and dirt so new paint will stick.
You’ll focus on debris removal and surface preparation to guarantee adhesion.
Visualize the cleanup:
- Flaky paint piled on a tarp
- Bristles sweeping dust away
- Crumbled edges exposed
- Smooth, clean substrate ready to prime
Use Degreasing Cleaner
1. You’ll want to degrease surfaces before priming; oil, grime, and residues prevent adhesion.
Choose appropriate cleaner types—trisodium phosphate substitutes, citrus-based solutions, or commercial degreasers—and follow product directions. Test in an inconspicuous spot.
Use proper degreasing methods: scrub with a nonabrasive pad, work in sections, and wear gloves.
Proper cleaning guarantees primer and paint bond reliably.
Rinse And Dry Thoroughly
After you’ve removed grease and grime, rinse the surface thoroughly to strip away detergent and loosened residue so primer can bond properly.
Use gentle rinse techniques, then employ effective drying methods so paint adheres.
Visualize:
- Steady spray washing loosened grit.
- Soft scrub with clear rinse.
- Microfiber squeegee to push water away.
- Warm air or fan for complete drying.
Choose the Right Primer for Problem Surfaces
When you’re dealing with peeling paint, pick a primer formulated for problem surfaces—like bonding, stain-blocking, or high-adhesion primers—so the new finish will stick and hide imperfections. You’ll match primer types to surface compatibility, prep properly, and apply evenly for best adhesion.
| Primer | Best For | Notes |
|---|---|---|
| Bonding | Smooth glossy | Promotes grip |
| Stain-block | Water stains | Seals tannins |
| High-adhesion | Flaking areas | Flexible coat |
| Shellac | Severe stains | Fast dry |
When to Use Bonding, Stain-Blocking, or Shellac Primers
If the old paint’s glossy or slick, reach for a bonding primer so the new coat will grab and stay; use a stain-blocking primer where tannin or water marks bleed through, and choose shellac when stubborn stains or odor need a fast, sealing solution.
You’ll get bonding primer benefits for adhesion and shellac primer uses for tough stains.
- Glossy trim
- Water stains
- Nicotine/tannin bleed
- Knotty wood
Pick the Best Paint Type and Finish for Each Surface
You’ll want to match paint types to the surface—use masonry paint for brick, exterior acrylic for wood, and moisture-resistant formulas for bathrooms.
Pick a finish that balances look and durability: flat hides flaws, satin and semi-gloss resist wear and are easier to clean.
Make sure your primer is compatible with both the substrate and the topcoat so the system bonds and lasts.
Surface-Specific Paint Types
Because different surfaces demand different formulations, picking the right paint type and finish matters for both adhesion and durability; you’ll want to match paint chemistry and sheen to the material—wood, metal, masonry, or previously painted surfaces—to prevent future peeling and simplify maintenance.
- Wood surfaces: stain-blocking primers, acrylic latex for interior surfaces.
- Metal surfaces: rust-inhibiting specialty paints.
- Masonry surfaces: breathable masonry paints.
- Drywall types & textured finishes: lightweight joint compound–compatible primers and paints.
Choosing Finish For Durability
When choosing a finish for durability, match the paint’s sheen and formulation to how each surface will be used and cleaned—high-traffic wood trim benefits from a tough satin or semi-gloss acrylic, while porous masonry needs a breathable, flat or low-sheen masonry paint to shed water but allow vapor transmission.
You’ll pick durable finishes based on surface selection, traffic, and cleaning frequency to maximize longevity.
Primer And Paint Compatibility
Matching finish to use is only part of the job—you also need to pair the right primer and paint so coatings bond and perform on each surface.
Choose primer types for substrate, promote paint adhesion, and match oil- or water-based systems.
Consider surface porosity, previous coatings, and finish.
Visualize examples:
- Bare wood — latex primer + acrylic paint
- Metal — rust-inhibitor primer + enamel
- Chalky surface — bonding primer + acrylic
- Bathroom tile — epoxy primer + semi-gloss
Match or Pick a New Color Over Patched Areas
If your patched areas are small and well-sanded, you can often blend in the original color by feathering the new paint into the surrounding surface; otherwise, choose a new shade that makes the patch look intentional. Use color matching techniques and weigh aesthetic considerations. Test swatches, view in different light, and pick finishes that hide texture.
| Test | Light | Finish |
|---|---|---|
| Swatch | Day | Matte |
| Blend | Night | Satin |
How to Apply Primer for Best Coverage and Adhesion
Before you paint, apply a primer that’s suited to the surface and the type of paint you’ll use so the topcoat adheres evenly and covers old stains or varying textures.
Choose primer types for wood, drywall, metal or stain-blocking. Use proper application techniques for thin, even coats and drying time.
- Sand
- Clean
- Prime
- Inspect
Paint Like a Pro: Brush, Roller, and Spray Tips
When you pick up the brush, roller, or sprayer, work with the tool’s strengths—use brushes for edges and detail, rollers for flat walls, and sprayers for large, textured surfaces—to get smooth, consistent coverage without overworking the paint.
Use brush techniques like angled strokes, roller methods such as “W” patterns, and spray advantages for speed. Control overlap, maintain wet edges, and steady paint application.
How Many Coats and Proper Drying Times
You’ll usually need two coats for good coverage over repaired, peeling areas, but one high-quality primer plus one finish coat can be enough in some cases.
Let each coat dry fully to the manufacturer’s recommended time—often a few hours for latex and longer for oil-based paints—before applying the next.
Rushing the process can cause poor adhesion and more peeling, so plan your schedule around proper drying times.
Number Of Coats
Although the exact number varies with surface condition and paint type, you’ll usually need two coats for good coverage and durability.
You’ll apply a primer first if needed, then a topcoat; adjust coats application based on porosity and color change. Monitor coats drying before the second coat.
- Sanded base
- Primer layer
- First topcoat
- Final touch-up
Proper Drying Time
Now that you’ve planned the coat sequence and prepped the surface, pay close attention to drying times between coats to get a smooth, durable finish.
You should wait recommended times on the paint can, adjust for humidity impacts, and use drying techniques like fans or dehumidifiers.
Thin coats dry faster; two thin coats often outperform one thick coat.
Test touch-dry before recoating.
Seal Transitions and Trim to Prevent Future Peeling
Because moisture and movement concentrate at joins, sealing connections and trim is essential to stop paint from peeling again.
You’ll use junction sealing and trim protection to block water and flex. Apply caulk, backer rod, and paintable sealant; sand and prime trim; and maintain joints.
- Smooth caulk bead
- Backer rod fill
- Sanded primed trim
- Paintable sealant finish
Common Mistakes That Cause Paint to Peel Again
If you skip proper surface prep, the new paint won’t bond and will peel again.
Using the wrong primer for your substrate or existing finish also causes failures.
Avoid those two mistakes and your repaint will last much longer.
Skipping Surface Preparation
When you skip surface preparation, you’re asking the paint to cling to problems instead of a sound base, and those issues almost always come back to haunt you.
Surface neglect ignores dirt, loose flakes, and moisture; you’ll see failure fast.
Remember preparation importance: clean, scrape, sand, and dry thoroughly before painting.
- Cracked flakes
- Greasy residue
- Damp wood
- Uneven edges
Using Wrong Primer
Although it might seem like an extra step, picking the wrong primer sets you up for peeling all over again; primers create the bond between surface and paint, and using one that’s incompatible with your substrate or topcoat breaks that bond.
You’ll get improper adhesion or an incorrect texture if you don’t match primer type to material—choose latex, oil, or bonding primer deliberately.
Maintain Painted Surfaces to Prevent New Peeling
To keep peeling from coming back, make routine checks of painted surfaces and address problems early. You’ll focus on surface upkeep through regular inspections, quick touch-ups, and moisture control to stop small issues from growing.
- Scrape flaking spots.
- Sand rough edges.
- Caulk gaps to block water.
- Repaint faded sections promptly.
When to Call a Pro: Complex Problems That Need Help
If regular inspections and quick touch-ups aren’t stopping recurring peeling, you’ll want professional help for more complex problems.
Call an expert consultation when you spot widespread blistering, structural moisture, mold, lead concerns, or failed previous repairs.
Call a professional if you see widespread blistering, structural moisture, mold, lead risks, or failed past repairs.
These signs urgency and need diagnostic testing, structural fixes, or remediation.
A pro protects health, prevents recurrence, and guarantees proper surface prep and durable repainting.
Frequently Asked Questions
Can I Repaint Without Fixing Underlying Moisture Sources First?
You shouldn’t; you’ll need a moisture assessment first because ongoing dampness undermines paint adhesion. Fix sources, let surfaces dry, and then repaint—otherwise the new finish will likely peel, blister, or fail prematurely.
How Long Should New Paint Last on Exterior Wood in Rainy Climates?
Contrary to expectations, you’ll often get 5–8 years of exterior paint durability on wood, but rainy climate considerations can cut that; you’ll need frequent inspections, high-quality coatings, and proper prep to extend performance.
Will Color-Changing Primer Hide Severe Stains Without Multiple Coats?
No — you shouldn’t expect a color-changing primer to hide severe stains in one coat. You’ll need stain blocking primer types and proper prep; oil‑based or shellac primers work best to stop bleed‑through with fewer coats.
Can I Paint Over Mold After Bleaching but Without Removing It?
You shouldn’t paint over mold after bleaching without removing it; you’ll risk poor paint adhesion and recurring growth. Clean and remove mold first, treat for mold prevention, then prime and repaint for lasting results.
Is Low-Voc Paint Safe for Pregnant Residents and Pets During Application?
Low-odor lullaby: low-voc benefits bring better breathing. You should ventilate well, vacate during application, wear masks, and avoid contact; take safety precautions for pregnant residents and pets by returning only after fumes dissipate.
Conclusion
Fixing peeling paint isn’t just cosmetic—it’s about stopping trouble before it spreads. You can tackle most jobs yourself if you diagnose the cause, prep carefully, and use proper tools and safety gear; think of it like mending a torn sail so it holds wind again. Seal junctions, prime bare spots, and paint with the right products to prevent repeat peeling. Call a pro for structural, moisture, or lead issues beyond DIY comfort.
