How to Paint Suede Walls: A Step-by-Step Guide to the Perfect Texture
You can refresh suede walls by prepping, priming, and painting to preserve that soft, muted texture. Start by cleaning and repairing damage, then use a bonding or stain-blocking primer suited to suede’s absorbency. Roll or spray two thin coats of high-quality acrylic or latex paint, working gently to avoid flattening the finish. Allow proper drying between coats and avoid heavy sanding. Follow the step-by-step tips ahead for troubleshooting, tools, and timing to get a lasting, professional look.
How to Paint Suede Walls Quick Answer and Project Overview
Yes—you can paint suede walls, but expect extra prep and a muted, textured finish rather than a crisp, smooth coat.
You’ll spend a few hours to a couple of days depending on repair needs, budget modestly for primers and specialty rollers, and find the difficulty moderate if you follow the right steps.
Painting makes sense for freshening color or covering minor wear, while severe damage or valuable original suede may be better off restored or replaced.
Quick Answer: Can you paint suede walls and what to expect?
Curious whether you can paint suede walls? Yes — you can transform them, but expect extra prep and texture changes.
When learning how to paint suede walls, you’ll clean, sand lightly, and apply primer designed for porous or textured surfaces.
Paint may mute the suede nap and alter sheen; multiple thin coats give best coverage. Results are durable if you prep correctly.
Project overview: time, cost, difficulty, and final look
Plan on this project taking a weekend for a single room: you’ll spend a few hours cleaning and sanding, a couple hours priming, and several short painting sessions (with drying time) over one to two days.
Expect moderate cost for primer, texture paint, and tools, medium difficulty if you’re careful, and a soft, velvety matte finish that hides minor imperfections.
- Budget: $50–$200
- Skill: DIY-friendly
- Outcome: subtle texture, durable finish
When painting suede walls is a good idea vs when to replace or restore
If your suede walls are mainly faded, lightly stained, or you just want a new color and texture, painting is a fast, cost-effective fix that preserves the underlying surface; however, if the suede is peeling, water-damaged, has mold, or the texture itself is integral to the room’s character or value, you should consider repairing or replacing it instead.
Assess adhesion, damage depth, and budget before deciding.
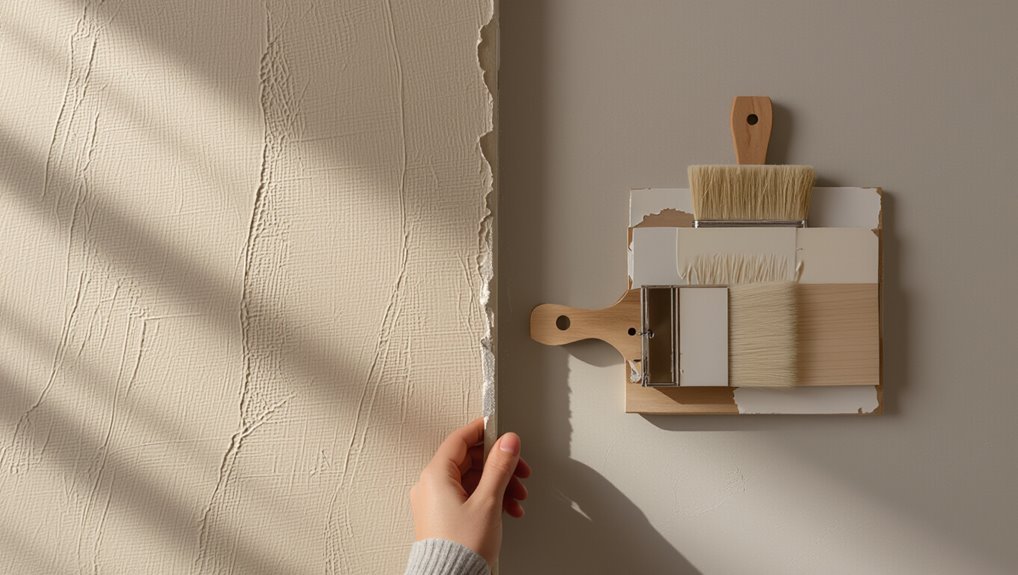
Understanding Suede Walls: Materials, Finish, and Challenges
Suede walls are a textured finish made from tinted plaster, micro-skims, or specialty paints applied with trowels, rollers, or suede cloths. You’ll want to know which method your wall used.
The nap, porousness, and irregular texture affect how much paint it soaks up and whether brush or roller marks will show.
Expect common issues—stains, flaking, and patchy coverage—and understand that painting will alter the nap and overall look, so plan for testing and surface prep.
What are suede walls? Materials and common application methods
Think of suede walls as a soft, textured finish that mimics the look and feel of real suede fabric; they use fine-grain plasters, tinted glazes, or specialty paints applied with sponges, suede brushes, or trowels to create that velvety, mottled surface.
You’ll choose materials based on durability and sheen, prepare substrates carefully, and apply layered, controlled strokes or stippling to build depth without overworking the finish.
Characteristics of suede finish that affect painting (texture, absorbency, nap)
Texture, absorbency, and nap are the three practical qualities you’ll need to account for when painting suede walls.
You’ll feel the soft, brushed surface that holds paint differently than flat plaster. Its variable absorbency soaks primer unevenly, and the nap’s direction changes sheen and coverage.
Work with low-viscosity primers, test sheen, and always stroke with the nap for consistent results.
Common problems with suede walls (staining, flaking, uneven texture)
A soft finish can hide a lot, but suede walls are still prone to common problems you should watch for: stains from oils or dyes, flaking where the nap lifts or the binder fails, and uneven texture that shows as patchy sheen or pile direction.
You’ll need to inspect, test, and target fixes quickly to avoid permanent damage.
- Stains
- Flaking
- Uneven texture
How painting changes texture and appearance realistic expectations
When you paint suede walls, expect the finish to change both visually and to the touch: paint fills fibers and binder gaps, dulls the nap, and can create a flatter, more uniform sheen that masks some surface flaws while making others — like pile direction or previously hidden repairs — more noticeable.
You’ll lose some softness; thin coats reduce texture loss, primers improve adhesion, and test patches set expectations.
Preparation: Assessing and Preparing Suede Walls for Paint
Before you start painting suede walls, assess the surface for damage, loose areas, and any existing coatings that might affect adhesion.
Do a small patch test to check paint compatibility, then clean with recommended mild cleaners while avoiding harsh brushes or solvents.
Repair and stabilize damaged suede with appropriate fillers and sanding, and mask trim and floors thoroughly to protect the room.
Step 1 Assess wall condition: damage, adhesion, previous coatings
Start by closely inspecting the suede surface for damage, adhesion problems, and signs of previous coatings so you know exactly what you’re dealing with.
Check for loose texture, stains, or soft spots; note paint layers or varnish. Document issues and plan repairs.
- Tears, gouges, or crumbling areas
- Flaking or peeling coatings
- Water stains or mold迹
Step 2 Testing adhesion and paint compatibility (patch test)

Do a small patch test to confirm the suede accepts your chosen primer and paint and to reveal any hidden adhesion or compatibility problems.
Apply primer, let it dry fully, then paint a 4×4-inch area.
Wait recommended cure time, check for lifting, flaking, discoloration, or texture change.
If issues appear, try a different primer/paint combination before proceeding across the room.
Step 3 Cleaning suede walls safely: tools and cleaners to avoid vs recommended
Now that your patch test passed (or revealed what to change), you’ll need to clean the suede surface carefully so primer and paint will stick and look even.
Use gentle brushes and mild cleaners; avoid harsh solvents or scrubbing pads that flatten texture.
- Vacuum with soft brush attachment.
- Blot stains with diluted dish soap.
- Test any cleaner on an inconspicuous spot first.
Step 4 Repairing damage: filling, sanding, and stabilizing loose suede
Inspect the suede closely and address any loose, torn, or missing fibers before you prime—untreated damage will show through paint and make the finish uneven.
Remove loose fibers with a soft brush, stabilize edges with fabric adhesive, and fill gouges using a flexible, paintable filler.
Sand gently with fine-grit paper, wipe dust, and spot-prime repairs so texture and adhesion match the surrounding suede.
Step 5 Masking, protecting trim, and covering floors
Ready to protect everything you don’t want painted? Cover floors with drop cloths, taping seams to prevent shifting.
Use painter’s tape on trim, baseboards, window and door frames—press edges firmly for crisp lines.
Remove switch plates and outlet covers, or tape them. Protect hardware and glass with plastic sheeting.
Check for gaps, re-tape as needed before priming and painting.
Primer and Product Selection
Before you paint, pick a primer that bonds to suede, blocks stains, and can fill texture where needed.
Choose a paint suited to the job—latex, acrylic, or a specialty masonry formula—and match it to the primer for best adhesion.
Use the right tools (a dense brush, medium-to-heavy nap roller, or a sprayer) and look for low‑VOC, durable products with an appropriate sheen.
Choosing the right primer for suede: bonding, stain-blocking, and texture-fill options
Picking the right primer for suede walls comes down to three tasks: creating a strong bond to the fabric-like surface, blocking stains and tannins, and filling or evening out texture so your paint goes on smoothly. Choose a bonding primer for adhesion, a stain-blocking primer for discoloration, and a high-build or texture-sealing primer to level nap.
| Feature | Use |
|---|---|
| Bonding | Adhesion |
| Stain-blocking | Tannin control |
| High-build | Texture fill |
| Shellac | Severe stains |
Best paint types for suede walls: latex vs acrylic vs specialty masonry paints
Now that you’ve matched primer type to the suede’s needs, pick a paint that works with that base and the nap’s texture.
Use high-quality water-based latex for ease, flexibility, and low odor.
Choose 100% acrylic for superior adhesion and durability on textured surfaces.
For exterior or highly porous masonry-like suede, consider specialty masonry paints designed for breathability and moisture resistance.
Tools and applicators: brush, roller nap, sprayer recommendations
Choose the right tools to get even coverage without crushing the suede nap: use a high-quality natural-bristle or nylon-blend brush for cut-in work, a short-nap (1/4″ to 3/8″) microfiber or mohair roller for most suede walls, and a fine-finish airless sprayer if you need speed and the most uniform coat.
Each tool works best with specific primers and paints, so match brush type to water-based or acrylic products and test a small area first.
- Use a brush for edges and detail.
- Roll with short nap, moderate pressure.
- Spray thin, overlapping passes; back-roll if needed.
Recommended product features: low-VOC, durability, sheen level
While you’ll want a primer and paint that protect the suede nap and last, prioritize low-VOC formulas, durable binders, and a low-to-satin sheen that hides imperfections without flattening texture.
Choose a stain-blocking, acrylic-latex primer for adhesion.
Pick paints labeled “low VOC” or “zero VOC,” with high-quality pigments and resins for scrub-resistance.
Avoid high-gloss finishes that emphasize texture flaws.
Step-by-Step Painting Process
You’ll start by priming the suede with the right technique, drying times, and number of coats to guarantee adhesion.
Then you’ll choose whether to smooth the nap or preserve the texture and pick the best tool—roller, brush, or sprayer—for that finish, plus how many paint coats and when to apply the next.
Finally, you’ll follow proper drying and curing steps and run a quick inspection checklist before calling the job complete.
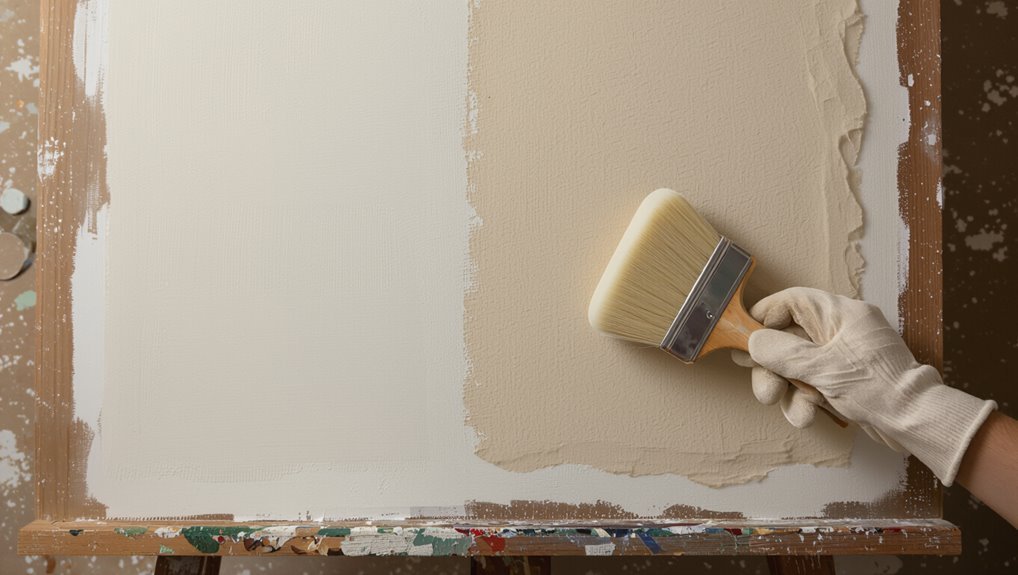
Step 1 Applying primer: technique, drying times, and number of coats
Before you lay down paint, prime the suede to seal its nap and create a uniform surface that accepts color evenly.
Use a thin, even coat with a high-quality bonding primer, let it dry fully (check label for 1–4 hours), and apply a second coat only if coverage is uneven.
- Roll thinly with a low-nap roller.
- Back-roll for evenness.
- Wait full cure before painting.
Step 2 Smoothing vs preserving texture: options and trade-offs
If you want a sleek, modern look or you prefer the suede’s soft nap intact, you’ll need to choose between smoothing the surface or preserving its texture—each approach changes application, tools, and final appearance.
Smoothing reduces imperfections for crisp lines but needs filler, sanding, and careful priming.
Preserving keeps depth and hides flaws but demands gentler prep and paint that won’t flatten the nap.
Step 3 Painting technique by tool: rolling, brushing, and spraying for suede texture
3 main application methods—rolling, brushing, and spraying—each shape the suede’s nap differently, so pick the tool that matches your texture goal.
Roll with a low-nap roller for even, subtle texture.
Brush with soft-bristle brushes to accentuate directional nap.
Spray with an HVLP for the finest, most uniform finish.
Practice on a sample to confirm feel and appearance before starting.
Step 4 How many coats of paint and when to apply the second coat
Now that you’ve practiced your chosen application method and settled on the nap direction, decide how many coats you’ll need to get the look and coverage you want.
Typically two thin coats give even texture and hide imperfections. Wait until the first coat’s surface is dry to the touch and no longer tacky before applying the second.
Adjust for color depth or surface porosity.
Step 5 Drying, curing, and final inspection checklist
Once the paint feels dry to the touch and the room’s humidity’s back in a normal range, give the surface time to fully cure before moving furniture or hanging art; curing can take anywhere from 24 hours to several days depending on paint type, temperature, and ventilation.
Check for uniform texture, touch up thin spots, remove tape, clean drips, and confirm no strong odor remains before reoccupying.
Alternatives and Finish Options
You can preserve the suede look with translucent washes or tinted glazes to tint without hiding texture.
If you want a smoother wall, you’ll need a skim coat and re-texturing steps and should weigh the time and skill required.
Consider hiring a pro for large or tricky jobs, and tackle smaller touch-ups yourself.
Preserving suede look with translucent washes or tinted glazes
Although a full opaque coat will cover suede’s depth, using translucent washes or tinted glazes lets you preserve that soft, layered look while adjusting color and tone.
These thin, semi-transparent applications sit over the base layer to tint and unify without hiding texture, so you can deepen shadows, soften highlights, or add subtle warmth without losing the nap-like effect that makes suede finishes special.
Use test swatches, work in sections, and apply glaze sparingly with a lint-free cloth or soft brush to control intensity.
Converting suede to a smoother finish: skim coat and re-texturing steps
If the translucent-glaze route doesn’t give you the smoother look you want, you can convert suede walls by applying a skim coat and re-texturing for a flatter, more uniform finish.
Patch defects, sand lightly, then apply a thin skim of joint compound with a broad knife.
After drying, sand smooth, prime, and choose a fine texture or sanding technique before repainting for a subtle, even surface.
When to hire a professional vs DIY
Deciding whether to tackle suede-wall work yourself or call a pro comes down to scope, skill, and patience: you can save money on small repairs but hire pros for complex retexturing or tight deadlines.
Consider:
- Time vs expertise — DIY if you have patience and steady hands.
- Cost vs quality — pros for flawless, durable finishes.
- Risk tolerance — hire for structural or irreversible work.
Common Problems, Troubleshooting, and How to Fix Them
You’ll run into a few recurring issues when painting suede walls, and knowing the causes makes fixes straightforward.
Expect to troubleshoot peeling or flaking from poor prep, blotchy or uneven color from insufficient priming or lap marks, texture loss from over-brushing, and stains that bleed through even after paint.
Below we’ll cover quick checks and targeted fixes for each problem so you can get the finish back on track.
Problem: Paint peeling or flaking after application causes and fixes
When paint peels or flakes from suede walls, it’s usually a sign of poor surface prep, incompatible products, or moisture issues—problems you can diagnose and fix without redoing the whole room.
Scrape loose paint, sand edges, clean with TSP, and allow drying.
Spot-prime with a compatible primer, use paint formulated for textured surfaces, and address leaks or ventilation to prevent recurrence.
Problem: Uneven color or blotchiness prevention and correction
If color comes out patchy or blotchy on suede walls, it usually means the paint wasn’t applied or prepared for the texture—so you’ll want to diagnose whether the issue’s from uneven absorbency, poor mixing, wrong primer, or application technique.
Fixes: re-mix paint, spot-prime with a latex primer formulated for textured surfaces, feather edges, and recoat using consistent pressure and overlapping strokes.
Problem: Texture loss or over-smoothing recovery strategies
After fixing blotchy color, the next headache is preserving the suede’s nap—vigorous sanding, heavy rollers, or overworking wet paint can flatten the texture and leave walls looking smooth and wrong.
To recover, lightly retexturize with a soft-bristled brush or stipple sponge while paint’s tacky, feather edges, and apply thin, matched texture coats.
Test in a hidden spot first.
Problem: Stains bleeding through stain-blocking solutions
One common frustration is seeing stains—water marks, smoke residue, or tannins—bleed back through stain-blocking primers and ruin fresh suede paint.
You should remove the source, clean and dry the area thoroughly, then sand lightly.
Apply a high-quality shellac-based primer, let it cure fully, and spot-test.
If bleed-through returns, repeat with an additional coat before repainting for reliable coverage.
Best Practices, Tips, and Maintenance After Painting
When you want the finish to last, follow prep and application best practices like proper priming, thin even coats, and using the right nap roller.
After the paint cures, clean suede walls gently with a soft brush or mild detergent and spot-touch any scuffs quickly.
Also watch seasonal humidity—too much moisture or rapid temperature swings can affect adhesion and texture, so control climate while paint cures and during maintenance.
Best practices during the job to ensure durable results
Start by keeping the work area clean, well-lit, and at a steady temperature so the paint cures properly and you can spot missed areas quickly.
You’ll work methodically, maintain wet edges, and use consistent pressure for texture. Protect edges, test blends, and let layers dry fully before next coat.
- Use quality tools
- Keep consistent technique
- Inspect as you go
Post-paint maintenance and cleaning for painted suede walls
Because suede-finish paint has a textured, slightly porous surface, you’ll need a gentle, regular maintenance routine to keep it looking fresh and prevent dirt buildup.
Dust weekly with a soft brush or microfiber duster, spot-clean stains with a damp sponge and mild detergent, and test cleaners invisibly first.
Avoid abrasive tools, heavy soaking, and harsh chemicals to preserve texture and color.
Seasonal and humidity considerations for painted textured walls
If you live in a humid climate or face big seasonal swings, plan for how moisture will affect your textured suede walls: high humidity can slow drying, promote mildew, and soften texture, while dry, heated air in winter can cause cracking or dust accumulation.
Use dehumidifiers or humidifiers, control ventilation, schedule painting for moderate conditions, and inspect seals, caulk, and finishes seasonally to prevent damage.
Cost, Time Estimate, and Tools Checklist
You’ll get a clear cost breakdown covering materials, tools, and optional pro labor so you can budget the job.
I’ll give time estimates based on room size and surface complexity so you know how long each phase will take.
Finally, you’ll get a complete checklist of tools and materials to gather before you start.
Typical cost breakdown: materials, tools, and optional professional labor
A basic suede-wall paint job will usually break down into three cost buckets: materials (primer, suede-compatible paint, fillers), tools (rollers, microfiber pads, sponges, tack cloths), and optional labor if you hire a pro—each affects your total spend and timeline. You’ll pay roughly $50–$200 materials, $20–$100 tools, or $200–$800+ for pros.
| Item | Low | High |
|---|---|---|
| Materials | $50 | $200 |
| Tools | $20 | $100 |
Time estimate by room size and complexity
Room size and wall condition drive how long a suede paint job will take, so plan based on square footage and surface prep needs.
You’ll estimate time by complexity: small, simple rooms finish faster; large or textured surfaces take longer; repairs add hours. Track tasks and buffer for drying between coats.
- Small room: 4–8 hours
- Medium: 1–2 days
- Large/complex: 2–4 days
Complete tools and materials checklist for the project
Before you start, gather everything you’ll need so the job stays efficient and tidy: list basic tools (rollers, brushes, trays, drop cloths, painter’s tape), specialty items for suede finishes (microfiber suede rollers or stippling brushes, texture applicators), surface prep supplies (spackle, sandpaper, primer), paint and sealant quantities, plus cleanup gear and safety equipment—then estimate costs and time per item to build your budget and schedule.
- Itemize costs.
- Allocate hours per task.
- Pack tools by step.
Frequently Asked Questions (FAQ)
You probably have a few practical questions before you start, like whether you can paint over the suede finish or how the paint will affect the feel and texture.
You’ll also want to know the best sheen for textured suede, how to remove paint if needed, and whether using spray primer or paint indoors is safe.
Below you’ll find clear, concise answers to those common concerns.
Can I paint suede walls without removing the suede finish?
Can you paint suede walls without stripping the finish? Yes—you can, but prep matters.
Clean thoroughly, sand lightly to scuff the surface, and apply a quality bonding primer.
Use thin, even coats of latex or acrylic paint and let each dry fully.
Test a small area first to verify adhesion and appearance before painting the entire wall.
Will paint change the tactile feel of suede walls permanently?
Exactly how your suede walls will feel after painting depends on the prep and products you use: if you seal the texture with a clear primer or heavy paint layer, the nap will stiffen and feel less plush.
Light, flexible coatings preserve softness more, but any paint will alter touch somewhat. Expect a subtle, often permanent reduction in the original velvety sensation.
What paint sheen is best for textured suede surfaces?
Which sheen should you pick for suede walls depends on whether you want to hide or highlight texture.
For subtle, forgiving coverage choose flat or matte—these minimize sheen and mask imperfections.
If you want the texture to pop, use a low-luster eggshell or satin; they reflect light gently and accentuate depth.
Avoid high-gloss; it emphasizes every irregularity.
How do I remove paint from suede if I don’t like the result?
If the finish doesn’t look right, you can remove or correct painted suede without ruining the texture.
Gently scuff fresh paint with a soft nylon brush or fine sanding sponge, working with the nap. For stubborn areas, use a mild, water-based paint stripper applied sparingly and wiped off immediately.
Always test a hidden spot first and let the wall dry completely before retexturing or repainting.
Can I use a spray primer/paint indoors on suede walls safely?
Can you safely use spray primer or paint indoors on suede walls? Yes, but take precautions: ventilate well, wear an N95 or respirator, and mask surrounding surfaces.
Test a small area first to confirm adhesion and texture compatibility. Use low-VOC or water-based formulations and light, even passes to avoid saturating the suede.
Hire a pro for large jobs or if ventilation’s limited.