How to Remove Chipped Paint From Metal the Clean and Easy Way
You can quickly fix chipped paint on metal by scraping loose flakes with a wire brush or scraper, then sanding edges smooth with 120–220 grit. Clean the surface with a degreaser, treat any rust with a converter, and wipe dry. Prime with a metal-appropriate primer, then repaint with quality metal paint. Wear a respirator, goggles, and gloves, and work in a ventilated area; keep going and you’ll find detailed steps, tips, and product picks to finish well.
Quick Answer The Clean and Easy Way to Remove Chipped Paint from Metal
For a fast, safe fix, you’ll remove loose flakes with a wire brush, sand the edges smooth, then wipe the metal clean before priming and repainting.
Gather a wire brush or sandpaper (120–220 grit), a scraper, rust remover or solvent, clean rags, primer, paint, gloves, and eye protection.
With those tools ready, you can move quickly and stay safe while restoring the finish.
One-sentence summary of the fastest safe method
If you want the fastest safe way to remove chipped paint from metal, use a power sander with fine-grit sandpaper or a wire brush attachment while wearing a respirator and goggles to control dust and protect yourself.
You’ll sand evenly, stop at bare metal, and clean residues before priming; this method shows you how to remove chipped paint from metal quickly while minimizing damage and health risks.
Tools and materials checklist
You’ll want the right gear before you start sanding or scraping so the job stays quick and safe.
Gather essentials: respirator, gloves, goggles; wire brush, sandpaper, scraper; rust converter, primer, metal paint.
Prioritize quality and fit for safety and efficiency.
- Respiratory and eye protection
- Mechanical removal tools
- Rust treatment and coatings
Understanding Chipped Paint on Metal
To remove chipped paint effectively, you need to know what causes it—like poor adhesion, impact, rust, or weathering.
Consider the metal type and paint finish, since powder coat, enamel, or anodized surfaces each need different methods.
Be careful: improper removal can cause corrosion, surface damage, or health hazards from dust and old leaded paints.
What causes paint to chip from metal surfaces
When paint starts flaking off metal, it’s usually because adhesion has failed—caused by factors like surface contamination, inadequate priming, thermal stress, or physical impact.
You should check for rust, oil, grease, or old loose paint that prevented bonding.
Also consider vibration, temperature changes, moisture under the coating, and mechanical abrasion; any of these will weaken adhesion and lead to chipping.
Types of metal and paint finishes and how they affect removal
Different metals and finish types change how paint chips come off and what removal method works best.
If you’re working with aluminum or stainless steel, smoother finishes often let paint peel in flakes; rougher cast or galvanized surfaces grip paint tighter.
Powder-coated, lacquered, or enamel finishes each respond differently to scraping, sanding, heat, or chemical strippers, so match technique to finish.
Risks of improper removal (corrosion, surface damage, health)
Although removing chipped paint might seem straightforward, doing it wrong can create bigger problems fast.
If you scrape too hard or use harsh chemicals, you’ll expose bare metal and speed corrosion. You can gouge or warp surfaces, ruining fit or finish.
Improper disposal or sanding old paint can release lead dust or toxic fumes, so use proper PPE, containment, and disposal methods.
Safety and Preparation
Before you start scraping, make sure you’ve got proper PPE — gloves, a respirator, and eye protection — and that the area is well ventilated.
Set up your workspace to protect floors and nearby items with drop cloths or plastic sheeting.
If the paint might be lead-based, stop work, test or assume it’s hazardous, and follow local legal and safety requirements.
Personal protective equipment and ventilation
You’ll need the right personal protective equipment and good ventilation to keep yourself safe while removing chipped paint from metal.
Wear a respirator, goggles, and gloves; avoid inhaling dust or fumes. Work near an open window or use an exhaust fan.
Follow this checklist:
- NIOSH-rated respirator
- Impact goggles
- Chemical-resistant gloves
Workspace setup and covering surrounding areas
Once you’re geared up and ventilating the area, set up your workspace so dust and paint chips stay contained and cleanup is quick.
Lay heavy-duty drop cloths and tape edges, move valuables away, and create a clear work zone.
Follow these steps:
- Seal floor and nearby surfaces.
- Isolate the piece to be worked on.
- Keep a dedicated waste bin for debris.
Identifying lead-based paint and legal/safety precautions
If the paint on your metal piece is old (generally applied before 1978) or you’re unsure of its age, treat it as potentially lead-based and take precautions:
wear a certified NIOSH respirator, disposable gloves, and goggles;
work outdoors or in a well-ventilated area;
avoid sanding or dry scraping—use wet methods or a HEPA vacuum;
test with a certified lead kit and follow local disposal and notification laws.
Step-by-Step Removal Process (Clean & Easy Method)
Start by inspecting the metal to gauge the chip size and paint type so you know what’s needed.
Clean the surface thoroughly to remove grease and dirt, then pick the best removal method for that metal and paint.
Use mechanical tools like scrapers, sandpaper, or wire brushes for most jobs, and reserve chemical strippers for stubborn or specialty coatings applied with safe technique.
Step 1 Inspect and assess the damage
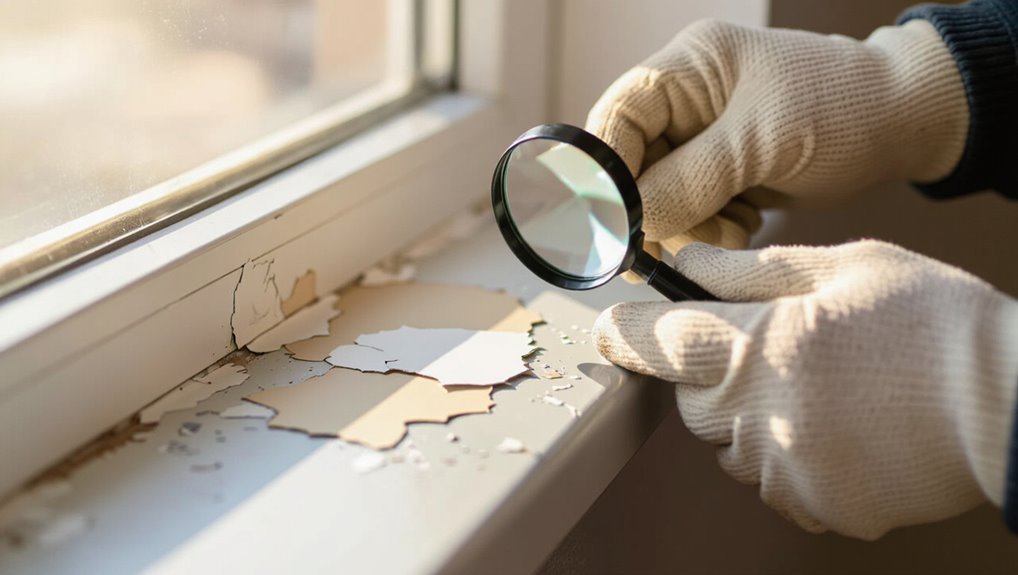
Begin by closely examining the chipped area to determine how extensive the damage is and whether rust or corrosion is present.
Note paint edges, flaking depth, and any metal pitting. Photograph or mark affected spots for reference.
Decide if repair needs spot treatment, filling, or full refinishing.
Gather measurements and list materials you’ll need before proceeding to the next step.
Step 2 Clean the surface to remove grease and dirt
Now that you know what needs repair, clean the area so paint will adhere properly. Wipe loose dust, degrease oil spots, and remove rust flakes.
Use nonabrasive cloths and a mild solvent, then rinse and dry fully.
Follow this quick routine:
- Dust and brush away debris
- Apply degreaser, scrub gently
- Rinse, dry, and inspect for residue
Step 3 Choose the right removal method for your metal and paint type
3 simple factors determine the best removal method: the metal type, the paint formulation, and how deep the chips go. You’ll match gentle solvents to thin enamel, stronger removers to oil-based or multiple layers, and avoid harsh chemicals on delicate alloys. Use this quick guide:
| Metal | Paint Type | Recommended approach |
|---|---|---|
| Steel | Oil-based | Solvent or stripper |
| Aluminum | Lacquer | Mild solvent |
| Brass | Enamel | Test small area first |
Step 4 Mechanical removal techniques (scraping, sanding, wire brushing)
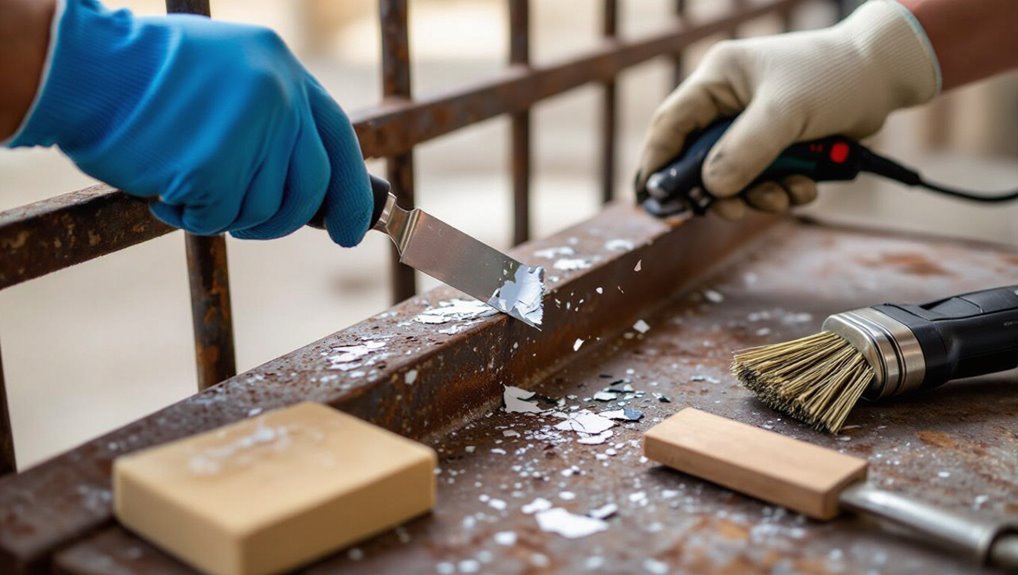
Grab your safety gear and choose the right mechanical tool for the job: scraping, sanding, and wire brushing each remove chipped paint differently, so match the method to the metal and paint thickness.
Scrape loose flakes with a stiff putty knife.
Sand progressively from coarse to fine for smooth edges.
Use a wire brush for rusted spots, keeping even pressure to avoid gouging the metal.
Step 5 Chemical strippers and safe application (when to use)
After you’ve removed loose paint mechanically, chemical strippers can tackle stubborn layers, multiple coats, or hard-to-reach spots where sanding or scraping would damage the metal.
Use them sparingly and safely:
- Choose low-VOC, metal-safe stripper and test a small area.
- Wear gloves, eye protection, and respirator; ventilate well.
- Neutralize per instructions, rinse, and dispose of waste properly.
Step 6 Power tools and best practices (orbital sander, grinder)
Move methodically when you switch to power tools—an orbital sander for broad, even removal and a grinder with a flap wheel or wire brush for stubborn spots will speed the job, but only if you control speed, pressure, and motion to avoid gouging the metal.
Use PPE, steady passes, and test settings:
- Wear respirator and eye protection.
- Start low RPM, light pressure.
- Keep moving, inspect often.
Step 7 Feathering edges and preparing for primer
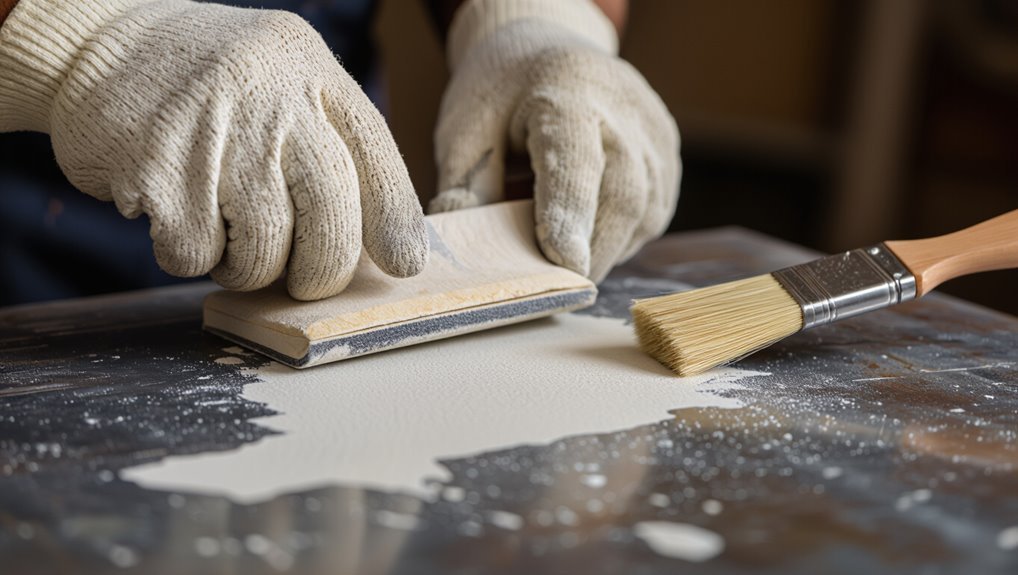
7. After sanding, blend the paint edges with fine-grit sandpaper so shifts are smooth.
You’ll feather outward from the bare metal into the remaining paint, easing abrupt lines.
Remove dust with a tack cloth, inspect for high spots, and repeat light sanding where needed.
Your goal is a uniform surface that lets primer adhere evenly without visible ridges or laps.
Step 8 Final cleaning and surface preparation before repainting
Now that the edges are feathered and smooth, you’re ready for the final cleaning and surface prep before repainting.
Remove dust and oils, degrease, then rinse and dry thoroughly. Follow these steps:
- Wipe with a tack cloth or microfiber.
- Use a solvent or degreaser; rinse and let dry.
- Apply a metal etch or primer within recommended time.
Alternative Methods Compared
You’ll weigh manual scraping, power tools, and chemical strippers based on the scale of the job and the metal’s condition.
Consider time, cost, and safety—power tools speed things up but need skill, chemicals work in tight spots but require precautions, and manual methods are cheapest but slow.
If the job’s large, complex, or involves lead paint or structural parts, hire a pro instead of risking a DIY mistake.
Manual vs. power vs. chemical removal
When deciding how to remove chipped paint from metal, you’ll weigh three main approaches—manual, power, and chemical—each with distinct speed, effort, and risk trade-offs. You’ll choose based on surface, time, and tolerance for mess or fumes.
| Method | Feeling |
|---|---|
| Manual | Patient relief |
| Power | Swift adrenaline |
| Chemical | Nervous caution ]]> |
When to hire a professional vs. DIY
After weighing manual, power, and chemical options, you’ll need to decide whether to tackle the job yourself or call a pro.
Assess scope, safety, and time. Consider:
- Small, superficial chips — DIY with manual tools.
- Large area or lead-based paint — hire a licensed pro.
- Tight deadlines or complex metalwork — pro guarantees speed and warranty.
Common Mistakes and How to Avoid Them
Don’t over-sand or gouge the metal—work gently and check your progress often.
Watch for rust hiding under chipped paint and choose a compatible stripper and products to avoid reactions.
Always wear proper protection and secure the work area to prevent contamination or injury.
Over-sanding or gouging the metal
Sand carefully—it’s easy to remove more metal than paint if you rush or use the wrong grit.
Use progressively finer sandpaper, keep pressure light, and move with the grain or contours.
Check often, stop when edges blend smoothly, and switch to a sanding block for flat areas.
If you gouge, fill and feather before priming to restore a uniform surface.
Ignoring rust under chipped paint
If you skip checking for rust beneath chipped paint, metal deterioration will continue under the surface and ruin your repair later.
You should remove paint until you see clean metal, inspect for pitting, and treat any rust with a wire brush or rust converter.
Prime and seal promptly. Ignoring hidden corrosion leads to recurring flaking and weakened structure, wasting time and money.
Using wrong stripper or incompatible products
Choosing the wrong stripper or mixing incompatible products can wreck your metal and make paint removal harder, so always match the chemical to the paint type and substrate.
Read labels, test a small area, and avoid solvents that react with primers or galvanization. Use manufacturer-recommended removers for lacquer, enamel, or epoxy.
Rinse thoroughly and neutralize residues before repainting to guarantee adhesion and metal integrity.
Inadequate protection leading to contamination or injury
When you skip proper protective gear or let dust and chemical residues spread, you risk contaminating the metal and injuring yourself or others; wear a respirator, chemical-resistant gloves, eye protection, and cover nearby surfaces to contain debris and runoff.
Also seal gaps, ventilate the area, and bag waste promptly.
Don’t eat or touch your face during work; decontaminate tools and clothing afterward.
Prevention and Best Practices After Removal
Now that the damaged paint’s gone, you’ll want to treat any rust and apply a proper primer to guarantee a durable base.
Pick a paint formulated for metal and follow application tips like thin, even coats and correct drying times.
Then set up simple maintenance—regular cleaning, spot checks, and touch-ups—to prevent future chipping.
Rust treatment and priming for long-lasting results
Although the paint’s gone, untreated rust will keep spreading, so you’ll want to stop it before you prime. Treat rust with a wire brush or converter, clean the surface, and let it dry.
Then apply a rust-inhibiting primer to bond and block moisture. Follow this simple sequence to guarantee adhesion and long-lasting protection.
- Remove
- Neutralize
- Prime
Choosing appropriate paint and application tips
If you want lasting results, pick a paint system designed for metal — a rust-inhibiting primer plus a topcoat made for the substrate and exposure conditions — and apply it under the right temperature and humidity.
Use compatible products, follow manufacturer pot life and recoat times, thin or mix as instructed, and apply even coats with proper tools.
Allow full cure before use.
Maintenance routines to prevent future chipping
Because routine care stops small problems from becoming big ones, make maintenance a regular part of your schedule after removing chipped paint:
Inspect the metal for new chips or rust every few months. Touch up minor flaws with compatible primer and topcoat right away. Keep fasteners and seams free of moisture and debris, and clean surfaces with a mild detergent before recoating.
- Inspect monthly.
- Touch up promptly.
- Keep dry and clean.
Tools, Materials, and Product Recommendations
You’ll find it easiest to match tools to the task—hand tools for small spots and power tools for larger areas—so I’ll list specific options for each.
I’ll also recommend chemicals, primers, and paints with brief safety notes to help you choose the right products.
Finally, I’ll give rough time and cost estimates for common jobs so you can plan ahead.
Recommended tools by task (hand tools, power tools)
For most chipped-paint jobs on metal you’ll want a mix of hand and power tools so you can match the tool to the scale and sensitivity of the piece.
Choose based on access, finish, and rust.
- Hand: scrapers, wire brushes, sanding blocks for detail.
- Power: orbital sander, rotary tool for heavy or large areas.
- Safety: gloves, eye protection, dust mask.
Recommended chemicals, primers, and paints (safety notes)
Start with a small kit of reliable chemicals and coatings so you can match the product to the metal and the job:
Use a mild stripper for thin failed paint, a phosphoric rust converter for surface rust, and solvent-cleaners for degreasing.
Wear gloves, eye protection, and respirator; work outdoors or ventilated.
Store products per labels and dispose responsibly.
- Mild stripper
- Rust converter
- Solvent-cleaner
Estimated time and cost comparison for common projects
Now that you’ve got a small kit of strippers, rust converters, and solvent-cleaners and understand basic safety, let’s look at how long common paint-repair jobs take and what they’ll cost so you can pick the right tools and products. You’ll save time by matching scope to supplies.
| Project | Time/Cost |
|---|---|
| Small touch-up | 30–60 min / $10–$25 |
| Chair frame | 1–2 hrs / $20–$40 |
| Tool box | 2–4 hrs / $30–$60 |
| Gate repaint | 4–8 hrs / $50–$120 |
FAQ
You’ll find quick answers here to common concerns like whether you can strip paint without power tools and how to tell if the paint contains lead.
I’ll also cover whether stripping will harm the metal, how long to wait before repainting, and which primers work best on bare metal.
If you need more detail on any point, ask and I’ll expand.
Can I remove paint from metal without power tools?
Yes — you can remove paint from metal without power tools, and for many small jobs hand methods are safer, cheaper, and give you more control.
Use a stiff wire brush, sanding block, or chemical stripper applied with a scraper and nylon brush.
Work in well-ventilated areas, wear gloves and eye protection, and test a small area first to avoid surface damage.
How do I tell if the paint contains lead?
How can you tell if old paint on metal contains lead? You can test it: use a EPA- or HUD-approved DIY lead test kit for a quick screen, or collect a sample for certified laboratory X-ray fluorescence (XRF) testing for definitive results.
If the building predates 1978, assume possible lead and use protective gear and containment until testing confirms otherwise.
Will removing paint damage the metal surface?
If you use the right removal method and take precautions, stripping paint shouldn’t permanently damage the metal. However, improper techniques can cause scratches, pitting, or heat distortion.
You should test a small area, choose a compatible stripper or gentle abrasive, avoid excessive force or heat, and protect edges.
Finish with corrosion protection to preserve the substrate and guarantee a smooth repainting surface.
How long should I wait between stripping and repainting?
You should wait until the metal is completely clean, dry, and free of residues before repainting—this usually takes 24 to 72 hours depending on the stripper used, the ambient temperature, and humidity.
Test for tackiness and wipe with solvent if needed.
Repaint only when the surface feels dry and clean to touch; rushing risks poor adhesion, blistering, and uneven finish.
What is the best primer for bare metal?
Wondering which primer will give bare metal the best protection and adhesion?
Use an etch or self-etching primer for ferrous metals to chemically bond and prevent rust; zinc-rich primers work great for galvanic protection on steel.
For aluminum, choose a primer formulated for aluminum or a wash primer.
Always clean, degrease, and follow manufacturer cure times before topcoating for lasting results.
Quick Repair Checklist and Next Steps
Start by following a short step-by-step checklist for a small repair: clean the area, remove loose paint, sand edges, prime, and touch up with matching paint.
If the job looks bigger than it should or the metal’s corroded, call a professional.
When you do, be ready to describe the metal type, extent of damage, dimensions, and any previous coatings.
Step-by-step checklist for a single small project
One clear checklist will keep this quick repair focused and efficient, guiding you from prep to final touch-ups without backtracking.
Follow these steps and finish confidently:
- Clean and sand the chip, removing loose paint and rust.
- Prime and match paint, apply thin coats, let dry between.
- Seal and inspect, smooth edges, tidy workspace and store leftover supplies for touch-ups.
When to call a professional and what info to provide
If the chip is deep, the metal’s structural integrity is compromised, or you keep finding recurring rust despite your repairs, call a professional rather than continuing DIY work.
Tell them what you’ve done, show photos, and note timelines.
Provide:
- photos and location of damage
- materials and products used
- symptoms and how long they’ve appeared
Expect estimates and safety advice.