How to Remove Dried Paint From Tile Without Damage
Open windows, wear gloves and eye protection, and test a hidden spot first. Identify whether your tile is glazed, matte, or natural stone and whether the paint is water- or oil-based by trying isopropyl alcohol. Soften latex with warm soapy water, vinegar, or rubbing alcohol; use mineral spirits or acetone sparingly for oil-based paint. Gently scrape with a plastic razor or putty knife, keep the surface wet, then clean and buff; follow steps below for more detail.
Quick: How to Remove Dried Paint From Tile
Grab a scraper or razor blade and start by gently lifting any loose paint—you don’t need to overthink it.
Work small, scraping at a low angle to avoid scratches. For stubborn spots, apply a little solvent, let it soften, then wipe with a soft cloth.
These paint removal techniques pair with simple tile care tips: rinse thoroughly, dry, and avoid abrasive tools to protect finish.
Safety Checklist Before You Start
Before you start scraping or applying solvents, take a quick safety check to protect yourself and your floors: open windows for ventilation, put on chemical-resistant gloves and eye protection, and lay down drop cloths or cardboard to catch chips.
Check labels for solvent hazards, keep a respirator handy, test tools on a hidden spot, and have a first-aid kit nearby.
Follow safety gear and ventilation tips.
Identify Your Tile Type and Finish
Now that you’ve handled safety, figure out what kind of tile and finish you’re working with—different surfaces react very differently to scraping and solvents.
- Porcelain, ceramic, stone — know common tile types to choose safe methods.
- Glazed vs. matte — inspect finish options; glazes tolerate gentler scraping.
- Natural stone needs pH-neutral care; textured finishes trap paint, so test a small area first.
How to Tell What Paint You’re Dealing With
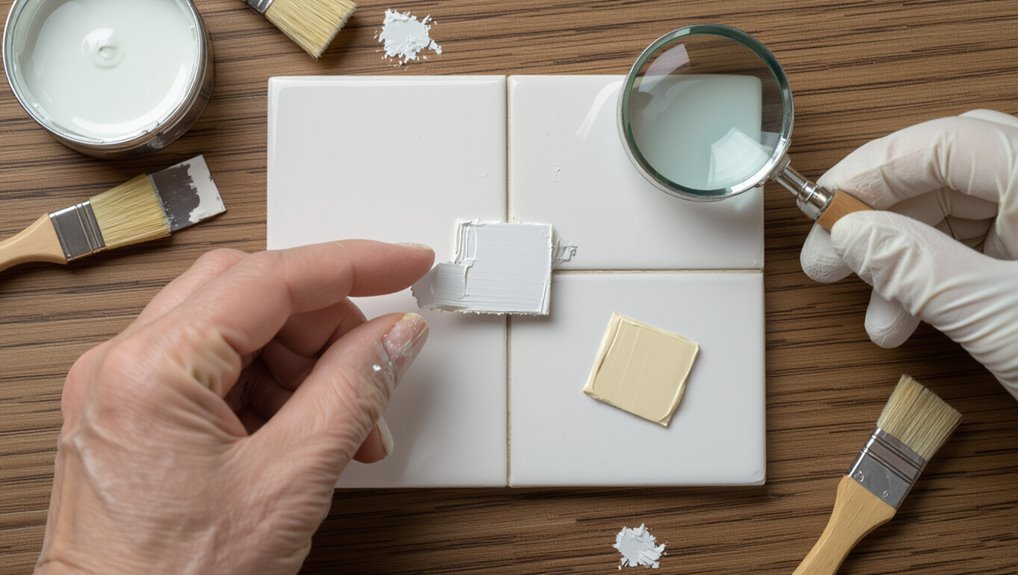
Curious whether the paint is water-based or oil-based? You can test paint types by rubbing a hidden spot with isopropyl alcohol—if it softens, it’s water-based; if not, likely oil-based.
Observe paint characteristics: sheen, thickness, and smell. Water-based dries faster and flakes; oil-based feels harder and yellowing may occur.
Record your findings before proceeding.
Gather Tools and Supplies
Once you’ve identified the paint type, gather the right tools and supplies so you can remove dried paint effectively and safely.
Once you know the paint type, gather the right tools to remove dried paint safely and effectively.
You’ll need items that support gentle paint removal techniques and follow tile care tips to avoid damage.
- Plastic scraper, soft-bristle brush, microfiber cloths
- Appropriate solvent (water-based or mineral spirits) and gloves
- Bucket, mild detergent, and protective tape
Test a Hidden Spot First
Before you apply any cleaner, test it on an inconspicuous spot like under a cabinet or behind a door.
Let the product sit for a few minutes, then wipe it away and check for any color change or damage.
If the tile and grout look unchanged, you can proceed with confidence.
Check Inconspicuous Area
Because tile finishes and grout react differently, test your chosen cleaner and removal method on a hidden spot first. You’ll avoid surprises and protect grout while practicing tile maintenance tips and paint prevention strategies.
- Try a corner or behind an appliance.
- Apply cleaner, wait the recommended time.
- Rinse and inspect under good light before proceeding.
Observe For Color Change
After testing a hidden spot, watch the area closely for any color change in the tile or grout.
If you see color fading or altered sheen within 24–48 hours, stop—your solvent affects the finish or paint adhesion.
Note subtle shifts under different light and gently blot rather than scrub.
Record results before treating visible areas to avoid irreversible damage.
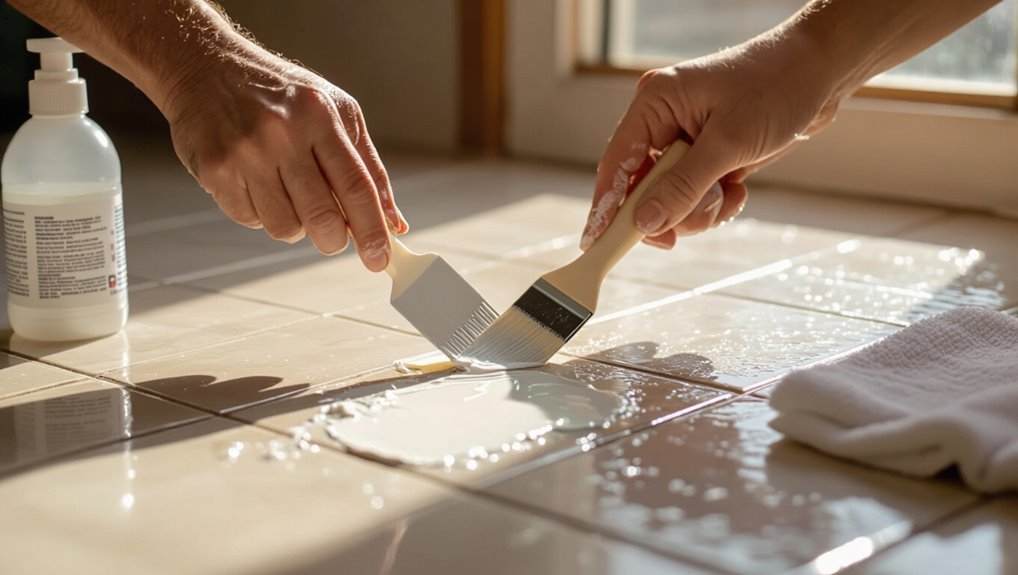
Soften Dried Paint With Warm Soapy Water
When paint’s long dried and feels stubborn, soften it first by soaking a cloth or sponge in warm, soapy water and laying it over the spot for 10–15 minutes to rehydrate the film.
Soften stubborn, dried paint by laying a warm, soapy cloth or sponge over it for 10–15 minutes.
You’ll use a gentle soap mixture and warm water to aid paint softening while keeping tile care in mind.
- Press damp cloth firmly.
- Reapply as needed.
- Pat dry, then scrape gently.
Use Vinegar to Loosen Latex Paint
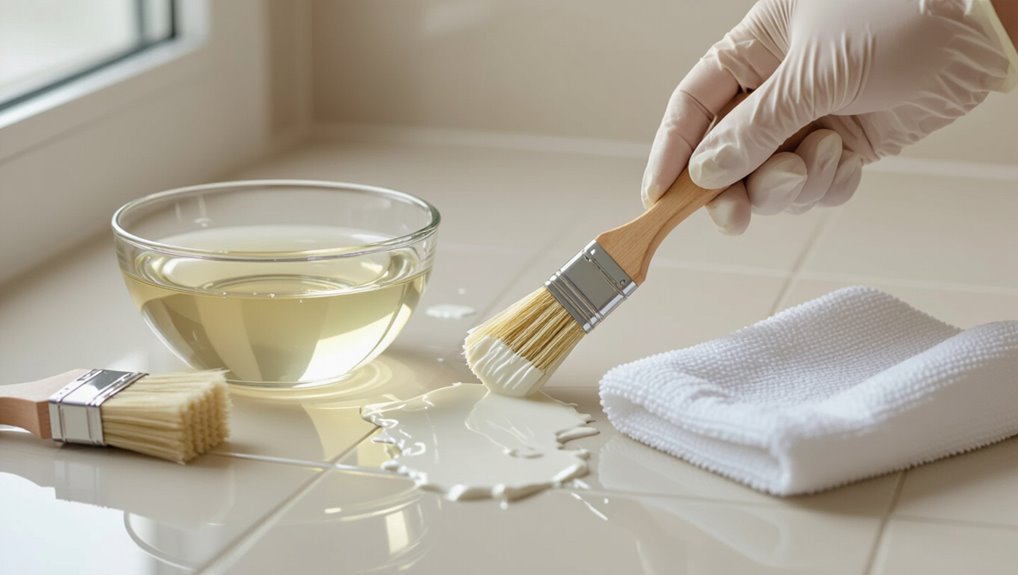
If warm, soapy water didn’t fully lift the dried latex, try white vinegar to loosen the remaining film.
Apply warm vinegar with a cloth, let it sit a few minutes, then gently scrape with a plastic scraper.
The vinegar benefits include safe paint softening without harsh chemicals.
Rinse the tile afterward and repeat as needed until the softened paint releases cleanly.
Use Rubbing Alcohol for Small Latex Spots
Try rubbing alcohol for small latex spots—the solvent breaks down the paint without damaging most glazed tile finishes.
Try rubbing alcohol on small latex spots—the solvent loosens paint without harming most glazed tile finishes.
You’ll dab, wait, and wipe gently for effective paint spot cleaning and simple latex paint removal.
Follow steps:
- Dampen a cloth, blot the spot, don’t soak grout.
- Let sit 30–60 seconds, then rub lightly.
- Rinse and dry the area.
Use Acetone (Nail Polish Remover) Safely on Tile
One quick option for stubborn dried latex or oil-based paint is to use acetone-based nail polish remover, but you should use it cautiously to avoid harming grout or some tile finishes.
Test a hidden spot, apply with a cotton ball, blot—don’t rub—then rinse thoroughly.
If concerned, consider acetone alternatives and always follow tile surface care: ventilate, protect surrounding areas, and wear gloves.
Use Commercial Paint Removers on Tile (Safe Options)
When you opt for a commercial paint remover, pick one labeled safe for your tile type (ceramic, porcelain, or natural stone) to avoid damage.
Test it on a small hidden spot first to confirm it won’t discolor or etch the surface.
Always follow the manufacturer’s instructions for application time, ventilation, and rinsing to protect the tile and your health.
Choose Tile-Safe Removers
If you don’t want to damage grout or the tile surface, pick a commercial paint remover labeled safe for tile and compatible with your tile material.
You’ll want eco friendly options or stronger formulas when needed; choose effective solutions and follow instructions.
- Water-based removers for delicate tiles
- Citrusy, low-odor eco friendly gels
- Heavy-duty, tile-safe solvent blends
Test Small Hidden Area
Why not start by trying your chosen remover on a hidden patch first?
You’ll check paint adhesion, glaze reaction, and colorfastness without risking visible damage.
Apply the product briefly, wait the recommended dwell time, then wipe and inspect grout and tile.
This quick test protects tile maintenance efforts and confirms the remover is safe before you tackle larger areas.
Follow Manufacturer Instructions
After confirming the remover won’t harm a hidden spot, follow the manufacturer’s directions exactly to protect your tile and yourself.
Use recommended PPE, ventilation, and timing from the product label. Check paint product recommendations and manufacturer guidelines before starting.
- Read label for surface compatibility.
- Use suggested applicator and dwell time.
- Neutralize and rinse per instructions.
Best Gentle Scrapers and How to Use Them
When removing dried paint from tile, pick a gentle scraper that protects the glaze while still lifting stubborn spots—options like plastic razor blades, flexible putty knives, and silicone scrapers work well.
Choose gentle blade options, hold at a low angle, and push rather than pry. Use short, controlled strokes, keep the surface wet, and test a hidden spot to refine your scraping techniques before tackling visible areas.
Non‑Abrasive Scrubbers That Won’t Scratch Tile
A soft, non‑abrasive scrubber will lift dried paint without scratching your tile—look for microfiber pads, melamine sponges (used wet and tested first), and nylon-bristle brushes that flex with the surface.
Use a soft, nonabrasive scrubber—microfiber pads, damp melamine sponges, or flexible nylon brushes—to lift dried paint without scratching tile.
You’ll protect grout and finish while practicing tile care and surface protection.
Try these options:
- Microfiber pad for gentle abrasion.
- Melamine sponge, damp and tested.
- Soft nylon brush for grout.
Steam Cleaning to Lift Stubborn Paint
When paint won’t come off with a scrubber, you can use a steam cleaner to soften and lift it.
Set the cleaner to a lower pressure and moderate temperature to avoid damaging grout or tile, and test on an inconspicuous spot first.
Hold the nozzle a few inches away and move slowly so steam loosens the paint without overheating the surface.
Steam Cleaner Settings
If steam’s your tool of choice, set your cleaner to a medium-high pressure and a temperature around 212°F (100°C) so the steam softens paint without damaging grout or tile glaze.
- Adjust steam pressure and heat settings for tile compatibility.
- Choose a small nozzle size for targeted lifts and reduced cleaning duration.
- Use surface protection around edges and test a discreet spot first.
Safe Steam Technique
Now that you’ve set pressure and temperature, use a steady, controlled steam technique to lift stubborn paint without harming tile or grout.
Hold the nozzle at an angle, move slowly, and test a small area first.
Combine steam cleaning benefits with gentle scraping and a microfiber cloth.
Rinse frequently, dry thoroughly, and monitor tile health to prevent discoloration or grout damage.
Remove Oil‑Based Paint From Glazed Tile
Because oil-based paint forms a tougher bond than water-based finishes, you’ll need stronger solvents and a bit more elbow grease to lift it from glazed tile.
Follow safe paint removal techniques and use tile protection methods to avoid damage.
- Test solvent on a hidden spot.
- Soften paint with mineral spirits, then scrape gently.
- Clean residue, rinse, and buff dry.
Avoid Solvents on Natural Stone Tiles : And Alternatives
When working with natural stone tile, avoid solvents because they can etch, discolor, or strip sealers; instead, use gentler mechanical methods and pH-neutral cleaners formulated for stone.
You’ll gently scrape with a plastic blade, soften residue with warm water and mild detergent, and test stone-safe poultices.
These natural stone alternatives and tile safe methods preserve finish without harsh chemicals.
Lift Paint From Grout Without Discoloring It
If paint has seeped into grout, act carefully so you lift it without bleaching or staining the joint lines; test a mild cleaner first and blot, not scrub.
Use gentle grout cleaning techniques and proven paint removal tips to protect color and texture.
- Apply a paste of baking soda and water, wait, then dab.
- Use a soft nylon brush for lift, not abrasive pads.
- Rinse and dry promptly to prevent residue.
Repair Tiny Chips After Paint Removal
After you’ve lifted paint from the grout, inspect the surrounding tile for tiny chips that might’ve been exposed during cleaning.
Gently clean chips, dry, then use a matching epoxy or ceramic filler for chip repair.
Smooth with a plastic putty knife, let cure, and sand lightly.
Smooth with a plastic putty knife, allow to cure fully, then sand lightly for a seamless finish.
Finish with color-matched touch-up paint or glaze for subtle tile restoration and long-lasting, seamless results.
Protect Surrounding Surfaces and Baseboards
Since you’ll be working with solvents, scrapers, and wet rags, take a few minutes to shield surrounding surfaces and baseboards before you start—cover baseboards with painter’s tape, lay down plastic or drop cloths over nearby flooring, and protect adjacent countertops or cabinets with cardboard or contractor paper.
Use protective coverings and baseboard masking to prevent damage.
- Tape edges tightly
- Lay drop cloths
- Shield fixtures
Fast Methods for Large Paint Splatters
First, you’ll identify the paint type so you know whether it’s water- or oil-based and which solvent will work.
Next, you’ll lift large splatters with a plastic or metal scraper, working gently to avoid gouging the tile.
Finally, you’ll apply the appropriate solvent safely, using gloves and ventilation to loosen any stubborn residue.
Assess Paint Type
Wondering how to tackle big dried paint splatters quickly? You first assess paint type so you choose safe removal for tile surfaces without damage.
Check paint characteristics: age, sheen, solvent base. Then test a hidden spot and note adhesion level.
- Water-based vs oil-based
- Age and cure time
- Surface adhesion and finish
Use Scraping Tools
Grab a sturdy scraper and get to work: for large dried paint splatters on tile, mechanical removal is usually the fastest, cleanest option.
Use firm, controlled strokes with appropriate scraper materials — plastic for glazed tile, metal for grout edges. Test a small area first.
Employ safe scraping techniques: hold the blade shallow, angle it, and lift paint fragments away to avoid scratching or chipping the tile.
Apply Solvent Safely
When you’re facing large dried paint splatters, a solvent can dissolve stubborn residues quickly—if you use it carefully.
You’ll protect tile and yourself by following solvent application steps and safety precautions. Apply solvent sparingly, test a hidden spot, ventilate, and wear gloves and a mask. Rinse residue promptly and repeat as needed.
- Test first
- Ventilate area
- Rinse thoroughly
Slow Methods for Textured or Intricate Tiles
Because textured or intricate tiles trap paint in crevices, slow, methodical techniques work best to avoid damage and restore detail. You’ll focus on patience and gentle tools.
Use textured tile techniques: soft-bristled brushes, wooden picks, and mild solvent applied sparingly. Work small sections, lifting softened paint gradually.
For intricate tile solutions, repeat gentle passes until paint releases, rinsing and blotting as you go.
Remove Residue and Restore Tile Shine
Start by identifying the paint type so you know whether solvents or simple cleaners will work without damaging the tile.
Use gentle cleaning methods—mild detergent, a soft brush, and a plastic scraper—to remove any remaining residue.
Once the surface’s clean, polish glazed tile and apply a suitable sealer to restore shine and protect against future stains.
Assess Paint Type
Wondering whether that flaky patch is latex or oil-based paint? You’ll want to identify paint types quickly to choose safe removal steps.
Check these paint characteristics to avoid damage:
- Water test: latex softens with water; oil resists.
- Smell: oil often has a stronger solvent odor.
- Texture: oil feels harder and shinier when fully cured.
Gentle Cleaning Methods
Once you’ve scraped away loose flakes, gently wipe the area with a microfiber cloth dampened in warm, soapy water to lift residue without scratching the tile; this simple step removes most latex-smear remnants and readies the surface for any targeted treatments.
For stubborn spots, try gentle scrubbing with a soft brush and mild paint solvents applied sparingly, then rinse and pat dry to restore shine.
Polish And Seal
Restore your tile’s luster by removing any remaining paint residue, then polishing and sealing the surface to protect it from future stains and wear.
- Use a nonabrasive polish and a microfiber cloth to buff away haze—follow tile maintenance tips for frequency.
- Clean grout lines, let everything dry fully.
- Apply sealant with even strokes; practice sealant application techniques and allow proper cure time.
Prevent Paint Accidents During Future Projects
When you plan ahead and set simple safeguards, you’ll cut the chance of paint mishaps and save time on cleanup.
Use paint prevention techniques like drop cloths, painter’s tape, and designated brush trays. Keep solvents and brushes away from tile edges, label cans, and ventilate the area.
Good project planning, steady routines, and quick spot-cleaning prevent dried paint and reduce repair work.
Troubleshooting Common Problems and Fixes
Even with precautions, you’ll still run into stubborn paint issues—streaks, gouges, ghosting, or residue in grout—but most have straightforward fixes if you act deliberately and pick the right method.
Even with precautions, stubborn paint problems like streaks, ghosting, or grout residue can usually be fixed with careful, proper methods.
- Test mild solvent first: preserves finish, follows tile preservation tips.
- Use plastic scraper plus poultice for ghosting; repeat gentle paint removal techniques.
- For gouges, sand minimally and touch up grout or sealant to protect tiles.
When to Call a Professional Tile Restorer
If the paint has caused chips, deep scratches, or large areas of glaze loss, you’ll want a pro to assess the extent of surface damage.
Call a tile restorer if stubborn stains persist after your best removal attempts or if you’re unsure whether a stain can be safely lifted.
Also get help when tiles or grout involve mixed or sensitive materials—professionals can determine compatible cleaning and repair methods.
Extensive Surface Damage
Because severe scratches, deep pitting, or large areas of glaze loss go beyond simple cleanup, you’ll want a professional tile restorer to assess and repair the damage.
You’ll need experts experienced in extensive surface damage and advanced tile restoration techniques.
Consider these steps:
- Professional inspection and damage mapping.
- Matching glaze or resurfacing.
- Polishing and sealing to restore durability and appearance.
Persistent Stain Presence
When stains penetrate grout or tile pores and resist repeated cleaning, it’s time to call a professional tile restorer who can evaluate whether specialized cleaning, poultices, or surface replacement is needed.
You should let them assess persistent discoloration, since pros apply advanced paint removal techniques and know tile preservation tips you might not.
They’ll advise safe restoration or replacement to prevent further damage.
Complex Material Compatibility
Persistent or deep-set stains often point to underlying compatibility issues between paint, cleaning agents, and your tile materials, so you’ll want a pro’s assessment before trying harsher fixes.
- You should call a restorer when surface compatibility is unclear or tests risk damage.
- Professionals diagnose material interactions that cause staining or finish loss.
- Let experts use targeted solvents and techniques to preserve tile value and avoid costly mistakes.
Frequently Asked Questions
Can Dried Paint Damage Grout Sealant or Cause Mold Buildup?
Yes — dried paint can damage grout sealant and trap moisture, which might promote mold; you should do grout cleaning promptly and use paint prevention measures like tape and drop cloths to avoid long-term issues.
Will Paint Removers Affect Heated Floor Systems?
Think of my neighbor testing solvents on a small patch: you’ll usually avoid damage if you match paint remover types to your system, mind heated flooring concerns, test a tiny area first, and use manufacturer-approved products.
How Do I Dispose of Paint Flakes and Used Solvents Safely?
You should bag paint flakes, label them, and take them to a hazardous waste facility; don’t pour solvents down drains. For solvent safety, store used rags in sealed metal containers and follow local disposal rules and recycling centers.
Can Scrubbing Paint off Release Harmful Fumes I Should Test For?
Yes — scrubbing paint can release fumes; studies show 40% of indoor renovation tasks raise VOC levels. You should test for fume exposure, monitor air, and act on health concerns by ventilating and using respirators.
Are There Child- and Pet-Safe Paint Removal Products Recommended?
Yes — you can use eco friendly options like citrus-based or soy gel removers and vinegar baking-soda DIY solutions; you’ll still test a small area, ventilate, and keep kids and pets away until surfaces fully dry and residues’re cleared.
Conclusion
You’ve got this—remember when you wiped a small paint drip off the kitchen tile and felt proud? That little win shows how patience and the right tools reclaim your space. Studies find gentle scraping plus a mild solvent works for most dried paint without damage, so start cautiously, test first, and go slow. If a stubborn spot resists, don’t force it—call a pro to avoid costly mistakes and keep your tiles looking like new.