
How to Remove Mold Before Painting for Safe Surfaces
Before you paint, don protective gear (N95, gloves, goggles), ventilate and contain the area with plastic sheeting, then scrub visible mold from nonporous surfaces using a mild detergent or bleach solution (1 cup bleach per gallon water) and use hydrogen peroxide on porous spots; rinse and let everything dry fully, checking with a moisture meter, replace severely damaged materials, and use a mold-blocking primer and mildew-resistant paint — keep going to learn prevention, troubleshooting, and when to call pros.
Quick Step-by-Step: Remove Mold Before Painting
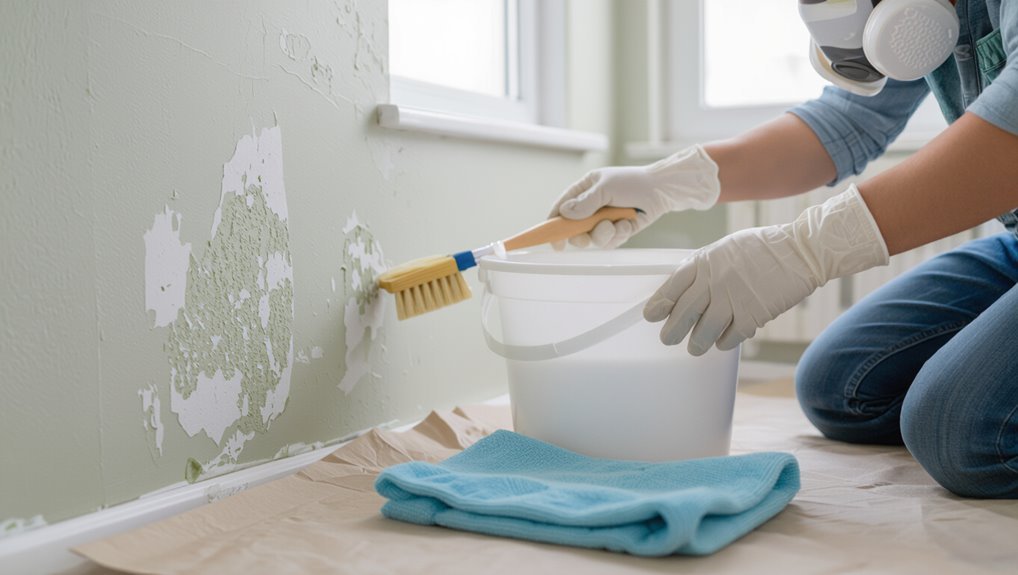
Start by evaluating the affected area and gathering safety gear: put on an N95 respirator, gloves, and eye protection, and ventilate the room.
Identify mold growth extent, contain the area with plastic, and dry surfaces.
Assess mold spread, seal the area with plastic sheeting, and thoroughly dry all affected surfaces.
Scrub with appropriate cleaning solutions, rinse, and let fully dry.
Prime treated spots with a mold-resistant primer before painting to guarantee adhesion and prevent recurrence.
Why Removing Mold Matters for Health and Paint Longevity
You should take mold removal seriously because mold spores can trigger allergies, asthma, and other respiratory problems.
If you paint over mold, the growth will continue and eventually cause paint to bubble, peel, or stain.
Removing mold first protects your health and guarantees your new paint job lasts.
Health Risks Explained
Because mold releases spores and microbial volatile organic compounds, it can trigger allergies, respiratory irritation, and worsen asthma — especially in children, the elderly, and anyone with weakened immune systems.
You should remove mold promptly to protect health concerns: it causes respiratory issues, allergic reactions, skin irritation, and altered immune response.
Left unchecked, it can aggravate chronic conditions, so clean before painting.
Paint Durability Impact
When mold’s allowed to grow on a surface, it not only poses health risks but also undermines paint adhesion and finish, so you’ll want to remove it before you prime or paint. You protect occupants and guarantee paint longevity by proper surface preparation; mold causes peeling, staining, and blisters that shorten coatings’ life.
| Issue | Effect |
|---|---|
| Mold | Poor adhesion |
| Stains | Visible defects |
| Blisters | Coating failure |
| Health | Recontamination risk |
Is That Dark Spot Mold or Dirt?
How can you tell if that dark spot is mold or just dirt? Focus on mold identification vs dirt comparison: mold often has fuzzy texture, musty smell, and regrows after wiping; dirt wipes away and leaves no odor.
- Inspect texture closely.
- Smell for mustiness.
- Try a damp cloth wipe.
- Note recurrence after cleaning.
Common Household Mold Types on Walls and Trim
Now that you’ve learned to tell mold from dirt, it’s helpful to know which mold types commonly show up on walls and trim so you can choose the right cleanup approach.
You’ll spot black mold and toxic mold stains, white mold fuzzy patches, and green mold streaks—mostly surface mold.
Good mold identification lets you target cleanup, mold prevention, and decide when to call a pro for persistent household mold.
What Causes Mold Inside and Outside the Home
You’ll usually find mold where moisture and food sources meet, so poor ventilation and high humidity make indoor spaces prime spots.
Water leaks and intrusion bring standing or hidden dampness that lets mold take hold.
Outside, mold also feeds on dirt, leaves, and other organic materials that collect on siding and trim.
Poor Ventilation And Humidity
Ever wondered why mold keeps coming back even after you clean it? You’re likely dealing with poor ventilation and high humidity.
Improve airflow and practice humidity control to stop spores thriving. Consider:
- Use exhaust fans during showers and cooking.
- Run dehumidifiers in damp areas.
- Open windows when weather allows.
- Maintain HVAC filters and ventilation improvement plans.
Water Leaks And Intrusion
If water gets into walls, ceilings, or crawlspaces from leaks or poor drainage, mold will find the moisture it needs to grow. You should stop water damage fast, dry areas, and seal entry points to prevent intrusion. Identify moisture sources and fix roofs, pipes, or grading.
| Problem | Action |
|---|---|
| Roof leak | Patch/replace |
| Pipe burst | Repair/replace |
| Poor grading | Regrade/flash |
| Flooding | Dry/sanitize |
Organic Materials And Dirt
Fixing leaks and stopping water intrusion reduces the moisture mold needs, but it won’t eliminate all growth if organic debris and dirt remain.
- Check environmental factors like humidity and sunlight.
- Remove leaves, dust, and organic growth from surfaces.
- Use appropriate cleaning methods for safe surface preparation.
- Address hidden moisture sources after cleaning to prevent recurrence.
How to Assess Severity: When DIY Is OK
When you spot mold before painting, quickly determine how extensive and where it’s so you can decide whether to tackle it yourself or call a pro.
For a DIY Assessment, check affected area size (small patches under 10 sq ft), substrate type, ventilation, and your health risks.
Gauge Mold Severity: light surface growth and nonporous materials are usually safe for DIY removal.
When to Call a Professional Mold Remediation Company
If you see large, visible mold growth, don’t try to handle it yourself — call a pro.
Also contact a remediation company if you suspect toxic mold or notice mold affecting structural elements or your HVAC system.
They’ll assess risks and prevent further damage before you paint.
Visible Extensive Growth
Because mold can spread quickly and affect your health and the structure of your home, call a professional when growth covers more than about 10 square feet, appears on HVAC systems or inside walls, or returns after repeated cleanings.
You’ll want experts to assess visible growth causes and advise visible growth prevention.
- Large area remediation
- Hidden contamination
- Recurrent colonies
- Complex HVAC cleanup
Toxic Mold Suspected
Should you suspect toxic mold, call a professional mold remediation company right away—avoid trying to handle it yourself.
If you notice toxic mold symptoms like persistent respiratory irritation, headaches, or unusual odors, get experts in.
They’ll assess risk, recommend mold testing options, and secure containment and removal.
Don’t delay: professionals protect your health and guarantee safe surfaces before you repaint.
Structural Or HVAC Damage
Besides health risks, mold can hide in places that affect your home’s structure and systems, and that’s when you need pros.
- Get a mold assessment and damage evaluation to protect structural integrity.
- Schedule an HVAC inspection to check air quality and hidden growth.
- Identify moisture sources before choosing remediation options.
- Ask about prevention strategies to stop recurrence and preserve safety.
Essential PPE for Mold Removal
When you tackle mold removal, you need the right personal protective equipment to keep yourself safe and prevent spreading spores; at minimum that means an N95 or better respirator, non-vented goggles, and disposable gloves and coveralls.
You should also use shoe covers and replace respirator filters regularly. Proper PPE supports accurate mold detection and lets you perform safe cleaning without risking contamination or health hazards.
Ventilation and Containment for Safe Cleaning
Before you start scrubbing, set up proper airflow by opening windows and using fans to push fresh air through the work area.
Seal off the room with plastic sheeting and tape to contain spores, and create negative pressure with an exhaust fan or a HEPA air scrubber vented outside.
That way you’ll keep contaminants from spreading and protect the rest of your home while you clean.
Proper Airflow Setup
Because disturbed mold releases spores and microscopic fragments into the air, you need a clear airflow plan that protects both your lungs and the rest of the house.
Use airflow design and ventilation tips to move fresh air in and contaminated air out while avoiding cross-contamination. Follow:
- Open windows to create cross-ventilation.
- Use box fans blowing out a window.
- Run HEPA air purifier nearby.
- Seal off adjacent rooms.
Containment And Negative Pressure
If you’re tackling mold removal inside a room, set up containment and negative pressure so spores don’t spread to the rest of the house.
You’ll seal doors and vents with mold barriers, use containment methods like plastic sheeting, and apply pressure techniques by exhausting air with a fan.
Run HEPA air filtration continuously, monitor differential pressure, and avoid disturbing contaminated areas.
Essential Tools, Cleaners, and Supplies to Have Ready
When you’re preparing to remove mold before painting, gather a focused kit of tools, cleaners, and safety gear so the job goes quickly and safely.
You’ll want reliable cleaning supplies and follow mold prevention tips as you work.
Prepare:
- N95 respirator, gloves, goggles
- Scrub brushes, scrapers, microfiber cloths
- Bucket, spray bottle, disposable towels
- Approved mold cleaner and mild detergent
Choosing Cleaners for Painted vs. Unpainted Surfaces
Now that you’ve gathered your gear, pick cleaners that match the surface you’re treating: painted walls need gentler, pH-neutral solutions to avoid stripping or discoloring the finish, while unpainted surfaces (wood, concrete, brick) can tolerate stronger, penetrating agents that remove mold from pores.
Check cleaner types and surface compatibility labels, test a small area, and choose products formulated for interior versus exterior use.
DIY Bleach Solution: Recipe & When to Use
You can make a simple bleach solution by mixing one cup of household bleach with one gallon of water to treat nonporous, painted surfaces.
Wear gloves, eye protection, and guarantee good ventilation, because bleach fumes and splashes can harm your skin and lungs.
Use the solution only on hard, nonporous areas, rinse thoroughly after treating, and never mix bleach with ammonia or other cleaners.
Bleach Solution Recipe
Although bleach isn’t right for every surface, a simple DIY bleach solution can quickly kill mold on nonporous areas like tile, glass, and sealed countertops.
Use 1 cup household bleach per gallon water, apply briefly, then rinse. Consider bleach alternatives for sensitive finishes and ongoing mold prevention.
Steps:
- Mix solution
- Apply with cloth
- Wait 10 minutes
- Rinse thoroughly
Safety And Usage
Because bleach can irritate skin, eyes, and lungs, take precautions before you mix the solution: open windows, wear gloves and eye protection, and use a mask or respirator if you’re in a confined space.
Follow safety precautions: dilute properly, avoid mixing with ammonia, test a small area, and ventilate.
Limit mold exposure time, rinse surfaces, and discard contaminated materials safely.
Using Hydrogen Peroxide on Porous Surfaces Safely
Hydrogen peroxide can be a safe, effective option for treating mold on porous surfaces—when you use the right concentration and technique. You should follow hydrogen peroxide safety steps for porous surface application to avoid damage and inhalation.
Hydrogen peroxide can safely treat mold on porous surfaces—use the right concentration and technique to avoid damage and inhalation.
- Ventilate area and wear gloves, goggles.
- Test a hidden spot first.
- Use 3% solution, apply gently.
- Rinse and dry fully before repainting.
Vinegar and Non-Toxic Cleaners: Benefits and Limits
You can use white vinegar as a simple, non-toxic way to kill many mold strains on hard surfaces because its acidity disrupts microbial cell walls.
Don’t expect vinegar or mild cleaners to fully remove mold from porous materials or heavy infestations, though—they often won’t penetrate or eliminate spores embedded in drywall or wood.
For those situations, you’ll need stronger treatments or professional remediation.
Vinegar’s Antimicrobial Power
When you’re looking for a simple, non-toxic way to tackle mold before painting, plain white vinegar is a surprisingly effective first line of defense; its acetic acid disrupts many common mold strains, loosening spores and reducing regrowth without harsh fumes.
- You’ll see vinegar benefits for surface cleaning.
- You’ll use vinegar applications on porous areas.
- You’ll spray, wait, and scrub gently.
- You’ll rinse and let dry thoroughly.
Non-Toxic Cleaner Limitations
Although vinegar works well on fresh, light surface mold, it won’t reliably kill every species or penetrate deep into porous materials.
So you shouldn’t expect it to be a cure-all for serious infestations. You should know non-toxic effectiveness varies: mild cleaners remove surface staining but have cleaning limitations against embedded colonies.
For heavy growth, use professional products or remediation to guarantee safety before painting.
Commercial Mold Removers: Labels and Active Ingredients
Because mold products vary widely, reading labels and knowing common active ingredients is essential before you buy.
You’ll compare mold removal products by active ingredients, efficacy ratings, environmental impact, and user reviews. Follow label instructions and safety precautions for commercial cleaners.
- Bleach-based: fast, corrosive.
- Hydrogen peroxide: safer, milder.
- Ammonia: effective, toxic when mixed.
- Quats: stable, residual.
Prepping the Area Before You Clean
Before you start cleaning, clear the workspace so you have room to move and don’t knock over anything.
Cover or remove nearby surfaces and furniture to protect them from cleaners and spores.
Open windows, run a fan for ventilation, and use plastic sheeting to contain the area and limit spread.
Clear The Workspace
1 thing to do first: clear the workspace so you can clean without scattering mold spores. You’ll remove clutter, improve workspace organization, and set safety precautions.
Follow this quick checklist:
- Remove furniture and decor.
- Declutter floors and shelves.
- Bag porous items that can’t be cleaned.
- Create a clear path for ventilation and waste removal.
Protect Nearby Surfaces
With the room cleared, protect nearby surfaces so cleaning won’t spread mold or damage finishes. You’ll use drop cloths, painter’s tape, and plastic sheeting as practical surface protection techniques, securing edges and delicate trim. These mold prevention strategies minimize cleanup and preserve finishes—treat it like restoring peace to your space.
| Item | Feeling |
|---|---|
| Drop cloth | Relief |
| Tape | Control |
| Plastic | Safety |
| Trim wrap | Care |
| Tools | Confidence |
Ventilate And Contain
Although you’ll want to keep mold spores from drifting into other rooms, don’t seal the space so tightly that fumes build up—open windows, run an exhaust fan, and set up a box fan blowing outward to pull air outside.
Then contain the work area and guarantee steady air circulation.
- Close doors, gap-seal edges
- Hang plastic sheeting
- Use a HEPA vacuum
- Wear PPE
Test a Small Spot to Confirm Treatment Works
Before you tackle the whole wall, pick a small, inconspicuous spot and apply your chosen mold treatment to confirm it works and won’t damage the surface.
Wait the recommended dwell time, then inspect for color change, bubbling, or finish damage. Use a clean cloth to blot; repeat if needed.
Document results for test effectiveness and keep the spot verification notes before proceeding.
Scrubbing Technique: Remove Mold Without Spreading Spores
Start by dampening the area lightly with your chosen cleaner to keep spores from becoming airborne.
Then scrub gently in a steady, circular motion using a soft brush or non-abrasive pad. Use careful scrubbing methods to lift mold spores without scattering them.
- Work outward from center
- Apply steady pressure
- Rinse brush between passes
- Replace dirty pads promptly
Rinsing, Drying, and Preventing Recontamination
After you’ve scrubbed the mold away, rinse the surface thoroughly with clean water to remove loosened spores and cleaner residue.
Use a sponge or low-pressure spray and work from the cleaned center outward so you don’t recontaminate treated areas.
Pat or blot excess water, then use surface drying methods like fans and dehumidifiers until completely dry.
Maintain ventilation and fix leaks to prevent recontamination using proven mold removal techniques.
Treating Porous Materials vs. Nonporous Surfaces
When you’re tackling mold, treat porous materials like drywall, wood, and fabric differently than hard surfaces because spores can penetrate and hide.
For porous items you’ll need deeper cleaning or replacement, while nonporous surfaces usually respond to scrubbing and disinfecting.
If mold has soaked into a material or keeps returning, you’ll want to replace it rather than keep trying to clean it.
Porous Material Cleaning
Because porous materials absorb moisture and spores, you’ll need different cleaning methods than you’d use on hard, nonporous surfaces; treat wood, drywall, and fabric with gentler, penetrating cleaners and allow plenty of drying time, while scrubbing and disinfecting works well for tile, metal, and plastic.
- Use porous material treatment for wood.
- Vacuum fabric before washing.
- Apply mold prevention tips like dehumidifying.
- Replace heavily infested drywall.
Nonporous Surface Prep
Shifting focus from porous materials, you’ll use different techniques on nonporous surfaces like tile, metal, glass, and properly sealed laminate. These materials don’t absorb moisture, so cleaners stay on the surface and you can rely on scrubbing and disinfecting to remove mold effectively.
Wear gloves, ventilate, apply appropriate cleaning solutions, scrub with a nonabrasive brush, rinse thoroughly, and dry completely before priming or painting.
When To Replace Materials
If mold has penetrated a material or keeps returning after cleaning, you’ll need to replace it rather than keep treating the surface.
Porous materials—drywall, wood, acoustic tiles, insulation, and unsealed grout—can trap spores and moisture deep inside, making complete remediation nearly impossible without removal.
Use material signs and clear replacement criteria to decide.
- Soft, crumbling drywall
- Rotten or warped wood
- Saturated insulation
- Persistent stained tiles
Removing Mold From Drywall: Repair vs. Replace
When mold shows up on drywall, you need to decide whether to repair the affected area or remove and replace the sheetrock entirely.
The right choice depends on how deep the contamination goes, how much of the wall is affected, and whether the structural integrity or insulation is compromised.
Do a damage assessment, weigh remediation options, choose drywall repair for surface cases, and mold replacement when contamination’s extensive.
Cleaning Mold From Wood Trim and Baseboards
Start by checking how far the mold has spread on your wood trim and baseboards so you can decide if cleaning will suffice or if replacement’s needed.
Protect yourself with gloves, a mask, and eye protection, then test a small area with a mild cleaner to guarantee the finish won’t be damaged.
When it’s safe, gently scrub with a wood-safe detergent or a diluted bleach solution, rinse, and dry thoroughly before painting.
Assessing Mold Extent
Begin by inspecting every piece of trim and baseboard for visible mold, soft spots, peeling paint, or a musty odor—these signs indicate whether the issue is surface-level or has penetrated the wood.
Use mold identification techniques and note mold growth indicators as you evaluate. Consider these steps:
- Tap for softness.
- Scrape a small area.
- Smell for mustiness.
- Map affected lengths.
Safe Cleaning Steps
Put on gloves, eye protection, and an N95 respirator before you touch the trim, since protecting yourself is the first and most important step.
Vacuum with a HEPA attachment, scrub wood trim and baseboards with an eco friendly solutions mix (vinegar or hydrogen peroxide), rinse, dry thoroughly, and sand lightly if needed.
Seal, repaint, and address moisture sources for long term prevention.
Cleaning Mold From Plaster and Lath Walls
Because plaster and lath are porous and often hide mold between layers, you’ll need a careful, patient approach to clean them without causing damage.
- Use mold identification techniques to locate affected lath and plaster.
- Dry the area thoroughly before cleaning.
- Gently scrub with mild detergent and a soft brush.
- Follow plaster restoration methods for repairs, then prime before painting.
Handling Mold on Ceilings and High Surfaces Safely
When mold shows up on ceilings or other high surfaces, you’ll need to work safely and methodically to remove it without spreading spores or risking a fall.
Use stable ladders or scaffolding, wear PPE, and ventilate well.
Apply gentle cleaning techniques—HEPA vacuuming, damp wiping with detergent or diluted bleach—and contain debris.
Prioritize mold removal safety and avoid aggressive scrubbing that damages ceilings.
Treating Bathroom Tile, Grout, and Shower Enclosures
Ceilings and high surfaces require careful access and containment, and bathrooms demand the same attention on a smaller scale: tiles, grout lines, and shower enclosures trap moisture and promote mold growth in tight, hard-to-reach seams.
- Use targeted cleaning techniques and product recommendations for grout treatment.
- Apply tile sealing for surface protection after cleaning.
- Practice shower maintenance and moisture management daily.
- Prioritize mold prevention with proper ventilation and periodic re-sealing.
Basement and Crawlspace Mold: Special Precautions
Basements and crawlspaces demand extra caution since they’re often damp, poorly ventilated, and prone to hidden mold growth. Before you start cleaning or painting, assess moisture sources, inspect structural materials, and plan containment to avoid spreading spores into the rest of your home.
Wear proper PPE, test for extensive contamination, fix basement conditions, improve crawlspace ventilation, use HEPA filtration, and isolate work areas before remediation.
Exterior Mold Removal: Pressure-Wash Cautions
Although pressure-washing can quickly strip mold from siding and decks, you should use caution to avoid damaging materials, driving moisture into gaps, or spreading spores to nearby plants and vents.
- Assess mold detection first; target affected areas.
- Use measured pressure techniques; avoid high PSI on soft siding.
- Follow safety precautions: PPE, contain runoff, protect plants.
- Perform regular equipment maintenance and rinse to prevent cross-contamination.
How Long to Wait After Cleaning Before Painting
After you’ve cleaned mold from a surface, wait until the area is completely dry before painting — moisture trapped under new paint can cause peeling and encourage regrowth.
Check dryness with touch and a moisture meter; drying time varies by material and humidity.
Only paint when fully dry to guarantee proper paint adhesion. Rushing risks bubbles, poor coverage, and renewed mold development.
Choosing a Primer That Blocks Stains and Mold
Primer choice matters: pick a high-quality, mold- and stain-blocking primer designed for the surface you’ve prepped so paint will adhere and stains won’t bleed through.
- Choose mold resistant primers for damp-prone areas.
- Look for stain blocking technology to seal tannins and mildew stains.
- Match primer type to drywall, wood, or masonry.
- Follow manufacturer cure times before topcoating.
Best Paint Types to Resist Future Mold Growth
Now that you’ve sealed stains and blocked mildew with the right primer, pick a topcoat that actively resists mold to keep surfaces cleaner longer; look for paints labeled “mildew-resistant” or “mold-inhibiting” and choose formulations suited to the room—durable, washable acrylic latex for most interior walls, specially formulated bathroom or kitchen paints with added biocides for high-humidity areas, and breathable masonry paints for exterior or basement walls to prevent trapped moisture.
Use mold resistant paints and antimicrobial coatings where humidity’s high.
Surface Prep Tips for Paint Adhesion After Treatment
Before you paint, make sure the surface is completely clean, dry, and free of any remaining mold residue so the new finish will stick and last.
- Sand glossy or damaged areas for proper surface preparation.
- Wipe dust with a tack cloth so paint adhesion improves.
- Prime stained spots with a mold-blocking primer.
- Allow full cure time between treatment, primer, and topcoat for lasting paint adhesion.
Fix HVAC, Ventilation, and Insulation to Stop Mold
Check your HVAC, ventilation, and insulation systems to remove the moisture sources that let mold take hold; if airflow is poor or insulation is missing, humidity builds and spores flourish.
Inspect ducts, seals, and vents, service HVAC regularly, and add insulation upgrades where needed.
Improve passive ventilation, install exhaust fans, and follow mold prevention strategies to reduce condensation and protect painted surfaces.
Moisture Control Measures to Keep Mold Away
Having fixed HVAC, ventilation, and insulation issues, you’ll want to adopt practical moisture-control measures to keep mold from coming back.
- Install moisture barriers and surface treatments to block damp.
- Use humidity control and ventilation systems to boost air circulation.
- Improve water drainage and landscaping solutions to divert runoff.
- Combine insulation upgrades with routine checks to prevent condensation.
Regular Inspection Checklist to Catch Mold Early
A simple, regular inspection routine can catch mold early when it’s easiest to remove, so set a schedule to look for signs every month in problem areas like basements, bathrooms, attics, crawlspaces, and around windows and plumbing.
Note early warning signs: musty odors, discoloration, peeling paint, or damp spots.
Use mold detection methods like moisture meters, flashlight checks, and targeted swab tests to confirm and act fast.
Cost Estimates: DIY vs. Professional Remediation
You’ll typically pay far less doing mold removal yourself, but costs can still range widely depending on the size of the problem and the materials you need—expect small DIY jobs to run $50–$300 and larger, more intensive efforts $300–$1,000.
- DIY costs: Material expenses and equipment rentals add up.
- Professional rates: Higher but include labor considerations.
- Cleanup expenses: Factor disposal and containment.
- Long term savings vs. warranty options: weigh value.
Troubleshooting: If Mold Reappears After Painting
If mold comes back after painting, don’t assume the paint failed—you likely missed the source or didn’t fully kill the spores before sealing them in.
Inspect for moisture, leaks, and hidden contamination; address mold recurrence factors like humidity or poor ventilation.
Inspect for leaks, dampness and hidden contamination; fix humidity and ventilation issues to stop mold coming back.
Remove affected paint, treat and dry surfaces, then use proper primers.
Check for paint adhesion issues before repainting to prevent repeats.
Frequently Asked Questions
Can Mold Spores in Paint Cause Allergies When Applied Over Cleaned Areas?
Yes — you can still trigger mold allergies if paint contains viable spores or allergens; you’ll reduce risk by using tested, low-spore products, sealing with mold-resistant primers, and ensuring paint safety through proper ventilation and allergen-free certifications.
Can Mold Grow Inside Household Paint Cans or Primers?
Yes — mold can grow inside paint cans or primers if moisture and contamination occur. You should practice mold prevention by keeping lids sealed, storing paint in cool, dry places, and labeling cans for proper paint storage.
Are Mold-Resistant Paints Safe for Nurseries and Pet Rooms?
Yes — you can use mold-resistant paints in nurseries and pet rooms; they help mold prevention strategies. Picture clean, pale walls protecting tiny breaths and paws; follow nursery safety tips, ventilate, and choose low-VOC formulas.
Do Warranties Cover Mold-Related Paint Failure After Remediation?
Usually you won’t get full coverage: paint warranties often exclude mold-related failures unless a certified mold remediation preceded painting and you followed manufacturer prep guidelines, so you’ll need documentation to claim paint warranties for mold issues.
Can Mold Testing Labs Identify Species From DIY Swab Samples?
Yes — you’ll be thrilled: labs can often ID mold from DIY swabbing methods, but they’ll note limits; mold identification techniques like microscopy and culture work better with proper sampling, so expect varying certainty and fees.
Conclusion
You’ve fought the grime and learned the science; now enjoy the clean, painted surface—but remember that fresh paint can hide a lurking problem as easily as sunlight reveals it. You’ll breathe easier and protect your investment if you pair careful removal with ongoing moisture control, yet don’t assume paint equals cure. Stay vigilant, act fast at the first sign of return, and balance confidence with caution so your newly painted space truly stays safe.
