How to Sand Ceiling Before Painting for Best Results
To get the best ceiling finish, wear a respirator, goggles, and coveralls, clear the room, and tape off fixtures. Identify your ceiling—drywall, plaster, or popcorn—then use appropriate grit: 120–150 for drywall, 80–100 for heavy texture. Sand in sections with a pole sander or block, apply gentle even pressure, vacuum dust frequently, and feather repairs. Prime before painting for adhesion and uniform sheen. Keep going and you’ll find tips on tools, grits, and cleanup.
Quick Step-by-Step Ceiling Sanding Checklist
Start by gathering the right tools—sandpaper (120–150 grit for drywall, 80–100 for heavy texture), a sanding block or pole sander, a vacuum or brush, drop cloths, safety gear (goggles, dust mask), and a ladder.
Start with the right tools—appropriate grit sandpaper, sander, vacuum, drop cloths, safety gear, and ladder
Work in sections, sand uniformly using gentle pressure, and vacuum dust frequently.
Smooth imperfections, wipe clean, and inspect for missed spots.
Follow proper sanding techniques for routine ceiling maintenance.
When You Need to Sand a Ceiling Before Painting
If your ceiling has visible bumps, peeling paint, glossy finishes, or uneven texture, you’ll need to sand before painting to confirm proper adhesion and a smooth final appearance.
You should sand when repairing cracks, removing flaking paint, or dulling high-gloss surfaces.
Prioritize sanding benefits for better primer and paint bonding.
Proper ceiling preparation prevents show-through and guarantees an even, long-lasting finish.
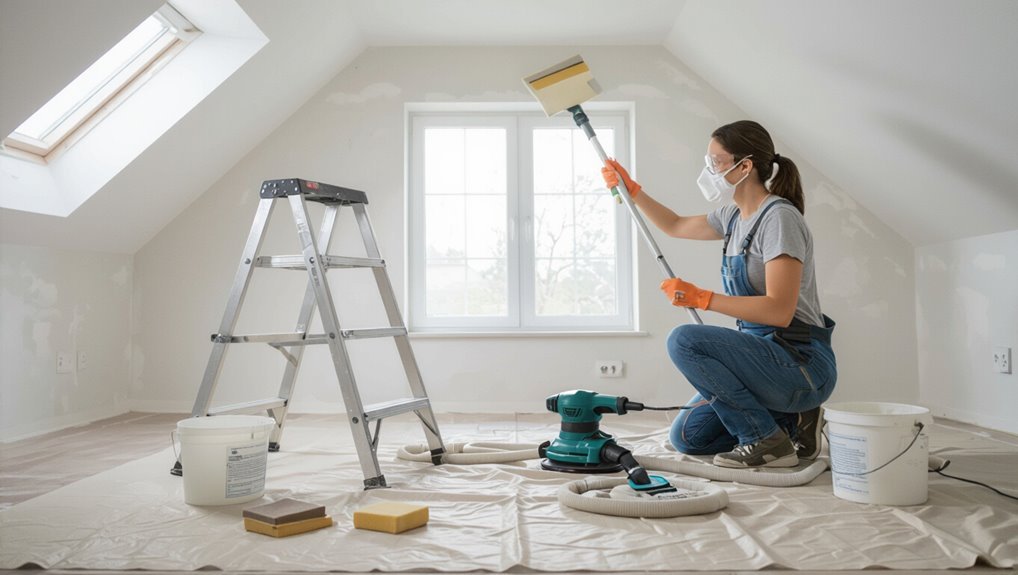
Safety Gear You Must Wear When Sanding Ceilings
Before you grab a sander, make sure you’re protected with the right gear: a respirator or dust mask to keep particles out of your lungs, goggles or a face shield to guard your eyes, and long sleeves or a disposable coverall plus gloves to protect your skin.
Don’t skip proper ventilation and a secure ladder or platform so you’re not breathing extra dust or risking a fall.
We’ll cover how to choose and use each item safely.
Respiratory Protection Essentials
Sanding ceilings kicks up a lot of fine dust and potentially harmful particles, so you’ll need proper respiratory protection to work safely and comfortably.
A well-fitting N95 or P100 respirator is the minimum, and a powered air-purifying respirator (PAPR) is best for heavy or prolonged jobs or when older paint may contain lead.
Choose certified respiratory masks with replaceable dust filters, test fit, and replace cartridges per manufacturer guidelines.
Eye And Face Shields
A clear, fitted face shield combined with impact-rated safety goggles will keep dust, paint chips, and stray debris out of your eyes and off your face while you work overhead.
You should wear eye protection and face shields to prevent injury and improve focus.
Emphasize safety importance: check fit, clean lenses, and choose gear compatible with your sanding techniques to avoid fogging or gaps.
Skin And Clothing Barriers
After you’ve secured eye and face protection, turn your attention to shielding your skin and clothes so dust and debris don’t irritate or contaminate your work.
Wear long sleeves, gloves, and a high-neck disposable coverall for skin protection. Choose washable work clothes beneath and sturdy shoes.
Use shoe covers and change or launder garments after sanding. Follow clothing precautions to prevent cross-contamination and skin irritation.
Identify Your Ceiling Type (Drywall, Plaster, Popcorn)
Before you start sanding, identify whether your ceiling is drywall, plaster, or popcorn so you know what tools and techniques to use.
Run your hand over the surface to assess the material and look for seams, paper, or lath that indicate drywall or plaster.
Note the texture type—smooth, troweled, or popcorn—because popcorn requires different handling than flat surfaces.
Assess Surface Material
Start by identifying exactly what type of ceiling you’re dealing with—drywall, plaster, or popcorn—because each needs different sanding methods and tools. Perform a quick surface assessment for damage and material compatibility, then choose abrasives and protection accordingly.
| Material | Clues |
|---|---|
| Drywall | Smooth, paper face |
| Plaster | Hard, hairline cracks |
| Popcorn | Bumpy, loose texture |
Note Texture Type
Texture matters — you need to know whether your ceiling is drywall, plaster, or popcorn because each texture changes how you’ll sand and prep it.
Do a quick texture analysis: smooth drywall sands easily, plaster needs gentler abrasion and patching, while popcorn requires testing for asbestos and typically removal rather than aggressive sanding.
Recognize ceiling styles to choose proper tools and safety gear.
Choosing Sandpaper Grit for Each Ceiling Type
When you pick sandpaper for a ceiling, match the grit to the surface: smooth drywall needs finer grits (220–320) to avoid visible scratches, while slightly rough plaster or previously painted ceilings often benefit from medium grits (120–150) to remove imperfections efficiently.
Match sandpaper grit to the ceiling: fine (220–320) for smooth drywall, medium (120–150) for rough plaster or painted surfaces.
Use sanding techniques suited to ceiling finishes and the job.
- 320: final smoothing
- 220: light prep
- 150: scuff sanding
- 120: paint removal
- 80–100: heavy leveling
Hand, Pole, and Drywall Sanders for Ceilings
Picking the right grit is only part of the job — you also need the right tool for ceiling work.
Choose between hand sander options for small patches, use pole sander techniques to reach high areas without a ladder, and leverage drywall sander benefits for large jobs.
Follow sanding efficiency tips: steady strokes, light pressure, and frequent dust control to get a smooth, paint-ready surface.
Best Electric Sanders for Ceilings (Budget, Pro, Rental)
When you’re ready to move from hand tools to power, picking the right electric sander makes the job faster and less tiring.
I’ll cover budget-friendly models that work well for occasional use, professional-grade units for contractors, and which sanders are best to rent for a one-off project.
That way you can match performance and cost to your ceiling sanding needs.
Budget-Friendly Sanders
A reliable, budget-friendly sander can speed ceiling prep without breaking the bank, and you don’t need pro gear to get smooth results.
You’ll find budget friendly options that deliver consistent finish and long life. Choose affordable tools with dust collection and ergonomic handles.
Consider:
- Random orbital sander
- Palm sander
- Detail sander
- Pole-mounted orbital
- Rental finish sander
Professional-Grade Options
If you need more power, durability, or dust control than budget models offer, professional-grade electric sanders will cut prep time and give a smoother, more consistent finish on ceilings.
You’ll appreciate variable-speed random orbital and drywall-specific sanders for consistent sanding techniques.
Choose sealed bearings, ergonomic grips, and integrated dust collection from trusted professional tools to reduce fatigue and cleanup while achieving uniform surfaces.
Sanders For Rental
Renting a sander gives you pro-level performance without the investment, so you can tackle ceiling prep for a day or a weekend and return the tool when you’re done.
You’ll choose among sander types and rental options to match project size, dust control, and budget. Consider:
- Orbital for light smoothing
- Random-orbit for finish
- Belt for heavy removal
- Pole sander for reach
- Vacuum-ready for cleanup
Dust Control: Vacuum, Adapter, Extraction
Controlling dust while you sand the ceiling lets you work cleaner, faster, and with less cleanup afterward; a shop vacuum with a proper sanding-adapter and extraction hose is the core of that control.
You’ll choose dust containment methods that match job size, check vacuum attachment features for fit and airflow, and run extraction continuously while sanding to minimize airborne dust and speed finishing.
Preparing the Room: Cover, Remove, and Mask
Before you sand, you’ll want to cover floors and furniture with drop cloths or plastic sheeting to keep dust off everything.
Remove light fixtures, vents, and any hardware that could get scratched or clogged with debris.
Tape off walls, trim, and remaining fixtures so sanding stays confined to the ceiling.
Cover Floors And Furniture
Start by clearing as much furniture as you can from the room. Then protect what stays with drop cloths or plastic sheeting—secure edges with painter’s tape so dust doesn’t sneak underneath.
Use proper floor protection and furniture covering to prevent scratches and dust.
- Lay overlapping drop cloths
- Tape seams
- Wrap delicate pieces
- Cover vents
- Use weighted edges
Remove Fixtures And Hardware
Remove light fixtures, switch plates, and any hanging hardware so you won’t sand around obstacles or spray them with dust.
Turn off power, label wires, and carefully detach fixtures—fixture removal prevents damage and speeds sanding. Store screws and small parts in marked bags.
For remaining pieces, apply painter’s tape and plastic sheeting for hardware protection. Clean removed fixtures before reinstallation to avoid trapped grit.
Protect Lights, Vents, and Fixtures From Dust
One simple step that saves you a lot of cleanup is to cover lights, vents, and other fixtures with plastic and painter’s tape so dust can’t settle inside them.
Use dust barriers and fixture covers to protect electrical parts.
Quick checklist:
- Seal light fixtures
- Wrap vents securely
- Cover smoke detectors
- Tape exposed wiring
- Protect lamps and chandeliers
Sanding Sequence for Flat Drywall Ceilings
Start with a sensible grit progression—begin coarse to knock down high spots, then move to finer grits for a smooth finish.
Focus each pass on sanding seams evenly so joints disappear without gouging the drywall.
Between steps, remove dust thoroughly so you can see imperfections and get a clean surface for primer.
Choose Grit Progression
Choosing the right grit progression keeps your sanding efficient and prevents visible scratch marks on a flat drywall ceiling.
You’ll start coarse, then refine with finer paper; grit selection and sanding techniques matter for smooth priming. Follow this sequence:
- 80–100 grit to level high spots
- 120 grit to blend joints
- 150 grit for feathering
- 180 grit for final smoothing
Vacuum and tack after each pass.
Sand Seam Smoothly
With your grit progression set, focus on sanding each seam in a deliberate sequence to avoid gouges and visible ridges. You’ll work from center outward, using light, even strokes and proper sanding techniques to blend joints for smooth finishes. Follow a logical path across the ceiling to keep edges consistent and prevent overlaps.
| Start | Middle | End |
|---|---|---|
| Center | Adjacent seam | Perimeter |
| Light strokes | Blend | Feather |
Remove Dust Thoroughly
Tackle dust right after sanding so it doesn’t settle back or interfere with primer and paint adhesion; use a high-efficiency vacuum (or vacuum-equipped pole sander) first, then wipe the ceiling with a slightly damp microfiber cloth or a tack cloth, working in overlapping passes from one side of the room to the other to guarantee you catch airborne particles and edges.
- Use HEPA vacuum
- Change cloths often
- Test cleaning solutions
- Mask vents
- Inspect under light
Sanding Textured Ceilings: Do’s and Don’ts
Sanding a textured ceiling demands care, since aggressive sanding can ruin the pattern or release hazardous dust; you’ll want to use the gentlest method that achieves a smooth edge without stripping texture.
Use soft-grit sanding sponges, test techniques on a scrap, wear PPE, and vacuum continually.
Avoid common sanding mistakes like over-sanding, spinning sanders, or wet sanding that collapses texture.
Feathering Edges and Blending Repair Patches
Although the repair may look flush at first, you’ll need to feather the edges so the patch disappears once painted.
Use gentle sanding, wider strokes, and progressive grits to blend surfaces. Apply thin compound layers and sand between coats.
Try these feathering techniques and blending methods:
- Start with medium grit
- Expand sanding radius
- Light final sanding
- Match texture
- Clean dust thoroughly
Tackling Old Paint, High-Gloss Areas, and Peeling
Start by evaluating the ceiling for flaking, bubbling, or shiny high-gloss spots so you know what needs attention.
Scrape or strip any loose or peeling paint back to a firm edge, then clean the surface of dust and residue.
Sand glossy areas with a coarse grit to dull the finish before smoothing with finer grit for painting.
Assess Surface Condition
Before you grab any tools, take a close look at the ceiling to identify old paint, glossy spots, and peeling areas so you know what prep each section needs.
You’ll perform a surface evaluation and damage identification to plan sanding, spot-prime, or feather edges.
- Note glossy patches
- Mark peeling zones
- Check texture differences
- Test adhesion gently
- Photograph problem spots
Strip Flaking Paint
Tackle flaking paint by removing any loose or glossy areas so new paint can adhere evenly; use a scraper for large chips, a wire brush or sanding block for stubborn spots, and a chemical stripper if multiple layers won’t come off mechanically.
You’ll clean dust, feather edges, and spot-prime bare patches.
These preparation techniques prevent peeling recurrence and guarantee a uniform surface ready for sanding and repainting.
Smooth High-Gloss Areas
If you’re dealing with old high‑gloss paint that’s prone to peeling, sand those shiny areas down until the surface loses its sheen and the edges of any flakes are feathered to the surrounding paint.
You’ll use proper sanding techniques to guarantee effective surface preparation and adhesion.
- Choose fine-grit sandpaper
- Sand with the grain
- Feather edges gently
- Clean dust thoroughly
- Prime sealed areas before painting
Fix Nail Pops, Cracks, and Small Holes Before Sanding
Start by locating and addressing nail pops, cracks, and small holes so they don’t telegraph through your new paint.
For nail pop repair, drive or remove the nail, secure with a screw, and countersink. Use quality compound for crack filling and hole patching, feathering edges.
After drying, sand smooth as part of surface preparation so finish coats sit evenly.
How Smooth Is Smooth Enough: Checking Progress?
How smooth should your ceiling feel before you reach for the paint? You’ll use sanding techniques and surface evaluation to judge readiness: it should be even, free of ridges, and consistent to touch.
Check with good light and hand.
Check your ceiling by eye and touch under bright light before painting to spot any imperfections.
- Run your hand across
- Use a bright lamp
- Try a fingertip rub
- Look for shadows
- Note texture changes
When to Stop Sanding (Avoid Over-Sanding)
You should feather patch edges so they blend with the surrounding texture without cutting into the ceiling.
Stop sanding when the surface feels smooth and matte, not shiny from over-sanding.
If the filler is still firmly bonded, you’ve sanded enough—don’t keep going.
Feather Edges Only
When you’re sanding repairs or seams, stop when you’ve feathered the patch into the surrounding ceiling—don’t keep sanding until the area disappears. You want smooth shifts, not gouges.
Use feathering techniques and blending methods to match texture and edge.
Tips:
- Sand outward lightly
- Preserve surrounding texture
- Check from different angles
- Use fine grit
- Clean dust before priming
Smooth, Not Shiny
Although the goal is a smooth surface, stop sanding before the patch starts to look glossy—you want dull, even dullness that indicates the fibers are blended, not ground away.
Check texture under consistent light, use progressive sanding techniques, and tap lightly to feel uniformity. Over-sanding weakens the patch and ruins surface preparation.
Halt when seams disappear and the area feels slightly satiny, not shiny.
Stop At Bonding
After you’ve achieved that even, slightly satiny feel, stop sanding as soon as the patch bonds to the surrounding surface—keep going only until the edges blend and the filler no longer lifts under light pressure.
You’ll protect texture and guarantee proper adhesion using correct sanding techniques during ceiling preparation.
- Check bond with fingertip
- Feather edges lightly
- Use fine grit
- Avoid gouging
- Clean dust thoroughly
Cleaning Up Dust Efficiently After Sanding
Dust from sanding settles fast and gets everywhere, so tackle it systematically: start by turning off HVAC and covering vents.
Then use a shop vacuum with a HEPA filter to pick up loose dust from the ceiling, walls, and floor.
Run a shop vacuum fitted with a HEPA filter to remove loose dust from ceilings, walls, and floors.
Next, employ dust containment methods like plastic sheeting and tack cloths.
Wipe surfaces with damp microfiber and mild cleaning solutions, then empty and clean equipment.
Priming After Sanding: Requirements and Best Primers
Once you’ve removed loose particles and wiped surfaces clean, prime the ceiling to seal sanding scratches, even out porosity, and guarantee topcoats adhere properly.
You should choose primer types based on surface preparation and moisture, and follow manufacturer drying times.
- Assess porosity
- Fix stains first
- Use appropriate primer types
- Apply thin, even coats
- Sand light between coats
Best Primers for Plaster, Drywall, and Popcorn Ceilings
With the surface sealed and sanding scratches smoothed, pick a primer tailored to the ceiling material—plaster, drywall, and popcorn each need different formulations to block stains, even out absorbency, and promote adhesion.
Use plaster primers for alkaline surfaces, drywall primers for uniformity, and popcorn primers that preserve texture finishes.
Prioritize paint adhesion, moisture resistance, and thoughtful color selection for best ceiling paints results.
Paint Choices That Work Best After Sanding
After sanding smooth and priming the surface, choose paints that match the ceiling’s texture and room conditions to get durable, even results.
Pick low-VOC options to reduce environmental impact, consider sheen levels for light reflection, and factor drying times with your schedule.
Balance color selection with room size and light. Use proper application techniques for uniform paint finishes.
- Low-VOC latex
- Eggshell for warmth
- Flat for imperfections
- Fast-dry formulas
- Roller nap choice
Common Mistakes That Ruin a Ceiling Paint Job
Although a ceiling looks simple, small mistakes can turn your fresh paint into a blotchy, peeling mess, so you’ll want to avoid them from the start. You must use proper sanding techniques, clean dust, fix stains, and choose primers. Skipping ceiling preparation or rushing causes peeling and uneven sheen.
| Mistake | Fix |
|---|---|
| Poor sanding | Use correct grit |
| Dust left | Vacuum & wipe |
Time Estimates: How Long Sanding and Prep Should Take
Plan on spending most of your prep time on sanding and cleanup: for a standard 10×12 room you’ll typically spend 1–3 hours sanding (depending on how rough the surface is), 30–60 minutes wiping and vacuuming dust, and another 30–60 minutes addressing repairs and priming.
So block out a half- to full-day before you start painting.
- Inspect surfaces
- Estimate sanding stages
- Schedule drying times
- Allocate cleanup slots
- Review supplies
Use time management and project planning to keep the timeline realistic and avoid rushing.
Working Safely on High and Vaulted Ceilings
Sanding high or vaulted ceilings adds height-related hazards you won’t face on a standard room, so adjust your schedule and gear accordingly: prioritize ladder safety—use a tall, stable ladder, buddy spotter, and non-slip feet.
Consider scaffolding options for larger areas to reduce fatigue and increase reach.
Wear a respirator, eye protection, and secure tarps; take frequent breaks to stay steady and focused.
When to Call a Pro: Structural Damage, Lead, or Big Jobs
When should you call a pro? You should seek professional assessment when ceilings risk structural integrity, involve suspected lead, or become overwhelming.
Get expert advice for safety and quality.
- Visible cracks or sagging needing damage evaluation
- Suspected lead requiring certified lead testing
- Large projects beyond DIY scope
- Compromised joists or beams
- Complex repairs plus painting
Cost Breakdown: Tools, Materials, Rental vs. Buy
A basic ceiling-sanding setup will cost you far less than hiring pros, but prices vary by tools, materials, and whether you rent or buy—expect to pay roughly $50–$300 for average DIY needs: sanders and accessories, abrasives, dust containment, and safety gear.
Do a cost comparison: buy if you’ll reuse tools long-term; choose rental options for one-off jobs to lower upfront spend.
Final Pre-Sanding Checklist to Follow Before You Start
Before you power up the sander, run through this quick checklist to guarantee the job goes smoothly and safely:
- Turn off power; cover fixtures and vents for safe ceiling preparation.
- Remove furniture or mask and drop cloth floors.
- Inspect for loose texture, nails, or cracks from your pre sanding checklist.
- Wear mask, goggles, and respirator.
- Choose grit and test a small, inconspicuous area.
Troubleshooting After Sanding and How to Fix Problems
Now that you’ve finished sanding and cleaned up the dust, inspect the ceiling carefully for common issues like gouges, uneven texture, or missed spots that could show through paint.
If you spot sanding mistakes or ceiling imperfections, fill gouges with joint compound, feather edges, re-sand lightly, and prime repaired areas.
Recheck for uniform texture before painting to avoid visible flaws.
Frequently Asked Questions
Can I Sand a Ceiling With LED Recessed Trim Installed?
Yes — you can, but you’ll need to protect fixtures and follow sanding safety tips. You’ll use ceiling preparation techniques like masking, gentle hand sanding around trims, vacuum attachments, and eye, mask, and ladder safety to prevent damage.
Will Sanding Affect Acoustic Properties of Soundproof Ceilings?
You’ll hardly destroy it—sanding lightly won’t wreck acoustic insulation or sound absorption if you avoid deep gouges. You should wear protection, use fine grit, and spot-sand; aggressive sanding can reduce performance noticeably.
How Do Humidity and Temperature Affect Sanding Performance?
Humidity and temperature affect sanding performance: you’ll sand slower in high humidity or heat because grit clogs and paper softens, while dry, moderate temps improve sanding techniques; proper ceiling preparation includes acclimating materials and controlling climate.
Can I Reuse Sanding Dust as Joint Compound Filler?
No, you shouldn’t reuse sanding dust as joint compound filler; it’ll weaken the mix and cause cracking. You should follow proper sanding techniques and dust management, collect dust separately, and use formulated fillers for durable patches.
Are There Eco-Friendly Sandpaper Alternatives for Ceilings?
Yes — you can choose eco friendly options like recycled-abrasive papers, plant-based backing sanders, and sustainable materials such as ceramic or aluminum oxide with recycled fibers; they’re effective, lower-waste, and often compostable or recyclable afterward.
Conclusion
You’ve prepped, inspected, and picked the right grit, but before you lift that sander, pause — literally. Picture the last sweep, the fine dust settling, the ceiling breathing smooth and ready. If you skipped a spot or ignored a crack, paint will whisper the truth. Do the final checklist, suit up, and sand with intent. When you step back, you’ll see whether your effort became a masterpiece or a lesson that demands one more careful pass.