How to Strip Peeling Paint Safely and Effectively
You can strip peeling paint safely by testing for lead, sealing the work area, and wearing proper PPE like a respirator, gloves, and eye protection. Contain dust with plastic sheeting and use HEPA vacuuming during sanding or scraping. Choose methods—wet, chemical, heat, or mechanical—based on substrate and paint age, and follow disposal rules for chips and waste. Fix moisture or adhesion causes, prime the surface, and continue if you want detailed steps and tool guidance.
Quick Answer: How to Strip Peeling Paint Safely
Start by evaluating the surface and the paint type so you know what hazards and methods apply; if the paint is old, test for lead before you begin.
You’ll wear PPE, ventilate, and contain dust as key safety precautions.
Use appropriate tools and methods for paint removal—scrapers, heat, or chemical strippers—working systematically and disposing of debris per local regulations.
How to Decide If You Need to Strip Peeling Paint
Before you grab tools or stripper, decide whether removing the peeling paint is necessary or if repair and repainting will do.
Do a brief paint condition assessment: note adhesion, blistering, substrate damage and extent.
Consider peeling paint causes like moisture, poor prep, or age.
If failures are localized and substrate is sound, spot-sand, prime, and repaint instead of full stripping.
How to Check If Paint Contains Lead
How can you tell if old paint contains lead? You should use certified lead testing kits or hire a lab for paint analysis; visual cues aren’t reliable. Wear protection, collect small samples per instructions, and document locations. Interpret results carefully and follow local regulations.
| Method | Speed | Accuracy |
|---|---|---|
| Home kit | Fast | Moderate |
| Lab test | Slow | High |
If Paint Has Lead: DIY or Hire a Pro?
Wondering whether you should tackle lead paint yourself or call a pro? Weigh lead detection and lead testing results, then balance DIY considerations against Professional evaluation.
Consider Health risks, Family safety, Safety regulations and Cost assessment.
If tests show low, stable exposure you might manage small, cautious jobs; if not, or if you’re unsure, hire a qualified pro to reduce hazards and guarantee compliance.
When to Call a Lead‑Abatement Pro
If testing shows high blood lead levels in your household, call a certified lead‑abatement pro right away.
You should also hire a pro when paint failure is widespread across walls, trim, or exterior surfaces.
And if you’re pregnant or have children under six in the home, don’t attempt major removal yourself—get a specialist.
High Blood Lead Levels
A spike in a child’s blood lead level is a clear signal you should call a certified lead‑abatement professional right away.
You’ll want immediate testing methods, risk assessment, and mitigation to prevent worsening health effects. The pro will advise prevention strategies, reduce environmental impact, and prioritize child safety.
Promote public awareness and treat suspected lead poisoning seriously to protect your household.
Widespread Paint Failure
When a whole room or exterior wall shows peeling, bubbling, or large sections of failing paint—not just a few chips—you should call a certified lead‑abatement pro.
They’ll assess hazards, test for lead, and recommend containment or replacement. You can learn causes of peeling and discuss prevention strategies with them; don’t attempt major removal yourself.
Hiring pros reduces exposure and guarantees compliance with safety regulations.
Pregnant Or Young Children
Because pregnant people and children under six are at highest risk from lead exposure, you should call a certified lead‑abatement pro as soon as you suspect peeling or chipping paint in areas they occupy.
Don’t attempt DIY abatement where child health or pregnancy is involved. A pro will assess risk, contain dust, and follow paint safety protocols so you protect vulnerable household members and meet legal requirements.
Essential Safety Gear Before You Start
Before you touch a scraper or heat gun, gear up properly: eye protection, a respirator rated for lead and dust, disposable coveralls, gloves, and sturdy footwear will keep you safe from chips, dust, and chemical exposure.
Follow local safety regulations, use certified protective gear, and inspect equipment for damage.
Secure ventilation, limit access, and dispose of contaminated PPE per guidelines to reduce risks.
Essential Tools and Products for Paint Removal
You’ll need a handful of reliable tools and the right products to remove paint efficiently and safely: putty knives, scrapers, wire brushes, sanding blocks, drop cloths, and respirators.
Choose quality chemical strippers or sanding supplies matched to your stripping techniques, and include eco friendly options like soy-based removers and biodegradable cleaners.
Keep replacement blades, solvent-safe containers, and gentle abrasive pads on hand.
Choosing Between Wet, Chemical, Heat, and Mechanical Methods
When deciding how to tackle peeling paint, weigh the surface type, paint age, nearby materials, and your comfort with tools and chemicals.
You’ll compare wet vs. dry and chemical vs. mechanical approaches, assess heat application risks, review method comparisons for effectiveness analysis, safety considerations, environmental impact, cost implications, project duration, and surface compatibility to pick the best, practical option.
Why Minimizing Dust Matters for Health and Cleanup
After weighing method pros and cons, you’ll want to minimize dust because it directly affects both health and cleanup. You’ll reduce dust exposure to lower respiratory issues and long term effects, and limit environmental concerns. Focus on containment, ventilation, and cleanup strategies to protect yourself and surroundings.
| Risk | Mitigation |
|---|---|
| Health impacts | PPE, HEPA vacuums |
| Environment | Proper disposal |
How to Set Up a Contained Work Area Indoors
Before you start scraping, cordon off the room so dust, chips, and fumes stay contained: close vents and doors, seal doorways and openings with heavy plastic sheeting and painter’s tape, and cover floors and furniture with taped-down drop cloths or plastic to create a cleanable work surface.
Set up a contained workspace, use local exhaust or window fans for indoor ventilation, and keep only essential tools inside.
How to Protect Landscaping and Surfaces Outdoors
Protect your yard and nearby surfaces by creating a clear perimeter with heavy plastic sheeting or contractor-grade drop cloths, anchoring edges with landscape staples, bricks, or tape so wind won’t lift debris onto plants or patios.
Use landscape barriers to block runoff, route wash water away, and protect beds.
Secure surface coverings over hardscape, mulch, and shrubs, and remove debris promptly to avoid staining or root damage.
Dry‑Scraping: Step‑by‑Step
Before you start dry‑scraping, clear and cover the work area so dust and paint chips don’t spread.
Hold the scraper at a low angle and use steady, controlled strokes to lift loose paint without gouging the wood.
Take frequent breaks to check your progress and adjust pressure to avoid damage.
Prepare The Work Area
1 clear, organized workspace makes dry‑scraping faster and safer.
You’ll cordon off the area, remove furniture, and cover floors and fixtures with drop cloths.
Prioritize work area organization and workspace safety by labeling hazards, securing loose items, and keeping a trash bin and first‑aid kit handy.
Guarantee good ventilation and clear walkways before you start.
Proper Scraping Technique
Start by testing a small, inconspicuous area to see how the paint adheres and which tools feel comfortable in your hand.
Choose tool selection based on paint types and surface preparation.
Use varied blade angles and gentle pressure control, adjusting for scraping techniques that maximize scraping efficiency.
Keep safety precautions—gloves, mask, eye protection—on, work steadily, and discard damaged blades promptly.
Wet Scraping and Misting to Cut Dust
When you mist the surface lightly and scrape with a sharp, flexible blade, you’ll cut airborne dust and make cleanup much easier.
Use wet scraping techniques and simple misting methods to keep paint particles damp as you work.
Hold the blade at a low angle, scrape in short strokes, rinse the blade frequently, and collect removed paint with a damp cloth to minimize spread.
Using Chemical Strippers Safely and Effectively
Before you apply any stripper, read the product label and gather appropriate PPE—gloves, eye protection, and a respirator if the label requires one—because these chemicals can be corrosive, toxic, or flammable.
Choose among chemical stripper types (caustic, solvent, or bio-based), test a small area, ventilate, protect surrounding surfaces, follow dwell times, neutralize residues, and dispose of waste per label.
Observe all safety precautions.
When and How to Use a Heat Gun Without Burning Paint
If you want to remove peeling paint without scorching the surface, use a heat gun at a low setting, keep the nozzle moving, and hold it several inches away so the paint softens rather than blisters. You’ll apply heat gun techniques with short bursts, test a corner, and use protective gear for paint burning prevention.
| Setting | Action |
|---|---|
| Low | Move constantly |
| Test | Start small |
| Safety | Wear gloves |
Power Sanders and Grinders: Dust Control Tips
When you use power sanders or grinders, contain the dust at the source by sealing the work area and using drop cloths or plastic sheeting.
Attach a HEPA-rated vacuum or extractor to your tool to capture fine particles before they spread.
Don’t skip a respirator and wipe down surfaces with a damp cloth after vacuuming to minimize residue.
Contain The Dust
Because sanding and grinding throw up a big cloud of dust, you’ll want to control it at the source to protect your lungs, your workspace, and anyone nearby.
Seal off the area with plastic sheeting, use tack mats at exits, and employ dust containment methods like shrouds or portable enclosures.
Collect debris frequently and follow effective cleanup techniques to minimize spread and exposure.
Use HEPA Extraction
You’ve sealed the room and minimized loose debris; now focus on capturing the fine dust that sanding and grinding create at the source with HEPA extraction.
Connect power tools to vacuums fitted with certified HEPA filters, run them continuously while you work, and check seals and hoses.
This reduces airborne lead, silica, and paint particles, improving air quality and lowering cleanup time.
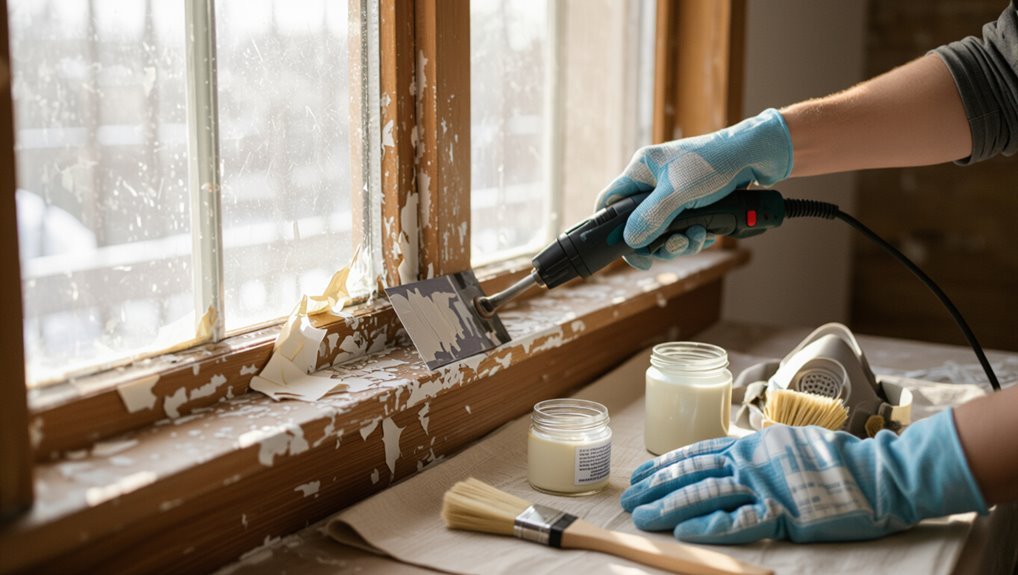
Safe Removal of Paint From Windows and Trim
Start by protecting the glass and surrounding surfaces: cover panes with low-tack painter’s tape and kraft paper, lay drop cloths, and mask hardware so dust and chemicals won’t damage them.
Cover glass and nearby surfaces with low‑tack tape, kraft paper, and drop cloths; mask hardware to prevent damage.
For window safety, wear goggles and a respirator.
Use a plastic scraper and chemical-free stripper on trim, testing a small area first.
Work slowly to preserve trim protection and avoid gouging wood.
Stripping Paint From Siding and Exterior Wood
Before you start stripping siding or exterior wood, you’ll want to clear loose debris, wash the surface, and repair any rotted boards so the remover works evenly.
Use work methods that keep paint chips contained, and choose a chemical or heat technique that’s appropriate for the material and any lead concerns.
Wear proper PPE and follow disposal rules so you remove paint safely and legally.
Surface Preparation Steps
1 key to successful exterior paint removal is thorough surface preparation; you’ll work safer and get a better finish if you clear away loose paint, dirt, mildew, and any failing caulk before you strip.
Start with surface cleaning using a mild detergent and brush, rinse well, then perform a surface assessment for rot, nail pops, or adhesion issues.
Repair, dry, and mask adjacent areas.
Safe Paint Removal
With the surface cleaned, assessed, and masked, you can begin safe paint removal from siding and exterior wood by choosing a method that matches the paint condition, substrate, and age of the home.
Follow paint safety protocols: wear PPE, contain debris, and monitor for lead.
Use appropriate removal techniques—chemical strippers, heat wands, or scraper/sander combos—avoiding excessive power washing that damages wood.
Handling Flaky Paint Over Plaster or Drywall
Start by evaluating the surface: flaky paint on plaster or drywall often indicates poor adhesion or trapped moisture.
You’ll need to remove loose material, determine the cause, and prepare the substrate for repair before repainting.
You’ll scrape, sand, assess drywall integrity, address moisture issues, perform plaster repair, prime for paint adhesion, and follow renovation tips and maintenance strategies to prevent recurrence.
Dealing With Paint on Cement, Masonry, or Metal
If the peeling paint sits on cement, masonry, or metal, you’ll need different prep and removal methods than for plaster or drywall because those substrates react differently to moisture, coatings, and abrasion. You’ll check surface compatibility and promote paint adhesion: use wire brushing, grinders, or chemical strippers suitable for each substrate, then prime with a compatible sealer.
| Tool | Substrate | Finish |
|---|---|---|
| Wire brush | Cement | Masonry primer |
| Grinder | Metal | Rust primer |
| Chemical | Brick | Waterproofing |
How to Test for and Treat Underlying Rot or Moisture
Before you strip paint, probe the surface with a screwdriver or awl to check for soft, spongy wood that signals rot.
If you find compromised areas, cut out the rotten material and replace or reinforce it before repainting.
Also trace and fix any moisture sources—leaky gutters, poor flashing, or plumbing—so new paint won’t fail.
Inspect For Softness
One clear test for hidden rot is to press the wood gently with the tip of a screwdriver or a sharp awl—soft, spongy areas will give under light pressure and may crumble away.
You’ll verify paint adhesion loss and perform a quick moisture assessment before repair.
- Probe suspect spots
- Tap for hollow sounds
- Remove damaged fiber
- Mark areas for repair
Address Moisture Sources
After you’ve identified soft or rotten spots, you need to find what’s letting water reach the wood and stop it at the source.
Probe joints, flashings, gutters and downspouts; run a moisture meter to map damp areas.
Replace or repair rotten lumber, add proper moisture barriers, improve drainage, and implement ventilation improvements in cavities.
Recheck moisture before repainting.
Repairing and Replacing Damaged Wood Before Repainting
While the flaking paint is the visible problem, damaged wood can undermine your new finish if you don’t fix it first.
Flaking paint is only surface—repair underlying wood first, or your new finish won’t last.
You should remove rot, replace boards, and use wood treatment and moisture barriers to prevent recurrence.
Follow these steps:
- Cut out soft wood.
- Fit replacement pieces.
- Apply preservative and sealant.
- Sand, prime, and repaint.
Disposing Paint Chips, Dust, and Chemical Waste Safely
Before you start cleanup, identify whether the paint or chemicals contain lead, asbestos, or other hazardous materials so you can handle them correctly.
Contain and collect chips and dust with HEPA vacuums, wet wiping, and sealed bags to prevent spread.
Follow local hazardous-waste rules for disposal or drop-off at designated facilities so you don’t risk fines or health hazards.
Identify Hazardous Materials
How will you know what’s hazardous when stripping paint? You’ll assess material identification, use testing methods to check for lead exposure, and follow renovation guidelines and safety regulations.
Hire pros when needed to meet professional standards.
- Confirm lead via certified tests
- Label contaminated materials
- Follow disposal rules
- Document results and actions
Contain And Collect Debris
Because paint chips, dust, and solvents can spread contamination quickly, you should set up containment and collection systems before you strip any paint.
Seal work area with plastic sheeting and tape, use drop cloths, and run a HEPA-filtered vacuum for dust.
Collect chips in labeled, leakproof containers. Keep chemical wastes in compatible containers and store separately.
Plan for debris containment and efficient cleanup.
Dispose According To Regulations
1 clear plan will keep you compliant and safe when you dispose of paint chips, dust, and chemical waste—follow local, state, and federal rules for hazardous materials, label and seal containers, and use certified hazardous-waste facilities or pickup services rather than throwing these items in regular trash.
Follow regulatory guidelines, transport responsibly, and document disposal.
- Confirm local rules
- Label containers
- Use certified facilities
- Keep records
Clean‑Up Checklist for Tools, Surfaces, and Floors
Start by gathering everything you’ll need so clean‑up is fast and safe: drop cloths, respirator or masks, disposable gloves, scrapers and sandpaper, a shop vacuum with HEPA filter, and sturdy trash bags.
Organize tools for tool organization, replace or secure surface protection and floor covering, contain chips for debris management, wipe residues, empty the HEPA vacuum, seal waste, and follow disposal rules to boost cleanup efficiency.
Preparing Stripped Surfaces for Primer and Paint
Now that the old paint’s off, you’ll want to clean the surface thoroughly so primer can bond properly.
Patch and sand any gouges or uneven areas until the substrate is smooth.
Wipe or vacuum away all dust before priming to guarantee a flawless finish.
Clean Surface Thoroughly
A clean surface gives primer and paint something to grip, so you’ll remove dust, loose particles, grease, and any leftover paint granules before priming.
Use appropriate cleaning techniques for each surface type, keeping it efficient and safe.
Follow this quick checklist:
- Vacuum or brush debris.
- Wash with mild detergent.
- Degrease stubborn oil spots.
- Rinse and dry thoroughly.
Repair And Smooth
Patch and sand any damage so the surface’s ready to accept primer and paint. Use appropriate repair techniques: fill holes with putty, replace rotten wood, and tighten loose trim.
After cures, sand progressively finer grits to blend edges. Employ smoothing methods like block sanding and feathering to create uniform profiles.
Inspect for imperfections and repeat targeted repairs before priming.
Remove Dust Completely
Start by removing every bit of dust and grit left from sanding—you’ll get better adhesion and a smoother finish if the surface is spotless.
Use proven dust removal techniques and effective cleaning methods so primer bonds well.
Follow these steps:
- Vacuum with brush attachment.
- Wipe with a tack cloth.
- Clean with mild degreaser.
- Rinse and dry thoroughly.
Best Primers and Paints for Previously Stripped Surfaces
Once you’ve removed loose paint and prepped the bare surface, choosing the right primer and paint will determine how durable and attractive the finish becomes.
Pick primer types matched to substrate—oil-based for bare wood, bonding primers for glossy areas, and stain-blocking primers where needed.
Select paint finishes (satin or semi-gloss for trim, flat for walls) and high-quality acrylics for longevity.
Timing and Environmental Conditions for Repainting
Because paint cures differently depending on temperature and humidity, you should only repaint when conditions fall within the product’s recommended range—typically between 50–85°F (10–29°C) and relative humidity below 85%.
Plan for ideal weather, monitor humidity levels, and avoid dew or direct sun.
- Check forecast
- Use a hygrometer
- Wait for stable temps
- Avoid windy days
Planning: Patch Repair vs Full‑Strip Project
Before you decide between a quick patch and a full strip, assess the extent of peeling and whether the remaining paint is sound.
Consider the surface material—wood, metal, or masonry will affect the method and prep required.
Finally, evaluate how much time and money you’re willing to invest so you can choose the most practical option.
Assess Paint Condition
Start by closely inspecting the surface to decide whether you can spot‑repair problem areas or need a full strip: look for active peeling, multiple paint layers, soft or powdery substrate, widespread cracking, or signs of moisture and rot that suggest the paint has lost adhesion systemically.
Then evaluate paint types and surface integrity to choose repair scope.
- Map failures
- Tap for hollow areas
- Scrape test patches
- Note moisture sources
Consider Surface Material
Different surfaces demand different approaches, so identify what you’re working on—wood, metal, masonry, or drywall—before deciding between a patch repair and a full strip.
Inspect surface texture and substrate integrity; rough or porous materials may need more prep.
Consider material compatibility with removers, primers, and coatings so your chosen method won’t damage the substrate or hinder adhesion.
Evaluate Time And Cost
When weighing a patch repair against a full strip, think about how much time you can commit and what you’re willing to spend—quick patches can save hours and cash now, but a full strip often prevents repeat work and may save money long term.
- Assess budget considerations and available labor.
- Estimate hours for patch vs full strip.
- Factor tool and disposal costs.
- Prioritize time management and future maintenance.
Cost and Time Estimates for Common Removal Methods
You’ll usually choose between three main removal methods—scraping and sanding, chemical strippers, or media blasting—and each varies a lot in cost and time depending on surface size, paint layers, and whether you hire pros.
For a clear cost analysis and time estimates:
DIY scraping is cheapest but slow;
chemical stripping speeds work at moderate expense;
media blasting is fastest yet costliest, especially for larger or multi-layer jobs.
How to Reduce Risk When Working Around Children and Pets
Because kids and pets are naturally curious, keep them out of the work area entirely and establish a clear exclusion zone before you start stripping paint.
You’ll control dust, fumes, and tools, and use child safety measures and pet protection strategies like supervised relocation and sealed containment.
Follow these steps:
- Seal room and vents.
- Use HEPA filters.
- Store tools locked.
- Supervise relocation.
Common Mistakes That Ruin Paint Removal Results
Don’t skip proper surface prep — if you don’t remove dust, grease, and loose paint, new coatings won’t stick.
Using the wrong tools will slow you down and damage the substrate, so pick scrapers, sanders, and chemical strippers suited to the job.
And if there’s any chance of lead paint, don’t ignore it — test first and follow safety rules to avoid serious health risks.
Skipping Proper Surface Prep
If you skip proper surface prep, you’re asking for problems down the line: paint stripper won’t adhere evenly, old paint flakes will lift, and new coatings won’t last.
You must respect surface preparation importance to avoid neglecting adhesion issues.
Do these steps:
- Clean thoroughly
- Remove loose paint
- Sand edges for feathering
- Degrease and dry before recoating
Using Incorrect Removal Tools
Choose the right tools or pay for it later: using the wrong scraper, heat source, or abrasive can gouge wood, warp metal, scorch siding, or leave stubborn residue that ruins your finish.
You’ll avoid incorrect tool usage by matching tools to material, testing on scrap, and choosing safe alternatives like plastic scrapers, adjustable heat guns, or gentle chemical strippers to protect surfaces and speed cleanup.
Ignoring Lead Paint Risks
What happens when you strip old paint without checking for lead? You risk lead exposure that contaminates dust and chips, causing serious health consequences for you and your family.
Don’t guess—test first, contain the area, and use proper cleanup.
- Test surfaces
- Seal and isolate
- Use PPE and HEPA
- Follow disposal rules
Troubleshooting Stubborn Paint or Hidden Coatings
When scraping and sanding won’t budge old layers, you’ll need to diagnose whether you’re dealing with stubborn paint, a shellac or varnish sealcoat, or a hidden lead-based layer before proceeding.
That determines the solvent, stripper, or method you’ll use and the safety precautions required.
Test small areas, try heat or chemical strippers suited to hidden coatings, wear PPE, and dispose of residue per local rules.
When to Hire a Pro: Red Flags and Complex Jobs
If your tests or stubborn layers point to lead, shellac, extensive rot, or structural damage, call a pro rather than soldiering on—these hazards require specialized tools, containment, and disposal methods most homeowners don’t have.
You’ll want a professional assessment when complexity exceeds DIY.
Consider hiring for:
- Lead or asbestos contamination
- Large-scale chemical stripping
- Structural repair during paint removal
- Historic finishes requiring conservation and advanced paint removal techniques
Long‑Term Maintenance to Prevent Future Peeling
Because peeling often returns when underlying issues persist, you’ll extend your paint’s life by keeping moisture, surface damage, and poor adhesion in check.
Implement preventive measures: seal gaps, improve drainage, and use quality primers.
Schedule routine inspections twice yearly and after severe weather.
Touch up chips promptly, maintain caulking, and clean surfaces so small problems don’t become large, costly failures.
Frequently Asked Questions
Can I Strip Paint From Furniture With Intricate Inlays Without Damaging Details?
Yes — you can strip paint from intricate furniture without harming details; you’ll use gentle solvents, small tools, and masking to protect inlay protection, work slowly, test finishes, and prioritize gentle furniture restoration techniques for best results.
How Do I Safely Remove Paint From Antique or Historical Woodwork?
Careful, conscientious cleaning: you’ll consult conservators, choose mild chemical strippers or heat guns on low, test tiny areas, document progress, stabilize fragile finishes, and follow antique preservation and historical restoration guidelines so you don’t damage originals.
Can I Use Household Vinegar or Baking Soda as Paint Strippers?
You can try vinegar for mild softening, but vinegar effectiveness is limited on multiple/coated layers; baking soda limitations mean it’s mostly for gentle cleaning, not full stripping. For antiques, use tested chemical or mechanical methods.
What Permits or Local Regulations Apply to Exterior Paint Removal?
You’ll need local building permits, lead paint notifications and abatement certifications if your home has lead paint; follow environmental regulations on containment, waste disposal and air monitoring, and check municipal rules for historic-property or neighborhood restrictions.
How Do I Prevent Stripped Wood From Warping During Drying?
Keep wood flat, supported, and shaded while you control moisture with slow, even drying; use moisture control measures like fans and dehumidifiers, then apply a wood sealing product promptly to lock moisture levels and prevent warping.
Conclusion
You’ll protect your home and health by tackling peeling paint smartly — and you don’t have to go it alone. Did you know about 24 million housing units in the U.S. contain significant lead‑based paint hazards? That statistic shows why testing and safe removal matter. If you’re unsure, get a certified inspection, follow safety steps, and hire pros for high‑risk or large jobs. Do that, and you’ll avoid future peeling and health risks.