How to Fix a Textured Wall: Simple Repair Methods
You can fix small dents, holes, cracks, and stains on textured walls yourself with a few tools and simple steps. Clean the area, apply patching compound or a drywall patch, feather edges, let it dry, sand lightly, then match the texture with a spray or hand tool and repaint. Use PPE and control moisture to prevent future damage. Keep going and you’ll find step‑by‑step techniques, tool lists, time estimates, and cost comparisons to guide you.
Quick Fix: Repairing Small Textured Wall Damage
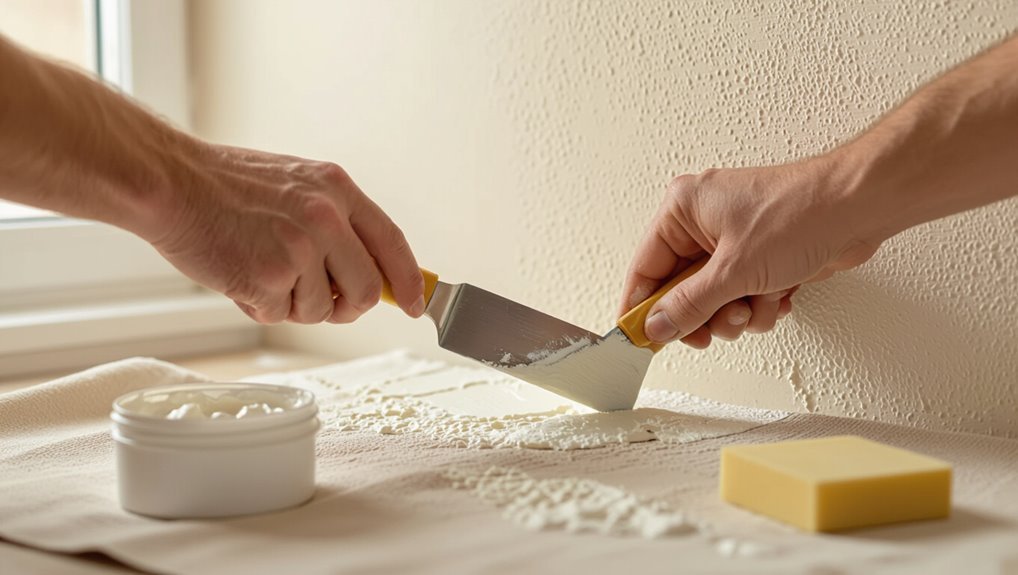
Small dings and chips on a textured wall are easy to fix yourself with a few simple supplies.
Small dings and chips on textured walls are simple DIY fixes with a few basic supplies and steps.
You’ll clean the area, apply a bit of patching compound to match texture, then feather edges smoothly.
Let it dry, sand lightly if needed, and touch up paint.
These quick solutions restore appearance fast, keeping repairs unobtrusive and durable without calling a pro.
Tools & Materials Checklist for Textured-Wall Repairs
Now that you know how to handle minor dings, gather the right tools and materials so each repair goes quickly and looks professional.
You’ll need repair tools for surface preparation, spackle, sanding blocks, texture applicators matched to texture types and texture patterns, primers and paint for paint matching, and sealants suited to wall finishes.
Keep repair techniques, texture consistency, damage prevention, and repair costs in mind.
Assessing Damage Type and Size on Textured Walls
Before you start repairing, take a close look and classify the damage by type—dents, holes, cracks, water stains, or surface abrasions—and measure its size so you can choose the right method.
During wall inspection, perform damage assessment and severity analysis, note texture identification and texture evaluation, then use damage classification to inform repair planning and select appropriate repair techniques for efficient, lasting results.
DIY vs. Hire a Pro for Textured-Wall Repairs
Wondering whether you should tackle a textured-wall repair yourself or call a pro?
You’ll weigh DIY Techniques vs Professional Services using Cost Analysis, Time Commitment, Skill Level, and Project Scope.
Consider Quality Comparison, Repair Expectations, Material Selection, and Long term Maintenance.
Choose DIY for small fixes; hire pros for complex textures or large areas to guarantee durable results.
Opt for DIY for minor textured-wall spots; call a pro for intricate patterns or extensive areas to ensure lasting results.
- DIY Techniques
- Professional Services
- Cost Analysis
- Time Commitment
Safety for Textured-Wall Repairs
Before you start, make sure you’ve got the right personal protective equipment—gloves, goggles, and a dust mask or respirator for sanding and patching.
Keep the room well ventilated and use plastic sheeting or a vacuum with a HEPA filter to control dust.
If you’re using a ladder or power tools, check stability, follow manufacturer instructions, and work with a spotter when needed.
Personal Protective Equipment
When you tackle textured-wall repairs, wear proper personal protective equipment to protect your eyes, lungs, and skin from dust, abrasive particles, and chemical irritants.
- Use safety goggles and dust masks to shield eyes and lungs.
- Wear durable work gloves and protective clothing to prevent irritation.
- Use hearing protection for loud tools.
- Choose slip resistant footwear to stay stable on ladders and scaffolds.
Ventilation And Dust Control
Because textured-wall repairs kick up a lot of fine dust and fumes, you should set up ventilation and dust control before you start work.
Open windows, run ventilation systems or box fans to exhaust air, and install dust barriers to seal off other rooms.
Use air purifiers with HEPA filters near the work area and monitor moisture control to prevent dampness that worsens dust and mold risks.
Ladder And Tool Safety
If you’ll be working above shoulder height, secure a sturdy ladder and gather only the tools you need to avoid trips and falls.
Check ladder stability, wear non-slip shoes, and keep tool organization tight to prevent accidents.
Follow these precautions:
- Inspect ladder feet and locks
- Keep a three-point contact
- Store tools in a belt or tray
- Clear work area for safe footing
Preparing the Workspace for Textured Repairs
Before you start repairing textured walls, clear the area and protect everything that shouldn’t get dust or compound on it: remove furniture or move it to the center of the room, cover floors with drop cloths, and tape plastic sheeting over trim, outlets, and fixtures.
Set up workspace organization and a compact repair station with tools, patching compound, sandpaper, and a trash bin within reach for efficient, safe work.
Cleaning Textured Surfaces Before Repair
Before you patch or paint, remove loose dust and debris from the textured surface with a soft brush or vacuum to guarantee proper adhesion.
For grease or oil stains, use a mild degreaser or trisodium phosphate solution and rinse thoroughly.
Let the wall dry completely so repairs bond and textures match.
Remove Dust And Debris
Start by removing loose dust and debris from the textured area so your patching compound will adhere properly; use a soft-bristle brush or a vacuum with a brush attachment to loosen particles.
Then wipe with a slightly damp cloth to pick up remaining dust. Use proper dust collection methods and surface preparation techniques to guarantee adherence.
- Brush gently
- Vacuum with attachment
- Damp cloth wipe
- Inspect for remaining grit
Degrease Stains And Oils
Once you’ve removed loose dust and grit, tackle greasy spots next so your patching compound will stick.
Use a degreaser or trisodium phosphate solution, scrub gently with a nylon brush, then rinse and dry.
For persistent marks try a solvent-based cleaner sparingly.
Follow oil removal techniques and stain prevention tips: seal sources of grease, ventilate while cooking, and test cleaners on an inconspicuous area first.
Repairing Tiny Nail Holes and Pinpricks
Patch those tiny nail holes and pinpricks with a quick, precise touch: press a bit of ready-mixed spackling into each hole with a fingertip or a small putty knife, wipe away the excess, and let it dry before sanding flush with the surrounding texture.
You’ll preserve a textured wall using simple repair techniques to aid wall maintenance and damage prevention.
- Clean first
- Spackle sparingly
- Sand gently
- Touch-up paint
Fixing Small Dents and Shallow Chips in Drywall Texture
Repair small dents and shallow chips by first cleaning the area, then filling the imperfection with a thin layer of lightweight spackling or joint compound.
Smooth it level with a putty knife so the surrounding texture remains intact, and letting it dry fully before feather-sanding and touching up paint.
You’ll match texture using textured wall techniques; follow repair product recommendations and test on scrap before finishing.
Patching Medium Holes (Up to 3 In.) in Textured Walls
Tackle medium holes (up to 3 inches) by cutting back to clean drywall edges, fitting a backing support, and applying a proper patch so the textured finish blends seamlessly.
Use these textured wall techniques and patching styles:
- Clean and square the hole
- Install a backing or mesh patch
- Apply joint compound in thin layers
- Texture-match and sand smooth before priming
Replacing Drywall Sections and Fixing Large Holes
When a hole is too big for a simple patch, you’ll cut out the damaged drywall back to sound studs and remove any crumbled paper or loose gypsum.
Fit and secure a new drywall section, tape the seams, and apply joint compound until it’s smooth.
Finish by matching the wall texture and painting once the repair is fully dry.
Remove Damaged Drywall
Cut out the damaged drywall back to solid material so you have a clean, square opening before you patch; this makes it easier to fit a replacement piece and guarantees the new joint will hold.
You’ll follow drywall removal steps and select patch techniques. Keep edges square, locate studs, cut replacement to fit, and secure with screws.
- Square edges
- Find studs
- Fit replacement
- Screw secure
Patch And Texturize Surface
Start by fitting the replacement drywall into the prepared opening so the edges sit flush with the surrounding wall; secure it to the studs with screws spaced every 8–12 inches, then apply tape and a thin layer of joint compound to the seams. Blend texture using matching spray or hand tools. Use textured wall techniques and follow repair product recommendations.
| Tool | Purpose |
|---|---|
| Knife | Trim |
| Tape | Reinforce |
| Compound | Smooth |
| Sprayer | Texture |
Treating Water Stains on Textured Walls
If your textured wall shows water stains, act quickly to prevent mold and further damage; you’ll first need to identify and fix the source of moisture before cleaning or repairing the surface.
You should assess water damage, dry the area, and use appropriate stain removal products. Then repair texture if needed.
- assess and document damage
- dry thoroughly
- apply stain removal solution
- repaint or texture-match
Preventing Mold and Future Water Damage
To keep mold and future water damage at bay, you’ll want to control indoor humidity with vents, dehumidifiers, and proper airflow.
Check and repair any roof, pipe, or window leaks as soon as you spot them so moisture doesn’t reappear behind textured surfaces.
Taking these steps now saves you from costly repairs and repeated wall treatments later.
Control Indoor Humidity
When you keep indoor humidity in check, you’ll protect textured walls from mold, bubbling, and long-term water damage. High moisture encourages mold spores to settle into textured crevices and weakens paint and drywall adhesives.
Use humidity control and moisture prevention tactics so you avoid damage.
- Run dehumidifiers in damp rooms
- Ventilate bathrooms and kitchens
- Use exhaust fans when cooking or showering
- Keep HVAC filters clean
Fix Leaks Promptly
Keeping humidity low helps, but you still need to stop leaks fast so water doesn’t sit in textured crevices and invite mold or cause paint and drywall to bubble.
Inspect regularly for leaks, use quick leak detection tools, and shut off sources immediately.
Dry affected areas, repair plumbing promptly, and maintain moisture control with vents or dehumidifiers to prevent recurrence and protect finishes.
Addressing Hairline Cracks Without Removing Texture
Although you don’t have to strip the texture, you can still repair hairline cracks quickly and invisibly by stabilizing the seam, filling the gap with a thin, flexible compound, and feathering the edges to match the surrounding texture.
Use hairline crack solutions and textured repair products.
Tips:
- Clean and sand gently
- Apply flexible filler sparingly
- Feather edges with a damp sponge
- Touch up paint to blend
Fixing Deep Cracks With Joint Compound and Tape
For deep cracks you’ll need a stronger repair than filler alone: grab joint compound and self-adhesive drywall tape, clean out loose debris, then bed the tape into a thin layer of compound so the crack is reinforced before you build up the surface.
Do a quick crack assessment, apply joint compound over the tape, feather edges smoothly, let dry fully, sand lightly, and finish with texture matching.
Removing Loose or Flaking Texture Safely
Start by evaluating the area to identify all loose or flaking texture you’ll need to remove; work from the edges inward and mark spots that crumble or pull away with a pencil or tape.
Begin by inspecting edges, marking any loose or flaky texture, and working inward before removal.
Use gentle texture removal techniques and wear protection. Apply safe scraping methods, then patch and prime.
- assess edges
- use protective gear
- scrape carefully
- vacuum debris
Match Orange-Peel Texture
First, you’ll study the existing orange-peel pattern so you can replicate its scale and density.
Next, pick a spray technique and nozzle that matches that pattern, and practice on cardboard until the texture looks right.
Finally, apply the spray and blend the edges by feathering outward so the repair disappears into the surrounding wall.
Assess Texture Pattern
When you’re matching an orange‑peel texture, inspect the wall from several feet away and under different lighting to see the overall pattern and density; this tells you whether you’re dealing with a fine, medium, or heavy orange‑peel and guides spray settings and material choice.
- Note texture styles and grain size
- Photograph for pattern identification
- Mark high and low spots
- Compare to sample sprays
Choose Spray Technique
Pick the spray gun settings and motion that reproduce the orange‑peel you identified: adjust nozzle size, air pressure, and material flow to match the grain size.
Use a consistent sweeping arc or cross‑coat depending on density, and maintain a steady distance (usually 10–18 inches) so droplets land and coalesce like the original texture.
You’ll test spray patterns on scrap, tweak for texture consistency, and note settings before proceeding.
Blend And Feather
Once you’ve dialed in your spray pattern, blend and feather the repaired area so the orange‑peel blends invisibly into the surrounding wall: you’ll use careful texture patterns and subtle blending techniques to match tone and scale.
Follow these steps:
- Light, overlapping sprays
- Feather edges with a dry brush
- Compare from different angles
- Sand tiny high spots, re-spray as needed
Recreate Knockdown Texture Without a Sprayer
If you don’t have a texture sprayer, you can still recreate knockdown texture using simple tools and a little patience; the basic method uses drywall compound, a trowel or drywall knife, and a wide taping knife to achieve the flattened “knockdown” look.
Apply thinned compound with splatter motions, let set slightly, then drag the taping knife to flatten peaks.
Focus on knockdown techniques and texture consistency.
Repairing Popcorn Ceiling Texture Spots
When you repair popcorn ceiling spots, your first goal is to match the existing texture so the patch isn’t obvious.
Use the same material and application pattern, then feather the edges so the repair blends into the surrounding ceiling.
Take your time smoothing connections and checking from different angles to confirm a seamless finish.
Matching Existing Texture
Although matching a popcorn ceiling’s texture can seem tricky, you can get a seamless repair by closely replicating the size, density, and spray pattern of the original material.
You’ll match texture styles and choose texture tools carefully. Test on cardboard, adjust mix and spray, then repair the spot.
- assess pattern
- mix consistency
- practice spray
- inspect lighting
Blending Repair Edges
After you’ve matched the texture, focus on blending the repair edges so the patch disappears under normal viewing.
Feather the compound outward with a damp sponge, then stipple lightly to mimic surrounding popcorn. Use small tools for texture matching and work in thin layers, sanding minimally between coats.
Finish with a thin primer coat, check under different light angles, and touch up edge blending as needed.
Blending Touch-Ups on Stipple and Swirl Textures
Match the existing pattern and feather the repair so the new paint disappears into the old—but don’t rush it.
Match the existing pattern and feather the repair so the new paint melts into the old—take your time.
You’ll use texture techniques and careful texture application to match repair textures. Focus on texture preservation, blending methods, texture consistency, and repair aesthetics.
- Tap to mimic stipple
- Swirl with varying pressure
- Blend edges with thin coats
- Step back and compare
Premixed vs. DIY Texture Compounds
Choosing between premixed and DIY texture compounds comes down to cost and convenience—you’ll pay more for premixed but save time.
DIY mixes can be cheaper and tailored for consistency and performance, but they require skill to get right.
Also consider storage and shelf life: premixed jars last longer unopened, while mixed batches can dry out fast.
Cost And Convenience
While premixed texture compounds save you time and hassle, they cost more per quart than powdered mixes you’ll thin yourself. If you’re doing a small patch or want consistent results with minimal fuss, the convenience often justifies the price.
Balance repair budget, material selection, tool availability, time management, project planning, cost estimation, repair efficiency, and resource allocation.
- Save time
- Lower upfront cost
- Fewer tools
- Easier cleanup
Consistency And Performance
Because premixed compounds come factory-formulated and thinned to a predictable viscosity, you’ll get consistent spray patterns and drying times without trial-and-error.
DIY powdered mixes, however, let you tweak thickness and texture but demand careful measuring and test patches to achieve the same repeatability.
You should perform a short performance evaluation and compare texture consistency, adhesion, and ease of sanding so you pick the best option.
Storage And Shelf Life
After you compare performance, consider how storage and shelf life will affect future touch-ups and leftover material.
You’ll choose premixed for convenience or DIY for control, but plan storage solutions and shelf organization to keep mixes usable.
- Airtight containers for DIY mixes
- Original sealed tubs for premixed
- Label dates clearly
- Store cool, dry, upright
Feathering and Blending New Compound Into Old Texture
When you start feathering, work from the repair’s center outward so the compound tapers smoothly into the surrounding texture; this prevents a visible ridge and helps the new material disappear into the old.
Use matching texture application techniques, a damp sponge, and light pressure to blend.
Respect compound drying times before painting, and inspect shifts under angled light to guarantee seamless integration.
Sanding Textured Surfaces Safely
Now that the compound’s feathered and fully dried, you’ll need to sand carefully to match the surrounding texture without damaging it.
Use gentle sanding techniques, light pressure, and appropriate grit. Observe safety precautions to avoid dust inhalation and surface gouging.
- wear a mask and goggles
- choose fine-grit sandpaper
- sand with the texture, not against it
- clean dust frequently
Best Primers for Repaired Textured Walls
Now that your texture’s smooth, you’ll need the right primer to guarantee repairs bond and paint looks even.
Compare oil-based primers for superior adhesion and stain blocking with water-based options that dry faster and clean up easily.
Also check coverage ratings so you don’t waste time re-coating.
Oil-Based Vs. Water-Based
Although both oil- and water-based primers can seal repaired textured walls, choosing the right one depends on the type of repair, the topcoat, and your tolerance for odor and drying time.
You’ll weigh oil based benefits vs. water based advantages. Consider:
- Oil: strong stain blocking, longer open time
- Water: low odor, fast dry
- Surface type
- Ventilation needed
Coverage And Adhesion
When you’ve patched a textured wall, pick a primer that offers both high coverage and strong adhesion so the repaired areas blend seamlessly and the topcoat won’t peel; look for primers labeled “high-build” or “bonding” and those formulated for masonry or drywall joins, since they’ll fill tiny voids and grip uneven textures better than standard primers.
| Primer Type | Benefit |
|---|---|
| Bonding | Superior adhesion techniques |
| High-build | Better coverage options |
Choosing Paint Sheen to Conceal Repairs
Because light highlights texture, choosing the right paint sheen helps hide patched areas and makes the wall look uniform.
You’ll pick sheens that balance durability and reflection; consider paint finishes and texture compatibility to avoid obvious spots.
Use matte where possible, satin for slight washability, eggshell for low-reflectivity, and semi-gloss only on trim or high-wear areas.
- Matte
- Eggshell
- Satin
- Semi-gloss
Matching Paint Color Over Textured Patches
If you want your patched area to disappear, match both the paint color and how it looks on the textured surface—not just the hue. Test small swatches under real light, note texture variations, and adjust tint strength. Use the table to track trials and drying results.
| Sample | Tint % | Finish |
|---|---|---|
| A | 5% | Eggshell |
| B | 10% | Satin |
| C | 0% | Flat |
Small-Area Repainting Techniques to Avoid Seams
Although small touch-ups seem simple, getting them to blend without visible seams takes a careful sequence of prep and application.
You’ll focus on seamless blending and texture matching to hide edges. Follow steps precisely:
- Clean and sand the repair perimeter
- Recreate texture with tools or spray
- Feather paint outward in thin layers
- Dry between coats and inspect for seams
When to Repaint the Entire Wall After Repair
If the repaired patch still shows a texture mismatch against the rest of the wall, you’ll want to repaint the whole surface to get a uniform look.
The same goes if the surrounding paint has faded or sun-damaged notably, since a fresh spot will stand out.
Repainting the entire wall is usually the cleanest fix when texture or color differences are obvious.
Full-Wall Texture Mismatch
When a patched area still stands out after the texture dries, you’re facing a full-wall texture mismatch and need to decide whether to repaint the entire wall.
Matching texture and color exactly is harder than most repairs, so repainting often gives the cleanest, most consistent result.
- Assess texture types and surface sheen
- Try small blending techniques first
- Repaint full wall for uniformity
- Use sample swatches to confirm match
Extensive Paint Fading
Because sunlight, cooking fumes, and time can bleach paint unevenly, you’ll often find a repaired patch looking considerably fresher than the surrounding wall.
If the surrounding paint has faded considerably, blending that new patch will only draw attention to the mismatch.
Assess fading patterns across the wall; if variations are broad, repainting the entire wall guarantees consistent color restoration and a seamless finish.
Quick Fixes for Rentals and Move-Out Touch-Ups
Although you mightn’t want to tackle a full retexture, you can handle most rental touch-ups with a few targeted tools and techniques; start by cleaning the area, matching the texture, and using removable products that your landlord will accept.
Check rental agreements to avoid violations and protect deposit returns.
- Clean and prep
- Blend texture lightly
- Use removable fillers
- Touch-up paint carefully
Budget-Friendly Materials That Work
You don’t need expensive pro products to repair textured walls—several affordable materials will get the job done cleanly and fast.
Pick budget friendly options like premixed spackle, joint compound, and lightweight patching plaster.
Use inexpensive sandpaper, painter’s tape, and a small putty knife.
Affordable alternatives such as caulk for hairline gaps and touch-up paint finish minor imperfections without breaking the bank.
Tools That Make Texture Matching Easier
When matching a textured wall, the right tools speed the job and improve accuracy: grab a variety of texture sprayers and stomp brushes, several sizes of putty knives, a hawk or mixing tray, and a selection of sanding blocks and sanding sponges.
Use texture matching techniques and repair consistency tips to guide tool choice.
- Texture sprayer
- Stomp brush
- Putty knives
- Sanding blocks
Common Mistakes That Make Repairs Stand Out
If a patch doesn’t match the surrounding texture and finish, it’ll stick out like a sore thumb, so you’ll want to avoid a few common slip-ups: over-sanding the repair, using the wrong compound or sprayer setting, and neglecting feathered edges that blend into the wall.
Poor surface preparation, wrong repair timing, bad pattern alignment, and ignoring visual assessment cause texture mismatch, increased repair visibility, reduced paint adhesion, and weakened texture durability.
Troubleshooting Repairs That Won’t Blend
Because small texture differences can jump out under certain light, start troubleshooting by examining the patch from multiple angles and in both natural and artificial light to pinpoint what’s off — is the pattern wrong, the sheen mismatched, or the edge too sharp?
Then assess damage and adjust repair techniques.
- Recheck surface preparation and texture tools
- Try alternate blending methods
- Verify paint matching and finish
- Match texture types for consistency and repair aesthetics
Curing and Drying Times for Repaired Textures
After you’ve corrected patterns, sheen, and edges, give the repaired texture proper time to cure and dry before sanding, priming, or painting.
Follow manufacturer curing time guidelines for joint compound or patching products, and allow additional drying time in thicker areas.
Check for firmness and absence of tackiness before proceeding.
Rushing risks delamination, sinkage, or visible seams—wait until fully cured and dry.
Seasonal Factors That Affect Drying and Adhesion
When seasons change, so do the temperature and humidity in your work area. Those shifts directly affect how quickly textures dry and how well they bond to the wall.
Monitor seasonal humidity and temperature fluctuations to adjust drying conditions and preserve adhesive strength. Consider weather impacts on timing and ventilation.
- plan around humidity
- control temperature swings
- optimize drying conditions
- protect adhesive strength
Preventative Maintenance for Textured Walls
You can keep textured walls looking great by sticking to a simple preventive routine: dust them gently with a soft brush or microfiber mop on a regular schedule.
Keep indoor humidity in check with ventilation or a dehumidifier so texture and adhesives don’t weaken.
And be careful around walls—avoid sharp impacts that can chip or tear the surface.
Regular Dusting Routine
A simple weekly dusting routine will keep textured walls looking fresh and cut down on buildup that eventually becomes harder to remove.
You’ll use gentle dusting techniques and set a cleaning frequency that fits your home.
Try these steps:
- Soft-bristle brush for cobwebs and high spots
- Microfiber duster for broad surfaces
- Vacuum with brush attachment for corners
- Spot-clean stains promptly with mild soap
Control Indoor Humidity
Because textured surfaces trap moisture and encourage mold, keeping indoor humidity in check helps preserve both appearance and air quality.
You should monitor humidity control with a hygrometer, aim for 30–50% RH, and run dehumidifiers or HVAC settings as needed.
Improve air circulation by using fans and opening windows when weather allows, reducing dampness that can damage texture and paint.
Avoid Sharp Impacts
When moving furniture or carrying tools, take care to keep sharp edges and corners away from textured walls to prevent gouges and snags.
You’ll reduce damage by using padding and planned routes. Focus on preventing dents and simple wall protection.
- Use corner guards
- Wrap edges with blankets
- Clear a direct path
- Get help for heavy items
Documenting Repairs for Landlords and Insurance
If you’re documenting textured-wall repairs for a landlord or insurance claim, keep clear, dated records of the damage, the steps you took, and any receipts or contractor estimates.
Photograph damage before, during, and after repairs, note dates and materials, and save invoices.
Use concise repair documentation to support insurance claims and landlord disputes, and provide copies to relevant parties promptly.
Eco-Friendly, Low-VOC Repair Options
Alongside clear documentation for landlords and insurers, you can reduce health and environmental impacts by choosing eco-friendly, low‑VOC products for textured-wall repairs.
Along with clear documentation, choose eco-friendly, low‑VOC products for textured-wall repairs to reduce health and environmental impacts
Pick supplies that limit fumes and waste, and follow label guidance.
- Use eco friendly materials like recycled joint compound
- Choose low voc options for primers and paints
- Prefer water-based adhesives
- Recycle leftover containers
Typical Time Needed Per Repair Type
Because repair type and surface condition vary, expect different time commitments for each job. After a quick damage assessment, you’ll know whether you’re facing a 30–60 minute patch, a 2–4 hour skim and texture match, or a multi-day repaint and drying cycle.
Plan for prep and cleanup. Track repair duration per task so you can schedule realistic work sessions and avoid rush mistakes.
Cost Comparison: DIY vs. Contractor
Wondering whether to tackle the repair yourself or hire a pro? You’ll want a clear cost analysis and solid contractor quotes before deciding.
DIY saves on labor but costs time and tools; pros charge more but guarantee finish. Consider:
- Materials and tool costs
- Estimated labor hours
- Average contractor quotes
- Risk of rework vs. warranty
Further Learning: Video Demos and Step‑by‑Step Guides
Watching a few targeted video demos can shave hours off your learning curve and give you a clear sense of each repair step before you touch the wall. You’ll follow video tutorials for common patches, then study advanced techniques for textures and feathering. Use step‑by‑step guides and pause/replay to match pace.
| Resource | Benefit |
|---|---|
| Video tutorials | Visual pacing |
| Guides | Detailed steps |
Frequently Asked Questions
Will Repairs Affect My Home’s Resale Disclosure Obligations?
Yes — repairs can affect resale value, and you’ll need to follow disclosure requirements. You’re obligated to honestly report material repairs or defects; failing to disclose significant work or concealed damage could create legal and financial liability.
Can Textured Wall Repairs Trigger Allergy Reactions From Dust or Materials?
Yes — think of dust clouds like stormy pollen; you’ll cough if you’re sensitive. Proper ventilation, HEPA masks, wet sanding and checking material safety reduce allergy triggers, and you’ll minimize reactions during repairs.
How Do I Document Repairs for Homeowner’s Insurance Claims?
You should photograph damage and repairs, keep receipts and invoices, note dates and contractors, write a repair documentation summary, and submit everything promptly to support insurance claims; keep copies and follow insurer procedures for faster approval.
Are There Specific Humidity Limits to Store Leftover Texture Compound?
A stitch in time saves nine: yes, you should. For compound storage, keep relative humidity 40–60% to limit humidity effects; seal containers tightly, store cool and dry, and check for skinning or odor before reuse.
Can Textured-Wall Repairs Void a Home Warranty or Condo Association Rules?
Yes — you can void warranty coverage or violate condo repair guidelines if you alter structural elements, use wrong materials, or skip approvals. Check your warranty, association rules, and follow repair guidelines or get professional, documented approvals first.
Conclusion
You’ve learned the tricks to hide dents, fill holes and match texture — so now your wall will look “naturally” imperfect, like it survived a tasteful indoor storm. You’ll grab a sponge, skimcoat, or sprayer, work carefully, and stand back as the flaw disappears (or at least surrenders politely). Whether you DIY or call in help, you’ll know the costs, time, and safety—so your textured wall can keep its character without announcing you tried.