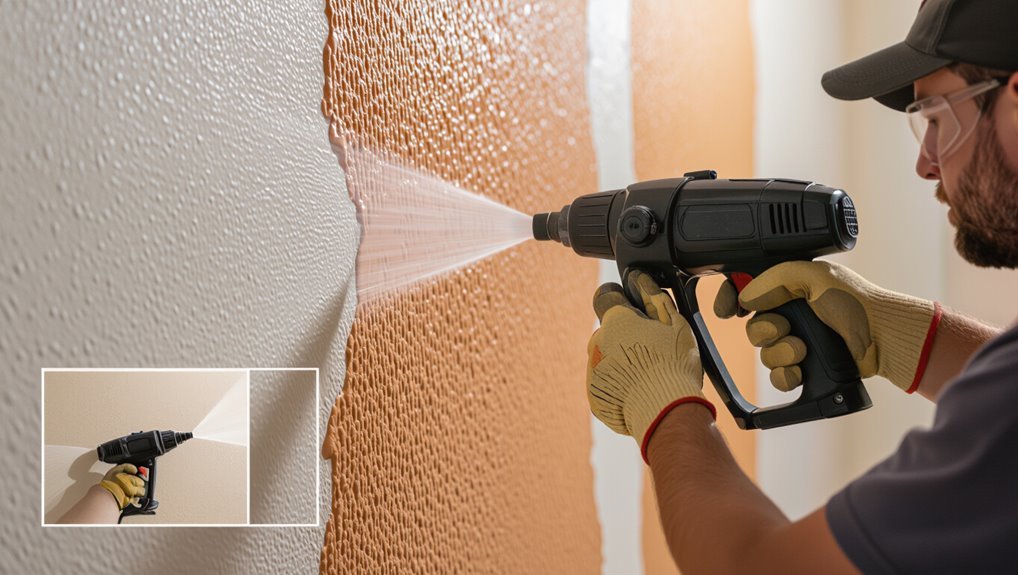
How to Texture a Wall With a Hopper Gun for Beginners
You can texture a wall with a hopper gun by mixing joint compound to a peanut-butter or thin batter consistency, hooking the gun to a compressor, and practicing spray settings on cardboard until the pattern and PSI feel right. Hold the gun 12–18 inches from the surface, sweep evenly with overlapping passes, and work in zones for consistent coverage. Clean the gun promptly to avoid clogs, feather edges for blends, and keep batches consistent — keep going to learn step-by-step setup and tips.
Quick Answer Can You Texture a Wall with a Hopper Gun?
Yes — you can texture a wall with a hopper gun and expect even, consistent orange-peel or knockdown finishes when you dial in the right nozzle, pressure, and mix.
It’s best for medium-to-large areas and for contractors or DIYers who want speed and repeatable results, while hand trowel or roll-on textures still beat it for small touch-ups or ultra-fine control.
If you’re working on a whole room or new construction, a hopper gun will save time and give professional-looking coverage.
Short, direct summary of results you can expect
You can texture a wall with a hopper gun and get professional-looking results quickly if you match the gun, nozzle, and material to your pattern and practice your spray technique.
Expect even, consistent texture after a few passes, with visible but controlled overlap lines.
With basic cleanup and touch-ups you’ll achieve durable, paint-ready finishes—learn how to texture a wall with a hopper and practice on scrap first.
Best situations for using a hopper gun versus alternatives
When you need to cover large areas quickly with consistent, repeatable texture—especially knockdown, orange peel, or heavy popcorn—a hopper gun is your best choice because it sprays more material faster and handles thicker mixes than a handheld sprayer.
Use it for ceilings, rentals, or multi-room jobs.
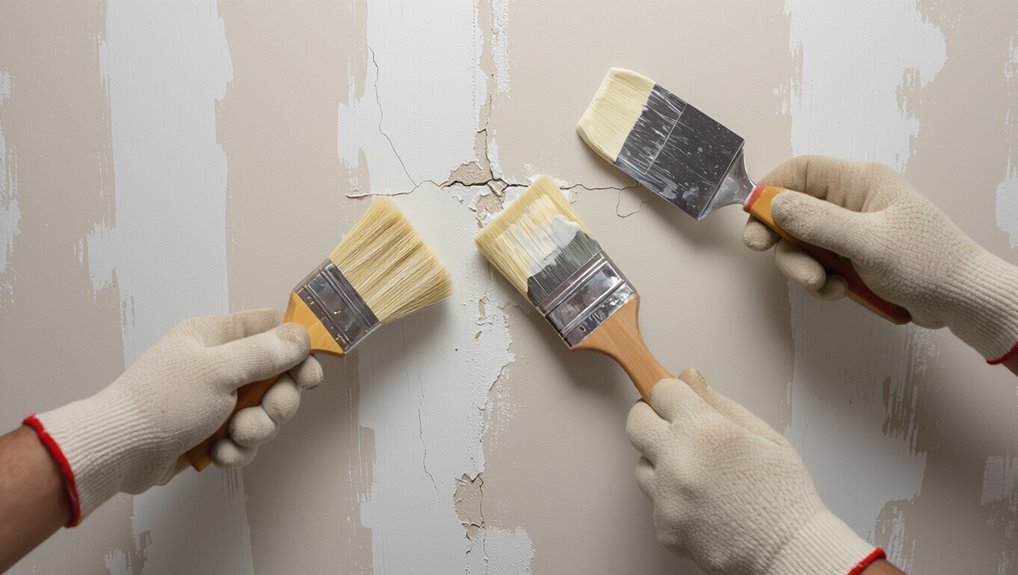
Choose alternatives—brush, roller, or hand trowel—for small patches, fine control, or delicate trim work.
Basics What Is a Hopper Gun and Why Use It?
A hopper gun is the handheld sprayer you’ll load with joint compound or texture mix, a hopper bin on top feeding material to an air-powered nozzle and control valve.
You’ll use it to create everything from fine orange peel to heavy knockdown or popcorn textures by changing tip size, air pressure, and material consistency.
Compared to spray rigs it’s cheaper and simpler to set up, and versus hand tools it covers big areas fast, though it can be messier and less precise.
Definition and components of a hopper gun
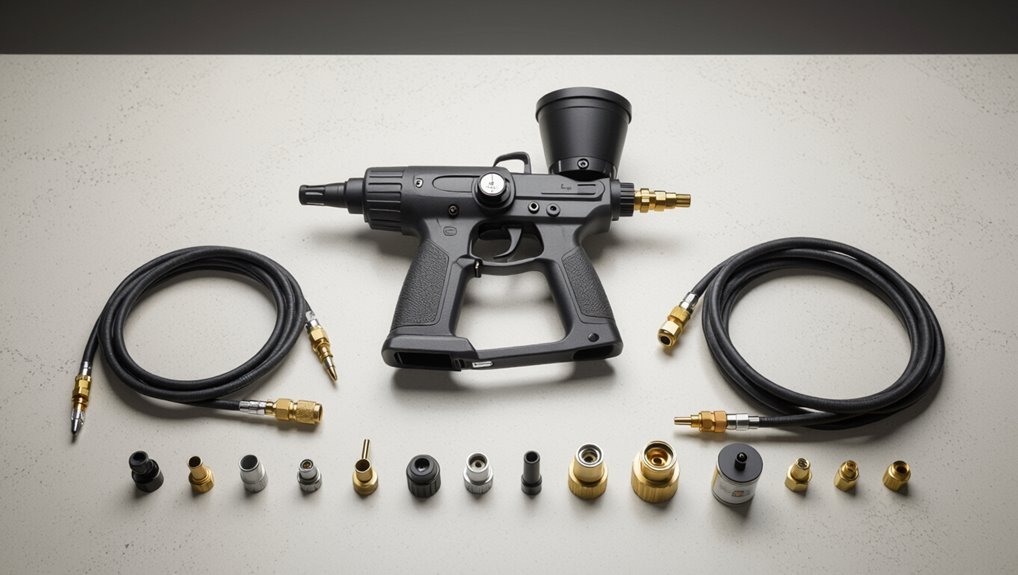
Think of a hopper gun as a heavy-duty paint sprayer that mixes and propels textured material through a nozzle so you can cover walls quickly and evenly.
You’ll find a hopper (container), air compressor hookup, fluid feed, nozzle/air cap, pressure adjustment, and trigger.
Together they control material flow, spray pattern, and texture consistency, letting you work efficiently and achieve uniform coverage.
Types of textures achievable with a hopper gun
Now that you know the hopper, its parts, and how they control flow and pattern, you can use that control to create a range of wall textures.
You’ll adjust nozzle size, pressure, and material mix to get distinct looks:
- Fine knockdown: delicate speckles smoothed slightly
- Orange peel: small, even dimples
- Spanish lace: irregular, decorative peaks
- heavy splatter: bold, pronounced texture
Pros and cons compared to spray rigs and hand tools
While hopper guns give you fast, consistent texture with minimal setup, they trade off some of the precision and material efficiency you get from dedicated spray rigs and the fine control of hand tools. You’ll choose speed and simplicity over exact edge work; rigs save material, hand tools allow detail.
| Tool | Strength | Weakness |
|---|---|---|
| Hopper gun | Fast, simple | Less precise |
| Spray rig | Efficient, even | Complex setup |
| Hand tools | Detailed control | Slow, skillful |
Before You Start Safety, Preparation, and Materials
Before you spray, make sure you’ve got proper safety gear—respirator, eye protection, and good ventilation—and clear the room with tarps and tape.
Check your tools and materials list: hopper gun model, compressor (CFM and PSI) and nozzle sizes suited for wall texture, texture mix, and repair supplies.
Also assess the surface—drywall, plaster, painted, or patched—so you can adjust compressor pressure, nozzle, and mix for an even finish.
Safety gear and ventilation requirements
Because you’ll be spraying tiny particles and working with pressurized equipment, wear proper personal protective gear and guarantee good ventilation before you fire up the hopper gun.
Protect yourself and others, seal off adjacent rooms, and plan airflow paths.
- NIOSH-approved respirator (P100)
- Safety goggles or full-face shield
- Hearing protection for compressor noise
- Disposable coveralls and gloves
Tools and materials checklist (hopper gun models, compressor specs, texture mixes, tarps, tape)
If you’re aiming for a consistent, professional finish, gather the right hopper gun, a compressor that meets CFM and PSI needs, the appropriate texture mix, and basic masking supplies like tarps and tape before you start.
This checklist keeps you from stopping mid-job to hunt for tools or troubleshoot mismatched equipment.
- Hopper gun (model suited to wall texture)
- Texture mix and water ratio
- Protective tarps and painter’s tape
- Bucket, stirrer, and clean nozzle parts
Selecting the right compressor and nozzle sizes for wall textures
When you pick a compressor and nozzle, match their capacities to the texture you’re spraying so you get even coverage without sputters or clogging. Choose a compressor with steady CFM at 40 PSI and a tank that reduces pulsing. Use larger nozzles for heavy knockdown, smaller for fine orange peel.
| Texture | PSI | Nozzle size |
|---|---|---|
| Fine | 30–40 | 4–6 mm |
| Medium | 35–45 | 6–8 mm |
| Heavy | 40–60 | 8–12 mm |
Surface assessment: drywall, plaster, painted, or repaired walls
Start by closely inspecting the wall’s material and condition so you know how the texture will adhere and what prep it needs.
Check drywall for paper tears and joint compound gaps; sand glossy paint and clean surfaces; roughen plaster slightly and repair cracks; prime repaired or porous areas.
Match texture mix and spray pressure to substrate, ensuring consistent adhesion and finish before you start.
Quick Prep Steps (Overview)
Start by protecting floors, fixtures, and trim with drop cloths and tape so overspray and texture can’t cause damage.
Patch holes, sand seams smooth, and remove dust so the hopper gun lays down an even coat.
Finally, tape and feather edges to blend the new texture with existing surfaces for a seamless finish.
Protecting floors, fixtures, and trim
Before you spray, protect every surface that shouldn’t get texture: cover floors with heavy-duty drop cloths or rosin paper, wrap baseboards and trim with painter’s tape and plastic, and remove or shield light fixtures and outlet covers.
Secure edges with tape, overlap coverings, and weight corners. Keep vents and doorways sealed, and label protected areas so you don’t accidentally disturb them during spraying.
Repairing holes and sanding seams
Patch any holes and smooth seams so the texture sticks and looks even; small dings take only a skim coat of joint compound while larger gaps need backing and a layer or two to build up to the surrounding surface.
Sand each repair flush with a fine-grit block, wipe away dust with a damp cloth, and spot-prime patched areas so the hopper gun texture adheres uniformly.
Taping and feathering edges for a seamless finish
Once seams and repairs are smooth, apply drywall tape and feather joint compound out at least 6–8 inches so the changeover disappears. Press the tape into a thin bed of mud, wipe off excess with your knife, then lay subsequent coats progressively wider and thinner so the edges blend seamlessly with the wall.
Let each coat dry, sand lightly, then wipe dust before priming and texturing.
Step-by-Step How to Texture a Wall with a Hopper Gun
Start by mixing your texture material to the right consistency so it flows through the hopper without clogging.
Set up your compressor and gun, test spray on cardboard to fine-tune pressure and pattern, then mark spraying zones so you maintain an even rhythm.
When you spray the wall, keep the correct distance, use smooth overlapping passes, and adjust your motion for consistent coverage.
Step 1 Mix the texture material to correct consistency
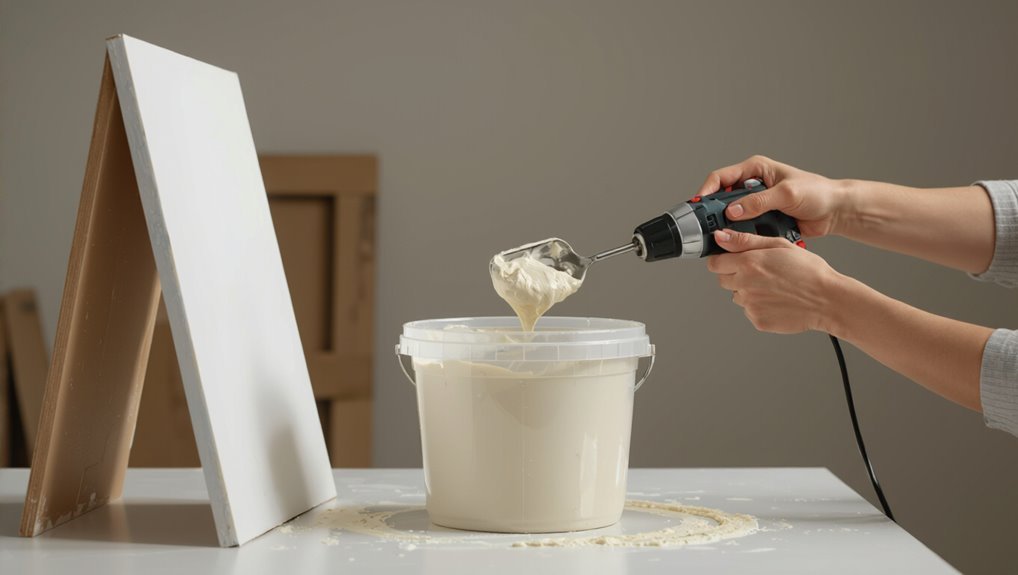
Gather your materials and mix the texture compound to a peanut-butter or heavy pancake-batter consistency so it will flow through the hopper gun without clogging or sagging on the wall.
Use a clean bucket, drill mixer, and measured water per manufacturer instructions.
Test small batches, adjust slowly, strain if needed, and keep mixture lump-free for consistent spray patterns and adhesion.
Step 2 Set up compressor and hopper gun (pressure and nozzle settings)
Before you spray, hook up the compressor and hopper gun, set the air pressure and nozzle size to the manufacturer’s recommendations, and do a quick trial on cardboard so you’ll know how the mixture atomizes and how the pattern looks at different pressures.
Secure fittings, check hoses for leaks, bleed the line, and adjust regulator increments. Note recommended PSI and match nozzle orifice to texture type.
Step 3 Test spray on cardboard and adjust pattern and pressure
3. You’ll test spray on cardboard to tune pattern and pressure before hitting walls. Aim for consistent texture, tweak controls, and note settings.
- Hold gun 12–18 inches from surface
- Sweep evenly, keep motion steady
- Increase pressure for finer mist, decrease for heavier splatter
- Mark ideal nozzle and PSI on cardboard for reference
Step 4 Mark spraying zones and technique for even coverage
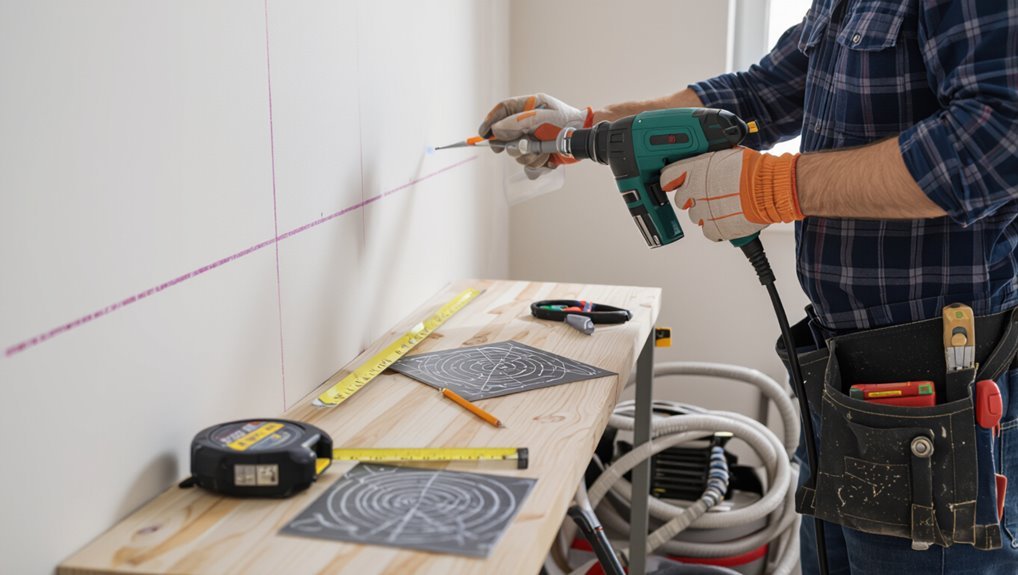
Once you’ve pinned the nozzle and PSI on the cardboard, map the wall into manageable spraying zones and plan your path before you start.
Mark each zone lightly with pencil or painter’s tape, noting vertical or horizontal orientation. Work systematically from top to bottom and side to side, keeping consistent coverage per zone.
Pause to blend edges so shifts stay seamless.
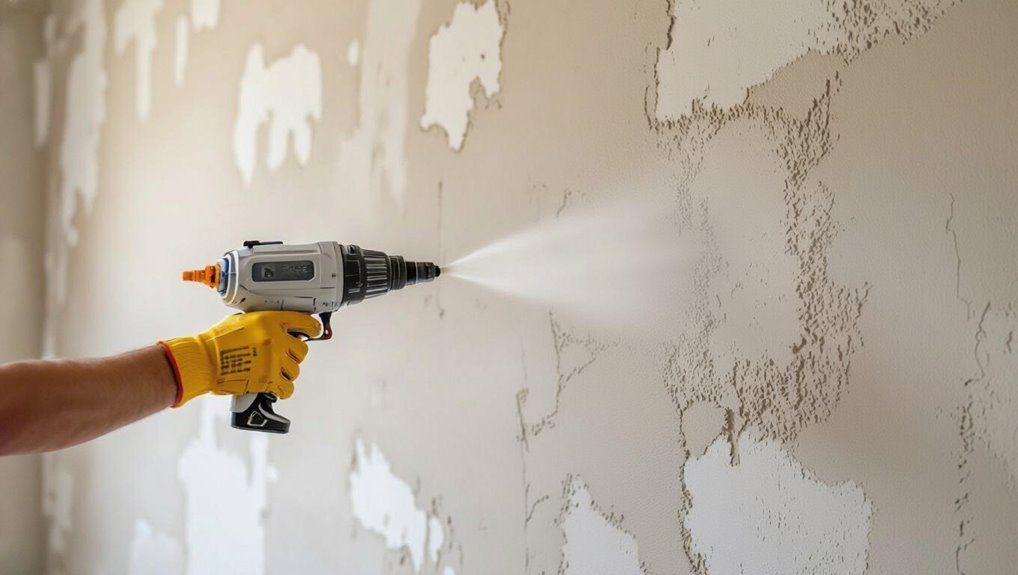
Step 5 Spray the wall: distance, motion, and overlap
Start about 18–24 inches from the wall and hold the hopper gun perpendicular to the surface.
Then move in a steady, overlapping sweep so each pass covers roughly half the width of the previous one; this distance and motion give you consistent droplet size and avoid heavy build-ups.
Keep your wrist relaxed, maintain a consistent speed, and slightly vary nozzle angle for even texture without overspray.
Step 6 Blending into corners and edges without spraying trim
When you reach corners and edges, slow your sweep and pull the gun slightly back so the spray feathering tapers off before it hits trim; this keeps texture on the wall while preventing buildup on adjacent woodwork.
Use quick, light bursts near corners, overlap less, and angle the nozzle away from trim.
Mask edges, remove excess immediately with a damp cloth, and maintain consistent texture tone.
Step 7 Drying time and when to inspect or touch up
After spraying, let the texture dry until it’s firm to the touch—typically 1–4 hours depending on thickness, humidity, and temperature—before you inspect or touch up; doing so prevents smudging and allows the surface to settle so you can see true coverage and any low spots.
Check in good light, mark imperfections, then spot-spray or feather edges.
Reinspect after full cure before priming.
Common Texture Patterns and How to Achieve Them
You’ll learn the settings and spray technique for classic orange peel so you can get consistent coverage and texture size.
Then you’ll practice the two-step knockdown method and timing to flatten peaks just enough without overworking the surface.
Finally, we’ll cover adjustments for splatter/skip trowel larger droplets and ideas for custom experimental textures so you can tailor the look.
Orange peel settings and technique
Orange peel is one of the most forgiving hopper-gun textures, and dialing in the right spray pressure, nozzle size, and material mix gets you consistent results quickly.
Hold the gun about 18–24 inches from the wall, use medium pressure, and choose a nozzle that produces fine droplets.
Keep a steady, overlapping stroke and test on scrap until the dimpled pattern looks uniform.
Knockdown two-step process and timing

Anyone can master the knockdown two-step by getting the timing right:
Mix paintable joint compound to pancake batter consistency. Spray overlapping droplets, keeping pressure steady.
Wait until peaks form but remain wet—usually 5–15 minutes depending on temperature.
Drag a wide drywall knife at a shallow angle to flatten peaks in one smooth stroke.
Practice to fine-tune wait time and knife speed.
Splatter/skip trowel look adjustments for larger droplets
To get a bold splatter or skip trowel look with larger droplets, increase the hopper gun’s nozzle size and raise material viscosity so blobs hold shape instead of feathering out.
Adjust air pressure lower for rounder drops, maintain consistent spray distance, and use a slower, staggered motion.
Test on scrap, tweak mix and pressure, then apply evenly to avoid clustering.
Custom textures and experimental effects
When you want a specific pattern—whether it’s a stipple, combed swirl, or directional rain—start by choosing nozzle size, mix consistency, and spray technique that match the effect.
Then test and refine on scrap until the pattern reads correctly at full scale.
For custom textures, vary pressure, tip angle, and distance; combine passes, use stencils or combs, and adjust drying time to lock in crisp, repeatable results.
Troubleshooting Common Problems and Solutions
If you run into uneven coverage or blotches, check your mix consistency, spray pressure, and overlap to even things out.
Keep the hopper gun clean and clear clogs as you go, and watch for drips, runs, or overspray by adjusting distance and technique.
For color inconsistency, feather and blend patch edges while matching texture and freshness to hide seams.
Uneven coverage or blotches causes and fixes
Even with the right mix and technique, you can get uneven coverage or blotches when texture material sprays inconsistently or the surface absorbs differently; check spray pattern, nozzle condition, material thinning, air pressure, and surface prep to pinpoint the issue.
Feather overlapping passes, keep a consistent gun distance and speed, prime porous spots, and test on scrap.
Blend missed areas promptly for uniform finish.
Clogging and hopper gun maintenance during use
One quick clog can stop your hopper gun cold, so keep an eye on flow and clean bits as you work: check the nozzle and air cap for buildup, strain material into the hopper to catch lumps, and monitor viscosity so thicker spots don’t accumulate and block passages.
Stop and clear blockages immediately, wipe seals, tighten fittings, and periodically flush lines with compatible solvent to maintain consistent spray.
Drips, runs, and overspray control
When you notice drips, runs, or excessive overspray, act quickly to prevent ruined texture and wasted material; blot small drips with a damp sponge before they set, sand larger runs once dry, and reduce air pressure or adjust nozzle distance to cut overspray.
Use masking to protect nearby surfaces, work in controlled passes, and test spray on scrap if problems persist.
Color inconsistency and patch blending
If your patched area looks noticeably different from the surrounding wall, don’t panic—color inconsistency usually comes from differences in base coat, texture depth, or drying time rather than the texture itself.
Feather edges, match spray pattern and thickness, then prime patched spots with a tint matched to the wall.
Allow full cure, then repaint the entire wall if needed for uniform color.
Best Practices, Tips, and Time-Saving Strategies
Keep your batches mixed the same way and label them so texture and color stay consistent across the wall.
Arrange your workspace and plan your spraying sequence to cut down on trips, wasted plaster, and setup time.
Clean the hopper gun and lines after each session, and know when a tricky job or tight deadline means you should call a pro instead of doing it yourself.
Consistent mixing and batch control
Although consistent texture starts at the mixing bucket, your technique and timing make the difference between a smooth finish and frustrating rework.
Measure water and compound for each batch, mix to identical viscosity, and note pot time.
Keep batches small enough to use before skinning, remix if separation occurs, and label mixed batches so you match spray pattern and drying behavior across the wall.
Efficient workspace layout and sequence
When you plan your workspace so tools, hoses, and mixed batches are within easy reach and protected from dust and foot traffic, you’ll move faster and avoid costly interruptions.
Set the spray machine, mixer, and waste bucket in a triangle near a power source and run hoses along the shortest path while taping or flagging trip points.
Position ladders, materials, and work lighting sequentially, stage panels to dry, and sequence spraying from top to bottom to minimize rework and motion.
Cleaning and maintenance to extend tool life
1 simple routine you can’t skip is cleaning your hopper gun right after each use, because dried texture wrecks nozzles, hoses, and pumps; wipe excess material, flush the system with water (or the recommended solvent), and disassemble and brush the nozzle and needle before the mix hardens.
- Rinse hopper and hose thoroughly
- Clean nozzle and needle with a brush
- Lubricate moving parts lightly
- Inspect seals and replace if worn
When to call a pro vs. DIY
Wondering whether to tackle wall texturing yourself or hire a pro?
You should DIY for small rooms, simple textures, and when you’ve practiced with the hopper gun.
Call a pro for large areas, complex or matching textures, high ceilings, or when time and finish-quality matter.
Pros handle prep, repairs, and cleanup faster and may prevent costly mistakes you’d otherwise fix later.
Cost, Time, and Material Estimates
You’ll want to budget for joint compound or texture mix, primer, and any rental or purchase costs for a hopper gun and compressor.
Decide whether renting for a one-off job or buying for frequent use makes more financial sense, and I’ll outline typical price ranges for both.
I’ll also give time estimates for small, medium, and large rooms so you can plan your schedule.
Typical material costs and rental vs. purchase considerations
If you’re budgeting for a hopper-gun texture job, plan for three main cost categories: materials (joint compound or texture mix, primers, and masking supplies), equipment (hopper gun, compressor, hoses, and scaffolding), and any rental or labor charges. Rent if you’ll texture once; buy if you’ll repeat projects. Compare costs, condition, and storage.
| Option | When to choose |
|---|---|
| Rent | Occasional use |
| Buy | Frequent use |
| Borrow | Free/short-term |
| Hire pro | No time/skill |
Time estimates for small, medium, and large rooms
For a typical hopper-gun texture job, expect time to vary mostly with room size and prep:
A small room (up to 150 sq ft) usually takes 2–4 hours including masking and cleanup;
a medium room (150–400 sq ft) runs 4–8 hours;
and a large space or open-plan area can take a full day or more.
Plan additional time for drying, touch-ups, and learning curve.
FAQ Frequently Asked Questions
You’ll find answers to common concerns about hopper guns, like using them on ceilings, matching small patches, and whether handheld sprayers can replicate the finish.
Expect guidance on the best indoor texture mixes and how long you should wait before painting.
If you have a specific patch or finish in mind, ask and we’ll cover the exact steps.
Can I use a hopper gun on textured ceilings as well as walls?
Curious whether a hopper gun works on ceilings as well as walls? Yes — you can use it on ceilings, but adjust technique: work in manageable sections, maintain steady spray angle, and control pressure to avoid drips.
Use an extension pole and wear eye protection.
Practice on scrap material to match texture and thickness before committing to the entire ceiling to guarantee even coverage and minimal overspray.
What is the best texture mix for indoor walls?
A simple 3-1 mix of joint compound to water (three parts premixed compound to one part water) gives you a smooth, easy-to-spray base for most indoor wall textures, though you can tweak viscosity for heavier or lighter effects.
For knockdown or orange peel, thin slightly; for heavier skip trowel effects, add a touch more compound.
Test spray, adjust, and strain before loading.
How long before I can paint over the texture?
How long you wait depends on the texture thickness and the drying conditions: thin orange-peel or light knockdown usually dries enough to prime and paint in 24 hours, while heavier textures or humid, cool environments can take 48–72 hours (or longer) to fully cure.
Check dryness by touch in inconspicuous spots; verify no tackiness, then apply a primer before your finish coat.
Can I achieve the same finish with a handheld spray gun?
Can you get the same look with a handheld spray gun? You can approximate some textures, but handheld guns offer less volume, consistency, and control than a hopper gun.
You’ll struggle with larger areas, matching pattern scale, and achieving uniform splatter. Use thinner mixes, practice nozzle distance, and expect more touchups.
For true hopper-style finishes, stick with a hopper gun.
How do I fix a small patch to match existing texture?
If you tried approximating a hopper finish with a handheld gun and ended up with a small mismatch, you can still fix a patch to blend with the existing texture.
Clean and feather edges, thin joint compound to match thickness, let it dry, sand lightly, then re-spray or stipple to replicate pattern.
Prime spot, paint to match, and check in different light for uniformity.
Visual Guide and Resources
You’ll find a step-by-step photo checklist that walks you through a one-wall project from prep to finish so you can follow each stage visually.
I’ll also link manufacturer manuals and recommended products so you can compare specs and buy the right hopper gun, compressor, and materials.
Use the images and links together to confirm technique and equipment before you start.
Step-by-step photo checklist for one-wall project
Checklist photos guide every stage of your one-wall hopper-gun texture job, so grab your camera or phone and plan shots that document prep, masking, gun setup, test sprays, full-wall passes, touch-ups, and cleanup.
Capture: initial wall condition, taped edges, hopper and nozzle close-up, spray pattern test, mid-pass progress, completed texture, feathered seams, final cleanup.
Organize images for reference and troubleshooting.
Links to manufacturer manuals and recommended products
Now that you’ve photographed each stage of your hopper-gun texture job, keep those images handy while you consult manufacturer manuals and product recommendations to match equipment settings and materials to the look you captured.
Use these links and picks to reproduce results precisely:
- Hopper gun user manual (setup, nozzle sizes)
- Texture compound datasheet (mix ratios)
- Recommended compressors (CFM/PSI)
- Wear parts kit (needle, nozzle, seals)