What Are Textured Walls Called? A Guide to Every Style and Finish
Textured walls are surfaces with raised patterns or coatings—names you’ll see include popcorn, orange peel, knockdown, skip trowel, swirl, Venetian plaster, and stucco—each describing a different look and application. You’ll find textures used to hide imperfections, change acoustics, or add style; they’re applied with trowels, sprayers, rollers, or sponges and range from subtle to bold. Keep this guide handy and you’ll learn how to identify, maintain, remove, or choose the right finish for your space.
Quick Answer What Textured Walls Are and Common Names
Textured walls are surfaces finished with raised patterns or coatings that add depth and hide imperfections. They are created with techniques like troweling, spraying, or rolling.
You’ll hear homeowners call them popcorn, knockdown, orange peel, or stipple, while pros may use terms like skip trowel or Venetian plaster for specific methods.
Knowing these names helps you communicate what look and technique you want.
Direct definition of textured walls
Think of a textured wall as a painted or plastered surface finished with intentional patterns or relief to add visual interest and hide imperfections.
You’ll find concise answers to what’re textured walls called: they’re simply walls treated with texture—stucco, knockdown, orange peel, or bead—created by applying compound or plaster and manipulating it before drying to produce tactile, decorative finishes.
Most common terms homeowners and pros use
Now that you know what textured walls are, let’s look at the names people actually use: homeowners and pros tend to call them by styles like orange peel, knockdown, popcorn (or acoustic), stucco, Venetian plaster, and beadboard.
- Orange peel — subtle, common.
- Knockdown — flattened peaks.
- Popcorn/stucco — rough, acoustic or exterior finishes.
Basic Understanding Why Texture Is Used on Walls
You’ll choose texture not just for looks but to hide drywall imperfections, improve acoustics, and boost durability.
It also shapes style—adding depth and changing how light plays across a room.
Keep in mind texture influences paint type, application technique, and long-term maintenance.
Functional reasons (hide imperfections, acoustics, durability)
Texture on walls serves practical purposes beyond decoration: it hides surface imperfections, improves room acoustics, and boosts durability so your walls stay looking good longer.
You’ll find textured finishes mask small cracks, uneven plaster, and patchwork without costly rework. They scatter sound, reducing echoes in busy spaces, and resist scuffs, dents, and wear, lowering maintenance and extending wall life.
Aesthetic reasons (style, depth, lighting effects)
While functional benefits matter, the look of a textured wall can transform a room by adding style, depth, and dynamic light play that flat paint can’t match.
You can use texture to set mood, emphasize architecture, or create focal points.
Try these effects:
- Soft textures for cozy warmth
- Bold patterns for drama
- Subtle stipple for gentle shadowing
How texture affects paint choice and maintenance
Because textured surfaces catch and hold paint differently than flat walls, you’ll need to choose products and maintenance routines with those quirks in mind.
Use thicker, high-hide paints and water-based elastomeric or acrylics for better coverage and flexibility.
Roll with nap appropriate for texture, touch up crevices carefully, and clean gently to avoid abrasion.
Expect more frequent spot repairs than on smooth walls.
Overview of Textured Wall Categories
Now let’s break textures into clear groups so you can pick the right approach for your space.
- Structural/applied textures — built into the wall for function and feel.
- Finish/decorative textures — surface treatments for style.
- Natural vs. manufactured — organic materials versus engineered options.
Structural/Applied textures vs. Finish/Decorative textures
When you choose a textured wall, you’re really picking between two approaches: structural or applied textures that change the wall’s form and performance, and finish or decorative textures that layer pattern and sheen without altering the substrate.
Structural options—stucco, plaster ribs, or board-and-batten—add depth and durability.
Finish textures—paint techniques, glazes, metallics—focus on visual effect and are easier to update.
Natural textures vs. Manufactured textures
While both aim to add tactile interest and character, natural textures come from materials like stone, wood, clay, and lime that carry inherent grain, warmth, and aging qualities.
Manufactured textures are engineered—think textured paints, vinyl panels, and molded gypsum—so you get consistent patterns, easier installation, and more predictable performance.
You’ll choose natural for authenticity, patina, and sustainability; pick manufactured for uniformity, cost control, and low maintenance.
Common Textured Wall Styles and Their Other Names
You’ll find that many textured wall styles go by multiple names, so it’s helpful to learn the common terms. Below is a quick reference to match each style with other names you’ll see used. Use this table to spot the textures when you’re planning or sourcing materials.
| Style | Other Name 1 | Other Name 2 |
|---|---|---|
| Orange Peel | Splatter Coat | Knockdown Spray |
| Knockdown | Arizona Texture | Mud Finish |
| Skip Trowel | Skip Coat | Hand-Troweled Texture |
| Swedish/Swirl | Circular Trowel Finish | — |
| Popcorn/Cottage Cheese | Ceiling Texture | — |
Orange Peel (also called splatter coat, knockdown spray)
Orange peel texture—also called splatter coat or knockdown spray—gives walls a fine, dimpled finish that hides minor imperfections and wears well over time.
You’ll find it common in homes and rentals because it’s easy to apply with a hopper gun or aerosol sprayer, paints smoothly, and masks small blemishes.
It brushes and cleans easily, offering subtle visual interest without heavy relief.
Knockdown (also called Arizona texture, mud finish)
Knockdown texture, often called Arizona texture or mud finish, gives walls a flattened, variegated look by letting sprayed droplets partially dry and then smoothing their peaks with a trowel or knife.
You’ll get a subtle, rustic surface that hides imperfections and accepts paint well.
It’s adaptable to rooms and ceilings, offering visual interest without heavy contrast or deep ridges.
Skip Trowel (also called skip coat, hand-troweled texture)
Skip trowel, often called a skip coat or hand-troweled texture, creates a soft, layered surface by dragging a trowel across a thin coat of joint compound so some substrate shows through.
You’ll get subtle depth and a slightly rustic look that hides minor imperfections. It’s applied by hand for controlled variation, sands lightly, and accepts paint well for understated, versatile finishes.
Swedish/Swirl Texture (also called circular trowel finish)
Swedish or swirl texture, also called a circular trowel finish, produces overlapping circular patterns that give walls a soft, decorative ripple.
You can apply it with a trowel or brush in circular motions, creating subtle depth and hiding minor flaws.
It suits living rooms and hallways, paints well, and offers a timeless, elegant look without overpowering the room’s other features.
Popcorn/Cottage Cheese (ceiling texture overlap)
If you liked the soft ripples of a circular trowel finish, you’ll find popcorn—also called cottage cheese—offers a completely different kind of surface interest for ceilings.
You’ll notice a bumpy, acoustical texture that hides imperfections and dampens sound. It’s applied by spraying or slopping on a stucco-like mix.
Removal can be messy, and it may contain asbestos in older homes.
Sand Finish (sand swirl, sandy texture)
Think of sand finish as a subtly gritty plaster that gives walls a warm, tactile look without calling too much attention to itself.
You’ll apply a sanded compound or additive and trowel or roller it in swirls or light stipple, creating gentle texture that hides minor flaws and reduces glare.
It’s durable, paint-friendly, and suits casual, rustic, or modern interiors.
Venetian Plaster (polished plaster, Italian plaster)
Venetian plaster, also called polished or Italian plaster, gives walls a smooth, marble-like depth by layering and burnishing thin coats of lime-based compound.
You’ll achieve subtle sheen and soft veining with trowel techniques, color washes, and fine polishing.
It’s ideal for interior feature walls and ceilings when you want an elegant, durable finish that reads as stone without heavy texture or exterior stucco characteristics.
Stucco and Exterior Roughcast (dash finish, pebble dash)
Moving from the smooth, indoor elegance of Italian plaster, stucco and exterior roughcast bring texture and weather resistance to building exteriors.
You’ll recognize dash finish and pebble dash by their coarse, aggregate-studded surfaces. Applied in layers, they resist moisture and hide imperfections.
Colors and coarseness vary; maintenance is low, but repairs need matching texture and proper sealing to prevent cracks.
Beadboard and Plank Textures (board-and-batten look)
Beadboard and plank textures—often called board-and-batten, tongue-and-groove, or shiplap—give walls a rhythmic, linear pattern that adds both charm and structural clarity to interiors and exteriors.
You can install vertical battens for farmhouse appeal, horizontal planks for coastal coziness, or narrow beadboard for vintage detail. They hide seams, offer dimensional interest, and suit painted or stained finishes with easy maintenance.
Brick/Stone Veneer and Faux Finishes (faux stone, faux brick)
If you like the linear, crafted look of board-and-batten, you might also appreciate the weight and texture of brick or stone veneer and faux finishes, which bring a more rugged, tactile character to a room.
You can install thin veneer panels or apply painted faux techniques to mimic masonry, adding depth, warmth, and an industrial or rustic vibe without full masonry work.
Fabric or Grasscloth Wallpaper Textures (textile wallcoverings)
When you want a warm, tactile wall that reads as both elegant and relaxed, fabric and grasscloth wallpapers deliver rich, woven texture without overwhelming a room.
You’ll find natural fibers—jute, sisal, linen—offering subtle variation, acoustic dampening, and organic appeal.
Installations vary in seam visibility and maintenance; expect delicate cleaning and occasional professional repair to preserve the weave’s depth and character.
Metallic and Microtexture Finishes (metallic plaster, micro-rolled)
Metallic and microtexture finishes give walls a refined, contemporary edge by combining subtle relief with reflective or finely dimpled surfaces.
You’ll use metallic plaster or micro-rolled coatings to catch light, add depth, and create a luxe yet restrained look.
These finishes mask minor imperfections, suit accent walls and commercial spaces, and pair well with minimalist decor for an upscale, modern feel.
How to Identify Which Texture You Have {step-by-step}
Start by scanning the wall for visual cues like repeat patterns, the scale of the texture, and how glossy or matte it looks.
Then gently run your hand (wearing gloves) to feel the texture and watch for signs of lead paint or damage that mean you should stop and take precautions.
If the pattern’s unclear or you suspect hazardous materials, call a professional to identify it safely.
Visual cues to look for (pattern, scale, sheen)
Although texture can be subtle, you’ll quickly identify your wall type by looking at three traits: pattern, scale, and sheen.
Observe repeatability (random vs. regular), note size of bumps or ridges (fine, medium, heavy), and check light reflection (matte, eggshell, semi-gloss).
Photograph sections for comparison and view from different angles to reveal low-relief patterns and sheen variance under light.
Tactile checks and safety considerations
Now that you’ve inspected pattern, scale, and sheen, move on to hands-on checks and safety steps before you touch the wall.
Wear gloves and a dust mask. Gently feel for raised ridges, stipple bumps, or sandiness.
Test a small, inconspicuous area with your fingernail to see if material flakes. Note moisture, loose sections, and odors; stop if you suspect lead, mold, or damage.
When to consult a professional for identification
When should you call a pro? You’ll want expert help if texture is ambiguous, hazardous, or needs repair beyond DIY. A pro identifies material, tests for lead/asbestos, and recommends fixes.
- Unknown origin or mixed textures — get a specialist.
- Suspected hazardous materials — stop and call.
- Structural or widespread damage — hire for accurate assessment.
Pros and Cons of Each Major Texture Type
You’ll want to weigh durability and maintenance, cost and installation difficulty, and paintability and renovation impact when choosing a texture. Below is a quick comparison to help you spot trade-offs at a glance. Use this to decide which textures fit your budget, lifestyle, and future plans.
| Feature | Notes |
|---|---|
| Durability | Some textures hide wear better and resist dents; others chip or crush more easily. |
| Maintenance | Smooth surfaces are easier to clean; heavy textures trap dust and require careful care. |
| Cost | Simple textures cost less to apply; intricate finishes raise material and labor costs. |
| Installation Difficulty | Spray and trowel techniques are faster for pros; hand-applied textures need more skill. |
| Paintability & Renovation | Flat textures are easier to repaint or skim-coat; deep textures may need removal for a smooth finish. |
Durability and maintenance comparison
Because different textures demand different care, choosing one means weighing durability against maintenance needs.
Smooth finishes scratch less but show marks; heavy popcorn or knockdown hide imperfections yet trap dust and resist washing.
Orange peel balances concealment and cleanability.
Raised or ornate textures are durable but harder to clean and repair.
Match texture to traffic, cleaning ability, and long-term wear.
Cost and installation difficulty
Although some textures look simple, their costs and installation difficulty can vary a lot, so you’ll want to match choice to budget and skill.
Simple knockdown or orange peel is affordable and DIY-friendly, while Venetian plaster, heavy stucco, or ornamental plaster demand pros and higher fees.
Consider prep, repair complexity, and drying time—those raise labor costs and affect scheduling when you decide.
Paintability and renovation implications
When planning a repaint or renovation, consider how each texture affects adhesion, coverage, and future work—smooth surfaces like skim-coated drywall take paint evenly and need fewer coats, while heavy textures (stucco, slap brush) hide imperfections but soak up more paint and can require special rollers or sprayers.
You’ll choose primers, tools, and techniques differently: sanding, de-glossing, or sealing rough textures saves time and improves finish.
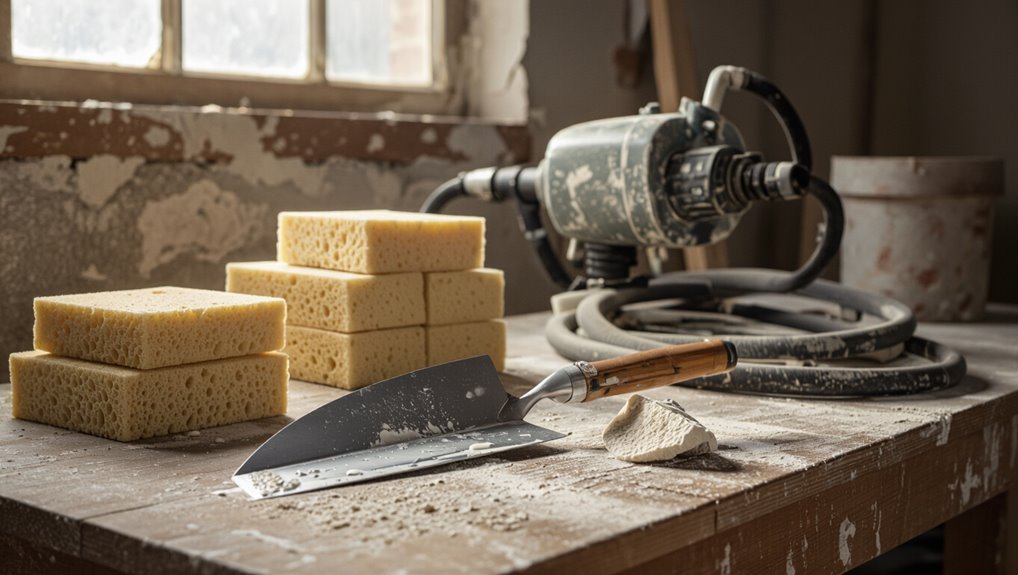
How Textures Are Applied Methods and Materials
You’ll apply textures by spraying, troweling, or hand-knocking down compound to create different looks and depths.
Common base materials include joint compound, plaster, and stucco, each suited to specific techniques.
Typical tools are sprayers, trowels, rollers, and sponges, and choosing the right combo affects finish and durability.
Spraying, troweling, hand-knockdown
If you want consistent, professional-looking texture, start by choosing the right application method—spraying for speed and uniform coverage, troweling for thicker, sculpted finishes, or hand-knockdown for a subtle, custom look—then match your material and tools to that approach so the finish holds up.
- Spraying: fast, covers large areas.
- Troweling: controlled, dimensional results.
- Hand-knockdown: personalized, soft patterns.
Common base materials (joint compound, plaster, stucco)
Think of the base material as the foundation for any texture—joint compound, plaster, and stucco each behave differently and demand different tools and techniques.
You’ll choose joint compound for indoor, smooth-to-textured finishes; plaster for durable, sculpted profiles and historical accuracy; and stucco for exterior, weather-resistant applications.
Each material sets, sands, and bonds uniquely, so match the base to your desired look and location.
Tools used (sprayers, trowels, rollers, sponges)
After you pick the right base—joint compound, plaster, or stucco—you’ll match it to tools that shape the final look: sprayers for fast, uniform coverage; trowels for sculpted or Venetian-style finishes; rollers for knockdown and orange-peel textures; and sponges for soft, organic effects.
Choose sprayers for speed, trowels for control, rollers for consistency, and sponges for subtle variation; practice first.
Choosing the Right Texture for Your Space
When choosing a texture, think about how it complements your home’s architecture and the room’s purpose so the finish feels intentional.
Consider how light and color will highlight or hide the texture, since shadows can change the look throughout the day.
Also weigh upfront costs against long-term maintenance to pick a durable option that fits your budget.
Matching texture to architectural style and room function
Although texture can be a subtle detail, it shapes how a room feels and works, so match it to both the building’s style and the room’s purpose.
For historic homes, pick traditional textures—venetian, plaster, or subtle knockdown—to respect period character.
In modern spaces, favor smooth, minimal textures.
For high-traffic or damp rooms, choose durable, easy-to-clean finishes that hide imperfections.
Lighting and color considerations
Texture choices don’t exist in isolation — lighting and color change how they read and feel in a room.
Natural light softens subtle textures; harsh artificial light highlights ridges and shadows.
Dark colors deepen texture, adding drama; light hues minimize surface detail.
Test samples under morning, afternoon, and evening lighting.
Adjust fixture direction and bulb temperature to achieve the desired visual impact.
Budget and long-term maintenance factors
Because your budget and the time you’ll spend maintaining walls shape long-term satisfaction, pick textures that balance cost, wear, and upkeep.
You’ll want durable, easy-to-clean finishes in high-traffic zones and softer, cheaper options elsewhere. Consider long-term repainting costs and repair complexity.
- Choose low-maintenance textures where you live most.
- Factor labor vs. material costs.
- Plan for future repairs.
Common Mistakes When Working With Textured Walls and How to Avoid Them
Don’t over-texture or pick a pattern that’s too large for the room, because scale can make a space feel cramped or chaotic.
Make sure you prep the surface thoroughly—poor prep leads to peeling, cracking, and costly fixes.
Choose the right paint finish and know common repair pitfalls so touch-ups blend and last.
Over-texturing and scale mismatch
When you pile on heavy textures or pick patterns that dwarf the room, the surface ends up shouting instead of supporting the design.
You should balance texture scale with room size, furniture and light. Choose subtle finishes for small spaces, reserve bold textures for large, well-lit rooms, and sample finishes at full scale.
Step back and adjust until texture complements, not competes.
Poor surface preparation leading to failures
If you skip proper preparation, even the nicest texture can fail — peeling, cracking, or showing every imperfection underneath.
You need to clean, dry, and repair surfaces before texturing. Remove loose paint, fill gouges, sand glossy areas, and prime porous patches.
Proper bonding and consistent substrate moisture prevent delamination and uneven absorption.
Take the time up front to guarantee durable, professional results.
Wrong paint finishes and repair pitfalls
Although the texture itself adds depth, choosing the wrong paint finish or tackling repairs poorly will make that depth work against you; glossy or satin paints highlight high spots and sanding mistakes, while heavy-bodied patching compounds can look lumpy under light-bodied paints.
You should:
- Use flat or matte finishes to hide imperfections.
- Match patching compound texture to the existing finish.
- Feather repairs and prime before painting to blend.
Removing or Covering Texture Options and Best Practices
You’ll weigh skimming and re-plastering or sanding and scraping to remove texture, balancing effort against finish quality.
You can also cover problem walls with drywall or wall panels for a faster, cleaner solution.
Compare refinish versus replace costs and time to decide which approach fits your budget and schedule.
Skimming and re-plastering vs. sanding and scraping
When you decide between skimming and re-plastering versus sanding and scraping, consider the texture type, surface condition, and your timeline—skimming gives a smooth, long-term finish but needs skill and drying time, while sanding/scraping is quicker and cheaper for small areas but can damage drywall and kick up lots of dust.
Choose skimming for full coverage, sanding for spot repairs, and always protect vents and floors.
Covering with drywall or wall panels
If the texture’s too stubborn or you want a fast, clean change, covering it with drywall or decorative wall panels gives you a predictable, low-dust result that skips intensive scraping or re-plastering.
You’ll attach 1/4″ or 1/2″ drywall over studs or furring strips, tape and mud seams, sand, prime, then paint or install panels.
It’s quick, durable, and hides imperfections.
When to refinish vs. replace (cost/time comparison)
Although refinishing keeps more of the existing wall in place, you should weigh time, cost, and long-term goals before deciding whether to refinish or replace textured walls. You’ll refinish to save money and time on minor texture; replace for severe damage or layout changes. Choose based on budget, timeline, and desired finish.
| Option | Typical outcome |
|---|---|
| Refinish | Lower cost, faster |
| Replace | Higher cost, longer |
Maintenance, Repair, and Touch-Up Tips
You’ll need simple, texture-specific cleaning methods to avoid damage—gentle cleaners and soft brushes for light textures, and low-pressure rinsing for tougher patterns.
For small gouges or chips, learn spot-repair and blending techniques so patches match the surrounding texture.
When repainting, prep carefully (clean, prime, and feather edges) and use the right spray or roller technique to keep the finish consistent.
Cleaning different textures safely
Because each wall texture traps dirt and responds differently to cleaning methods, you’ll want to match your technique and cleaning solution to the surface to avoid damage.
Test cleaner in an inconspicuous spot.
Use soft brushes for light textures, microfiber for smooth ones, and low-pressure rinses for heavy patterns.
Avoid abrasive pads, strong solvents, and soaking porous finishes to prevent deterioration.
Spot repairs and blending techniques {step-by-step}
Start by evaluating the damage and matching the texture and paint before you touch the wall; that way you’ll know which repair method—fill, skim, or patch—will blend best.
For small dents, press lightweight filler, texture to match with a tool or sponge, sand lightly, and feather edges.
For larger spots, patch drywall, replicate texture, and use touch-up paint sparingly to hide changes.
Repainting textured surfaces prep and technique
Prep the room and assess the texture before you open a paint can: clean the surface, remove dust and grease, patch any flaws, and make sure the existing texture and sheen are well matched so your repaint will sit and blend properly.
Follow these steps to repaint textured walls:
- Prime repaired areas lightly.
- Use a nap roller matching texture depth.
- Apply thin, even coats, feathering edges.
Frequently Asked Questions (FAQ)
You probably have a few quick questions about textured walls—here are the top things people ask.
- Can they be smoothed out?
- Will painting cost more?
- How do you match texture for repairs?
I’ll also cover whether textures hide problems and how messy removal can be.
Can all textured walls be smoothed out?
Wondering if every textured wall can be smoothed out? You can smooth many textures, but success depends on type, thickness, and substrate.
Light orange peel or fine knockdown sands and sands easily with joint compound or skim coats.
Heavy popcorn, roughcast, or deeply troweled stucco may need more work—demolition, multiple skim coats, or professional tools—and sometimes replacement is simpler.
Are textured walls more expensive to paint?
How much more will it cost to paint textured walls?
You’ll likely pay more because textures need extra prep, thicker paint, and careful cutting-in.
Deep textures take more paint and time, and contractors may charge higher labor rates.
Expect a modest premium—often 10–30% extra—depending on texture depth, room size, and whether you need repairs or priming before topcoat application.
How do I match a texture for repairs?
Need a perfect match? Start by identifying the existing texture—take close photos and a small sample.
Feather the repair edges, use the same compound and tools (brush, roller, hopper) and practice on scrap drywall.
Match application speed and pressure, let it dry, sand lightly, then prime and paint with the same sheens.
Blend gradually for an invisible repair.
Do textured walls hide mold or structural issues?
Can textured walls conceal signs of mold or structural damage? Yes — heavy textures can obscure staining, surface mold, hairline cracks, and unevenness, making problems harder to spot.
You should inspect suspicious areas closely, use a moisture meter, and peel back a small section if needed.
Don’t assume texture hides everything; persistent odors, soft spots, or visible growths need professional evaluation.
Is textured wall removal messy and time-consuming?
Wondering what to expect when you strip textured walls?
It can be messy and time-consuming depending on texture, surface prep, and removal method. You’ll create dust, debris, and likely repair work.
Wet-scraping or chemical softeners reduce dust but add cleanup.
Plan for drop cloths, ventilation, protective gear, and several hours to days for scraping, sanding, patching, and priming before repainting.
Conclusion and Recommended Next Steps
You’ll recall the key texture names and selection tips covered earlier to help narrow your options.
Use the decision checklist—budget, room function, maintenance, and sample testing—to confirm the right choice for your home.
If you’re unsure, consult a pro, get samples, or request an estimate to move forward confidently.
Quick recap of texture naming and selection tips
One quick way to lock in the right textured wall is to match the texture name to the room’s purpose and your maintenance tolerance—choose durable, subtle textures for high-traffic areas and bolder, statement textures where you want visual impact.
Note finish names (matte, eggshell, satin), texture types (skip trowel, knockdown, orange peel), and sample in situ before committing.
Decision checklist for homeowners considering texture changes
Ready to move forward? Use this quick checklist to decide on texture changes:
- Assess surface condition, budget, and timeline.
- Match texture style to room function and lighting.
- Plan maintenance, future repainting, and durability needs.
You’ll make smarter choices by weighing practicality, aesthetics, and costs before committing to a finish.
Call to action: consult a pro, get samples, or request an estimate
Now that you’ve weighed practicality, aesthetics, and costs, take the next step by consulting a pro, ordering texture samples, or requesting an estimate—each action gives you concrete information to finalize choices.
You’ll get realistic timelines, color matches, and budget clarity.
Decide confidently after seeing samples and quotes.
- Consult a pro
- Order samples
- Request an estimate