What Makes Spray Paint Dry Faster? Quick Dry Tips
You can make spray paint dry faster by controlling temperature, humidity and airflow, using thin, even coats, and allowing short flash times between passes. Aim for 65–80°F, low humidity, and steady ventilation or gentle fans to pull solvents away. Use fast-dry primers or compatible additives, keep a consistent 8–12 inch spray distance, and prep surfaces well to avoid rework. Follow safety precautions for fumes and heat, and keep going to learn practical tips and product picks.
Quick Tips to Speed Spray-Paint Drying
If you want spray paint to dry faster, start by working in the right conditions: warm, low-humidity air and good ventilation speed solvent evaporation and minimize tackiness.
You’ll use quick, even spray techniques, keep passes light, and let thin layers cure between coats.
Adjust paint consistency for atomization, avoid over‑application, and aim for steady airflow to cut drying time.
What Affects Spray-Paint Drying Time
Because several factors work together to determine how fast spray paint dries, you’ll want to take into account environment, paint chemistry, application technique, and substrate all at once.
You should check spray paint composition—solvent or water base, pigments, and additives—as these change evaporation and curing.
Drying time factors also include coat thickness, airflow, and surface porosity, so adjust technique accordingly.
How Temperature Speeds Drying
When you raise the temperature, paint solvents evaporate faster and chemical curing reactions accelerate, so coats tack up and harden in less time.
You’ll notice clear temperature effects on drying mechanisms—higher heat boosts evaporation and crosslinking, shortening open time.
Consider:
- Warm air speeds solvent loss.
- Heated substrates cure quicker.
- Gentle heat reduces dust adherence and improves finish.
How Humidity Slows Drying
Although higher moisture in the air may seem harmless, it slows spray paint drying by reducing solvent evaporation and prolonging tackiness. You should monitor humidity impact and adjust drying techniques—wait longer between coats and use low-VOC solvents. Avoid painting during high relative humidity.
| Humidity (%) | Effect | Tip |
|---|---|---|
| <40 | Fast | Paint |
| 40–60 | Moderate | Delay |
| >60 | Slow | Postpone |
How Airflow Speeds Drying
Humidity slows solvent evaporation, but increasing airflow helps pull moisture and solvent vapors away from the painted surface so the coating sets faster.
You can manage airflow effects with simple ventilation strategies to speed drying without harming finish.
Try these steps:
- Position fans to move air across, not directly at, the surface.
- Open opposite windows for cross-ventilation.
- Use low-speed exhaust to remove vapors.
Which Spray-Paint Formulas Dry Fastest
You’ll want to weigh solvent-based versus water-based sprays, since solvents generally dry faster but have stronger fumes.
Look for fast-drying specialty formulas labeled “quick dry” or “fast tack” for jobs that need speed.
And remember some additives and accelerators can shave drying time, though they may affect finish or adhesion.
Solvent-Based Vs. Water-Based
When deciding which spray-paint formula dries fastest, you’ll usually find solvent-based paints cure quicker than water-based ones because their solvents evaporate more rapidly and promote faster film formation.
You should consider spray paint composition and drying agents when choosing.
Compare:
- Solvent-based: faster evaporation, stronger drying agents.
- Water-based: safer, slower cure.
- Hybrid: balanced speed and cleanup.
Fast-Drying Specialty Formulas
Beyond basic solvent and water-based options, several specialty spray formulas are engineered specifically to dry extremely fast for quick recoats and touch-ups.
You’ll favor acrylic-enforced, lacquer, and rapid-evaporation urethane sprays when speed matters. These offer fast drying benefits like shorter tack times and faster handling.
Choose based on substrate, durability needs, and specialty applications such as automotive trim or metal fixtures.
Additives That Speed Drying
If you need paint to set up faster, adding the right drying additives can cut tack time and speed recoats without compromising finish quality.
- Use fast dry additives formulated for acrylics; they thin and accelerate solvent evaporation.
- Try metal-complex drying agents for alkyds to catalyze curing.
- Add silicone-free retarders only when needed to control flow without slowing dry time.
How Solvent Type Changes Drying Speed
Because the solvent carries the paint’s binder and controls how quickly it evaporates, choosing the right solvent changes drying speed dramatically.
You’ll weigh solvent properties and evaporation rate against paint formulation, drying agents, and drying inhibitors.
Consider surface interaction, environmental factors, and application techniques since they alter chemical reactions and performance characteristics.
Pick solvents that suit your substrate and conditions to speed drying without harming finish.
How Fast-Dry Primers Save Time
Switching solvents isn’t the only way to speed up a project—using a fast-dry primer gets you to topcoat sooner.
You’ll notice fast dry benefits immediately: shorter wait times, reliable adhesion, and improved primer efficiency that reduces sanding.
Apply thin, even coats and follow manufacturer recoat windows so you can move on quickly without compromising finish.
- Faster recoat
- Better adhesion
- Less prep time
How Thin Coats Dry Faster Than Thick Coats
When you spray thin, even coats, each layer sheds solvents and cures much faster than a single heavy pass, so you can recoat sooner and avoid runs.
You’ll notice thin layers reduce trapping of solvents, speed solvent evaporation, and lower overall paint viscosity impact.
Adopt a measured spray technique so each coat dries uniformly, minimizes sagging, and builds consistent coverage without extended drying time.
How to Apply Thin, Even Spray Coats
Before you spray, make sure the surface is clean, dry, and free of dust so paint lays down smoothly.
Hold the can at the manufacturer’s recommended distance and move steadily to avoid buildup.
Apply light, overlapping passes so each coat is thin and even.
Prep The Surface
Prep the surface by cleaning, sanding, and masking so your spray coats lay down thin and even.
You’ll do surface cleaning and surface inspection, use sanding techniques for material preparation, and apply primer application to guarantee paint compatibility and better finish quality while considering environmental factors.
- Clean and inspect
- Sand and prep edges
- Prime compatible materials
Maintain Proper Distance
Although it might feel tempting to hold the can close for faster coverage, keeping a consistent 8–12 inches between the nozzle and the surface helps you lay down thin, even coats.
Move the can in smooth, overlapping passes and keep your wrist steady so each stroke blends into the last.
Monitor spray distance to control paint thickness, avoiding heavy buildup that slows drying and causes runs.
Use Light Overlaps
Keeping that steady 8–12 inch distance will help, but how you overlap each pass determines how thin and even your coats end up.
You’ll use light, consistent strokes and avoid heavy starts or stops. Focus on these spray techniques for efficient paint layering:
- Passes: overlap 30–50% for uniform coverage.
- Speed: keep a steady, brisk motion.
- Layers: build multiple thin coats, drying between.
How Distance and Spray Pattern Affect Drying
1 simple adjustment — how far and how you hold the spray can — changes how paint lands and how fast it dries.
You’ll adjust spray distance and spray angle with the right nozzle type to suit paint viscosity and surface texture.
Smart application techniques and overspray control limit drying anomalies.
Consider environmental factors and drying conditions so you can apply consistent, efficient coats.
When to Wait Between Coats for Best Speed and Finish
Now that you’ve tuned distance, angle, and spray pattern to control coverage and drying, you’ll need to time your recoat windows to balance speed with a smooth finish.
Use precise drying techniques and coat timing to avoid runs and uneven texture.
Time coat timing and drying precisely to prevent runs and ensure an even, smooth finish.
- Light tack-free wait for fast builds.
- Short flash between thin coats.
- Longer wait before heavy topcoats for leveling.
How to Test Tack-Free Time vs. Full Cure
Anyone testing tack-free time versus full cure should use simple, repeatable checks so you know when it’s safe to recoat and when the finish has reached its final hardness. You’ll do tack free testing with a finger touch and note resistance; full cure evaluation uses a gentle scratch and flex. Compare results:
| Test | Result |
|---|---|
| Tack touch | Slight/no transfer |
| Cure probe | No mark/no flex failure |
How Temperature-Controlled Spaces Speed Drying
You’ll speed drying by keeping the ambient temperature in the paint’s recommended range so solvents evaporate evenly.
Control humidity—low to moderate levels help tack-free time without causing blistering or slow curing.
Also make sure you have steady airflow and proper ventilation to carry away solvents and prevent moisture buildup.
Optimal Ambient Temperature
Keeping the ambient temperature between about 65°F and 80°F (18°C–27°C) speeds spray-paint drying by promoting even solvent evaporation without causing surface defects.
You’ll control temperature effects and environmental factors to hit ideal conditions, optimize paint viscosity and application techniques, aid curing times, and complement surface preparation or drying agents.
- Monitor temps.
- Adjust heaters.
- Stabilize workspace.
Humidity Control Effects
Temperature control helps, but humidity has a bigger say in how fast spray paint dries—moist air slows solvent evaporation and can cause longer tack times or blushing, while very dry air speeds evaporation and raises the risk of orange peel or cracking.
You should monitor humidity levels, use moisture control and drying agents, adjust temperature management, refine surface preparation and paint application, and consider paint chemistry and environmental factors without relying solely on air circulation.
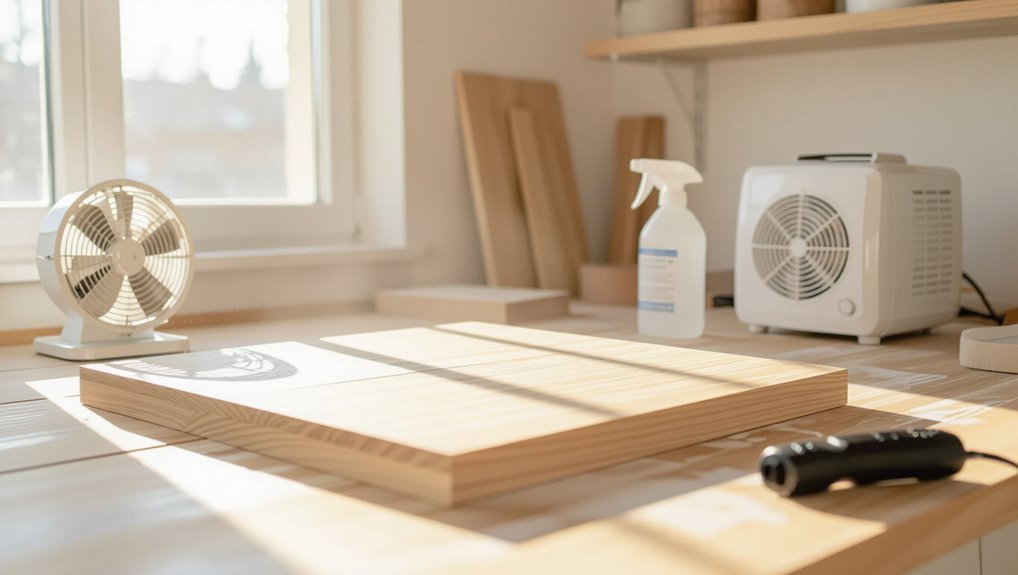
Airflow And Ventilation
Airflow matters as much as heat: in a temperature-controlled space, steady ventilation removes solvent-rich air and replaces it with drier, conditioned air, so your spray paint dries faster and more evenly.
- Use ventilation systems and fan usage to boost air circulation around drying racks.
- Apply airflow techniques that respect spray patterns and avoid overspray.
- Optimize drying environments with humidity control for consistent results.
How to Warm Spray Cans Safely in Cold Weather
When you’re working in cold weather, warming spray cans a little before use helps the paint atomize properly and dry faster; do it carefully to avoid damaging the can or creating a safety hazard.
You should raise spray can temperature gently using body heat, warm water (not hot), or a low-temperature heat pack.
Avoid open flames, heaters, or microwave heating—use safe warming methods and test spray before application.
How Low Temperatures Lengthen Tack Times
Because cold slows the solvents in spray paint from evaporating, you’ll notice tack times stretch out considerably as temperatures drop.
You should account for the temperature impact and avoid painting in cold conditions when possible.
Consider these effects:
- Slower solvent evaporation increases tackiness.
- Thicker wet film risks runs and smudges.
- Extended cure time raises contamination chance and delays recoating.
How to Use Fans Safely to Accelerate Drying
Position fans so air flows across the painted surface, not directly at it, and keep them several feet away to avoid disturbing the finish.
Make sure you’re ventilating the space well and directing fumes outside with an exhaust fan or open windows.
Always use grounded fans, keep cords clear of wet paint, and never run electrical equipment in very damp conditions.
Fan Placement Tips
1 smart fan placed right can cut drying time without harming the finish: point the airflow across the painted surface rather than directly onto it, keep fans at least 3–4 feet away to avoid blowing dust or creating uneven curing, and angle them so air skims the surface to promote evaporation while minimizing turbulence.
- Adjust fan placement for even coverage.
- Test fan angles for gentle skimming.
- Use multiple low-speed fans, spaced evenly.
Safety And Ventilation
Fans can speed drying, but you’ve got to prioritize ventilation and safe setup to avoid fumes, fire risks, and dust contamination.
Position fans to pull fumes away, open windows, and use exhaust if possible.
Wear protective gear to limit fume exposure, isolate the area for workspace organization, remove flammables, and follow drying hazards guidance and safety practices to reduce risk.
When to Use a Heat Gun to Speed Drying
If your project needs to be ready sooner than the paint’s normal cure time, a heat gun can safely accelerate drying when used correctly.
You’ll want to reserve it for small areas, painted metal, or parts where surface heat won’t warp or blister the finish.
Follow heat gun usage and safety precautions:
- Keep moving—avoid concentrated heat.
- Maintain 6–12 inches distance.
- Test on scrap first.
When to Use a Hair Dryer Safely
A hair dryer can speed surface drying on small spray-painted pieces where a heat gun would be overkill or too hot for the material; use it when you’re working with plastics, thin metals, or spots that need gentle, controlled warmth.
Observe hair dryer safety, choose low-to-medium heat settings, keep distance matters in mind, use steady drying techniques, consider paint types, guarantee air circulation, handle equipment properly, adjust for surface preparation and humidity control with technique adjustments.
When Sunlight Helps : and When It Hurts
When you’re spray painting outdoors, sunlight can speed drying by raising surface temperature and improving airflow, but you should use it selectively—direct mid-day sun works well for fast, durable finishes on metals and thick coatings, while low-angle or very intense sun can cause blistering, orange peel, or uneven curing on lacquers, enamels, and thin layers.
- Weigh sunlight benefits vs sunlight drawbacks: direct exposure boosts temperature impact.
- Prefer indirect exposure for delicate finishes to limit UV effects and color fading.
- Find drying balance to protect paint adhesion and manage surface interaction.
How Ventilation Reduces Dust in Wet Paint
Keep airflow moving across your work to stop dust and particles from settling into wet paint.
Use filtered ventilation or a portable HEPA fan so you’re bringing in clean air instead of debris.
Also control humidity—moderate levels cut airborne contaminants and help paint dry evenly.
Airflow Prevents Particle Settling
Because dust settles slowly in moving air, you can use ventilation to keep particles from dropping into wet paint and ruining the finish.
You’ll notice airflow effects quickly as consistent air circulation suspends dust, speeding drying and preserving gloss.
- Position fans to sweep across, not directly at, the piece.
- Create a gentle cross-breeze.
- Limit abrupt air changes that stir settled dust.
Filtered Ventilation Reduces Debris
If you add simple filters to your shop’s airflow, they’ll trap airborne dust and paint overspray before it reaches wet surfaces—so your finish stays cleaner and you spend less time sanding and repairing.
Use filtered air in ventilation systems for effective dust control, improving air quality and supporting drying methods.
Pair this with good workspace organization, careful spray technique, surface preparation, and smart paint selection amid environmental factors.
Controlled Humidity Limits Contaminants
Filtered ventilation not only traps dust but also helps you manage humidity levels, which plays a big role in how contaminants behave around wet paint.
You’ll speed drying and improve contaminants management by controlling moisture and airflow.
- Reduce airborne particles with filters.
- Balance humidity control to prevent tackiness.
- Use steady ventilation to stop settling dust.
How Surface Material Changes Drying Speed
When you spray paint, the material you’re coating plays a big role in how fast the paint dries: porous surfaces like wood and unprimed metal soak up solvent and speed surface-dry times, while smooth, nonporous materials such as glass and glossy plastic keep solvents on the surface and slow drying.
You’ll consider surface texture, material porosity, paint absorption, coat thickness, finish smoothness, substrate compatibility, drying consistency, paint interaction, environmental factors, and surface preparation.
How Prep Helps Paint Dry Smoothly on Wood
Because wood soaks up solvents and shows texture, prepping it properly makes your spray paint dry more evenly and look smoother.
Because wood soaks up solvents and shows texture, proper prep helps spray paint dry evenly and appear smoother
You’ll focus on Wood preparation: Surface cleaning, Dust removal, and Moisture assessment before work.
Then Surface sanding, Finish sanding, and Grain filling for even texture.
Finally, Wood sealing, Primer application, and Adhesion improvement to speed drying and guarantee a uniform, durable finish.
How Moisture in Wood Affects Drying
If wood holds too much moisture, your spray paint won’t cure properly and can stay tacky or peel later.
You should assess moisture content and wood type before painting, because absorption rate and wood grain affect how paint soaks in.
Match surface treatment and paint compatibility, control drying conditions, and adjust paint thickness to prevent runs, bubbling, or delayed curing on damp substrates.
How Metal Surfaces Change Drying Behavior
Although metal doesn’t soak up paint like wood does, it changes drying behavior in other important ways that you need to take into account.
- Understand metal surface interaction and surface texture impact—rough vs. smooth alters paint adhesion differences.
- Monitor substrate temperature influence and environmental considerations to manage drying time variability.
- Control coating thickness impact and application technique effects to speed cure and prevent runs.
How Plastic and Laminate React to Fast-Dry Paints
When you spray fast-dry paint onto plastic or laminate, the surface chemistry and smoothness dictate adhesion and drying more than porosity.
So you’ll need to adjust preparation and technique accordingly. You should test plastic compatibility, scuff or degloss smoothly, and use adhesion promoters for laminate adhesion.
Spray thin, even coats, allow flash times, and avoid overworking edges to prevent peeling or pooling.
How to Choose the Right Quick-Dry Primer
Pick a primer that matches your surface — plastic, laminate, metal, or wood — so the paint will adhere and cure properly.
Check the primer’s drying speed rating to make sure it fits your project timeline and recoat window.
If you need both adhesion and fast turnaround, choose a product labeled for your material with a short dry time.
Surface Compatibility
Because different materials react differently to primers, you’ll want to match a quick-dry primer to the surface before you spray.
Consider surface preparation, paint adhesion, material compatibility, substrate moisture, surface texture, and the drying environment to guarantee fast, even curing.
- Metal: degrease, low substrate moisture.
- Wood: seal pores, control humidity.
- Plastic: use adhesion-promoting primer.
Drying Speed Ratings
While quick-dry primers promise fast tack-free times, you’ll want to compare their actual drying speed ratings to match your project timeline and conditions.
Check drying time specs and consider drying techniques and methods that suit your drying environment.
Account for drying factors and challenges like humidity or temperature.
Choose primers with drying efficiency, proven drying solutions, and drying innovations to guarantee reliable results.
How Additives Can Speed Drying
If you need paint to cure faster, additives are a simple way to speed the process without changing your technique: they thin the film, promote solvent evaporation, or chemically accelerate cross-linking so spray coats dry sooner.
You’ll weigh additive types, drying mechanisms, performance factors, compatibility issues, chemical interactions, and application techniques.
- Retarders/accelerators
- Solvent modifiers
- Catalysts
When Not to Use Accelerants or Additives
Though additives can speed drying, you shouldn’t reach for accelerants or solvent modifiers in every situation.
You’ll avoid accelerant risks by skipping them on delicate finishes, plastics, or when ventilation’s poor. Follow additive cautions on branded paints and test a small area first.
If you’re unsure, rely on proper technique and drying conditions rather than chemical shortcuts.
How Paint Temperature Before Spraying Matters
Because paint temperature affects viscosity and atomization, starting with paint at the right temperature helps you get an even spray, proper coverage, and predictable dry time.
Starting with paint at the proper temperature ensures even spray, consistent coverage, and predictable drying.
You’ll control paint viscosity and improve your spray technique by warming or cooling cans to manufacturer specs.
Try these steps:
- Test viscosity with a simple flow check.
- Adjust temperature gradually.
- Practice consistent spray technique.
How Low Humidity and Dehumidifiers Help
When you keep humidity low, paint solvents evaporate faster and more evenly, so coats tack up sooner and drying times shrink; using a dehumidifier gives you control over that process by removing moisture from the air and preventing dew or blushing on solvent-based finishes.
You’ll notice clear humidity effects: reduced drying time and fewer defects. Proper dehumidifier usage maintains consistent conditions for predictable results.
How to Set Up a Drying Station in Small Spaces
You can create an effective drying station in a tight space by pairing a compact ventilation setup with a clear, organized work surface.
Position a small exhaust fan or window vent to pull fumes and speed evaporation, and keep painted pieces on a riser or pegboard to allow airflow underneath.
Keep tools, masks, and drying racks neatly arranged so you can move items quickly without disturbing drying coats.
Compact Ventilation Setup
If space’s tight but you still want fast, clean drying, set up a compact ventilation station that moves air and keeps fumes away from you and your project.
Use a compact fan setup with a portable exhaust to pull fumes out a window or door. Prioritize direction, distance, and safety.
- Aim airflow
- Exhaust route
- Fan speed
Organized Work Surface
Start with a cleared, level surface that’s dedicated to drying so you can move pieces through the spray-to-cure cycle without bumping wet paint.
You’ll boost paint organization and workspace efficiency by using shelves, a small rack for spray can arrangement, labeled bins for material categorization, color coding for projects, and prioritizing tool accessibility.
Plan projects to minimize clutter reduction and speed drying shifts.
How Masking and Staging Cut Rework Time
Because masked edges and organized staging keep parts predictable, you’ll spend far less time fixing overspray, mismatched seams, and handling mistakes.
Use masking techniques and staging strategies to enable rework reduction and an efficient workflow. Focus on project planning, time management, and preparation tips to streamline finishing touches.
- Plan zones.
- Label parts.
- Pre-mask edges.
How to Avoid Runs When Trying to Dry Paint Fast
When you want paint to dry fast without runs, spray thin, even coats instead of heavy layers.
Keep a consistent, proper distance from the surface so each pass lays down a uniform film.
That way you’ll speed drying while preventing drips and sags.
Thin, Even Coats
Apply several light passes instead of one heavy coat to keep spray paint from sagging or running—you’ll get faster drying and a smoother finish.
Use proper spray techniques and application methods to control paint consistency and coating layers.
Consider surface preparation, environmental factors, equipment choices, and product selection for ideal drying times and finish quality.
- Thin coats
- Overlap passes
- Monitor build
Proper Spray Distance
Keep your can or spray gun at the right distance—typically 6–12 inches for aerosols and 8–12 inches for most HVLP or conventional guns—to avoid runs while still letting paint flash and dry between passes.
Adjust spray angle, nozzle type, and spray pattern to suit surface texture and paint thickness.
Match application technique, coat layering, product selection, and drying environment to your drying method.
How to Prevent Orange Peel While Accelerating Drying
If you want faster drying without causing orange peel, balance thinner coats and proper flash times so solvent evaporates evenly and the finish levels out.
You’ll control orange peel causes by adjusting spray technique, distance, and overlap.
Follow these quick steps:
- Use light, even passes.
- Allow short flash between coats.
- Thin paint per label and test on scrap.
How to Manage Dust and Insects During Fast Drying
While you’re speeding up drying, you’ll also invite dust and bugs that can mar a smooth finish, so plan to protect the work area and timing of coats.
You’ll use dust management tactics, workspace cleanliness, and surface protection like protective covers.
For outdoor precautions control drying conditions, choose calm, dry weather, and use insect prevention sprays or screens to keep your spray environment contaminant-free.
How to Speed Drying on Detailed or Fragile Parts
Because detailed or fragile parts can’t take heavy handling or harsh heat, you’ll speed drying with gentle, targeted techniques that preserve edges and delicate features.
- Use light, rapid spray techniques to control application speed and reduce surface tension that harms fragile surfaces.
- Choose drying methods matching material compatibility to protect detailed designs and guarantee paint adhesion.
- Adjust environmental factors to optimize paint interactions without aggressive manipulation.
How to Combine Baking and Air-Drying for Durable Finishes
Now that you’ve mastered gentle techniques for fragile parts, you can combine short, low-temperature bakes with controlled air-drying to get a tougher, more cured finish without harming delicate details.
Use proper surface preparation and check paint compatibility, set drying stations for temperature control and humidity management, employ airflow enhancement and targeted baking techniques, and pair quick dry products with precise spray techniques and air drying methods.
How to Check Gloss and Texture After Quick Drying
Once the paint feels dry to the touch, check surface gloss by viewing it under a bright light at an angle to spot uneven shine or dull patches.
For texture, run a clean fingertip gently across a hidden edge to feel for roughness, tackiness, or orange peel.
If you find inconsistencies, note the areas for light sanding or another quick coat.
Surface Gloss Check
After a short cure period, inspect the sprayed surface under good light to judge gloss and texture — you’re looking for uniform sheen, consistent reflection, and any orange peel, dust nibs, or dull spots that indicate uneven drying.
Check these drying indicators related to surface type, gloss levels, finish uniformity, application technique, paint compatibility, drying environment, surface preparation, coating thickness, and texture assessment.
- Match gloss to designated finish.
- Note sheen variations.
- Record defects for recoat.
Texture Finger Test
Having inspected the gloss and noted any defects, you can perform a quick texture finger test to confirm surface readiness.
Lightly touch an inconspicuous spot; you’re checking for tackiness, grain, and uniformity. Compare that feel to a cured reference for texture comparison.
If it’s tacky, revisit your drying techniques—more time, thinner coats, or warmer, drier conditions will finish the job.
How Fast Drying Can Harm Adhesion (and How to Avoid It)
When paint skins over too quickly, it can trap solvents beneath the surface and prevent proper bonding to the substrate, which weakens adhesion and leads to flaking or peeling later on.
You’ll avoid adhesion issues by achieving a proper drying balance. Try these steps:
- Spray thin, even coats.
- Add longer flash times between coats.
- Lightly scuff between layers for mechanical grip.
How Post-Curing Affects Long-Term Durability After Fast Drying
Even if your spray paint seems dry to the touch, proper post-curing is what actually locks in hardness and chemical resistance, so you’ll want to control temperature, humidity, and time to prevent long-term failures. Post curing benefits include improved adhesion strength, finish quality, and paint longevity; choose curing methods that balance durability factors and environmental impact to maximize long term performance.
| Concern | Feeling |
|---|---|
| Strength | Relieved |
| Longevity | Confident |
| Finish | Proud |
How to Fix Tacky or Soft Paint After Fast-Dry Attempts
Post-curing improves hardness, but if you rushed drying and now the surface feels tacky or soft, you can still rescue the job with careful steps.
- Assess drying errors: clean dust, check surface preparation, and gently wipe tacky paint.
- Use troubleshooting techniques: low-temp bake or controlled recoat to restore paint adhesion.
- Employ repair methods: scuff, thin primer spot, and reapply thin coats to fix soft finish and fast dry issues.
How to Troubleshoot Slow-Drying Spray Paint
If your spray paint stays tacky or takes ages to dry, start by checking the basics: temperature, humidity, ventilation, and whether you applied coats too thickly or too soon.
Troubleshoot spray paint issues by adjusting environmental factors, refining application techniques, and confirming paint compatibility with surface treatments.
Consider drying solutions like thinner or heat lamps, follow safety measures, and revise project planning to prevent reoccurrence.
How to Plan Projects Around Optimal Drying Windows
When will your painted piece be ready for handling or the next coat?
Plan project scheduling around ideal conditions: coordinate paint selection, surface preparation, and drying techniques. Use temperature monitoring, humidity management, and airflow strategies.
Organize workspace with dedicated drying stations.
- Schedule layers by forecasted ideal conditions.
- Arrange drying stations for airflow and spacing.
- Track temps, humidity, and cure times.
How Safety Precautions Change When Drying Faster
When paint dries faster you’ll need to rethink safety: wear appropriate PPE because fumes and overspray can concentrate more quickly.
Increase ventilation and use fume control measures to keep air breathable as solvents evaporate faster.
Also watch for fire and heat hazards, since quicker drying can raise solvent vapor levels and ignition risk.
Personal Protective Equipment
Anyone speeding up spray-paint drying should rethink their personal protective equipment, because faster curing changes exposure risks and heat conditions.
- Choose gloves selection and protective clothing for skin safety; adjust paint handling and equipment maintenance to avoid burns.
- Follow mask requirements and eye protection when changing spray technique or using accelerants.
- Prioritize workspace cleanup and maintain ventilation practices to reduce residue and accidental exposure.
Ventilation And Fume Control
Because faster drying often raises solvent vapors and heat, you’ll need to reassess ventilation and fume control to keep exposure and fire risk low.
You should position fans for strong air circulation, add local fume extraction near the spray zone, and improve odor control with activated carbon filters or exhaust.
Reconfigure workspace layout to separate inhalation pathways and provide clear escape routes.
Fire And Heat Hazards
If you speed up drying, you increase both heat build-up and the concentration of flammable vapors, so you’ll need to adjust safety measures accordingly.
You must prioritize fire safety and heat management when using spray can products, avoid ignition sources, and limit flammable materials.
Follow emergency procedures, keep fire extinguishers nearby, wear protective gear, and favor outdoor spraying.
- Clear area
- Monitor temperature
- Have extinguisher ready
How to Balance Speed, Appearance, and Longevity
When you’re racing against time, you still need to balance drying speed with how the finish looks and how long it lasts. Quick methods can cut curing time but often sacrifice hardness, gloss, or adhesion.
You’ll weigh speed vs. quality: use thinner coats, proper prep, and controlled heat/ventilation for a drying balance.
Plan curing time for durability and touch-ups instead of rushing.
Recommended Fast-Dry Brands and Products
1. You’ll want ideal brands that pair effective formulas with fast dry techniques—look for recommended products labeled quick dry options.
- Krylon Fusion (spray paint) — durable, fast-drying formula.
- Rust-Oleum Painter’s Touch — versatile, quick dry performance.
- Montana Gold — professional-grade, rapid cure and smooth finish.
Use these ideal brands to speed projects while maintaining appearance and longevity.
Frequently Asked Questions
Can Spray Paint Be Accelerated Safely on Painted Electronics or Circuit Boards?
You can, but you shouldn’t rush it; spray paint on electronics risks solvents seeping into components. Use safe methods: low heat, gentle airflow, and rapid-turnaround conformal coatings instead of direct fast-drying accelerants near PCBs.
Will Spraying Over Existing Solvent-Based Paint With Fast-Dry Waterbased Paint Cause Problems?
Yes — you’ll risk solvent interaction and poor paint adhesion if the waterbased fast-dry layer sits atop solvent-based paint; imagine cracking varnish like dried river mud. Sand, clean, and use a proper primer to avoid failure.
How Do VOC Regulations Limit Available Fast-Dry Additives and Methods?
They limit what you can use by capping volatile organic compounds, so manufacturers can’t include some solvents or accelerated agents; that forces reformulation into compliant fast dry formulations, which may dry slower or cost more.
Can Fast-Drying Coatings Be Recoated Later Without Sanding?
Yes — you can often recoat without sanding, but it’s like treading a tightrope: timing matters. Use proper recoating techniques and compatible drying agents, follow manufacturer windows, and test adhesion to avoid lifting or defects.
Do Pigments or Colorants Significantly Change Dry Times Between Brands?
Yes — pigment composition and brand formulation can change dry times; you’ll notice some pigments (like heavy inorganic whites) slow drying while others dry quicker, and each brand’s resin, solvent blend, and additives influence overall cure speed.
Conclusion
You want paint to dry fast, and sometimes rushing works — coincidentally, the tricks that speed drying (warmth, low humidity, airflow) are the same things that let you finish projects sooner and enjoy the result. So when you pick a warm, breezy spot, you’re not just drying paint; you’re creating the conditions that let your plans meet reality. Use safe methods, balance appearance with durability, and let timing and care coincide for the best outcome.