
What Tape Doesn’t Peel Paint? Best Painter’s Tape Guide
Pick low- to medium-tack painter’s tape matched to your surface—low tack for delicate walls and wallpaper, medium or high tack for cured or rough finishes. Clean, dry, and prime surfaces first, test a small patch, and remove tape slowly at a low angle within the recommended window (usually 24 hours to 14 days depending on tape). Use rubber or acrylic adhesives based on heat and UV needs, and follow simple prep and removal steps to avoid lift; keep going to learn pro tricks.
Quick Verdict: Which Tape Won’t Peel Paint
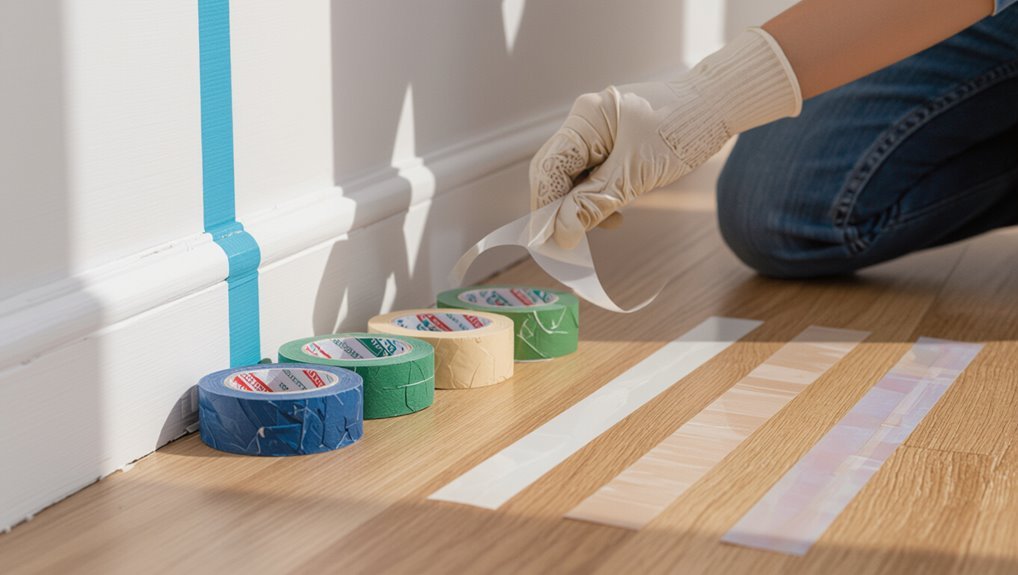
You want a tape that holds cleanly and lifts without ripping fresh paint.
You’ll choose tapes proven for tape durability and advanced adhesive technology that balance grip and gentle release.
Choose tapes with proven durability and advanced adhesives that balance firm hold with gentle, paint-safe release.
Look for low-tack options labeled safe for delicate surfaces, micro-adhesive formulas, and crisp-edge seals.
Test a small area first; the right tape prevents peeling while giving sharp lines and easy removal.
Who This Guide Is For and When to Use Tape
Who benefits most from this tape guide and when should you reach for it?
You’ll find it useful if you’re prepping walls, trim, or detailed projects and want clean lines without damage.
Use it when matching tape types to surface and paint finishes, protecting hardware, or timing removal for best results.
It’s for DIYers, pros, and anyone avoiding peeling or bleed.
How to Choose Tape: A 3-Step Decision Checklist
Start by matching the tape to your surface: delicate walls need low-tack tape, rough or exterior surfaces need stronger adhesive.
Decide how long the tape will stay on—higher adhesion holds up for days but can damage paint if left too long.
Combine surface type and adhesion level to pick the right tape for a clean edge without residue.
Surface Type Match
When matching tape to your surface, think about texture, finish, and fragility—each affects adhesion and removal.
You’ll evaluate surface texture compatibility: smooth, semi-rough, or porous, and choose tape that won’t seep or lift.
Consider paint finish impact—glossy or delicate finishes need gentler tapes.
Test a small area, wait for full cure, then remove slowly to avoid damage.
Tape Adhesion Level
Because the right adhesion level determines whether tape holds clean lines or ruins your surface, you’ll want a simple, three-step checklist to pick tape that sticks just enough.
First, assess your surface type.
Second, match tape durability to project length.
Third, choose adhesive technology rated for delicate or rough finishes.
Test a small patch before committing to full application.
Surface Prep to Prevent Paint Lift
If you want your tape to release cleanly, prep the surface so paint can’t lift off with the adhesive.
Clean dirt, dust, grease, and chalky residue; sand glossy spots lightly for better paint adhesion.
Remove dirt, dust, grease, and chalky residue; sand glossy areas lightly for improved paint adhesion.
Use primer on porous or repaired areas and allow full cure time.
Apply tape to dry, stable surfaces for reliable surface protection and a crisp removal without paint damage.
How to Test Tape on Your Wall in 5 Minutes
Before you tape the whole room, do a quick 5-minute test on an inconspicuous spot so you can confirm adhesion and clean removal without risking visible damage.
Try different tape types, then wait, peel, and inspect.
Steps:
- Clean a small area
- Apply short strips of each tape type
- Press firmly, wait five minutes
- Peel slowly, check for lift or residue
Tape Adhesives Explained: Rubber, Acrylic, Silicone
Three common adhesives—rubber, acrylic, and silicone—cover most painting and masking needs, and knowing their strengths helps you pick the right tape for the job. You’ll weigh rubber adhesives for stick, acrylic benefits for clean removal and UV resistance, and silicone properties for high heat. Use adhesive comparisons to judge tape performance.
| Adhesive | Strength |
|---|---|
| Rubber | High initial tack |
| Acrylic | Clean removal |
| Silicone | Heat resistant |
Backing Materials: Paper, Crepe, Film, Foil – Pros/Cons
Knowing the adhesive helps, you’ll also want to match the backing to your project—paper, crepe, film, and foil each shape how the tape conforms, resists paint bleed, and removes.
Match the backing to your project—paper, crepe, film, or foil—to control conforming, bleed resistance, and removal.
- Paper tape advantages: easy tear, good edge crispness, low residue.
- Crepe tape disadvantages: stretches unpredictably, can cause uneven edges.
- Film tape uses: waterproof masking, sharp lines on glossy surfaces.
- Foil tape benefits: heat resistance, durable barrier for textured areas.
Painter’s Tape vs. Masking Tape: What’s Different?
When you compare painter’s tape and masking tape, focus first on adhesion and residue—painter’s tape peels cleanly from delicate surfaces while masking tape often leaves sticky residue.
Also consider surface compatibility: painter’s tape is formulated for painted walls and trim, whereas masking tape can be better for rougher surfaces or general-purpose use.
Knowing those differences helps you pick the right tape for clean lines without damage.
Adhesion And Residue
Because adhesion and residue determine both the success of a paint line and the ease of cleanup, choosing the right tape matters: painter’s tape uses a milder adhesive designed to stick firmly without pulling paint, while traditional masking tape often has a stronger adhesive that can leave gummy residue or tear fresh paint.
You’ll want to avoid tape residue and adhesion issues.
- Painter’s tape minimizes pull
- Easier cleanup
- Less gummy residue
- Fewer adhesion issues
Surface Compatibility
1 key difference between painter’s tape and traditional masking tape is how they behave on different surfaces, and that affects both stick and removal.
You’ll find painter’s tape formulated to release cleanly from delicate walls, freshly painted trim, and finished wood, while masking tape’s stronger adhesive can bond too tightly to slick, stained, or cured surfaces and pull off paint or leave residue.
You should match tape to surface after proper surface preparation and choose adhesive technology suited to finish and exposure.
Tack Levels Explained: Low, Medium, High – When to Use Each
Painter’s tape comes in low, medium, and high tack levels, and choosing the right one depends on the surface, paint type, and how long you’ll keep the tape in place.
You’ll match tack levels to tape applications and project requirements using tape selection based on surface consideration, adhesive types, job suitability, and painter’s preferences.
- Low tack: delicate surfaces
- Medium tack: general use
- High tack: rough surfaces
- Removability tips
Best Painter’s Tape for Fresh Paint (24–48 Hours)
If you need tape removal within 24–48 hours, choose a medium- or low-tack painter’s tape designed for fresh paint—these tapes stick well enough to seal edges but release cleanly without lifting still-cured paint.
You’ll want tapes labeled for delicate surfaces, apply them smoothly, and remove at a 45° angle.
Ignore common tape myths and follow fresh paint techniques to prevent bleed and peeling.
Best Painter’s Tape for Cured Paint (Weeks to Years)
When you’re working on cured paint, start by cleaning and drying the surface so the tape can grip properly.
Choose a tape with stronger adhesion designed for aged finishes to prevent lifting or bleed-through.
Remove it slowly at a low angle and warm stubborn edges with your hand or a hair dryer to avoid peeling the paint.
Surface Prep Importance
Preparation matters—especially on cured paint that’s been sitting weeks or years.
You’ll use surface preparation techniques to reduce contaminants and consider paint adhesion factors before taping. Follow these quick steps so tape won’t lift old finishes:
- Clean with mild detergent and rinse
- Degloss with fine sandpaper
- Remove dust with tack cloth
- Let surfaces fully dry before applying tape
Tape Adhesion Strength
Because cured paint can be less porous and harder to bond with, you’ll want a tape that balances strong initial tack with clean removal; choose a high-adhesion painter’s tape formulated for aged or gloss finishes, and test a small strip first to confirm it sticks without lifting or leaving residue.
| Feature | Note |
|---|---|
| Adhesion | High initial tack |
| Durability | Resists aging |
| Residue | Low risk |
| Performance | Stable under time |
| Surface | Gloss/aged safe |
Safe Removal Technique
After choosing a high-adhesion tape for aged or glossy paint, you’ll want a removal method that protects the finish while preventing residue or lift-off.
Use gentle heat, slow peeling, and surface-safe cleaners to extend tape lifespan and aid cleaning surfaces.
Tips:
- Warm tape with a hairdryer
- Pull at 45° slowly
- Use mild solvent if needed
- Clean adhesive residue promptly
Tapes Pros Trust for Delicate Surfaces and Wallpaper
When you need to protect delicate surfaces or wallpaper, pros reach for tapes designed to stick firmly without peeling paint or tearing paper. You’ll choose based on adhesive properties, surface compatibility, wallpaper textures and paint types. Consider masking techniques, removal strategies and tape performance per painter preferences.
| Tape Type | Best Use |
|---|---|
| Low-tack | Delicate surfaces |
| Washi | Wallpaper textures |
| Paper | Paint types |
| Clear | Tape applications |
Tapes for Exterior Trim, Siding, and Outdoor Use
Choose tapes rated for UV, moisture, and temperature resistance so your exterior trim and siding stay protected through sun, rain, and seasonal swings.
You’ll want tapes emphasizing exterior durability and weather resistance for clean lines and easy removal.
Consider options that grip wood, vinyl, and metal without residue:
- Rubber-based adhesive for strong hold
- Medium-strength crepe for paint protection
- Polymer for flexible seams
- Low-residue film
UV- and Temperature-Resistant Tapes for Long Projects
For long projects you’ll want tape whose adhesive stays stable in heat so it won’t ooze or lose tack over days or weeks.
Also look for backings that block UV to prevent sun degradation and paint bleed-through.
Together those features keep edges crisp and removal predictable even in hot, sunny conditions.
Heat-Stable Adhesive Performance
Although long projects often expose tape to harsh sunlight and fluctuating temperatures, you’ll want an adhesive that stays put without melting, shrinking, or leaving residue.
You’ll look for adhesive stability and temperature resistance so edges stay clean.
Consider features:
- High-temp adhesive formula
- Consistent tack over weeks
- Clean removal at elevated temps
- Minimal creep or residue
UV-Blocking Backing Materials
Someone working on long outdoor jobs needs a backing that shields paint and adhesive from UV damage as well as temperature swings.
You’ll prioritize UV resistance and backing durability to prevent color fading and guarantee surface protection.
Do a material comparison—polyethylene, vinyl, paper—consider light exposure, tape longevity, and environmental impact so you pick a tape that lasts without harming finishes.
Blue Painter’s Tape Brands That Don’t Peel Paint
When you need a blue painter’s tape that lifts cleanly, pick brands designed for delicate surfaces and extended hold times. They use proprietary adhesives and controlled backing stiffness to prevent paint pull while sealing edges.
You’ll evaluate blue tape via brand comparisons, noting tack, residue, and edge crispness.
- 3M ScotchBlue
- FrogTape
- Duck Clean Release
- Intertape Pro-grade
Green & Purple Specialty Tapes: What They’re For
Green and purple specialty tapes serve specific jobs you don’t get from standard blue painter’s tape.
You’ll use green for delicate surfaces and low-tack needs, purple for heavy-duty masking and UV resistance.
Understand each tape characteristics and match them to the job.
Know each tape’s traits and choose the right one for the task to ensure clean, reliable results.
Follow proper application techniques: clean surface, press edges firmly, remove within recommended time to avoid residue or paint lift.
FrogTape vs. 3M vs. Scotch: Side-by-Side Comparison
Now you’ll compare FrogTape, 3M, and Scotch across three key traits: paint edge accuracy, adhesion and residue, and ease of removal.
You’ll see where each tape excels and where it falls short so you can pick the best one for your project.
Keep an eye on surface type and paint timing, since they affect performance.
Paint Edge Accuracy
Because crisp lines make the difference between a pro-looking job and a redo, this comparison focuses on how FrogTape, 3M, and Scotch perform at preventing bleed and producing sharp paint edges.
You’ll learn edge sealing techniques and tape application methods to get clean results.
- FrogTape: PaintBlock helps seal edges.
- 3M: Consistent crepe for control.
- Scotch: Budget-friendly, careful pressure needed.
Adhesion And Residue
When you peel tape off a freshly painted surface, adhesion and residue matter as much as edge accuracy.
This comparison looks at how well FrogTape, 3M, and Scotch stick without leaving gummy leftovers or ripping paint. You’ll weigh adhesion factors like tack, surface compatibility, and dwell time.
FrogTape minimizes residue; 3M balances grip and cleanup; Scotch suits light jobs but may need extra residue removal.
Ease Of Removal
Peeling tape cleanly should feel effortless, and that’s where FrogTape, 3M, and Scotch really differ: you’ll notice tape durability and surface compatibility affect removal.
You want clean pulls without paint lift. Consider:
- FrogTape: designed for crisp edges, high surface compatibility
- 3M: balanced grip, reliable durability
- Scotch: easy peel, budget-friendly
- Tips: remove slowly, 45° angle
Budget-Friendly Tapes That Still Protect Paint
You don’t need premium tape to keep clean lines—affordable options can still protect paint effectively if you choose the right type and apply it correctly.
Look for budget tape options labeled low-tack or painter’s-grade; they offer affordable quality without risking peel.
Test a small area, press edges firmly, remove slowly at a 45° angle within 24 hours to prevent adhesive residue or lifting.
Tape Selection by Paint Type: Latex, Oil, Enamel
When you pick tape, match the adhesive strength to your paint—latex needs gentler tack than oil or enamel to avoid lifting.
You’ll also want to time removal based on paint type and curing so edges come off clean without tearing.
Finally, check the tape backing (paper, crepe, or film) for flexibility and paint compatibility to get the sharpest lines.
Adhesion vs Paint Type
Because different paints dry and bond differently, picking the right tape depends heavily on whether you’re using latex, oil, or enamel.
Consider adhesion properties and paint compatibility to avoid lifts. Match tape tack to paint type, surface, and finish. Choose lower tack for delicate latex sheens; stronger adhesion for oil or enamel on smooth surfaces.
- Latex: low to medium tack
- Oil: medium tack
- Enamel: medium-high tack
Test first on scrap.
Removal Timing Effects
Although removal timing might seem minor, it has a big impact on edge quality and paint lift depending on whether you used latex, oil, or enamel—so plan removal based on paint type and cure time to get clean lines.
You should match tape types to drying speed: peel latex masking sooner, wait longer for oil and enamel.
Use gentle removal techniques at a 45° angle to prevent lifting.
Tape Backing Compatibility
If you’re matching tape backings to paint types, pick a backing that bonds without pulling finish or shedding adhesive—latex paints tolerate lighter, low-tack crepe or paper backings that peel cleanly, while oil and enamel often need stronger, film-backed tapes with tougher adhesives to resist solvent softening and longer cure times.
- Consider tape compatibility factors for paint chemistry
- Match tape material properties to cure time
- Use low-tack for fresh latex
- Choose film-backed for oil/enamel
Tape for Textured Walls and Popcorn Ceilings
When you’re working with textured walls or popcorn ceilings, choose a tape that’s flexible and designed to seal uneven surfaces without tearing the texture when removed.
You’ll focus on surface compatibility and wall preparation to guarantee paint adhesion.
Apply tape gently for secure tape application, and remove slowly to prevent damage.
Proper technique balances protection and damage prevention for textured surfaces and popcorn ceilings.
When to Avoid Tape and Better Masking Alternatives
Textured surfaces and popcorn ceilings often need special care, but there are times you should skip tape altogether and use other masking methods.
You’ll want tape alternatives and masking techniques that protect edges without damaging paint. Consider:
- Liquid mask for irregular textures
- Adhesive putty for small trims
- Masking film with low-tack edges
- Foam edging for gaps and curves
How Long Tape Can Stay On Without Damaging Paint
Because paint adhesion varies by sheen and age, you’ll want to remove painter’s tape promptly to avoid lifting or residue.
Aim for 24 hours to a week on fresh latex; high-quality tape can extend tape longevity up to 14 days in stable conditions.
Older or brittle paint reduces paint durability, so check small sections frequently and don’t leave tape on through temperature swings or prolonged sunlight exposure.
Correct Tape-Removal Technique to Avoid Lifting Paint
If you pull the tape off slowly and at a low angle, you’ll greatly reduce the chance of lifting fresh or fragile paint.
You should peel steadily, keep tape taut, and work toward the surface. For reliable tape removal and paint preservation, follow these tips:
- Score edges gently with a blade
- Peel at a 45°–90° low angle
- Pull slowly and evenly
- Warm stubborn tape slightly
How Long to Wait Before Removing Tape for Clean Lines
Timing depends on the paint: latex usually needs about an hour to become tacky, while oil-based paints can take several hours or overnight.
You should peel at a 45-degree angle back on itself to protect the edge and prevent lifting. If the paint starts to stretch or come up, stop and use a sharp blade to score the tape before finishing the removal.
Peel Timing By Paint Type
When you remove painter’s tape at the right moment, you get sharp, clean lines; remove it too soon or too late and you risk tears, smudges, or lifted paint.
Match peel timing to paint type and consider paint curing and tape performance. Follow guidelines:
- Latex: peel after tacky, 1–2 hours
- Acrylic: 24 hours
- Oil: 48–72 hours
- Fast-dry: 1 hour
Edge Removal Technique
Wait about 45–60 minutes after latex feels dry to the touch, but before it fully cures, to get the cleanest edge; this brief window lets the paint film hold at the tape line so you can pull it away without lifting or tearing.
You should score glossy finishes, peel at a 45-degree angle, and use edge sealing techniques.
These tape removal strategies prevent seepage and jagged lines.
Common Causes of Paint Peel Unrelated to Tape
Although tape can get the blame, paint often peels for other reasons you can fix—poor surface prep, moisture, incompatible paint layers, or extreme temperatures all cause adhesion failure.
You should inspect paint quality, surface condition, primer type, and paint age. Check humidity levels and temperature fluctuations. Improve application technique and control environmental factors.
- Dirty or glossy surfaces
- Excess moisture
- Old paint layers
- Rapid temperature swings
Fixing Paint That Peeled When Tape Came Off
First, you’ll assess how much paint peeled and whether the damage is just surface flaking or deeper layers coming off.
Then you’ll prep the area by scraping loose paint, sanding smooth, and cleaning the surface.
Finally, you’ll prime any bare spots and repaint to match the surrounding finish.
Assess Damage Extent
When tape pulls paint away, start by inspecting the area closely to determine how much paint lifted and whether the substrate (drywall, wood, or metal) is intact.
Do a damage assessment and paint evaluation to decide next steps without immediately repairing.
- Note lift size and depth
- Check substrate firmness
- Photograph for records
- Mark edges for cleanup
Repair And Repaint
Start by cleaning and prepping the damaged area so your repairs bond properly: gently scrape loose paint, sand feathered edges until smooth, and wipe away dust with a damp cloth or tack rag.
Use appropriate repair techniques—fill gouges, sand filler flush, and prime exposed substrate.
Then apply repaint strategies: match sheen and color, feather edges, and remove tape slowly at a 45° angle for a seamless finish.
Quick Troubleshooting: Common Tape-Related Issues
Troubleshooting tape problems is usually straightforward if you know what to look for: peeling, bleeding, residue, or paint lift each have distinct causes and fixes you can apply quickly.
Troubleshooting tape issues is simple: identify peeling, bleeding, residue, or paint lift, then apply the right fix.
Check tape selection and adhesive types first, then try these fixes:
- Peel slowly at a 45° angle to avoid paint lift.
- Use a sharper blade for clean edges.
- Warm stubborn residue with a hair dryer.
- Replace old tape between coats.
Product Checklist: What to Buy for a No-Peel Job
Pick the right supplies and you’ll cut the risk of paint lift dramatically: high-quality painter’s tape rated for your surface (delicate, multi-surface, or exterior), a sharp utility knife or fresh blade for crisp edges, a plastic or metal putty knife for smoothing, tack cloths to remove dust, and a hair dryer or heat gun for stubborn residue.
Also grab compatible primers, brushes, rollers, and drop cloths; match paint types and application techniques to surfaces.
Pro Tips From Painters to Guarantee No-Peel Results
If you want paint lines that stay put, follow pro habits: press tape down firmly with a putty knife or credit card, remove it at a 45° angle while the paint is still slightly tacky, and score the edge with a fresh utility blade when working over glossy or previously painted surfaces.
Press tape firmly, score glossy edges, and remove at 45° while paint is slightly tacky for crisp lines.
- Test tape durability on scrap
- Match tape to paint compatibility
- Work in steady strokes
- Pull slowly and evenly
Health, Safety, and Environmental Notes for Tape Adhesives
Adhesive tapes can affect your health, worksite safety, and the environment, so handle and dispose of them deliberately: you should follow tape safety and safety regulations, read user guidelines, and limit exposure to material toxicity.
Consider adhesive health risks, choose sustainable options and eco friendly alternatives, and reduce environmental impact by recycling, using low-tox formulations, and storing tapes properly to prevent waste.
Frequently Asked Questions
Can Painter’s Tape Remove Wallpaper Adhesive Residue?
Yes — you can sometimes remove light wallpaper adhesive with painter’s tape, but tape effectiveness varies; you’ll need fresh high-tack tape, press firmly, pull slowly at 45°, and accept that stubborn residue often needs solvent or scraping.
Will Tape Leave Residue on Semi-Gloss Kitchen Cabinets?
Measure twice, cut once: you won’t always get residue. Tape’s adhesive strength and removal timing matter, so test first—gentler tape usually won’t harm semi-gloss kitchen cabinets’ finishes if peeled slowly and kept under recommended time.
Can Tape Be Used on Newly Plastered or Skim-Coated Walls?
Yes — you can use tape on newly plastered or skim‑coated walls, but you’ll wait for proper plaster drying time and use tape adhesion techniques like low‑tack tape, short dwell times, and testing a small area first.
Does Tape Affect VOC Levels or Indoor Air Quality?
Imagine a contractor testing low-VOC acrylic tape in a sealed room: you’ll see minimal emissions. You’ll want to check tape composition and indoor humidity, since solvent-based adhesives raise VOCs especially in high humidity.
Can Tape Damage Wallpaper Seams or Borders When Removed?
Yes—you can damage wallpaper seams or borders when removing tape, especially on delicate wallpaper types; protect seams with low-tack tape, test a small area first, and pull slowly at a low angle to preserve seam protection.
Conclusion
You’ll tape clean, smooth edges that stay crisp — not jagged, peeling chaos — and you’ll feel the relief when paint lifts clean with the tape, not the drywall. Follow the quick tests, pick low-tack painter’s tape, prep surfaces, and peel at the right angle and speed. The right tape turns a risky, messy job into a calm, precise finish, so your walls look professional and your cleanup stays simple.
