
What to Do With Diamond Painting When Finished: Creative Ideas
When you finish a diamond painting, seal it with clear glue or spray mount, flatten wrinkles gently with a cloth and low heat, then photograph high‑resolution shots for a digital archive. Mount or frame it with protective glass or acrylic, or repurpose motifs into pillows, coasters, jewelry, or mixed‑media art. Donate, sell, or commission pieces online, and store finished works in acid‑free sleeves with silica packs. Keep going to learn detailed tips for framing, repair, and creative upcycles.
Seal & Protect Your Diamond Painting
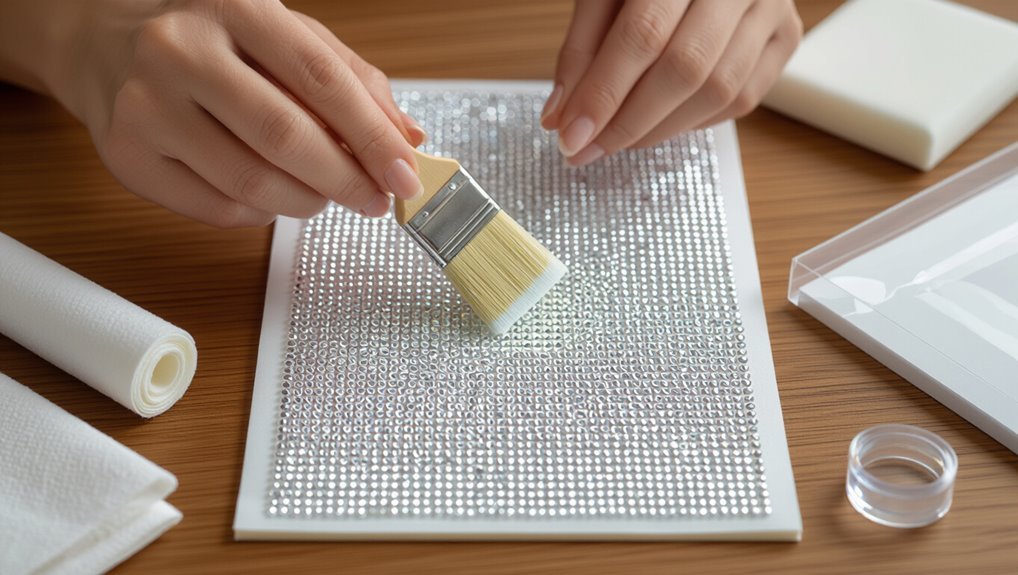
Once your diamond painting is finished, seal it to lock gems in place and protect the canvas from dust, moisture, and sunlight.
You’ll choose adhesive options like clear glue or spray mount, then apply careful sealing techniques—brushing thin layers or misting evenly.
Let each coat dry fully, avoid pooling, and test a corner first so your gems stay secure and colors stay true.
Flatten & Smooth Wrinkles From Diamond Paintings
After sealing, you may still notice small wrinkles or ripples around the gems; you can smooth these out with a few careful steps to make your painting look its best.
Lay the canvas face down on a flat surface, cover with a soft cloth, and press evenly.
Use gentle heat from an iron (low, no steam) or roller from diamond painting tools for effective wrinkle removal techniques.
Photograph & Digitally Archive Your Finished Piece
Once your diamond painting is finished, photograph it in even light and at multiple angles so you get sharp, true-to-color images.
Use a tripod or steady surface and shoot in high resolution to preserve detail for prints or sharing.
Then organize your files with clear names, dates, and folders so you can find and back up each piece easily.
Capture High-Quality Images
A well-photographed diamond painting preserves your work and makes sharing it easy, so set up a clean, evenly lit area and use a steady camera or phone to capture true color and detail.
Frame tightly, avoid glare with polarizing tricks, try varied lighting techniques, adjust camera settings for low ISO and correct white balance, and shoot RAW or high-quality JPEGs for crisp, shareable images.
Organize Digital Archives
When you’ve photographed your finished diamond painting, organize and back up those images immediately so they’re easy to find and safe from loss.
Create a consistent naming scheme, store originals and edited versions in dated folders, and keep at least one offsite backup (cloud or external drive).
Use digital storage and archival techniques to preserve files.
- Catalog metadata
- Sync to cloud
- Verify backups
Mount & Frame Diamond Painting for Wall Display
When you’re ready to turn your diamond painting into wall art, start by choosing a mount that supports the canvas without bending it.
Frame it with protective glass or acrylic to keep the drills clean and secure, and use archival backing if you can.
Finally, attach proper hanging hardware and anchor it to the wall so it stays level and safe.
Choose A Suitable Mount
Mounting your diamond painting correctly turns it from craft to gallery-ready art, so pick a method that protects the gems and complements your space.
Consider mounting options that match decorative frames and support varied wall placements. Focus on color coordination, hanging styles, and other aesthetic considerations.
- Float mount for depth
- Foam board for budget
- Stretcher bars for tension
Frame With Protective Glass
A protective glass frame will keep your diamond painting pristine while giving it a polished, finished look—so pick a frame that fits the finished canvas size and style of the piece.
You’ll choose among display options like floating or standard frames; use framing techniques that secure the canvas flat, prevent dust, and reduce UV fading, ensuring the artwork stays vibrant for years.
Secure And Hang Properly
Picture hook and level in hand, you’ll want to secure and hang your diamond painting so it stays flat, straight, and safe on the wall.
Use solid hanging techniques and thoughtful wall placement:
- Mount on foam board, tape edges, add D-rings.
- Frame with backing, use hanging wire for balance.
- Use wall anchors for studs or heavy pieces.
Make a DIY Floating Frame for Diamond Painting
While you can leave your finished diamond painting unframed, creating a DIY floating frame gives it a modern, gallery-ready look that’s surprisingly simple to achieve; you’ll just need basic tools, a few materials, and about an hour of focused work. You’ll mount the piece slightly inset for a floating frame effect, creating a sleek creative display.
| Tool | Purpose |
|---|---|
| Frame kit | Edges |
| Foam board | Backing |
| Glue | Secure |
| Ruler | Measure |
| Hanging hardware | Install |
Stretch Diamond Painting Onto Canvas Frame
Before you stretch your diamond painting, measure the canvas and frame carefully so everything lines up.
Use appropriate mounting adhesive and techniques to keep the diamonds secure without puckering the fabric.
Finish with neat edges and a protective backing or frame to showcase your work and keep it intact.
Prepare And Measure Canvas
Start by laying your diamond painting face down on a clean, flat surface and remove any wrinkles or creases by smoothing gently from the center outward; this makes it far easier to get accurate measurements and a tight stretch when you mount it to the frame.
Use canvas types and measuring tools; follow preparation steps, layout planning, color matching, and artistic techniques.
- Measure edges.
- Mark centers.
- Note bleed.
Mounting Adhesive Techniques
Now that you’ve measured and marked the canvas, it’s time to stretch it onto the frame and choose the right mounting adhesive. You’ll select mounting materials and adhesive types after careful surface preparation. Use secure mounting techniques for varied mounting surfaces and plan display options.
| Item | Purpose |
|---|---|
| Adhesive | Bonding |
| Tape | Temporary hold |
| Staple | Edge secure |
| Glue | Permanent |
| Pads | Spacing |
Finishing And Framing Tips
1 simple trick will make stretching your diamond painting onto a canvas frame much easier: work from the center out and keep the canvas taut as you secure each side.
You’ll consider color choices, frame styles, backing materials, hanging techniques, preservation methods, design themes, and embellishment ideas.
- Staple evenly
- Trim excess
- Add backing and hang
Create Pillows, Coasters & Trays From Diamond Painting
Transform your finished diamond painting into functional décor by mounting sections onto pillows, coasters, or serving trays—each piece brings sparkle to everyday items and makes great gifts.
You can sew diamond panels onto pillow covers, affix sealed mosaics to custom coasters, or inset designs into decorative trays.
These projects let you personalize home accents and create unique gifts that showcase your handiwork.
Turn Small Diamond Paintings Into Jewelry & Keychains
If you enjoyed turning panels into home accents, you can also shrink your favorite motifs into wearable pieces and everyday charms.
Try these ideas to make jewelry design and keychain crafting simple, using resin casting and smart embellishment techniques for creative accessories and personalized gifts:
- Seal small canvases into bezels.
- Embed gems in resin pendants.
- Attach hardware for instant charms.
Sew Diamond Painting Onto Bags, Pouches & Phone Cases
Sewing diamond painting onto bags, pouches, and phone cases lets you combine sparkle with everyday function—just trim the canvas, secure the edges, and stitch it in place for a custom, durable accent.
Choose fabric choices that handle weight, plan design placements for balance, and use proper sewing techniques for strength.
Explore subtle embellishment options like beads or topstitching to integrate the piece seamlessly.
Repurpose Loose Gems Into Mixed‑Media Art
Give your leftover drills a second life by weaving them into mixed‑media pieces that add texture, sparkle, and dimension to canvases, journals, or home decor.
Try these ideas using mixed media techniques and artistic repurposing:
- Gem collage for art journaling as creative embellishments and decorative accents.
- Gem mosaics on frames for unique displays.
- Layered pieces combining paint, fabric, and gems.
Gift Presentation: Wrap & Package Diamond Paintings
Anyone receiving your diamond painting will appreciate thoughtful wrapping that protects the piece and highlights its sparkle.
You’ll use gift wrapping and presentation techniques like padded tubes, decorative boxes, or flat protective boards.
Choose wrapping materials that match themed gifts, add embellishment ideas—ribbons, charms—and include personalized notes.
Creative packaging makes the reveal special and keeps your artwork safe during transit.
Donate or Auction Your Diamond Painting for Charity
If you want to support a cause and share your work’s sparkle, donating or auctioning a diamond painting can raise funds and awareness quickly.
You can:
- Donate to community donation drives or local shelters to brighten spaces.
- Offer pieces to charity auction or fundraising events to raise money.
- Host crafting workshops or art therapy sessions, blending creativity with giving.
Sell or Commission Diamond Paintings Online
1 smart way to turn your hobby into income is to sell or take commissions for diamond paintings online.
You’ll use market strategies and niche targeting to choose sales channels and online platforms.
Apply pricing tips, branding essentials, and promotional techniques on social media.
Prioritize customer engagement and clear shipping considerations to build trust and repeat business while streamlining fulfillment.
Store Diamond Paintings: Long‑Term Care & Cleaning
When you’re storing finished diamond paintings long-term, protect them from dust, humidity, and direct sunlight to preserve sparkle and adhesive strength.
Use proper diamond painting storage and gentle cleaning techniques to keep pieces pristine. Consider:
Use proper storage and gentle cleaning to keep finished diamond paintings pristine and sparkling for years.
- Seal in acid-free sleeves with silica packs.
- Store flat in a cool, dark place.
- Dust lightly with a soft brush before shelving.
Fix Gaps, Loose Gems & Other Finish Problems
After you finish a piece, check it closely for gaps, loose gems, or misaligned drills so you can fix problems before they worsen; small issues are easy to repair but can ruin the overall look if ignored.
You’ll use gap filling and gem securing strategies, pick adhesive options wisely, apply touch up techniques, and follow restoration methods for finishing touches.
Emphasize problem solving and quality control.
Materials & Tools Checklist for Finishing and Upcycling
You’ll want a compact kit of essential finishing supplies—sealant, roller, tweezers, and a lint-free cloth—to make your piece durable and polished.
For upcycling, gather tools like a craft knife, strong adhesive, sanding paper, and mounting hardware so you can transform canvases into trays, coasters, or framed art.
Keep everything organized in one box so you can finish projects quickly and start upcycling whenever inspiration strikes.
Essential Finishing Supplies
A handful of reliable tools and materials will take your diamond painting from sticky canvas to polished piece you’re proud to display or upcycle.
You’ll want essential tools for finishing techniques and protection:
- Frame or mounting board for display and stability.
- Clear sealer (spray or brush-on) to lock beads.
- Tweezers, roller, and clean cloth for alignment and dust removal.
Upcycling Tools Checklist
When you’re ready to give your finished diamond painting new life, gather a concise set of tools and materials that’ll make upcycling efficient and durable: adhesive rollers, backing boards, framing supplies, sealants, fabric glue, trim scissors, and storage boxes.
Use crafting techniques and restoration methods for repairs, creative storage for supplies, and leverage project showcases, community sharing, event participation, collaboration opportunities, and inspiration sources to spark ideas.
Frequently Asked Questions
How Do You Remove Adhesive Residue From the Canvas Edges?
You’ll gently lift residue with adhesive removal techniques: use a soft cloth, mild rubbing alcohol or adhesive tape, working slowly to avoid damage. Follow canvas preservation tips like testing a corner and drying fully to protect edges.
Can Diamond Paintings Be Used Outdoors or in Humid Climates?
You can, but you shouldn’t leave diamond paintings exposed; they’re not inherently weather resistant. If you want outdoor display, seal them with UV‑protective, waterproof varnish and mount under shelter to avoid humidity, fading, and adhesive failure.
Are There Copyright Issues When Selling Fan Art Diamond Paintings?
Yes — you can face issues: when selling fan art you’ll need to follow copyright laws, respect selling restrictions, and manage legal considerations like permissions or licenses, so you shouldn’t assume commercial sale is automatically allowed.
How Do You Transport Large Diamond Paintings Without Damaging Them?
You’ll practically need armor: roll finished canvases face-in, tape lightly, slip into a rigid tube or flat portfolio, add bubble wrap, label fragile, and use diamond painting storage sleeves for protective transport so nothing shifts or scratches.
Can Kids Safely Help Finish or Upcycle Diamond Paintings?
Yes — you can safely involve kids using kid friendly techniques like blunt tools, washable glue, and supervised trimming; you’ll enjoy creative collaboration crafting framed pieces, magnets, or mixed-media panels while teaching patience and care.
Conclusion
You’ve turned tiny sparkling beads into something jaw‑droppingly gorgeous—don’t let it flake, fold, or fade! Seal it, smooth it, frame it, or turn it into a show‑stopping gift so that your masterpiece survives applause, pets, and accidental coffee. Photograph and archive, sell if you must, or stash it away like a treasure. Treat it with a touch of reverence—this isn’t just craft, it’s glittery soul therapy that deserves center stage forever.
