
Why Is My Paint Roller Leaving Bubbles? Causes and Fixes
You’re getting bubbles because you’re trapping air or solvent vapors under wet paint or using the wrong roller, technique, or conditions. Thin paint, overworking, rolling too fast, heavy pressure, dirty or shed-prone covers, high humidity, or cold surfaces all encourage foaming and blisters. Smooth small blisters with a brush; sand and recoat dried bubbles; slow down, load rollers properly, and match nap to texture to prevent recurrence. Keep going and you’ll get exact fixes and a troubleshooting checklist.
Who This Guide Is For and What You’ll Learn
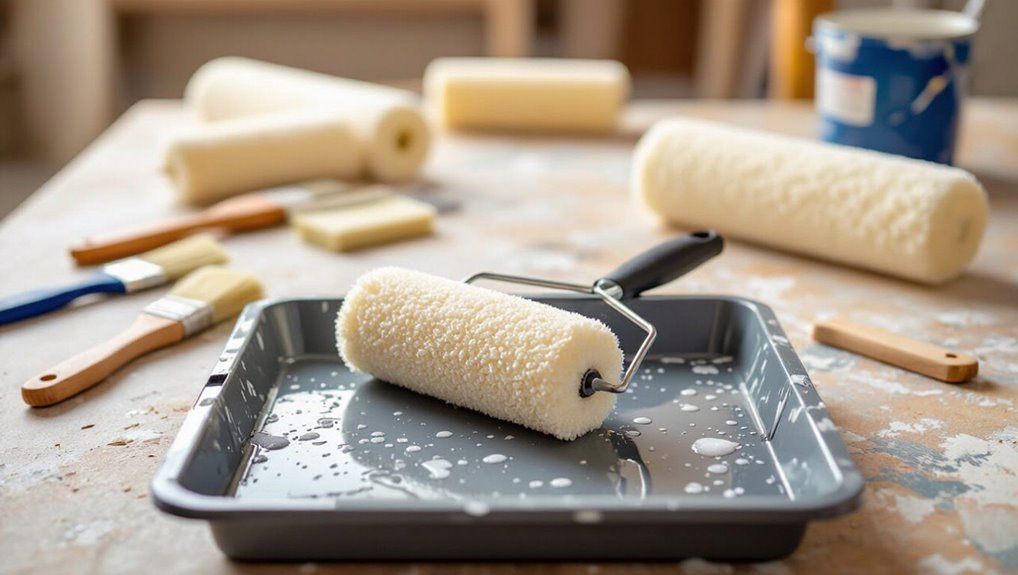
If you’re tackling a paint job at home or managing a small renovation, this guide is for you.
You’ll learn practical DIY painting steps: project planning, paint selection, surface preparation, and roller techniques that improve paint application and finish quality.
Expect clear troubleshooting tips, bubble prevention strategies, and roller maintenance advice so you can avoid common issues and finish confidently.
Quick Answer and 3 Fixes to Try Now
Quick answer: bubbles happen when air or solvents get trapped beneath wet paint, but you can often fix them yourself with three simple methods. Try these bubble solutions and adjust roller techniques:
| Fix | When to use |
|---|---|
| Smooth with a brush | Small, fresh bubbles |
| Light sand & recoat | Dried bubbles |
| Thin paint & roll slowly | Widespread bubbling |
How to Quickly Diagnose Bubble Types
Look at the bubble patterns to spot air entrapment—clustered pinholes mean trapped air, while larger blisters often point to surface issues.
Check paint consistency: thin, runny paint and over-thinning usually cause more foaming, while overly thick paint can trap solvent gases.
Finally, consider the surface and your technique—poor adhesion, high humidity, or aggressive rolling will help you pinpoint the root cause.
Air Entrapment Patterns
When you inspect paint roller bubbles, start by noting their size, location, and pattern—those details tell you whether air is trapped in the paint film, coming from the substrate, or introduced by your technique.
Small, evenly spaced beads often reflect air bubble physics from aggressive roller application techniques.
Large, clustered domes near seams indicate substrate outgassing or trapped moisture.
Adjust pressure and stroke speed accordingly.
Paint Consistency Clues
Noting bubble patterns gives you clues about where air is coming from, but paint consistency often tells you what those bubbles mean. Check paint viscosity first; too thin or thick creates different bubbles. Combine quick checks with roller maintenance to isolate issues.
| Clue | Likely Cause | Quick Fix |
|---|---|---|
| Small, uniform | Low viscosity | Thicken slightly |
| Large, irregular | Overworked roller | Clean/replace roll |
Surface And Technique
Start by scanning the surface and your technique to match bubble patterns to causes: run your hand over the dried paint to feel for texture, note whether bubbles cluster along seams or high spots, and watch how your roller lays down paint—quick, jerky strokes usually trap air at edges while dragging over rough patches forces bubbles out from valleys.
Adjust roller technique and improve surface preparation accordingly.
How Paint Bubbles Form
You’ll usually see two main causes: air trapped under the roller or air released from the paint as solvents evaporate.
Trapped air bubbles form when the roller pushes pockets of air into the wet film, especially over rough surfaces or with thick application.
Solvent outgassing happens when solvents escape from the drying paint and push tiny bubbles up through the coating.
Trapped Air Bubbles
When you roll paint over a surface, tiny pockets of air can get trapped between the roller nap and the paint film, and those pockets expand or escape later as visible bubbles.
You’ll cause trapped air when you press too hard, roll too fast, or use an overly dense nap. That sudden release drives bubble formation, leaving uneven texture and pinholes.
Solvent Outgassing
If solvents in the paint evaporate from below the surface faster than the top skin can dry, they’ll push vapor upward and form bubbles as that trapped gas seeks escape. You should check solvent evaporation rates and choose compatible roller material to reduce outgassing. Work in thin coats, control temperature, and use slower solvents if needed.
| Factor | Fix |
|---|---|
| Evaporation | Thin coats |
| Roller material | Match paint |
| Temperature | Cool room |
| Solvent type | Slower solvent |
Common Roller Causes of Bubbles
Roller-related bubbles usually come from a few predictable mistakes: using a low-quality or overly worn roller, loading the nap unevenly, or rolling too fast so air gets trapped in the wet paint.
Check roller materials for shedding or improper weave, load evenly, and slow your stroke.
Adjust application techniques—press lighter, overlap strokes, and maintain a wet edge to prevent trapped air and bubbles.
Pick the Right Nap for Your Surface
Pick the right roller nap for the surface you’re painting to reduce bubbles and get even coverage.
Use a short nap on smooth surfaces for a sleek finish and a longer nap on textured walls to reach crevices.
Matching nap to surface saves touch-ups and keeps paint from trapping air.
Match Nap To Surface
When you’re choosing a roller nap, match its length to the texture of the surface: shorter naps (1/4″–3/8″) suit smooth walls and trim, medium naps (1/2″–3/4″) work well for lightly textured or standard drywall, and long naps (1″–1½” or more) are best for rough or stucco surfaces so the roller gets paint into crevices rather than leaving bare spots.
- Consider roller materials for finish
- Check surface compatibility before buying
- Swap nap for consistent coverage
Short Nap For Smooth
If your walls are smooth—trim, cabinets, or freshly plastered drywall—a short nap (about 1/4″–3/8″) will give you the flattest, most even finish because it holds less paint and lays it down thinly.
You’ll get short nap benefits like reduced splatter and fewer bubbles, plus a smooth application that minimizes texture pickup.
Choose a dense roller and roll evenly for best results.
Long Nap For Textured
Because textured surfaces need more paint to fill grooves and crevices, you’ll want a long nap—typically 3/8″ to 1″—so the roller holds enough paint to cover peaks and valleys without dragging.
You should focus on roller selection to avoid bubbles and uneven coverage.
Consider:
- Pile depth matched to texture
- Fabric type for consistent release
- Proper loading and pressure techniques
Why a Dirty Roller Traps Air
Though it seems harmless, a roller crusted with dried paint or lint actually holds pockets and grooves that trap air as you roll.
Those pockets release tiny bubbles into the fresh coat. You’ll see bubbling increase if nap is caked.
Follow roller maintenance tips to prevent buildup, and use deliberate air release techniques—slow, even passes and occasional light pressure—to minimize trapped air without replacing covers.
Prep: How to Clean and Prime Roller Covers
Start by removing loose fibers and dried paint from the roller with a stiff brush or your fingers.
Remove loose fibers and dried paint from the roller using a stiff brush or your fingers.
Then rinse it thoroughly under warm water until the run-off is clear. You’ll follow basic roller maintenance and cleaning techniques, then prime the nap lightly.
Tips:
- Squeeze excess water and let the cover air dry.
- Use mild detergent for stubborn paint.
- Lightly dampen before priming.
Proper Paint Loading Technique, Step‑by‑Step
1. You’ll learn paint roller techniques and paint loading methods step-by-step to avoid bubbles. Dip, roll off excess in tray, and reload evenly. Work in short passes, checking coverage and nap saturation. Clean drips and edges as you go.
| Step | Action | Tip |
|---|---|---|
| 1 | Dip roller | Submerge 50% |
| 2 | Roll tray | Even coat |
| 3 | Inspect | Adjust load |
Best Rolling Speed and Pressure to Use
Now that you’ve mastered loading the roller evenly and working in short passes, focus on how fast and how hard you roll—both directly affect bubbles and finish uniformity.
You’ll aim for an ideal roller speed and consistent, light optimal pressure application.
Tips:
- Roll steadily, no fast flicks
- Apply even, moderate pressure
- Slow down at edges to smooth out paint
Wrong Roller Motion for Different Paints
Different paints behave differently under the roller, so using the same motion for all of them will often give you bubbles, lap marks, or an uneven nap.
You should adjust your roller technique to match paint interaction: use long, even strokes for thin latex, a crisscross or tip-off for thicker emulsions, and avoid overworking edges.
Match motion to paint viscosity.
When Trapped Air in the Roller Creates Bubbles
If your roller wasn’t soaked properly before use, air pockets can stay trapped in the nap and cause bubbles as you roll.
Overloading the core with paint or squeezing the roller too hard can force air out unevenly and leave blister-like spots on the wall.
Pay attention to how you load and roll the cover so trapped air doesn’t get pushed onto the surface.
Improper Roller Soaking
One common cause of roller bubbles isn’t soaking the nap properly—when air stays trapped inside the roller core, it releases as you roll and leaves small blisters in the paint.
You should follow roller soaking techniques and paint absorption tips to prevent this.
Try these steps:
- Submerge and squeeze to expel air
- Let soak until saturated
- Roll off excess before painting
Excess Paint In Core
After you’ve soaked and squeezed a roller, don’t assume it’s ready—overloading the core with paint can trap air pockets that push up as bubbles while you roll.
Check for excess paint by squeezing and tapping the roller; heavy core saturation means paint’s pooled inside the nap.
Reduce loading, spin or roll off on a tray, and replace the cover if bubbles persist.
Trapped Air During Rolling
When you roll too quickly or lift the roller abruptly, air can get trapped between the nap and the surface, then escape as tiny bubbles that mar the finish; slowing your strokes and keeping a steady, even pressure helps prevent that air from forming in the first place.
Use correct roller technique and manage air pressure.
- Roll slowly, steady pressure
- Re-load evenly
- Backroll to smooth
Shaky or Fast Rolling: What It Does
If you roll too fast or shake the roller as you work, you’ll whip air into the paint and leave a trail of tiny bubbles on the surface.
Using a shaky technique or fast application traps microscopic air pockets in the nap. Slow, steady strokes let bubbles escape and the paint level out.
Pause to smooth high spots and avoid jerky motion for a uniform finish.
Paint Viscosity Problems: Too Thin or Too Thick
If your paint’s too thin, it’ll run and trap air under the roller, causing bubbles and poor coverage.
If it’s too thick, the roller drags and pushes air into the film, also leaving blisters.
You’ll learn how to spot each problem and adjust viscosity for a smooth finish.
Too Thin Paint
A paint that’s runnier than it should be will sag, drip, and trap air more easily, causing bubbles to form under the roller’s nap.
You’ll notice uneven coverage when paint viscosity is off; adjust mixing and avoid over-diluting. Improve application techniques to reduce entrapped air.
- Use manufacturer’s thinning guidelines
- Roll slowly, avoid splashing
- Strain mixed paint before loading
Too Thick Paint
When paint’s too thick, it resists flattening under the roller and traps solvent and air pockets that pop into bubbles as the film dries.
You’ll see rough, stippled texture and clumps rather than a smooth finish. You should thin the paint per manufacturer guidance, stir thoroughly, and test viscosity.
Proper paint thickness improves roller application, prevents entrapment, and yields an even, bubble-free coat.
When to Thin Paint and How Much
Though thinning isn’t always necessary, you’ll want to do it when paint is too thick to level, splatters excessively, or clogs your roller and leaves bubbles.
You’ll use paint thinning to improve paint consistency; add small amounts, test, repeat. Aim for smooth, not watery.
- 5–10% water for latex
- Manufacturer thinner for oil/enamel
- Stir and retest before rolling
Mixing Methods That Create Foam
When you mix paint too long or too fast you’ll trap air that shows up as foam on the roller.
Using high-speed mixers or shaking cans vigorously makes that worse by whipping more bubbles into the finish.
Next we’ll look at how each method creates foam and how to avoid it.
Overmixing Paint Thoroughly
A few minutes of vigorous mixing can seem like progress, but overmixing paint traps air and creates foam that shows up as tiny bubbles on your roller finish. You should stop when pigment and binder are uniform.
Avoid aggressive overmixing techniques and let paint settle briefly.
- Stir gently with a flat stick
- Tap container to release trapped air
- Pour slowly to reduce paint foam
Using High-Speed Mixers
If you crank paint in a high-speed mixer, you’ll quickly whip in air and foam that won’t disappear before you roll. You should avoid prolonged high speed mixing to prevent trapped bubbles.
Let mixed paint rest after blending so entrained air escapes, and use gentle stirring for final adjustments. These steps improve foam reduction and stop roller bubbles from ruining your finish.
Shaking Cans Vigorously
You’ve seen how high-speed mixing traps air; shaking paint cans vigorously does the same but often faster and less visibly.
If you use a rough shaking technique, you’ll whip foam into the paint. Keep can stability and gentle motion to reduce bubbles.
Consider these tips:
- Shake minimally, then rest the paint
- Tap sides to settle air
- Stir slowly before rolling
Correct Mixing Tools and Methods
Choose the right mixing tools and you’ll cut air bubbles and get a smooth, consistent finish. You should use proper mixing techniques and smart tool selection: paddle stirrers or low-speed drills reduce entrained air. Stir gently, avoid whipping. Match tool size to can volume and strain paint if needed.
| Tool | Speed | Best for |
|---|---|---|
| Paddle | Low | Full cans |
| Drill | Low | Large batches |
| Spoon | Slow | Small jars |
Additives and Extenders That Increase Foaming Risk
When you add extenders, surfactants, or some rheology modifiers to paint, they can boost foam formation by lowering surface tension and stabilizing bubbles.
You should watch additive properties closely and avoid unnecessary foaming agents.
Consider these risks and steps:
- Identify high-foaming additives
- Test small batches for bubbles
- Reduce agitation and opt for low-foam substitutes
Using Paint Conditioner Correctly (And When Not To)
Although paint conditioners can cut brush and roller drag and reduce brush-caused foam, you should use them sparingly and only when compatibility and thinning limits are confirmed.
You’ll see paint conditioner benefits like smoother laydown, but overuse increases bubbles.
Follow manufacturer instructions for proper dilution, test a small batch, and avoid conditioners with unknown solvents or additives that may destabilize surface tension and trap air.
Reusable Rollers: Residues That Cause Bubbles
If you reuse rollers without thoroughly cleaning them, old paint buildup can create lumps that trap air and make bubbles.
Leftover soap or detergent can also leave a film that prevents new paint from flowing smoothly.
Even stray fibers and debris caught in the nap will introduce imperfections and promote bubbling.
Old Paint Buildup
Because old paint and dried fibers trap solvent and air, reusable rollers with residue can eject tiny bubbles as you roll, leaving a pocked finish.
You should remove buildup to prevent poor paint layer interaction and paint adhesion issues. Clean or replace rollers, and:
- Scrape hardened areas gently
- Soak in appropriate solvent briefly
- Inspect nap for trapped debris
Soap And Detergent Residue
Old paint buildup isn’t the only culprit—soap and detergent left in reusable rollers can also cause tiny bubbles as you paint. You should rinse thoroughly after cleaning, test different soap types and avoid strong detergent brands that leave films. Replace or deep-clean rollers before use to stop bubbling.
| Step | Action | Tip |
|---|---|---|
| 1 | Rinse | Use mild soap |
| 2 | Inspect | No residue |
| 3 | Dry | Air dry fully |
Fibers And Debris Left
Lint and stray fibers left in reusable rollers will trap air and create tiny bubbles as you paint, so you need to remove them before starting.
You should inspect and clean rollers to prevent fiber contamination and guarantee proper debris management.
Do this by:
- Brushing out loose fibers
- Rinsing and spinning to dislodge debris
- Storing rollers in clean, sealed containers
Poor-Quality Roller Covers and Defects to Avoid
When you pick a cheap or poorly made roller cover, you’re setting yourself up for bubbles, streaks, and an uneven finish. Check roller material and surface compatibility: low-quality nap sheds, has seams, or holds air. Replace defective covers and match nap to substrate.
| Defect | Effect | Fix |
|---|---|---|
| Shedding | Spots | Replace |
| Seams | Lines | Use seamless |
| Foam voids | Bubbles | Choose dense foam |
Surface Temperature and Humidity Effects
If you paint on a cold surface, the finish can skin over unevenly and trap solvents, causing bubbles as it warms.
You’ll also get trouble when humidity is high—moisture can prevent proper film formation and create blistering.
Before you roll, check temperature and humidity and wait for conditions within the paint maker’s recommended range.
Cold Surface Risks
Because cold surfaces don’t let paint dry properly, you’ll see more bubbling and poor adhesion when the substrate is below the paint’s recommended temperature range.
You should avoid painting on a cold surface and monitor temperature effects closely.
Consider these precautions:
- Warm the room and substrate before painting
- Use fast-curing products rated for low temps
- Test a small area to confirm adhesion and finish
High Humidity Problems
Cold conditions aren’t the only environmental issue you’ll face; high humidity can cause its own set of paint roller problems.
You’ll notice slower drying, blistering, and bubbles when humidity effects raise moisture levels on surfaces.
Work in lower humidity or use dehumidifiers and fans, thin paint slightly, and allow extra drying time to prevent trapped moisture and poor film formation.
New Paint vs. Old Finishes: Reaction Bumps
When you roll new paint over an older finish that’s incompatible, the chemicals can react and create small raised bubbles or “reaction bumps.”
You’ll spot uneven texture where finish compatibility failed.
To address it, you should:
- Identify the old coating and test adhesion
- Sand and remove reactive layers
- Prime with a compatible bonding primer before repainting
Flash Bubbling and Solvent Evaporation
If paint dries too fast on the surface while solvents trapped below are still evaporating, you’ll get tiny raised blisters called flash bubbles that mar the finish.
You can prevent them by controlling temperature, humidity, and airflow to reduce rapid solvent effects.
Thin coats, longer tack times between layers, and using slow-evaporating additives help bubble prevention so rollers leave a smooth, durable film.
Alkyd vs. Latex: Formulation Differences
Although both alkyd and latex paints aim to cover surfaces smoothly, they rely on very different chemistries that affect drying, film formation, and how rollers interact with the wet film.
Although both alkyd and latex paints seek smooth coverage, their different chemistries change drying, film formation, and roller interaction.
You’ll notice differences in tack, cure time, and bubble susceptibility between alkyd formulations and latex formulations:
- Alkyd formulations: slower dry, more leveling, solvent-sensitive
- Latex formulations: faster dry, water-based, less solvent reflow
Roller choice affects bubble pickup.
Spray vs. Roller: Why Finishes Differ
Having covered how alkyd and latex chemistries affect drying and bubble behavior, you’ll see that application method plays an equally large role in the final surface.
You’ll notice spray benefits: fine atomization, even film, and fewer entrapped air pockets.
Roller techniques offer texture control and faster coverage but can trap air if overloaded or rolled too quickly, so adjust pressure and nap for smoother results.
How to Remove Bubbles Mid-Job
When you spot bubbles forming while you’re rolling, stop and tackle them right away to prevent trapped air from ruining the finish.
Use quick mid job solutions to smooth wet bubbles with gentle pressure.
Act fast: smooth wet paint bubbles with gentle pressure to preserve a flawless finish mid-job.
Try these bubble removal techniques:
- Lightly roll over bubbles toward wet paint
- Use a fine-tip brush to pop and level
- Feather edges with a damp roller for uniform texture
Fixing Dried Bubbles and Blisters
Don’t ignore dried bubbles and blisters—they’ll keep compromising the finish if you don’t fix them properly.
Scrape loose paint with a putty knife, sand edges smooth, and clean dust.
Apply appropriate filler, sand again, prime the spot, then repaint.
These bubbling remedies and blister repair steps restore a flat, durable surface and prevent future peelback when you follow proper prep and priming.
When Bubbles Signal Moisture or Contamination
If paint bubbles reappear despite proper prep, they’re often telling you there’s moisture or contamination underneath the coating.
You should locate the problem quickly: use moisture detection and inspect likely contamination sources before recoating.
- Check for leaks, condensation, and wet substrate.
- Look for oily residues, dust, or mildew on the surface.
- Test small areas, dry thoroughly, then repair before repainting.
Tools and Products to Prevent Roller Bubbles
Pick the right tools and products and you’ll cut bubble problems before they start: choose high-quality rollers with the proper nap for your surface, use a low-shed synthetic or microfiber cover to reduce lint and foam entrapment, and pair them with a roller frame that holds the nap evenly so you get consistent pressure. Follow roller maintenance tips and use bubble prevention products.
| Tool | Material | Benefit |
|---|---|---|
| Roller cover | Microfiber | Low lint |
| Frame | Sturdy | Even pressure |
| Tray | Ridged | Release air |
| Cleaner | Mild solvent | Extends life |
Quick Prep Checklist Before You Start Rolling
1 quick checklist will save you time and keep bubbles at bay: confirm the surface is clean and dry, stir the paint thoroughly, strain it if needed, choose the correct nap roller and attach it securely, and set up a ridged tray with enough paint so you can load the roller evenly.
You’ll focus on roller preparation and surface cleaning before you roll.
- Check tools
- Test load
- Work area ready
Common Rookie Mistakes Pros Avoid
You’ve prepped the paint and tools, now make sure you don’t sabotage the job with avoidable habits.
Don’t overload the roller, skip back-rolling, or paint over dirty surfaces — common rookie mistakes that trap air and cause bubbles.
Don’t overload the roller, skip back-rolling, or paint dirty surfaces — rookie errors that trap air and cause bubbles.
Follow expert tips: use proper nap, maintain even pressure, and keep a wet edge.
Fix habits early to get smooth, bubble-free results.
Troubleshooting Flowchart: Find the Cause Fast
Want to find the cause fast? Use this quick troubleshooting flowchart to isolate issues and guide bubble prevention and roller maintenance.
Follow steps, check paint, roller, and technique, then fix.
- Inspect paint viscosity and drying time.
- Check roller condition and frame for damage.
- Test application speed and pressure; adjust technique for even coverage.
Frequently Asked Questions
Can Paint Bubbles Indicate a Chemical Reaction With Previously Applied Coatings?
Yes — you can get bubbles from a chemical reaction with old coatings; you’ll see compromised paint adhesion when surface preparation’s poor, and incompatible layers or contaminants react, causing bubbling, lifting, and weakened finish that you’ll need to strip.
Can Primer Selection Reduce the Risk of Topcoat Bubbling?
Yes—you can reduce bubbling by choosing appropriate primer types and doing thorough surface preparation. Use adhesion-promoting or stain-blocking primers on clean, dry surfaces; they’ll improve topcoat bonding and cut the risk of trapped solvents or poor adhesion causing bubbles.
Do Metallic or Textured Paints Require Special Rolling Techniques?
Like tuning an instrument, you’ll adjust technique: metallic finish needs light, even strokes to avoid streaks; textured surfaces demand thicker nap and stippling. Use proper rolling techniques for consistent paint application and controlled coverage.
Can Extreme Cold Cause Bubbling During Paint Curing?
Yes — extreme cold can cause bubbling during curing. You’ll see paint temperature drop slow drying, trap solvents, and with high humidity levels condensation forms; together they’ll create blisters, so avoid painting in freezing or very cold, damp conditions.
Should I Replace Rollers After Solvent-Based Paint Use?
Yes — you should replace rollers after solvent-based paint use if cleaning can’t fully remove residue; you’ll avoid solvent compatibility issues, preserve finish quality, and follow roller maintenance tips like testing cleaners and storing separately to prevent contamination.
Conclusion
You’ve learned why rollers bubble and how to fix them — and you’ll avoid that popcorn-ceiling look next time. About 80% of DIYers report bubbling at least once, so you’re not alone; think of two in every ten rooms turning out smoother on the first try. Use the quick fixes, follow the prep checklist, and check your roller and paint temperature. Do that, and your next coat will lay flat, even, and professional.
