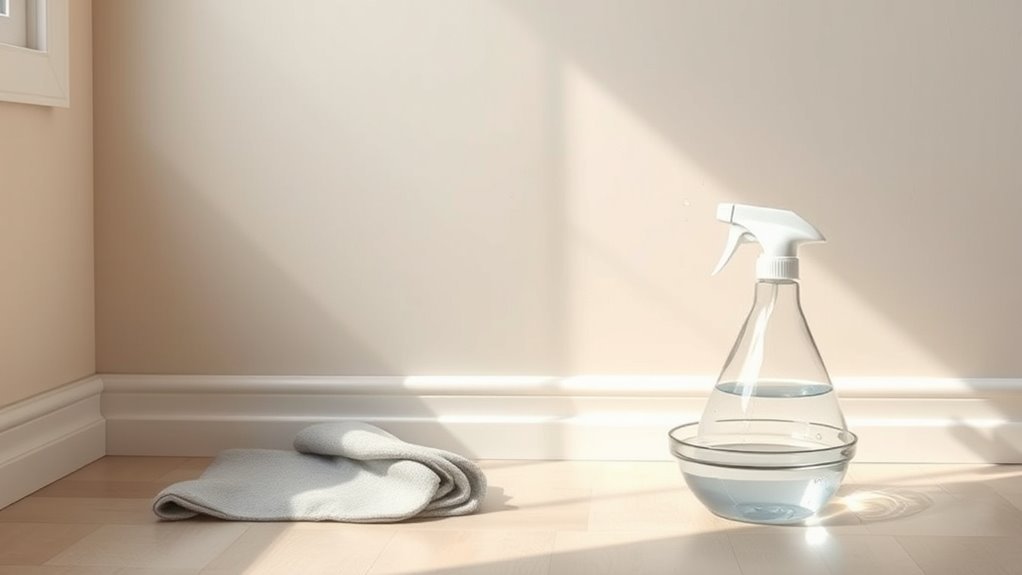
How to Wash Painted Walls Without Leaving Streaks
You can wash painted walls without streaks by starting with a dry dusting, testing a mild cleaner in a hidden spot, and working top-to-bottom in small sections. Use a well-wrung microfiber cloth or mop, a two-bucket system (soapy and rinse), room-temperature water, and gentle, pH-neutral solutions. Rinse each panel immediately and blot dry with a clean microfiber towel to prevent watermarks. Keep going and you’ll find tips on sheen-specific care and troubleshooting.
What This Guide Covers and Who It’s For
Before you start scrubbing, this guide tells you exactly which painted surfaces and stains you can safely clean, the tools and cleaners that won’t damage paint, and step-by-step techniques to avoid streaks and patchy results.
You’ll learn which finishes tolerate water and mild detergent, when to test for color matching after spot cleaning, and how to protect paint adhesion while removing grime.
This guide’s for homeowners, renters, and pros who want consistent, streak-free results without repainting.
You’ll get clear instructions on prep, gentle cleaning solutions, and techniques that preserve finish and avoid uneven fading.
Quick Answer: Simplest Way to Wash Painted Walls Without Streaks
When you want the fastest, most reliable result, mix warm water with a few drops of mild dish soap. Use a soft sponge or microfiber cloth, and work top-to-bottom in gentle, overlapping strokes to prevent drips and streaks.
Rinse the cloth frequently and change the water when it gets cloudy. Test a small, inconspicuous area first to check paint durability and how wall texture affects cleaning.
If residue remains, buff with a dry microfiber pad. For scuffs or stubborn marks, use a gentle eraser.
Keep notes on color matching for future touch-ups after cleaning high-traffic zones.
Step-by-Step Streak-Free Wall Wash (Summary)
If you want streak-free walls, follow these clear, ordered steps: prepare the area and supplies, test a small patch, wash in top-to-bottom strokes with a mild soap solution and a soft sponge, rinse or change cloths frequently, and finish by gently buffing any remaining haze with a dry microfiber.
Start by moving furniture and protecting trim.
Mix mild detergent with warm water; avoid harsh cleaners that cause color fading or harm finish.
Work a 3×3 foot section, rinse immediately, and blot excess moisture.
Dry with overlapping passes to preserve texture preservation.
Inspect under good light and repeat only if needed.
Paint Sheens to Know: Flat, Eggshell, Satin, Semi-Gloss, Gloss
Although sheen doesn’t change the color, it affects durability, cleanability, and how light plays on your walls, so choosing the right finish matters.
You’ll pick flat for low-reflective, forgiving surfaces and textured walls where imperfections hide. Eggshell offers a soft luster, balancing elegance with modest scrub-ability—good for living rooms influenced by color psychology.
Satin adds a gentle glow, practical for hallways and family spaces. Semi-gloss and gloss are shiny, highlight architectural details, trim, and moisture-prone areas.
Each sheen alters perceived depth and mood, so match finish to room use, surface condition, and the emotional tone you want.
How Sheen Changes Cleaning and Durability
You’ll notice sheen levels—from flat to gloss—directly affect how tough and washable your walls are. Higher sheens resist scuffs and wipe clean easier.
While flatter paints hide imperfections, they need gentler cleaning. For high-traffic areas, you’ll usually want satin or semi-gloss for the best balance of durability and appearance.
Sheen Levels Explained
Because sheen affects both how well paint stands up to scrubbing and how much surface texture shows, choosing the right finish matters when you clean walls. You’ll notice sheen influences appearance, cleaning approach, and how color psychology reads in a room—glossier finishes reflect more light, brightening hues; flatter sheens mute tones and hide wall texture. Pick based on room use and aesthetic.
Consider:
- Flat: hides imperfections, softens color psychology, low reflectivity.
- Eggshell/satin: balances concealment and wipeability for everyday spaces.
- Semi-gloss/gloss: durable, shows texture and highlights colors, easier to wipe down.
Durability And Cleanability
When you pick a paint sheen, you’re also choosing how much wear and scrubbing the wall will tolerate: higher-sheen paints put more binders and resins in the finish, so they resist scuffs, stains, and repeated cleaning far better than flat paints.
You’ll notice glossier sheens wipe clean with mild soap and a soft cloth, while flat finishes absorb soils and show marks after vigorous scrubbing.
Consider wall texture: smooth surfaces clean easier than textured ones, which trap dirt.
For lasting results, match paint durability to room use, clean gently, test a small area, and avoid abrasive tools.
Best Sheen For High-Traffic
Which sheen should you pick for a busy hallway or family room? You’ll want a finish that balances scrub-ability with appearance; higher sheens clean better but show flaws. Consider how decor color and wall texture affect visibility: dark colors and smooth walls reveal streaks more, while textured or lighter surfaces hide imperfections.
Choose according to traffic and style:
- Eggshell or satin: moderate shine, hides texture, easier to clean.
- Semi-gloss: tough and washable, highlights imperfections on uneven walls.
- Matte: hides flaws and color depth but resists cleaning less; use only low-traffic spots.
Match sheen to use and maintenance needs.
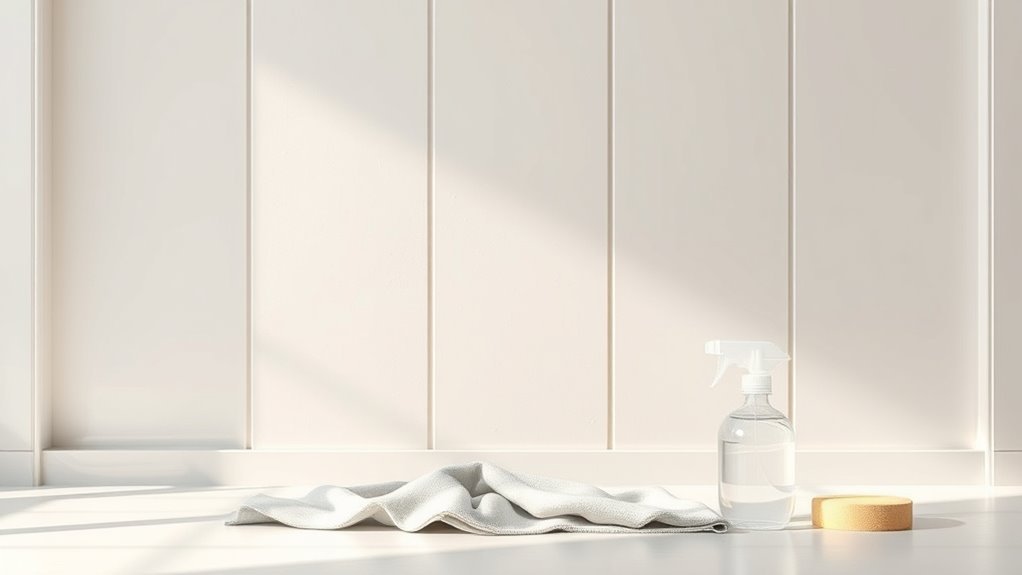
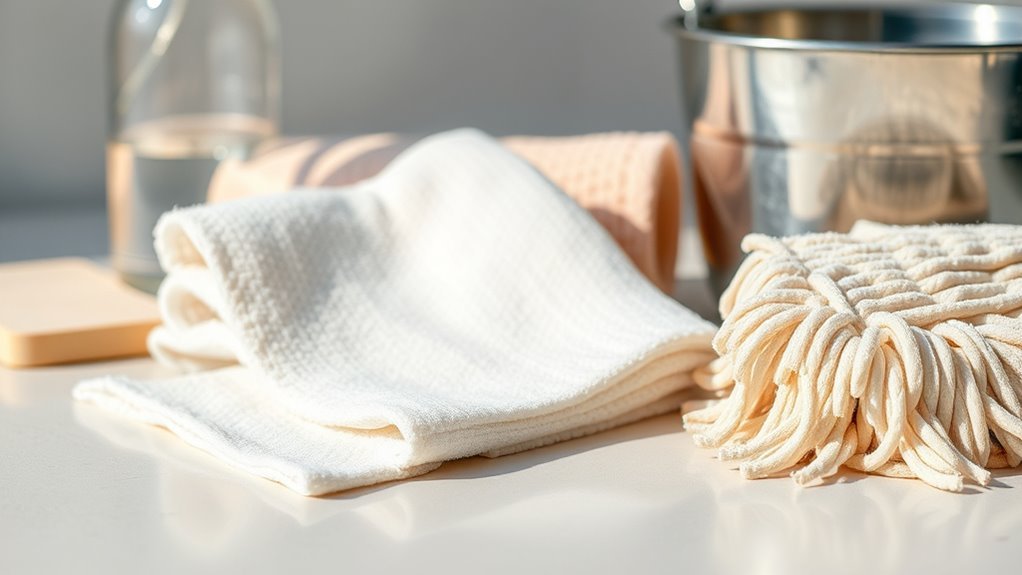
Tools You Need for Streak-Free Wall Washing
You’ll want soft microfiber cloths to trap dirt without scratching paint.
Use gentle, pH-neutral cleaning solutions to remove grime without dulling the finish.
For high or large walls, a sturdy extendable handle makes the job easier and helps you keep even pressure to avoid streaks.
Soft Microfiber Cloths
Because microfiber traps dirt and holds moisture without leaving lint, soft microfiber cloths are the go-to tool for streak-free wall washing. You’ll appreciate how Microfiber technology lifts grime gently, adapts to wall texture, and speeds drying so streaks don’t form.
Choose plush, lint-free cloths and keep several on hand so you’re always using a clean one.
- Use a slightly damp cloth for painted surfaces.
- Work in small sections, following the paint’s sheen.
- Rinse or swap cloths when they look dirty.
Handle cloths gently, launder them without fabric softener, and replace when worn.
Gentle Cleaning Solutions
When you want streak-free painted walls, pick mild, pH-neutral cleaners and simple household ingredients that lift dirt without stripping paint or leaving residue.
You’ll mix gentle dish soap (a few drops per quart of warm water), white vinegar diluted half-and-half with water for washable finishes, or a commercial pH-neutral wall cleaner.
Test any solution on an inconspicuous spot to protect paint color and varying wall textures.
Use separate buckets for rinse and wash, and change water when it’s dirty.
Avoid harsh abrasives, bleach, or concentrated detergents that can dull finishes or damage textured surfaces.
Sturdy Extendable Handle
Although a good scrubber can reach most spots, a sturdy extendable handle makes streak-free washing faster and safer by letting you keep even pressure and consistent contact from floor to ceiling.
You’ll control angle and force, which matters for different paint texture and avoids uneven drying that shows on wall color. Choose lightweight, lockable poles and a swivel head to stay perpendicular to surfaces.
Attach a soft microfiber pad or sponge to reduce streaks. Adjust length so you don’t overreach; stability beats speed.
Maintain the handle and fittings to prevent slips and sudden drops.
- Lightweight aluminum pole
- Locking mechanism
- Swivel pad head
Best Sponges, Cloths, and Mops to Prevent Streaks
If you want streak-free painted walls, pick tools that lift dirt without leaving excess moisture behind. Choose soft, lint-free microfiber cloths for smooth finishes; they trap grime and dry fast, which helps with color matching when touch-ups follow.
For textured walls, use dense microfiber pads or a sponge with rounded edges to reach crevices without abrasion. A flat mop with removable, washable microfiber heads speeds larger areas and controls water.
For stubborn spots, a nonabrasive cellulose sponge works if you wring it thoroughly. Replace or launder cloths often to avoid redepositing dirt and streaks.
Cleaning Solutions Safe for Painted Walls
Now that you’ve picked the right tools, choose gentle cleaners that lift dirt without damaging paint or leaving streaks. Test any product in an inconspicuous spot to see how your wall color reacts and whether the paint finish dulls. Prefer mild, pH-neutral options labeled safe for painted surfaces.
- Mild dish soap diluted in warm water for general cleaning
- Commercial wall cleaners formulated for painted walls and varied paint finishes
- Rubbing alcohol for small greasy spots, applied sparingly
Rinse with clean water, blot dry, and avoid harsh solvents or abrasive pads that strip pigment or gloss.
Homemade Cleaners That Won’t Damage Paint
When you want a simple, cost-effective cleaner that won’t harm the paint, stick to mild, pH-neutral mixtures you can make at home. You’ll mix soft ingredients like dish soap, vinegar, or baking soda with water, test a hidden spot for color matching, and respect wall texture to avoid damage. Use gentle cloths and rinse well.
| Cleaner | Ratio | Best for |
|---|---|---|
| Dish soap | 1 tsp/1 gal | Light dirt |
| Vinegar | 1 cup/1 gal | Glossy paint |
| Baking soda paste | 1 tbsp + water | Stains |
| Rinse water | Plain | Final pass |
Store-Bought Cleaners Worth Using on Walls
When you’re ready to use a ready-made product, pick a mild all-purpose cleaner that lists neutral pH and non-abrasive ingredients to protect the paint.
For tougher marks, choose specialty paint-safe formulas labeled for painted walls or interior surfaces so you won’t strip finish or color.
Always test any store-bought cleaner in an inconspicuous spot before cleaning the whole wall.
Mild All-Purpose Cleaners
Although you’ll find plenty of cleaners marketed for walls, mild all-purpose solutions give the safest balance of cleaning power and paint protection, so you can remove dirt and grease without stripping finish or leaving residue.
You’ll choose a gentle pH-neutral cleaner that won’t alter color matching or highlight wall texture. Test a hidden spot first, dilute per label, and use a soft cloth or sponge.
- Look for “pH neutral” or “for painted surfaces”
- Avoid abrasive powders or harsh solvents
- Use distilled water for final rinses to minimize streaks
These cleaners work well for routine maintenance.
Specialty Paint-Safe Formulas
If you want a no-fuss option for tougher stains or high-traffic areas, specialty paint-safe cleaners are formulated to cut grease and grime without dulling or etching your paint. You’ll find spray or foam formulas labeled safe for latex and enamel finishes; test a hidden spot first to confirm color matching remains intact.
Use a soft microfiber or sponge and work top to bottom, following the cleaner’s dwell time. For varied wall textures, choose a gentle scrub pad or brush that won’t snag.
Rinse thoroughly with clean water and dry with a lint-free cloth to avoid streaks.
Proper Dilution Ratios for Common Cleaners
Because cleaners vary in strength and ingredients, getting dilution right prevents paint damage and streaks while still removing grime. You’ll choose ratios based on paint type, wall texture, and color matching needs so cleaners don’t dull or lift pigment. Start mild and increase strength only as needed.
- Mild soap: 1 teaspoon dish soap to 1 quart warm water for general cleaning.
- Vinegar solution: 1 cup white vinegar to 1 gallon water for deodorizing and light stains.
- Degreaser: follow label, commonly 1:10 (cleaner:water) for kitchens; rinse thoroughly afterward.
Always wring cloths well and work top to bottom.
How to Test a Cleaner Safely on Painted Surfaces
When you test a cleaner, start in an inconspicuous spot so you can spot any color change, gloss loss, or softening before it affects a visible area.
Dampen a white cloth with the diluted solution you’ll use, then blot and rub gently for 30 seconds.
Inspect for streaks, altered wall texture, or paint peeling once dry.
Check for streaks, texture changes, or peeling once the area is fully dry before continuing
Try both matte and semi-gloss sections if present.
Wait an hour and check again under good light.
If stain removal works without damage, proceed.
If you see fading, tackiness, or lifting, stop and choose a milder cleaner or more dilution.
Preparing the Room: Move Furniture and Protect Floors
Before you start washing, move furniture away from the walls and lift or slide heavy pieces with help to avoid damage.
Lay drop cloths or plastic sheeting to protect floors and tape seams so water and cleaner won’t seep underneath.
Clear wall surroundings like lamps, curtains, and wall art so you have full access and nothing gets splashed.
Move Furniture Safely
If you plan to wash painted walls without streaks, start by moving furniture out or to the center of the room and covering it with drop cloths so you have clear, protected working space.
For safe furniture rearrangement, empty drawers, secure loose parts, and use sliders or a dolly to avoid strains.
Take down wall art removal carefully, label hooks and hardware, and store pieces flat with padding.
Lift with knees, get help for heavy items, and keep pathways clear.
Finally, tuck cords and small items away so you won’t trip while working.
- Use sliders or a dolly
- Label and pad art
- Work with a partner
Protect Floors Thoroughly
Since you’re about to wash the walls, protect the floors with durable coverings that stop drips and abrasions. Lay down contractor-grade drop cloths or plastic sheeting, taping seams so cleaning solution won’t seep underneath.
Use foam or felt pads under heavy furniture you can’t move to avoid scratches when shifting pieces. Keep a small absorbent mat by your ladder to catch splashes.
If you plan spot touch-ups later, keep a swatch for color matching handy and note how wall textures affect paint sheen.
Remove taped coverings carefully after walls dry to avoid pulling paint or leaving adhesive residue on floors.
Clear Wall Surroundings
Start by clearing a workable area around each wall so you can move freely and clean without risking damage to furniture or floors. Remove small items, shift larger pieces to the room center, and cover them with drop cloths. Protect floors with plastic or canvas to catch drips and grit.
Check baseboards and corners for fragile trim before you start. Consider wall color and paint texture when placing lights or stands to avoid shadows that hide streaks.
- Move furniture to the room center and lift from walls.
- Cover belongings with breathable cloths.
- Tape edges of floor protection securely.
Dry-Clean Walls Before Wet Washing
Before you get out the bucket, dry-clean your walls to remove dust, cobwebs, and loose grime that would turn into streaky residue once wet. Use a soft-bristle broom or extendable microfiber duster, working top-to-bottom and following wall texture to avoid snags.
Before washing, dry-clean walls—top-to-bottom with a soft broom or microfiber duster to prevent streaks.
For wallpaper removal areas, gently lift loose edges with a putty knife before dusting so fibers or paper bits don’t smear when washed.
Vacuum with a brush attachment for textured surfaces and ceilings. Pay attention to corners, trim, and light fixtures.
Finish by wiping switches and outlets with a dry cloth, ensuring surfaces are debris-free before wet cleaning.
Streak-Free Washing Technique: Top-to-Bottom, Panel-by-Panel
While you work, clean each wall from the top down and treat each section as its own panel so water and soap don’t run over already-cleaned areas. You’ll rinse and dry each panel before moving on, checking paint preparation notes to avoid damaging finishes. Work methodically so streaks don’t form where wet meets dry. Use consistent pressure and overlapping strokes. Consider color matching touch-ups after drying if water alters sheen.
- Start at corners and move outward
- Rinse mop or cloth often to prevent redepositing dirt
- Dry each panel immediately with a clean microfiber cloth
Two-Bucket Method and When to Use It
Once you’ve worked each panel top-to-bottom and kept rinsing and drying to prevent streaks, use the two-bucket method to keep grime from getting re-deposited on the paint. You fill one bucket with clean soapy water and one with rinse water. Use a wash mitt in the soapy bucket, then dip in rinse before returning to soap. That keeps contaminants separate and protects color matching on repaired areas and varying wall texture from smears. Assess heavily soiled sections first and use the method for whole-room cleans or spot treatment.
| Step | Purpose | Tip |
|---|---|---|
| Soap | Loosen dirt | Gentle cleanser |
| Rinse | Remove residue | Clear water |
| Dry | Prevent streaks | Microfiber cloth |
How to Wring and Rinse Cloths to Stop Streaking
If you want streak-free walls, wring and rinse your cloths so they’re damp but not dripping; squeezing out excess water prevents dirty runoff from running down the paint and leaving streaks.
Work methodically: rinse, wring to a flat fold, then smooth the cloth over the wall. Match pressure to wall texture and use color coordination—light cloths show dirt, dark ones hide residue but inspect often.
Follow this quick checklist:
- Rinse until suds fade, then wring tightly.
- Fold cloth flat for even contact across varied textures.
- Replace cloths when visibly soiled to avoid reapplying grime.
Rinsing Strategy: Why a Neutral Water Rinse Matters
Use room-temperature water when you rinse so you don’t shock the paint or leave mineral streaks.
Start at the top and work downward, rinsing each section once so dirty water doesn’t run over clean areas.
You’ll get an even, streak-free finish by keeping the rinse neutral and moving top to bottom.
Use Room-Temperature Water
When you rinse painted walls, choose room-temperature water because it prevents streaking and protects the finish. Extreme hot or cold water can change how the paint dries and leave visible marks. You’ll get even drying and avoid raising paint gloss or causing faint lines.
Match your rinse to the paint’s cure and test a small area if you’ve used decorative techniques or varied wall textures. Use gentle motion and minimal soap residue to keep results uniform.
- Use lukewarm water and a soft cloth.
- Rinse frequently to avoid soap buildup.
- Pat dry with a microfiber towel to finish.
Rinse From Top Down
After rinsing with room-temperature water, start at the top of the wall and work downward so gravity carries away soap and residue instead of dragging it back over cleaned areas.
You’ll rinse in overlapping vertical strokes, keeping water neutral to avoid altering paint sheen or color matching. Test a small section where wall texture varies to confirm runoff doesn’t pool in grooves.
Use a clean, soft sponge or microfiber mop and refresh rinse water often to prevent redepositing dirt.
Finish by blotting any drips near trim. Rinsing top-down gives a uniform finish and minimizes streaks on painted surfaces.
Drying Technique to Prevent Watermarks and Streaks
Although rinsing removes dirt, how you dry the wall determines whether you’ll see streaks or watermarks. You’ll work fast but gently: blot excess moisture with a clean microfiber towel, moving top-to-bottom to match rinse direction.
For textured surfaces, pat rather than rub to protect wall texture and avoid lifting paint. Quick drying also preserves paint durability by preventing prolonged water contact.
- Use a second dry microfiber to finish and smooth.
- Open windows or run a fan for even airflow.
- Avoid heat sources that can blister paint or set marks.
Follow this routine and you’ll prevent streaks reliably.
When to Use Spot Treatment vs Full-Wall Wash
If you only see isolated marks or smudges, spot treating those areas will save time and reduce moisture exposure to the whole wall.
Choose a full-wall wash when stains are widespread, the paint looks dull, or you’ve never cleaned the surface since it was painted.
Always test a small area first so you’ll know whether spot cleaning will blend or if a full wash is needed.
When To Spot Treat
When should you spot treat instead of washing the whole wall? You’ll choose spot treatment when stains are isolated, paint is older or delicate, or when color matching and wall texture differences make full washes risky. Spot treating saves time and prevents unnecessary moisture exposure.
- Small, localized marks (scuffs, spills) that won’t affect surrounding paint
- Areas where color matching is easy and texture won’t show cleaning lines
- Fragile finishes or high-porosity patches that could react poorly to broad wetting
Test a hidden area first, use gentle cleaners, and blend outward to avoid rings or noticeable repairs.
When To Wash EntireWall
Because dirt, smoke, or fading often affects entire rooms, you should wash the whole wall when stains are widespread, the finish is resilient, or consistent color and texture make a full clean safe.
Check paint type—eggshell and satin handle cleaning better than flat.
Remove or cover wall art, shift furniture placement away from walls, and protect floors.
Test a small area to confirm no color loss or sheen change.
Use mild detergent, a soft sponge, and top-to-bottom strokes, rinsing frequently.
If results are uneven, stop and consider repainting or professional cleaning to avoid streaks and damage.
Identifying Stains vs General Grime
Although both look like dirt, stains and general grime behave differently and call for different cleaning approaches. You’ll learn to spot whether a mark’s surface-level grime or a stubborn stain that may need special care to avoid color matching issues or worsening paint peeling.
Check these quick clues:
- Texture: grime wipes away with mild soap and water; stains often resist and may require targeted cleaners.
- Location: high-touch areas suggest grime; isolated spots near vents or kitchens often indicate stains.
- Transfer test: rub with a damp cloth—if pigment lifts, it’s likely grime; if not, treat as a stain.
Treating Fingerprints and Light Smudges Without Scrubbing
If you want to remove fingerprints and light smudges without scrubbing, reach for a soft microfiber cloth lightly dampened with warm water and a drop of mild dish soap. This lifts oils and oils-based residues without abrading the paint.
Gently blot and wipe in a single direction, rinsing and rewringing the cloth often to avoid streaks. For persistent marks, add a splash of white vinegar to the rinse water. Test an inconspicuous spot first.
Regular gentle cleaning preserves finish and complements current decorating trends, while maintaining the desired effect of paint color psychology—keeps tones true and surfaces feeling fresh without harsh abrasion.
Removing Scuff Marks From Painted Walls
When scuffs show up from shoes, furniture, or daily wear, you can often lift them without damaging the paint by working gently with the right tools and cleaners. Start by trying a soft rubber eraser or a microfiber cloth with a little soapy water, and progress to a melamine sponge or a mild cleaner only if needed.
Test any method in an inconspicuous spot first to protect decorative techniques and respect wall texture. Work from the scuff edge inward, blotting rather than rubbing.
Tips:
- Use a soft rubber eraser for light marks.
- Damp microfiber for gentle cleaning.
- Melamine sponge sparingly, with care.
Getting Rid of Crayon, Marker, and Ink Safely
Before you start scrubbing crayon, marker, or ink, test your cleaner on a hidden spot to make sure it won’t damage the paint.
Use gentle solvents like diluted dish soap, rubbing alcohol, or a melamine sponge for stubborn marks, working from the edges inward.
Rinse the area with clean water and blot dry to avoid streaks.
Test Cleaner On Hidden Spot
Although you’re enthusiastic to tackle crayon, marker, or ink marks, always test your cleaner on a hidden spot first; this quick check prevents damage like paint removal, discoloration, or sheen changes. You’ll want a small cup, soft cloth, and patience. Apply a dab, wait a minute, blot—don’t rub—then inspect under good light. If safe, proceed; if not, stop.
- Pick a Hidden spot behind furniture or in a corner.
- Use the mildest Test cleaner you have (water, diluted dish soap).
- Note results and dry fully before full cleaning.
Gentle Solvents For Stains
If a simple damp cloth or mild soap won’t lift crayon, marker, or ink, try gentler solvents that dissolve the stain without stripping paint or altering sheen. You can use rubbing alcohol, white vinegar, or a magic eraser dampened slightly; apply to a cloth, not directly to the wall.
Work from the edge toward the center to avoid spreading and watch how color contrast changes. Test on a hidden spot first to check for discoloration or altered wall texture.
Blot gently, don’t rub hard. Rinse with a damp cloth and dry; repeat sparingly until the mark fades.
Handling Greasy Kitchen Splatters and Smoke Residue
When grease and smoke build up on painted walls, they leave a sticky, discolored film that regular dusting won’t remove, so you’ll need targeted cleaning to avoid streaks and damage.
Start by testing a mild detergent solution in an inconspicuous spot to check color matching and paint durability. Use soft cloths, work top-to-bottom, and rinse with clear water.
- Mix warm water with a few drops of dish soap for fresh splatters.
- Use a baking soda paste for stubborn spots, gently rub then rinse.
- For smoke haze, wipe with diluted vinegar, then rinse thoroughly.
Dry with a microfiber cloth to prevent streaks.
Dealing With Mold, Mildew, and Water Stains Carefully
Because mold, mildew, and water stains can keep spreading and damage both paint and drywall, you should tackle them promptly and gently to avoid making the problem worse.
Act quickly but gently—treat mold, mildew, and water stains to prevent spreading and damage to paint and drywall.
Start by testing a mild solution—one part white vinegar to three parts water—on an inconspicuous spot to check for effects on wall color and paint texture.
Use a soft sponge, work top to bottom, and rinse with clean water to prevent residue.
For stubborn spots, apply a paste of baking soda and water, let sit briefly, then scrub lightly.
Dry the area thoroughly and monitor for recurrence, addressing leaks as needed.
Prevent Paint Softening and Color Loss
To prevent paint from softening or losing color, use gentler cleaners, limit water exposure, and test any product on a hidden patch before treating a visible area. You’ll protect finish and avoid paint peeling by working slowly and watching wall texture changes.
Use a damp microfiber, not a soaking sponge, and blot instead of scrubbing stubborn spots.
- Pick pH-neutral cleaners and mix them sparingly.
- Rinse with minimal water and dry immediately with a soft cloth.
- Always test on an inconspicuous area noting any softening or color shift.
Stay cautious: repeated wetting weakens coatings and can reveal underlying damage.
Blending Spot-Corrections Into Surrounding Paint
After you’ve guaranteed the paint won’t soften or fade, blend any spot-corrections so they disappear into the surrounding surface. Work while edges are slightly tacky: feather the repair with a dry brush or small roller, extending strokes beyond the patch to merge texture.
Match sheen and temperature to aid color matching; compare under the room’s normal light. Thin your paint for seamless flow on tiny spots, and apply multiple thin layers rather than one heavy coat.
Step back between passes to check for visible seams. For final integration, lightly mist the area with water and gently roll to even the finish.
Touch-Up Painting Tips After Stubborn Stain Removal
After you remove a stubborn stain, prep the surface by cleaning, sanding lightly, and letting it dry so the patch won’t show.
Make sure you match the paint color and finish exactly—test a small area first.
Use thin, even coats and feather the edges to blend the touch-up into the surrounding wall.
Prep The Surface
When stubborn stains come off, you’ll need to prep the area so your touch-up paint blends seamlessly. Clean residue with mild detergent, rinse, and dry fully.
Lightly sand any rough edges where paint peeling occurred to feather the repair. Wipe dust away with a tack cloth before priming small bare spots.
- Remove grease and contaminants thoroughly.
- Sand and smooth peeling or raised edges.
- Use primer on exposed substrate.
Choose primer compatible with your finish so the patch accepts color matching later. Keep the repair minimal and smooth to avoid obvious gradations when you apply touch-up paint.
Match Paint Perfectly
Now that the surface’s prepped and primed, focus on matching paint so your touch-up disappears. You’ll want an exact color matching approach: bring a chip to the store or use a spectrophotometer app to get a precise formula.
Test the mixed sample on a hidden area and let it fully dry; sheen differences show after curing. For paint blending, feather the edges by applying thin coats with a small brush or mini roller, extending slightly beyond the repair.
Lightly sand between coats if needed, then wipe clean. Step back and view from different angles and lighting to confirm the repair is invisible.
How to Preserve Trim and Baseboards While Washing Walls
Because trim and baseboards catch the drips and scuffs you miss on the wall, you’ll want to protect them before you start washing—mask edges with painter’s tape, lay down drop cloths, and remove or cover hardware.
Keep trim protection matched to your wall color so cleaning doesn’t leave visible contrast, and consider paint texture differences to choose softer cloths for glossy trim.
Work top-down and use minimal moisture.
- Use a damp sponge, not soaking wet, along the tape line.
- Wipe baseboards with a microfiber cloth and gentle cleaner.
- Dry immediately to prevent streaks or swelling.
Cleaning Textured and Faux-Finish Walls Without Damage
Before you start, test a small, inconspicuous area to make sure the texture or finish won’t react.
Use a mild, pH-neutral cleaner and a soft brush or sponge so you don’t strip paint or lift the finish.
When you’re done, gently blot and dry with a soft cloth to prevent water marks and preserve the texture.
Test A Small Area
When you’re about to clean a textured or faux-finish wall, always test a small, inconspicuous area first to confirm your method won’t lift paint, dull the finish, or leave marks. Pick a spot near a corner or behind furniture where color matching and wall texture are least noticeable, then proceed carefully.
Use these quick checks:
- Gently blot with your chosen cloth, then inspect for sheen changes.
- Rinse the spot and let it dry to check for streaks or softening.
- Compare the test area to adjacent paint for discoloration or texture loss.
If it passes, you can continue confidently.
Use Gentle Cleaning Solutions
If you want to protect textured or faux-finish walls, stick to mild, pH-neutral cleaners and diluted solutions that won’t break down binders or alter sheen. You’ll avoid harsh solvents, bleach, or abrasive powders that can strip paint or change color matching.
Mix a few drops of dish soap in warm water or use a labeled gentle cleaner, testing first in an inconspicuous spot. Work from bottom up with a soft sponge to respect wall texture, rinsing frequently.
For stubborn spots, blot gently and repeat testing rather than increasing strength. Maintain patience to preserve finish and hue.
Dry With Soft Cloth
Because excess moisture can dull paint and trap dirt in crevices, dry textured and faux-finish walls promptly with a soft, lint-free cloth to protect the finish. You’ll avoid streaks and preserve paint color by blotting gently rather than rubbing. Work top to bottom, following wall textures so you don’t lift pigments or damage detailing.
After wiping, inspect for missed spots and air-dry in humid rooms.
- Use a microfiber or cotton cloth folded for thickness.
- Lightly press into grooves; don’t scrub textured areas.
- Swap cloths when damp to prevent streaking.
This routine keeps finishes even and long-lasting.
Portable Tools for Washing Painted Walls
Although you can tackle most touch-ups with just a sponge, choosing the right portable tools makes washing painted walls faster, more effective, and streak-free.
You’ll want a soft microfiber cloth for gentle wiping and a squeeze mop or handheld scrubber for larger areas.
Use an extendable pole with a microfiber pad to reach high spots without ladders.
A gentle scrub brush with nylon bristles helps with textured paint without damaging paint texture, while a spray bottle lets you control solution application to avoid saturating wall color.
Keep a small bucket for rinsing and a lint-free towel for final drying.
Child- and Pet-Safe Cleaning Options
When you’re cleaning walls around kids and pets, choose non-toxic ingredients like diluted vinegar, castile soap, or baking soda so you won’t risk harmful residues.
Use soft, chemical-free tools—microfiber cloths, sponge mops with washable pads, and a gentle-bristled brush—for effective cleaning without abrasion.
Rinse surfaces with plain water and dry thoroughly to remove any leftover cleaner.
Non-Toxic Cleaning Ingredients
If you want a safe, effective way to clean painted walls around kids and pets, choose simple, non-toxic ingredients you likely already have at home. You’ll protect color matching and paint durability by avoiding harsh solvents. Test any mix in an inconspicuous spot first.
- Mild dish soap with warm water: removes grease without stripping finish.
- White vinegar diluted (1 cup per gallon): cuts grime and deodorizes, safe on most latex paints.
- Baking soda paste for spot cleaning: gently lifts scuffs without abrasive damage.
Use gentle motions, rinse with clean water, and dry with a soft cloth to prevent streaks.
Safe Cleaning Tools
Now that you’ve picked gentle, non-toxic cleaners, choose tools that protect kids and pets while getting walls streak-free. Use microfiber cloths and mop heads—they trap dirt without harsh fibers, rinse easily, and reduce dripping near play areas.
Keep cleaning solutions in clearly labeled, sealed spray bottles up high.
For scuffs and fingerprints, use magic erasers sparingly and test in an inconspicuous spot to preserve color matching and finish.
Match tools to wall textures: soft pads for smooth paint, soft-bristled brushes for textured surfaces.
Store tools safely out of reach and dry them completely to prevent mildew and odors.
Eco-Friendly Cleaners That Still Avoid Streaks
Although you might worry that green cleaners won’t perform as well, several eco-friendly solutions clean painted walls without leaving streaks. You can protect finish and respect eco friendly practices while adapting to wall texture. Test any mix on a hidden patch first.
Eco-friendly cleaners can clean painted walls streak-free—test a hidden spot first and adapt for texture.
- Diluted white vinegar (1:10) for grease, wiped with a damp microfiber.
- Castile soap solution, rinsed quickly to prevent residue.
- Baking soda paste for spot cleaning, blotted off gently.
Work top to bottom, use wrung-out cloths, and dry with a soft, lint-free towel so you won’t leave streaks or damage paint.
Common Mistakes That Cause Streaks and How to Avoid Them
Even with eco-friendly cleaners that work, you can still make mistakes that leave streaks on painted walls. Rushing, using too much soap, or letting solutions dry unevenly creates visible lines.
Don’t scrub aggressively; improper pressure and wrong brushes ruin paint and accentuate wall texture. Avoid mixing cleaners that leave residues.
Use consistent painting techniques for touch-ups so repaired areas blend after cleaning. Work top-to-bottom in small sections, rinse with clear water, and dry with a lint-free cloth or microfiber to prevent streaks.
Test a hidden spot first to confirm your method won’t mar finish or reveal streaking.
Quick Fixes When Streaks Appear After Cleaning
If streaks show up after you’ve cleaned a wall, don’t panic—you can usually correct them with a few simple moves.
First, re-dampen a microfiber cloth with plain water and buff in light circular motions to lift residue.
Re-dampen a microfiber cloth with water and gently buff in circular motions to lift residue and reduce streaks.
If streaking persists, try a diluted vinegar rinse (1 part vinegar to 4 parts water), then dry with a clean cloth.
Avoid scrubbing areas with paint peeling; note those need repair, not cleaning.
Consider spot-sanding and wall priming before repainting if damage’s present.
Quick checklist:
- Buff with water using a microfiber cloth
- Rinse with diluted vinegar
- Dry thoroughly to prevent marks
Troubleshooting: Why Certain Stains Won’t Come Out
Because stains vary in composition and how long they’ve set, some won’t come out with basic cleaning—you’ll need the right solvent and technique for each type. Identify stain source (grease, ink, mildew) and consider paint mixing history and wall textures—older paints or textured finishes trap residues differently. Test cleaners in an inconspicuous spot, blot don’t rub, and work from mild to stronger agents. If stain persists, it may be chemically bonded or embedded in texture requiring repainting or targeted stripping.
| Stain | Likely cause | Tip |
|---|---|---|
| Grease | Cooking splatter | Degreaser, blot |
| Ink | Permanent dyes | Solvent, dab |
| Mildew | Moisture | Bleach mix, ventilate |
| Paint | Wrong thinner | Strip, repaint |
Before-and-After Checklist to Inspect for Streaks
Before you declare the job done, walk the room with fresh eyes and good light to spot any streaks or uneven sheen you might’ve missed while cleaning. Check immediately after walls dry and again from different angles; natural light reveals streaks that artificial light hides.
Before you call it finished, re-scan the room in good light and at different heights to spot streaks.
Consider how uneven patches affect color psychology and the way wall art reads. Use this quick checklist:
- Inspect from waist height and then standing tall to catch sheen shifts.
- Move or remove wall art briefly to check behind frames and ensure consistent finish.
- Note areas to retouch, mark lightly with painter’s tape for follow-up.
How Often to Wash Different Rooms and Wall Types
Although traffic and function vary by room, you should establish a simple schedule so cleaning doesn’t become a big job. Wipe high-traffic areas like kitchens and hallways every 1–2 months, bedrooms and living rooms every 3–6 months, and guest rooms or storage yearly. Use gentle cleaners to protect color coordination and avoid disturbing wall art. For textured or semi-gloss finishes, clean more often; flat paint hides marks but cleans less well. Target spot-cleaning for spills. Follow the table to sketch your routine:
| Area | Frequency |
|---|---|
| Kitchen | 1–2 months |
| Hallways | 1–2 months |
| Living room | 3–6 months |
| Bedrooms | 3–6 months |
Seasonal Maintenance Checklist for Painted Walls
You’ve set a routine for regular wipe-downs; now make a seasonal checklist to catch issues that monthly cleaning misses. Inspect walls for scuffs, chips, and staining, noting areas where paint texture has changed from moisture or abrasion. Test small color matching with leftover paint before touching up. Check baseboards, trim, and high-traffic zones for buildup or mold.
- Spring: deep clean, assess for water damage and repaint spots needing color matching.
- Summer: inspect for sun-fade, touch up thin areas, smooth any rough paint texture.
- Fall/Winter: check for drafts, condensation, and seal cracks to prevent peeling.
Frequently Asked Questions
Can I Wash Painted Walls After Recent Repainting, and How Long to Wait?
Yes — you can, but wait 2–4 weeks for paint durability to build; glossy finishes cure faster. Gently test a hidden spot, consider wall texture when scrubbing, and use mild soap with soft cloths to avoid damage.
Will High Humidity or Weather Affect Streak Formation During Washing?
Studies show up to 90% of indoor streaks correlate with high humidity; you’ll notice Humidity impact and Weather influence strongly. Don’t wash on humid or rainy days, and dry walls quickly to prevent streaking and streak buildup.
Can Wallpapered or Vinyl-Coated Walls Be Cleaned the Same Way?
Yes — you can clean them differently: for wallpaper maintenance, spot-test, use a soft sponge and mild detergent; for vinyl cleaning tips, wipe with diluted soap, rinse, and dry to avoid damage or streaking, working gently.
Are There Protective Coatings to Prevent Future Staining or Streaks?
Yes — you can apply protective coatings like clear acrylic sealers or water-based polyurethanes for stain prevention; they’ll repel dirt and moisture, so you’ll clean walls easier and reduce future streaks with gentle wiping.
How to Handle Electrical Outlets, Switches, and Wall-Mounted Tech When Washing?
About 70% of household accidents involve electrical issues, so you’ll prioritize Electrical safety. Turn power off, use Outlet protection covers, clean around switches with damp cloth, avoid spraying, and reinstall plates tightly after drying.
Conclusion
You’ve got the know-how now, but don’t start scrubbing just yet—hold that sponge. Take a breath, gather a microfiber cloth, mild detergent, and a clean bucket, then move slowly from top to bottom. Follow the gentle, even strokes and rinse each section before it dries. When you step back, the wall will either reveal a flawless finish or show the one stubborn streak you can fix in minutes—satisfying, right?