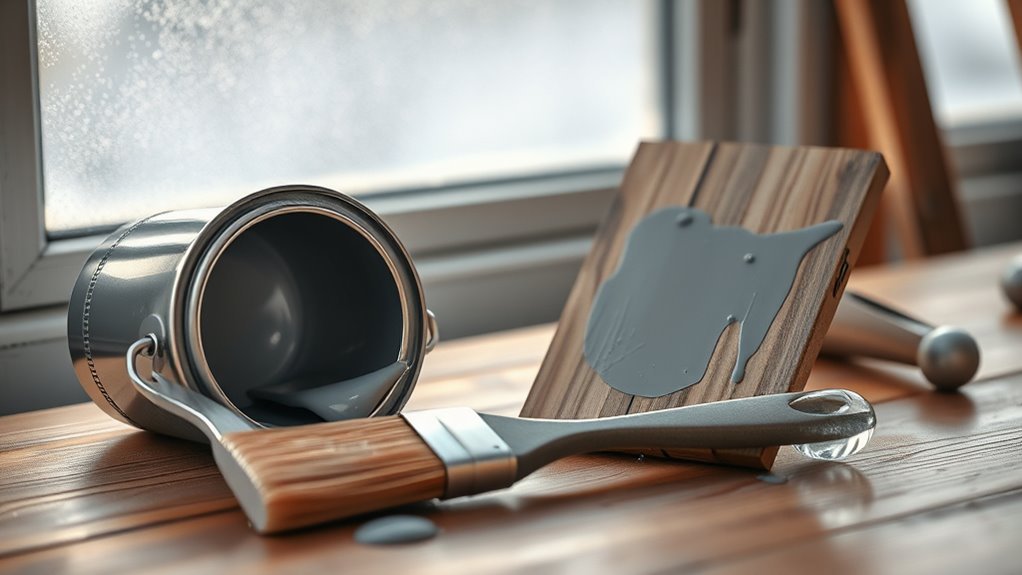
Does Paint Dry Slower in the Cold
Yes — paint dries slower in the cold, so you’ll need more time and care. Low temperatures thicken paint, slow solvent evaporation, and prevent binder particles from coalescing into a strong film, causing tacky, blotchy, or weak finishes. Thin coats, longer wait times, heaters or low‑temp formulations, and good surface prep help. Watch for tacky spots, clouding, or poor adhesion, and follow manufacturer limits; keep going and you’ll find practical fixes and precautions.
Does Paint Dry Slower in the Cold?
Cold can also change viscosity, so when you’re doing color mixing be aware pigments may behave differently and require more stirring or thinner adjustments.
For storage, keep cans in a stable, warmer spot to preserve consistency and prevent separation or freezing.
Plan accordingly: let paint warm before use, monitor drying times, and adjust ventilation to help evaporation without freezing surfaces.
Quick Answer and What to Do Now
How should you proceed right now? You’ll want to inspect the job: check tackiness, color contrast between coats, and any lingering paint odor.
If surfaces feel sticky or the new coat looks uneven, raise temperature or add gentle heat and increase ventilation to speed curing. Avoid adding more paint; wait until tack is gone.
For small projects, move pieces indoors or use a space heater and a fan safely. Keep humidity lower if possible.
Test a hidden patch before recoating. Document conditions—temperature, humidity, and time—so you can adjust next time and prevent color contrast or odor issues.
How Cold Slows Solvent Evaporation
When temperatures drop, solvents in paint evaporate much more slowly because reduced thermal energy cuts the rate at which molecules escape the liquid surface. You’ll notice longer tack times and higher humidity near the film as vapor pressure falls; solvents need more energy to change to gas, so drying stretches out.
That affects scheduling, indoor work, and choices about thinning or heating. Remember that color psychology or decorative deadlines don’t speed chemistry, and you should avoid disposing of slow-dry paint—consider paint recycling options instead.
- Keep ambient temperature steady
- Increase airflow gently
- Use compatible low-temperature solvents
How Low Heat Delays Binder Film Formation
Slower solvent evaporation also affects the binder, because film formation depends on polymer chains coalescing as the carrier leaves. With low heat, those chains stay rigid and can’t flow together to form a continuous film.
You’ll notice tacky, powdery surfaces when binder particles haven’t fused, and subsequent layers may not adhere. Low temperatures limit molecular mobility, so you must allow extra cure time or provide gentle heat to encourage coalescence.
When remixing stored paint for touch-ups, remember color mixing can be uneven if binders didn’t form correctly. Proper storage and paint recycling practices help preserve binder integrity for reliable film formation.
Cold vs. Warm: Latex Paint Differences
You’ll notice latex paint dries much slower in cold conditions, which lengthens open time and affects how long you’ll wait between coats.
Cold also hampers proper film formation, so the final surface can be weaker or uneven compared with warm curing.
And because viscosity rises as temperature drops, you’ll need to adjust thinning, application speed, or tools to maintain good coverage.
Drying Time Differences
Curious how cold air changes latex paint’s drying? You’ll notice cold slows water evaporation, so tack-free times and recoat windows stretch. You should expect longer wait times, especially below 50°F, and adjust schedules accordingly.
Color mixing and paint storage matter: chilled cans can thicken, altering perceived drying and blending.
- Plan longer cure and tack-free intervals in cold conditions.
- Use warmed, well-stored paint to keep consistency and predictable drying.
- Avoid fast recoat attempts; extended humidity in cold prolongs drying.
You can speed things up modestly with gentle warming and increased air circulation, but don’t force rapid drying.
Film Formation Quality
Beyond longer tack-free times, cold alters how latex paint coalesces into a continuous film. You’ll notice reduced coalescence can leave micro-voids, affecting color consistency and overall aesthetic appeal. Cold slows polymer particle merging, so films can be weaker, chalky, or uneven. You should avoid painting near freezing; instead wait for warmer conditions or use additives designed for low temperatures. Proper surface prep helps, but it won’t fully counteract poor film formation. Refer to the quick comparison below for practical expectations and choose conditions that preserve finish integrity.
| Condition | Effect |
|---|---|
| Warm | Smooth, strong |
| Cold | Fragile, uneven |
| Additive | Improved coalescence |
| Prep | Helps but limited |
Temperature-Dependent Viscosity
When temperatures drop, latex paint thickens noticeably, so you’ll find it flows slower, levels less effectively, and resists brush or roller action compared with warm conditions. You’ll need to adjust technique: thicker viscosity traps air, delays coalescence, and can alter Color consistency across a surface.
Warm paint spreads evenly, improving film formation and minimizing lap marks. Primer compatibility matters because some primers tolerate thinning better, while others separate or sag if you alter viscosity.
Heat speeds solvent evaporation and polymer fusion; cold prolongs both. Manage temperature, use recommended thinners sparingly, and test a small area before committing to full application.
- Thinning options
- Application speed
- Test panels
Cold vs. Warm: Oil-Based Paint Differences
If you’ve ever tried brushing oil-based paint on a chilly morning, you know temperature changes how paint behaves. You’ll notice slower tack-up, longer flow time, and a thicker feel compared with warm conditions. Cooler temps delay solvent evaporation, so sanding and recoating take more patience; warming the room or using slow-dry alkyds helps control finish.
Pick pigments thoughtfully—color psychology matters because darker shades absorb more heat when warmed, subtly affecting drying. If you care about fumes, consider eco-friendly options like low-VOC oil blends or proper ventilation to reduce exposure while maintaining predictable curing in varied temperatures.
How Humidity Affects Paint Drying in Cold Weather
Cold slows oil-based paint’s solvent evaporation, and humidity further alters that pace by changing how moisture interacts with the film and substrate. You’ll notice high humidity slows skin formation, trapping solvents longer and prolonging tackiness, especially on cool surfaces.
Cold and humid conditions slow oil-based paint drying, trapping solvents and prolonging tackiness—especially on cooler surfaces.
Low humidity can help solvents escape but risks poor flow and adhesion in cold. Consider sunlight exposure and paint color, since darker hues warm slightly and speed drying; pale shades stay cooler and dry slower. Monitor conditions and choose timing accordingly.
- High humidity increases blushing and extended tackiness.
- Low humidity risks poor leveling in cold.
- Darker paint color can offset some humidity effects.
How Ventilation Influences Curing in Cold Conditions
Because ventilation controls how quickly solvents and moisture leave the paint film, you should manage airflow carefully during cold-weather curing to prevent extended tackiness, blushing, or incomplete film formation.
You’ll balance ventilation to remove moisture without chilling the surface; gentle, continuous airflow often beats bursts that cool the film.
In poorly ventilated spaces, solvent retention stalls curing and can alter sheen and hue, affecting color psychology in sensitive spaces.
For eco-friendly finishes with low-VOC solvents, controlled ventilation is still essential since reduced solvent levels lengthen open time.
Monitor humidity and airflow to achieve uniform cure without temperature-driven defects.
Surface Temperature vs. Air Temperature: Which Matters?
While air temperature sets the general environment, the temperature of the surface you’re painting dictates how the coating actually cures: film formation, solvent evaporation, and chemical crosslinking all happen at the interface, so a warm room won’t save a chilled substrate.
You should focus on substrate warmth because a cold surface prolongs tackiness, alters paint texture, and can trap moisture.
Air movement helps evaporation, but can’t reverse poor surface conditions.
Consider color psychology for perceived finish—darker hues show texture and uneven cure more.
Prep, surface heating, and timing matter to achieve uniform results.
- Warm the substrate when possible
- Control humidity and airflow
- Test small areas first
Minimum Temperature Thresholds for Common Paints
If you want reliable drying and adhesion, know each paint type’s minimum temperature before you start: most water-based latex paints need at least 50°F (10°C) to film properly, acrylics can tolerate slightly cooler conditions around 45°F (7°C) for short periods, and oil-based and alkyd coatings generally require 40°F (4–5°C) or warmer to cure; specialty low-temp formulations may go lower, but always check the manufacturer’s specs and factor in substrate temperature and dew point.
| Paint Type | Min Temp | Feeling |
|---|---|---|
| Latex | 50°F | Cautious |
| Acrylic | 45°F | Hopeful |
| Oil/Alkyd | 40°F | Confident |
Consider color theory and paint branding when choosing low-temp products; labels matter.
What Happens When Wet Paint Freezes
- Pigment clumping and uneven color
- Cracked or porous finish after thawing
- Weakened bond to substrate, increasing peeling
If paint freezes, don’t assume normal curing will resume. Test a small area and consider disposal or professional advice to avoid long-term failure.
How Cold Changes Primer Performance
Because primers set the foundation for any paint job, cold temperatures can seriously alter their chemistry and adhesion, and you’ll notice the effects even before topcoat application. You’ll find primers thicken, cure slower, and attract moisture, reducing bonding to substrates.
That means more sanding, longer recoat windows, or outright failure on porous surfaces. Choose formulations rated for low temperatures and consider additives manufacturers recommend.
Also weigh aesthetic goals: altered base tones can shift perceived hue—impacting color psychology—and some eco-friendly finishes designed for cold cure differently, so verify compatibility to avoid compromised durability and unwanted color shifts.
How Cold Affects Paint Sheen and Finish
When temperatures fall, paint sheen can shift and finishes may look uneven as solvents evaporate more slowly and binders cure differently. You’ll notice flatter spots, blotchy gloss, or clouding, especially on large surfaces or with quick color mixing that wasn’t thoroughly blended.
Cold slows film formation, so you should control application conditions and use warmed paint from proper paint storage. Test a small area first and adjust technique.
Consider using additives formulated for lower temperatures and wait for manufacturer-recommended recoat windows.
- Warm cans before use
- Stir thoroughly during color mixing
- Keep stored paint at consistent temperature
Typical Extra Drying Time in Cold Weather
How much longer will paint take to dry in cold weather? You’ll typically see drying times increase 50–200% depending on temperature, humidity, and ventilation.
For latex at 20–50°F you might wait 2–8 hours to feel dry and 24–72 hours to handle. Oil-based can double or triple typical times.
Factors include color mixing (darker pigments absorb heat differently) and paint branding—manufacturer formulas cure at varying rates.
You can shorten delays with heat, dehumidifiers, and fans, but always follow label recommendations.
Plan extra days between coats and longer curing before heavy use in cold conditions.
Signs Paint Hasn’t Cured Properly in Cold
If paint hasn’t cured properly in cold conditions, you’ll notice distinct physical and performance issues that signal incomplete drying. You’ll see tacky or soft spots when you touch the surface, and fingerprints or smudges may remain.
Color consistency can be off, with blotchy or uneven sheen. Strong paint odors may linger longer than normal, indicating solvents haven’t fully evaporated.
You might also observe dirt pickup and poor adhesion where flakes or peeling start. Watch for dull patches that resist polishing.
Common signs include:
- Tacky finish and smudging
- Uneven color consistency
- Lingering paint odors and solvent smell
How to Test Dryness in Low Temperatures
Because cold slows chemical reactions, you’ll need a few quick, reliable checks to confirm paint has truly dried rather than just surface-set. First, press gently with a clean fingertip through a glove; no tackiness means more confidence, but test several spots.
Because cold slows drying, press gently through a glove — no tackiness across several spots means it’s likely dry.
Second, try the fingernail edge: a firm film resists slight scraping without gouging.
Third, check solvent resistance by dabbing with a damp cloth; no color transfer suggests curing.
Note color psychology effects—cool light can make wet areas look different.
Prefer eco-friendly pigments if retesting later, since they’re less prone to off-gassing during slow cures.
Best Indoor Strategies for Cold-Weather Painting
When you paint indoors in cold weather, keep the room warm enough for the coating’s recommended temperature range so it cures properly.
You’ll also want to control humidity with a dehumidifier or humidifier as needed, since moisture levels affect drying time and finish.
Finally, improve air circulation with fans or vents to help solvents evaporate and promote even curing.
Control Indoor Temperature
Although cold air slows curing, you can still get reliable results by keeping the workspace warm and stable. You’ll set a consistent temperature (ideally 50–70°F depending on paint), avoid cold drafts, and warm surfaces before painting. That steady warmth helps film formation and adhesion, so coatings cure evenly and predictably.
Consider how color psychology influences choices—warmer tones feel cozier in cool conditions—and choose eco-friendly pigments to reduce VOCs while maintaining performance. Use portable heaters safely and monitor temps with a thermometer.
- Place heaters to warm surfaces, not just air
- Seal windows and doors
- Precondition materials to room temperature
Manage Humidity Levels
How do you keep humidity in the sweet spot for cold-weather painting? You monitor levels with a hygrometer and aim for 40–50% relative humidity so paint cures predictably and color matching stays true.
Use a dehumidifier when moisture spikes from indoor activities, and a humidifier if air gets too dry to prevent premature film formation. Keep doors closed to limit moisture sources, and avoid hanging wet laundry nearby.
If you store leftover cans, seal them tightly to reduce contamination and enable paint recycling. Track conditions and adjust devices; consistent humidity preserves finish quality and helps coatings dry evenly.
Improve Air Circulation
Controlling humidity sets the stage, but you also need steady air movement to carry solvents and moisture away so coatings dry evenly. You’ll position fans to create gentle cross-ventilation without blasting tacky paint.
Keep vents open and circulate warm, filtered air to prevent cold pockets that slow curing. Use portable fans and an exhaust setup to exchange room air; avoid drafts that cause uneven drying.
Consider eco-friendly formulations and how temperature affects gloss and color—color psychology matters when hues shift during cure. Monitor conditions and adjust airflow to maintain consistent drying and finish.
- Place fans for cross-ventilation
- Use exhaust to remove moisture
- Avoid direct blasts on wet surfaces
Temporary Heating Options for Faster Drying
When you need paint to dry faster in cold conditions, temporary heating gives you a controllable, immediate boost in temperature and humidity control that speeds solvent evaporation and film formation. You can use electric space heaters, infrared panels, or propane heaters carefully; monitor temperature to protect paint chemistry. Consider how color psychology affects perceived warmth when choosing shades, and pick eco friendly paints to reduce fumes. Keep heating temporary and supervised, avoid direct scorching, and let coatings cure gradually to prevent cracking.
| Heater Type | Best Use |
|---|---|
| Electric | Indoor small rooms |
| Infrared | Direct surfaces |
| Propane | Well ventilated |
| Radiant | Even warmth |
| Oil-filled | Slow, steady warmth |
Using Dehumidifiers and Fans Safely When Cold
Although cold air holds less moisture, you can still speed paint drying safely by combining a dehumidifier and fans to lower humidity and promote even airflow. You’ll place equipment to avoid blowing dust into wet surfaces and prevent uneven drying that can affect color mixing or reveal subtle differences between paint branding.
Use a dehumidifier and gentle fans to lower humidity and circulate air without blowing dust or causing uneven drying.
Run the dehumidifier until relative humidity hits the manufacturer-recommended range, and set fans on low, angled to circulate rather than blast.
- Keep intake filters clean to avoid contaminating finishes.
- Maintain safe distances from paint and heat sources.
- Monitor humidity and temperature continuously to avoid over-drying.
Choose Paints Formulated for Cool Temperatures
When you’re painting in cold weather, pick products labeled for low-temperature application so they’ll cure reliably at cooler temps.
Look for formulas or additives that boost curing and resist freezing, and consider fast-setting options to cut drying time.
These choices help your job finish properly even when it’s chilly.
Formulated For Low Temperatures
If you’re working in cool conditions, pick a paint specifically formulated for low temperatures so it can cure properly without long delays or finish problems. You’ll get faster film formation and fewer runs compared with standard formulas, and manufacturers often boost coalescents so pigments resist color fading.
These paints improve moisture resistance during curing, letting you paint in chilly, damp environments with less risk of blushing or adhesion loss. Choose products labeled for low temps, follow flashing and recoat times, and store cans warm before use.
Key benefits to check:
- Extended open time for leveling
- Additives that prevent clouding
- Tested low-temp adhesion
Additives That Improve Curing
Because cool temperatures slow coalescence and film formation, manufacturers add specific ingredients that help paint cure reliably in chilly conditions. You’ll find low-VOC coalescents with lower evaporation points, antifreeze additives that prevent crystallization, and modified binders that promote film formation at lower temps.
Those tweaks keep sheen consistent and help with precise color matching when coatings set slowly. Some formulas also use stabilizers that extend shelf life, supporting paint recycling and reducing waste.
When you pick a product, check technical data for minimum application temperature and additive descriptions so you get reliable curing without compromising finish.
Choosing Fast-Setting Options
Having picked paints with additives that help curing in cool air, you’ll want to prioritize fast-setting formulations designed specifically for lower temperatures. You’ll choose products labeled for cold-weather application, balancing drying speed with finish quality and color psychology—faster cures can alter sheen and perceived hue.
Look for eco friendly paints that still meet performance claims. Test a small patch to confirm adhesion and appearance. Consider ventilation and mild heat to assist curing without compromising VOC limits.
- Cold-weather acrylics rated to 35°F (1.7°C)
- Low-VOC, eco friendly fast-curing options
- Manufacturer cold-application guidelines and tests
Additives to Adjust Drying in Cold Weather
When temperatures drop, you can speed and stabilize paint drying by adding specialized cold-weather additives that lower the paint’s freeze point, improve film formation, and maintain workability.
You’ll choose compatible antifreeze agents, coalescents, and thickeners to keep viscosity steady so color mixing stays consistent and decorative techniques remain predictable. Additives let you thin without overreducing binders, boost adhesion at low temps, and shorten tack time safely.
Follow manufacturer proportions, test small batches, and note VOC or warranty impacts. Use slow-setting blends sparingly; they can sag. Proper dosing preserves finish quality while helping paint cure in cooler conditions.
Preparing Surfaces for Cold-Weather Painting
If temperatures are near or below the paint’s recommended range, you’ll need to prepare surfaces more carefully to guarantee adhesion and proper curing. You’ll clean, dry, and warm surfaces; remove loose paint and dust; and sand glossy areas so coatings bond despite cold.
Primer choice matters—use one rated for lower temps. Think about color psychology when picking darker tones that absorb heat, speeding drying slightly. Also plan for paint recycling of excess and containers.
Keep tools warm and use slow, deliberate strokes to avoid lap marks.
- Clean and degrease
- Sand and feather edges
- Use cold-rated primer and warmer hues
Tack-Free vs. Fully Cured in Cold Conditions
After you’ve prepped and warmed surfaces, you’ll notice two different milestones as paint dries: tack-free and fully cured. You’ll feel tack-free when the surface isn’t sticky; that happens relatively quickly even in cold if humidity’s low and you’ve used recommended paint branding and proper ventilation.
Full cure takes longer because solvents or water must evaporate and polymer chains must form; cold slows that chemistry. Don’t assume tack-free equals durability—abrading or recoating too soon can ruin finish.
Also consider color mixing effects: pigments and extenders can alter cure times, so follow manufacturer cure specifications rather than guesswork.
Thin Coats vs. Thick Coats in the Cold
You’ll notice thin coats dry faster in cold weather because they shed solvents and moisture more quickly.
Thick coats can trap moisture and slow the chemical cure, increasing the risk of runs or incomplete curing.
Pay attention to coating thickness because it directly affects both drying time and final cure.
Thin Coats Dry Faster
Why does a thin coat of paint dry noticeably faster in cold conditions? You’ll find thinner layers expose more surface area, letting solvents evaporate and curing proceed even when temperatures are low.
When you use careful color mixing and controlled brush techniques, you avoid overloading the film and reduce drying time. Apply thin coats to build opacity gradually; each layer dries quicker and bonds better.
- Thin layers increase evaporation rate.
- Controlled brush techniques prevent pooling and sagging.
- Gradual color mixing keeps pigment load manageable.
You’ll work faster and get smoother results in the cold by favoring thin, deliberate coats.
Thick Coats Trap Moisture
Thin coats dry faster because they let solvents escape. But if you pile on thicker layers in cold weather, you’ll trap moisture and slow both evaporation and film formation.
You’ll notice sagging, tackiness, and longer touch times because cold air holds less vapor, so moisture lingers inside thick films. You should apply thin, even passes to avoid these problems and to reduce waste—thinner coats also make paint recycling easier when you scrape or strip later.
Don’t rely on color psychology to mask defects; bright hues may hide imperfections temporarily, but trapped moisture still undermines adhesion and appearance.
Coating Thickness Affects Cure
When you apply thicker coats in cold conditions, the paint’s cure slows dramatically because heat and solvent escape are both reduced. This causes the film to stay soft and vulnerable for longer. You should prefer thin, even passes to speed solvent release and reduce sagging.
Cold traps moisture under thick films, prolonging tackiness and risking finish defects. Plan color coordination to minimize rework and avoid extra layers.
Store materials properly; proper paint storage at stable temperatures keeps viscosity predictable so you can apply correct film build from the start.
- Thin coats dry more reliably
- Thick coats increase blushing and runs
- Proper storage preserves application quality
When to Recoat at Low Temperatures
If you’re painting in cold weather, wait longer between coats than the product label suggests—lower temperatures slow solvent evaporation and film formation, so the paint needs more time to develop a tack-free surface before recoating. You’ll check tackiness, follow manufacturer minimums, and raise temperature or use heat lamps if needed. Also consider Color psychology when choosing finishes, and prefer Eco friendly paints that tolerate cooler cure windows. Use a finger test, humidity monitor, and spot test before recoating. Consult label for low-temp recoat times and avoid rushing, which risks poor appearance and solvent entrapment.
| Test | Action | Threshold |
|---|---|---|
| Finger | Wait | No tack |
| Humidity | Reduce | <70% |
| Temp | Raise | Manufacturer min |
| Spot | Sample | Smooth film |
How Cold Affects Adhesion and Durability
When you paint in cold conditions, the film may not form completely, leaving thinner, uneven coverage that weakens protection.
You’ll also face higher brittleness risk as binders cure improperly, which can cause cracking under stress.
Those issues together hurt substrate bonding, so the coating won’t adhere or last as designed.
Reduced Film Formation
Why does paint laid on cold surfaces fail to form a continuous, resilient film? You notice reduced coalescence because low temperatures slow solvent evaporation and polymer flow, so particles don’t fuse properly.
Poor film formation hurts adhesion and durability; uneven color mixing and altered brush techniques can’t compensate for incomplete particle bonding.
You should control substrate temperature and use formulations rated for cool conditions to improve film integrity.
- Confirm substrate is within recommended temperature range
- Use paints with low-temperature coalescing agents
- Avoid fast cooling during drying
These steps help achieve a continuous, durable film despite cooler conditions.
Increased Brittleness Risk
Although cold slows chemical mobility, it also makes cured paint more brittle and prone to cracking, so you’ll see reduced toughness and poorer long-term adhesion on chilled substrates.
You’ll notice microcracks forming sooner, and impacts or flexing can open fissures that let moisture in.
Cold-cured films often feel stiffer, lowering abrasion resistance and shortening service life.
Color consistency can shift as pigments distribute differently in denser binders, so finishes may look uneven.
Choose paint branding with cold-weather formulations and follow manufacturer temperature recommendations to minimize brittleness.
Proper curing time and avoiding stress during drying will help maintain durability.
Poor Substrate Bonding
If you apply paint in cold conditions, it often can’t form a strong bond with the substrate because the binder’s flow and wetting are reduced and surface moisture or frost interferes with adhesion. You’ll notice poor substrate bonding leads to peeling, flaking, and reduced durability.
Cold limits penetration into pores and slows coalescence, so surface preparation becomes critical. Check primer compatibility with low temperatures; the wrong primer won’t help.
Take these steps to reduce failure:
- Clean and dry surfaces thoroughly before painting.
- Use primers rated for cold application to ensure primer compatibility.
- Allow extra curing time and avoid freezing temperatures.
Preventing Blistering and Cracking in Cold-Applied Paint
When you apply paint in cold conditions, trapped moisture and uneven film formation can quickly lead to blisters and cracks, so you must manage surface temperature, humidity, and application technique carefully. You’ll choose primers rated for low temps, thin coats, and slower recoat intervals to let solvents escape. Select flexible formulations and eco friendly pigments to reduce brittleness; consider color psychology when choosing darker tones that absorb heat. Monitor dew point and avoid painting near opening vents. Use gentle heat and airflow to cure—not force dry. Inspect and sand any imperfect areas before recoating.
| Step | Action | Benefit |
|---|---|---|
| 1 | Prime | Adhesion |
| 2 | Thin coats | Solvent release |
| 3 | Gentle heat | Controlled cure |
Managing Condensation on Cold Surfaces During Painting
Because cold surfaces reach the dew point quickly, you’ll often see water condense onto walls, windows, and metal before paint ever bonds. So you need to control surface temperature and humidity to prevent adhesion failure and staining.
Cold surfaces hit dew point fast—control surface temperature and humidity to prevent condensation, paint failure, and staining.
You’ll ventilate, raise surface temps with heaters or warm water, and use dehumidifiers to keep relative humidity below critical levels.
Choose primers suited for damp conditions and eco-friendly paints that tolerate slight moisture.
Remember color psychology when selecting hues—darker tones hide minor imperfections better.
Implement quick checks and wipe surfaces before coating.
- Monitor dew point vs. surface temp
- Use targeted heating
- Wipe and prime
Seasonal Scheduling: When to Postpone Exterior Work
While you can push to finish a job, plan exterior painting around predictable seasonal risks to avoid costly rework and adhesion failures. You should postpone when temperatures drop below manufacturer minimums, humidity stays high, or freeze-thaw cycles are expected within 24–48 hours, since those conditions prevent proper film formation.
Consider how color psychology affects perceived warmth—darker hues absorb heat but may still fail if ambient conditions are wrong. Delay rather than force work; use proper storage and paint recycling for leftovers until conditions improve.
Schedule projects for stable, mild windows to protect finish, warranty, and long-term appearance.
Cost and Energy Trade-Offs of Heating Jobs
You’ll need to weigh fuel and electricity costs when deciding how much heat to add for a cold-weather paint job. Consider the efficiency of heaters you rent or buy, since higher-efficiency units can cut operating costs even if they cost more upfront.
Also factor labor time versus expense—faster drying can reduce crew hours but may raise energy bills.
Fuel And Electricity Costs
How much will it cost you to keep paint drying in cold weather? You’ll weigh fuel and electricity expenses against schedule gains, factoring in color consistency and proper paint storage to avoid waste.
Portable heaters, space heaters, and insulated enclosures raise hourly operating costs; electricity spikes faster than propane in many regions. Estimate kilowatt-hours or fuel gallons, then multiply by run time needed to reach safe drying temperatures.
- Short runs lower total cost but may risk uneven drying.
- Continuous heating guarantees color consistency and usable finish.
- Proper paint storage reduces reheating frequency and material loss.
Heating Equipment Efficiency
Because heating choices drive both job cost and drying quality, you should weigh unit efficiency, fuel type, and runtime when planning cold-weather painting.
Choose heaters with high thermal efficiency to cut fuel use and maintain steady temps that preserve color mixing integrity and avoid banding or settling.
Electric units offer cleaner control; fuel burners provide faster recovery but need ventilation and higher operating costs.
Match heater placement to prevent hot spots that harm primer adhesion or cause uneven curing.
Track energy consumption against project value so you can justify rental or purchase based on performance, safety, and consistent finish results.
Labor Time Versus Expense
Once you’ve picked heaters that balance efficiency, fuel type, and placement, you’ll face the next trade-off: labor time versus heating expense. You’ll decide whether to pay crews for longer workdays at lower temperatures or speed drying with higher energy use.
Shorter schedules raise costs but reduce cold-related issues and let color psychology choices settle faster, while slower drying can affect finish uniformity and cure of eco-friendly pigments. Weigh productivity against utility bills, equipment rental, and potential rework.
- Faster heating: higher fuel costs, less labor time
- Slower approach: lower energy, more worker hours
- Hybrid: targeted zones, balanced expense
Safety Tips for Portable Heaters and Ventilation
When you use a portable heater to speed paint drying in cold conditions, keep it at least three feet from flammable materials and never leave it unattended; proper placement and supervision cut the biggest risks.
You should ventilate well—open windows or use exhaust fans—to disperse fumes and reduce carbon monoxide risk.
Use electric heaters with tip-over and overheat protection, and plug them directly into outlets, not extension cords.
Monitor humidity and temperature to avoid trapped solvents that affect finish and link to historical techniques and color psychology in choosing safe work conditions.
Store solvents sealed, dispose of rags safely, and have a fire extinguisher nearby.
How Professional Painters Adapt to Cold Weather
Although cold slows curing, professional painters adapt by changing materials, timing, and technique to keep quality consistent. You plan work around warmer daytime hours, let primers set longer, and choose formulations suited for low temps while considering color psychology to preserve desired mood.
Although cold slows curing, painters adapt—timing, materials, and technique ensure consistent color and mood in chill.
You communicate realistic timelines to clients and monitor humidity to avoid adhesion issues. You also minimize waste through paint recycling practices, remixing leftovers for touch-ups. Small adjustments keep results predictable.
- Schedule exterior work midday for faster tack
- Extend recoat windows and inspect under varied light
- Reuse and label leftover mixes for accurate future matches
Tools and Materials That Help in the Cold
Because cold changes how paint flows and cures, you’ll want a compact kit of tools and specially formulated materials to keep jobs moving. Bring a heated work lamp, insulation blankets, a portable heater with thermostat, and a low-temp mixer to maintain viscosity.
Use paints labeled for low-temperature application and primers that bond in chill; choose faster-curing additives sparingly. Keep brushes and rollers designed for denser, cold-thicker coats.
Consider color psychology when selecting hues—darker tones hide flaws but absorb heat differently. Favor eco friendly pigments to reduce VOCs and environmental impact while still achieving reliable coverage in cool conditions.
Quick Troubleshooting: Common Cold-Curing Problems
If your paint’s not curing right in cold weather, check for surface moisture first—damp substrates and condensation will prevent proper adhesion.
You’ll also want to address slow film formation, which shows up as tacky or soft coatings and often means you need warmer conditions or a faster-curing product.
Start by drying the surface and raising the temperature or using additives recommended for low-temperature curing.
Surface Moisture Issues
Notice dampness on your paint soon after application? You’re likely battling surface moisture: dew, condensation, or trapped wetness that stops curing. You can’t force drying; instead control humidity, temperature, and substrate prep. Remember color psychology affects perceived dryness—darker tones look wet longer—so don’t judge by eye alone.
Also avoid using leftover mixtures from paint recycling that may have altered solvents and higher water content.
- Wipe and dry surfaces before painting.
- Use dehumidifiers or warmth to lower ambient humidity.
- Wait for recommended substrate temperature and avoid painting at night.
Slow Film Formation
Surface moisture issues often mask a related problem: slow film formation, where the paint forms a skin or tacky layer long before solvents or binders fully cure. You’ll notice uneven sheen, tackiness, or blotchy color as top layers set while underlying film remains soft.
In cold conditions, reduce humidity and raise substrate temperature to promote uniform coalescence. Stir thoroughly to maintain color consistency and follow paint branding instructions—formulations differ in low-temperature performance.
Avoid thin coats; apply recommended film thickness and allow extended cure times. If issues persist, switch to a low-temp or fast-coalescing product designed for chilly environments.
When to Call a Pro Versus DIY Redo
Wondering whether you can fix the problem yourself or need a pro? You can tackle minor cold-related issues—blushing, tacky spots, slight unevenness—if you understand color mixing and stick to trusted paint branding to guarantee compatibility.
Call a pro when adhesion fails, mold appears, large areas show film collapse, or you lack proper heating and ventilation. Pros also handle specialty coatings and warranty concerns.
- DIY if damage is superficial and small.
- Hire a pro for structural or widespread finish failure.
- Consider costs: recoat supplies versus professional remediation.
Decide based on scope, skills, and environmental control.
Quick Checklist for Painting in Cold Weather
When temperatures dip, you’ll want a compact checklist to keep paint jobs from failing. You’ll prep surfaces, check forecasted temps, and manage paint storage to prevent freezing or thickening. Mind humidity, dry times, and ventilation. Confirm color matching under the actual light you’ll use. Use slow-setting formulas if needed and warm the room gradually after application.
| Task | Purpose | Tip |
|---|---|---|
| Prep surface | Improve adhesion | Remove frost |
| Check temp | Ensure cure | Stay above label minimum |
| Store paint | Maintain viscosity | Keep indoors |
| Match color | Avoid surprises | Test patch |
| Control humidity | Speed drying | Use dehumidifier |
Frequently Asked Questions
Will Paint Color Appear Different When Dried in Cold Temperatures?
Yes — you’ll notice color consistency can shift when paint dries slowly in cold conditions; longer drying time can alter sheen, cause uneven curing, and slightly change final hue, so expect subtle differences unless you control temperature.
Can Cold-Weather Painting Void Product Warranties?
Yes — you can void warranties if you ignore labeled temperature limits; like Icarus flying too low, manufacturers warn about Temperature effects and altered paint viscosity, and you’ll be responsible for failures beyond specified conditions.
Do VOC Emissions Change During Slow Cold Curing?
Yes — you’ll see VOC emissions shift during slow cold curing: temperature fluctuations extend curing time, causing prolonged off-gassing and variable emission rates, so you’ll experience longer exposure periods and potential peaks as the paint gradually stabilizes.
How Does Cold Affect Paint Storage Life and Shelf Stability?
Cold lowers paint’s shelf stability by promoting separation, viscosity changes, and potential freezing; you’ll see Temperature effects like gelling or pigment settling. Follow Storage guidelines: keep moderate, stable temperatures, avoid freezing, and gently remix before use.
Can Additives Reduce Freezing Risk for Wet Paint?
Yes — like antifreeze for a sleeping river, additives can reduce freezing risk for wet paint. You’ll preserve paint consistency and avoid longer drying time, but choose compatible additives and test batches for performance.
Conclusion
Think of your paint job like planting in late autumn: in cold soil, seeds sit patient, needing warmth to wake. You’ll want to give the coating time and gentle heat—don’t rush or smother it—or the film won’t knit properly. Use heaters, stirred paint, and patience as your sun and mulching. If you tend the job right, the finish will bloom strong; hurry it, and you’ll be left pulling up frostbitten sprouts.