How Long Does Gloss Paint Take to Dry
You can expect gloss paint to be touch‑dry in a few hours but not fully cured for days to a week, depending on type, coat thickness, temperature and humidity. Water‑based glosses usually dry faster (2–4 hours to recoat), while oil‑based ones can take 16–24 hours or longer between coats and several days to harden. Keep coats thin, ventilate, and avoid heavy use until cured—keep going and you’ll find practical tips, timings, and troubleshooting next.
Quick Answer: Gloss Paint Drying and Curing Timelines
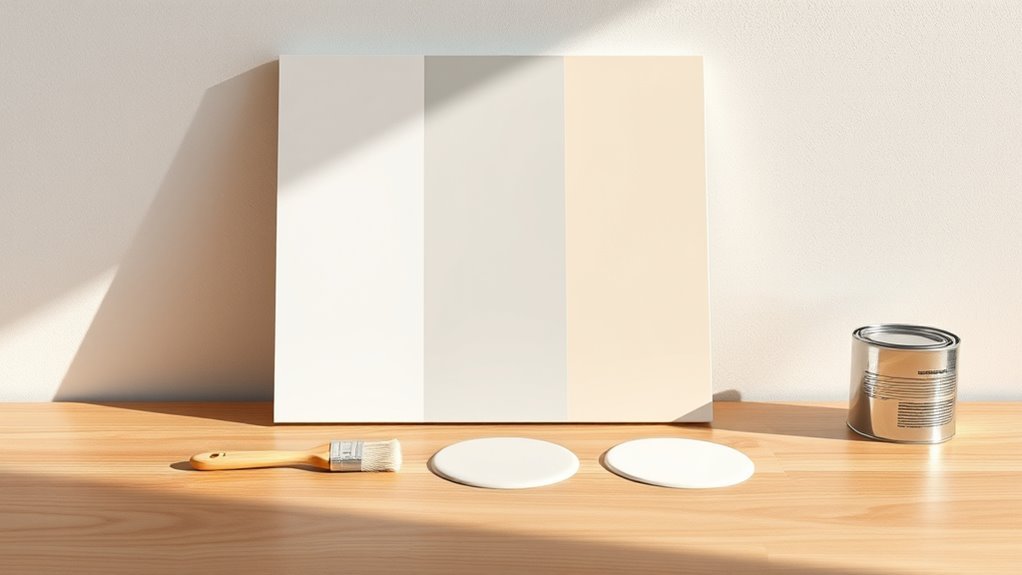
Wondering how long gloss paint really needs? You’ll usually see surface drying in 1–6 hours and recoat times at 4–24 hours, while full curing can take days to weeks depending on formula and conditions.
You should follow manufacturer times, adjust for temperature and humidity, and avoid heavy use until cure.
When you mix colors, allow extra time because thinner tints cure faster; proper color mixing matters for consistency and drying.
If you prefer eco-friendly options, pick low-VOC or water-based glosses—they dry quicker and emit less odor.
Keep ventilation steady and check touch tests before resuming use.
Gloss Paint: What “Dry” vs “Cured” Actually Means
When gloss paint feels dry to the touch it may still be slightly tacky, so you shouldn’t handle or stack painted pieces right away.
Curing is the longer chemical process that gives the coating its full hardness and resistance, which can take days to weeks depending on the formula and conditions.
I’ll explain how tackiness indicates partial drying and what to expect for the full cure timeline.
Dry Time Vs. Tackiness
Although a gloss paint surface can feel dry to the touch within hours, that doesn’t mean it’s fully cured or ready for heavy use. “Dry” usually refers to a tack-free feel, while “cured” means the solvent and chemical reactions have completed and the film has reached its full hardness and durability.
You’ll notice tackiness varies with temperature, humidity, and coat thickness. Pay attention after applying color mixing or considering primer selection—both affect solvents and cure.
Check tack with a light fingertip touch; it shouldn’t transfer. Watch for these signs:
- Slight stickiness under pressure
- No transfer on finger
- Firm edge resistance
- Even gloss without marring
- No indentation retention
Full Cure Timeline
How long will a gloss paint really take to go from “dry to the touch” to fully cured? You’ll see surface dry in hours, but full cure can take days to weeks depending on temperature, humidity, and film thickness. Proper color mixing and following label instructions help chemical crosslinking; also avoid disturbing coats during cure. Store cans correctly—proper paint storage preserves catalysts that aid curing.
| Condition | Typical Cure |
|---|---|
| Warm, dry, thin coats | 3–7 days |
| Cool, humid, thick coats | 2–4 weeks |
| Poorly stored/old paint | Extended or failed cure |
Touch-Dry vs Recoat vs Full Chemical Cure
Because each stage of drying serves a different purpose, you need to understand the difference between touch-dry, recoat, and full chemical cure. You’ll know when a surface won’t stick to your finger, when it’s safe to apply another coat, and when the paint reaches full gloss durability and resists color fading. Learn the stages so you won’t damage the finish.
- Touch-dry: surface dry to the touch, not load-bearing.
- Recoat window: safe interval for additional layers.
- Handle time: when you can move panels gently.
- Full chemical cure: maximum hardness and resistance.
- Final inspection: check gloss and color stability.
Oil-Based Gloss Paint: Drying Stages and Touch Safety
When you use oil-based gloss paint, drying happens in distinct stages—surface tack fades within hours, but the film keeps hardening for days to weeks—so don’t assume it’s safe to touch or move the piece just because it feels dry.
You’ll notice initial tack loss, then handling dryness (usually 6–24 hours), and finally full chemical cure that can take 7–30 days depending on temperature, humidity, and layer thickness.
Avoid stressing surfaces until cure for peak gloss durability and to prevent fingerprints or dents.
Remember darker paint color can show imperfections more, so handle with extra care during curing.
Water-Based (Acrylic/Latex) Gloss: Drying and Recoating
Although water-based acrylic and latex glosses dry faster than oils, they still follow distinct stages you should know before recoating or handling. You’ll notice tacky, set, and fully cured phases; temperature, humidity, and film thickness change timing.
Use proper color mixing to avoid overworking paint, and choose brush techniques that minimize streaks and bubbles. Typical recoating windows matter, so test a small area.
- Tacky to touch: avoid fingerprints
- Set: light sanding possible
- Recoat: follow label minimum
- Cure: full hardness develops over weeks
- Cleanup: water-soluble before cure
Gloss Paint Timelines by Popular Brands (Typical Touch-Dry)
When you compare popular gloss brands, you’ll notice touch-dry times usually range from about 30 minutes to a few hours. Factors like formulation and temperature shift those numbers, so check each brand’s label for its typical touch-dry claim.
Next, we’ll highlight common brands and the touch-dry times you can expect.
Brand Comparison Times
Because drying time varies by formulation and climate, you’ll want to compare brands before you buy. Check labels for recommended conditions, and consider Color mixing needs and Environmental impact info when choosing.
Compare typical touch-dry claims, but test small areas.
- Brand A: fast tack-free, higher VOCs
- Brand B: moderate dry, low-VOC option
- Brand C: premium sheen, longer cure
- Brand D: budget-friendly, slower set
- Brand E: waterborne, quick recoat window
You’ll weigh sheen, recoat intervals, and sustainability. Buy sample pots to confirm performance in your room’s humidity and temperature.
Typical Touch-Dry
If you’re checking touch-dry times for gloss paint, expect most popular brands to claim a tack-free surface within 30 minutes to 2 hours under ideal conditions. Actual times depend on temperature, humidity, and ventilation.
You’ll notice faster touch-dry with thin coats and warm, dry air. Follow manufacturer guidance after any color mixing because tinting can alter drying chemistry.
Also mind paint storage—old or improperly stored cans may thicken and slow drying. Test a small area before full application, and wait recommended recoat intervals.
These steps help you predict touch-dry reliably and avoid surface defects or tacky finishes.
Recoat Windows for Oil vs Water-Based Gloss Paint
Although both oil-based and water-based gloss paints give a shiny finish, their recoat windows differ enough that you should plan your schedule around them. You’ll choose water-based for faster recoat times and easier cleanup, or oil-based for durability but longer waits. Consider color mixing effects and proper paint storage to keep consistency between coats.
Both oil- and water-based gloss paints shine—choose water for quick recoats and easy cleanup, oil for durability and patience.
Follow these recoat guidelines:
- Water-based: recoat in 2–4 hours under ideal conditions.
- Oil-based: recoat in 16–24 hours, sometimes longer.
- Light sanding recommended between coats for adhesion.
- Check manufacturer’s label for exact times.
- Adjust for humidity and temperature.
How Coat Thickness Alters Drying and Sheen
When you apply a heavier coat of gloss paint, it takes noticeably longer to dry and can stay tacky underneath the surface longer, so plan longer cure times and avoid piling on thickness to speed the job.
You’ll see thicker layers flatten sheen differently; a heavy film can look glossier at first but may dull as solvents evaporate unevenly, risking color fading where pigments migrate.
Thick coats also show brush strokes more readily and trap solvent beneath a cured surface, promoting runs and wrinkling.
Apply thinner, even passes, sanding lightly between coats to control sheen, build durability, and preserve true color.
How Temperature Speeds Up or Slows Gloss Paint Drying
Temperature controls how fast the solvents in gloss paint evaporate, so warmer air will usually speed drying while cooler air slows it.
But humidity interacts with heat — high moisture can counteract warmth and keep drying times long.
In very cold conditions the paint’s chemical curing almost stalls, so you’ll get longer tack times and weaker final gloss.
Temperature And Evaporation Rate
Because heat speeds molecular motion, warmer conditions make the solvents in gloss paint evaporate faster, shortening the tack-free and dry-to-touch times you’ll notice. You’ll also see finish differences tied to color psychology and should consider eco-friendly options when choosing formulas.
Higher temps speed curing but can cause skinning or runs. Lower temps slow evaporation and prolong handling time.
To manage temperature effects, try:
- Test a small panel at room and elevated temps
- Use fast-dry, low-VOC products for quicker set
- Avoid direct sun that unevenly heats surfaces
- Keep consistent ambient temperature during curing
- Monitor surface, not just clock time
Humidity’s Interaction With Heat
If you’re working in a humid environment, higher temperatures won’t speed gloss paint drying as much as you’d expect because moisture in the air slows solvent evaporation and extends tack-free and cure times.
You’ll notice humidity counteracts heat: even warm air can’t pull moisture from wet paint quickly when relative humidity is high. Manage temperature fluctuations to prevent reabsorption of moisture during cooler nights or sudden drops.
Choose paint color selection carefully—darker hues absorb heat but won’t overcome high humidity’s slowing effect.
Monitor both humidity and stable temperature to get predictable gloss drying and avoid tackiness or uneven sheen.
Cold Conditions Slow Curing
Warm, humid air may stall gloss paint drying, but cold conditions create a different problem: low temperatures slow both solvent evaporation and the chemical curing reactions that harden the finish. You’ll notice a curing delay in chilly rooms, and you should plan accordingly.
Manage temperature to speed cures and prevent problems like runs or tackiness.
- Cold conditions lengthen dry-to-touch time
- Reduced solvent evaporation increases tackiness
- Chemical curing reactions slow dramatically
- Risk of poor film formation and adhesion rises
- Use heaters, slow recoat times, or warmer storage
Monitor conditions; raising temperature shortens curing delay.
How Humidity Affects Gloss Paint Drying and Finish
While gloss paint promises a sleek, reflective finish, humidity plays a big role in how quickly it dries and how smooth that sheen looks. You’ll notice humidity effects immediately: high moisture slows solvent evaporation, extending tack time and raising the risk of runs or sagging.
Low humidity speeds surface drying but can trap solvents below, causing later blush or wrinkling. Substrate paint absorption changes with humidity, too—damp surfaces absorb less, affecting adhesion and sheen uniformity.
To get a consistent gloss, monitor moisture levels, adjust your schedule, and choose products formulated for the expected humidity to minimize defects.
Ventilation and VOCs: Safe Drying Practices
Because paint releases volatile organic compounds as it dries, you’ll want good ventilation to protect your health and speed curing. Open windows and run fans to move air; avoid confined spaces. Pay attention to fumes when color mixing or during paint storage to prevent buildup.
Follow these safe practices:
- Use cross-ventilation with intake and exhaust airflow.
- Run an indoor air purifier rated for VOCs.
- Wear a respirator if ventilation is limited.
- Keep paint cans sealed except when in use; store away from living areas.
- Dispose of rags and thinner properly to reduce off-gassing.
These steps keep you safer and help gloss paint dry evenly.
Substrate Types: Wood, Metal, Plastic – Drying Differences
When you paint gloss on wood, it soaks in and can take longer to cure fully, especially on bare or porous timber.
Metal usually allows quicker surface drying but may need primer to prevent peeling.
While plastic can be tricky—some types repel paint and extend drying time or require special adhesion promoters.
Consider substrate porosity and preparation, because those factors most influence how long your gloss paint actually needs.
Wood Surface Dry Times
How long will gloss paint take to dry on wood? It depends on surface prep, porosity, and conditions. You’ll notice drying varies with grain and finish; wood grain affects absorption and paint adhesion.
Expect tack-free in 1–4 hours, recoat in 4–24 hours, full cure in days to weeks.
- Sand smooth to follow grain for better adhesion
- Use primer to seal porous areas and reduce soak-in
- Thin coats dry faster and level nicely
- Maintain 50% humidity and 65–75°F for predictable drying
- Softwoods dry faster than dense hardwoods due to porosity
Adjust timing based on climate and coat thickness.
Metal And Plastic Differences
Although wood soaks up paint, metal and plastic behave very differently and demand different prep and timing, so you’ll need to adjust expectations and technique. You’ll notice metal differences: smooth, nonporous metal needs degreasing, abrasion, and primer; gloss dries faster on thin coats but can run. Plastic properties vary widely; some plastics need adhesion promoters and cool, steady temperatures for proper cure. Test a small area and plan longer tack times for plastic. Follow manufacturer instructions and allow extra drying before handling.
| Substrate | Tip |
|---|---|
| Metal | Prime, scuff |
| Plastic | Use promoter, test |
Aged Primer or Old Paint: Effects on Drying and Adhesion
If your surface still has aged primer or old paint, you’ll want to inspect it before applying gloss, since degraded coatings can slow drying and weaken adhesion.
You should assess and prepare the substrate to prevent peeling, blistering, or extended tackiness. Consider these quick checks and fixes:
- Remove loose flakes from aged primer to expose stable layers.
- Sand glossy old paint to create mechanical grip for new gloss.
- Clean off contaminants that impede cure and bonding.
- Spot-prime bare areas with compatible primer to balance absorption.
- Replace severely deteriorated sections rather than painting over them.
How to Test if Gloss Paint Is Ready for a Second Coat
You can start with a simple touch dryness check by lightly pressing a clean fingertip to a hidden spot—if it feels tacky, wait longer.
For a more reliable test, use the solvent method: rub a cotton ball slightly dampened with mineral spirits over a small area; if paint softens or comes off, it’s not ready.
If both tests pass, you can safely apply the second coat.
Touch Dryness Check
When the surface feels dry to the touch, it doesn’t always mean the paint is ready for a second coat—so you’ll want to run a simple fingertip test to be sure. Gently press a clean fingertip to an inconspicuous area: no tackiness means you can proceed, but look also for color blending and texture smoothing before recoating.
Follow these quick checks:
- Light press: no stickiness
- Edge inspection: no lifting or wrinkling
- Slight sheen change: even finish
- Spot test area: consistent color blending
- Wait and recheck: if unsure, pause longer
If any check fails, give more dry time.
Solvent Test Method
After the fingertip checks, try a solvent test to confirm the paint can handle a second coat without softening or lifting. Dampen a cotton swab with mineral spirits, acetone, or the paint’s manufacturer’s recommended solvent; test in an inconspicuous corner. Rub gently—if paint softens, smears, or detaches, wait longer.
If the surface resists, you’re safe to proceed. Use the solvent test to avoid disrupting color blending or causing patchy gloss. For textured surfaces, verify texture enhancement won’t be lost by premature recoating.
Record drying times and conditions so future coats match finish and performance consistently.
When It’s Safe to Sand Between Gloss Coats
If you need a smooth, durable finish, wait until the gloss coat is tack-free and firm enough to resist fingerprints before sanding between coats. You’ll judge readiness by feel and appearance; avoid sanding while soft to prevent drag marks and ruined color blending or altered finish sheen.
Follow these steps:
Follow these steps: test firmness, sand lightly with fine grit, clear dust, then proceed.
- Lightly touch an inconspicuous edge to confirm firmness.
- Use fine grit (320–400) for leveling, 600+ for ultra-smooth.
- Keep pressure minimal to avoid cutting through the film.
- Clean dust with a tack cloth before next coat.
- Allow full cure for maximum adhesion if uncertain.
Preventing Smudges and Fingerprints While Gloss Dries
Because gloss finishes stay soft for a while, you’ll want to plan handling and workspace layout to keep fingers and smudges off the surface until it’s firm. Use barriers like low-tack painter’s tape, gloves, and temporary supports to avoid contact. Keep the area dust-free and limit foot traffic; a simple cardboard shield around the piece helps.
When painting, mix Color mixing batches to match so you won’t have to retouch later. Choose Brush types with smooth, even application—synthetic bristles for water-based, natural for oil—so you apply fewer coats and reduce handling.
Wait the recommended tack-free time before moving.
Practical Tricks to Speed Gloss Paint Drying at Home
Keeping the surface clean and untouched helps, but when you need a faster turnaround you can speed up gloss paint drying with a few simple steps at home. Open windows to boost airflow, control temperature, and avoid high humidity.
Be careful with color mixing—thinner layers dry quicker than heavy coats. Consider these practical tips:
- Use a fan to circulate air gently over the painted area.
- Maintain warm, steady room temperature (not hot).
- Apply thin, even coats with proper brush technique.
- Allow adequate flash-off time between coats.
- Avoid overcrowding the space to reduce moisture buildup and environmental impact.
Should You Use a Drying Agent or Accelerator?
Wondering whether to add a drying agent or accelerator to your gloss paint? You can, but weigh benefits and trade-offs.
Accelerators cut tack time and let you recoat sooner, which is useful for tight schedules or humid spaces. They may alter sheen or slightly shift paint color choices, so test a small patch first.
Choose products labeled for architectural paints and consider eco-friendly options to reduce VOC exposure. Follow manufacturer dosing—more isn’t faster—and ventilate.
For fine finishes or antiques, skip additives and allow longer curing.
Ultimately, use accelerators sparingly and test to ensure appearance and durability meet expectations.
Safe Tools and Equipment to Speed Gloss Paint Drying
You can speed up gloss paint drying with the right tools, but you’ll want to use them safely. A heat gun on a low setting helps evaporate solvents faster without blistering the finish.
Low-odor solvents can thin paint or clean surfaces with less harmful fumes. Always follow manufacturer guidelines, keep good ventilation, and test on a scrap piece first.
Heat Guns
If you need to speed up gloss paint drying without damaging the finish, a heat gun can be an effective tool when used correctly. You’ll control heat and airflow to raise paint temperature gently, reducing tack time and helping solvents evaporate.
Follow safety and technique to avoid blistering or discoloration.
- Keep the gun moving; avoid concentrating heat.
- Use low to medium settings for even drying.
- Maintain a 6–12 inch distance from the surface.
- Test on a scrap piece first to check reaction.
- Wear heat-resistant gloves and eye protection.
Heat guns work, but monitor paint temperature closely.
Low-Odor Solvents
While low-odor solvents won’t dramatically cut gloss paint’s total cure time, they can speed surface drying safely by promoting faster solvent evaporation without strong fumes. You’ll get odor reduction and cleaner workspaces, and eco friendly formulations reduce VOC exposure so you can work indoors more comfortably. Use sparingly, follow manufacturer directions, and ensure ventilation.
| Benefit | When to Use | Note |
|---|---|---|
| Faster surface dry | Warm, ventilated spaces | Not full cure |
| Odor reduction | Indoor projects | Safer for sensitive occupants |
| Eco friendly formulations | Low-VOC requirements | Check compatibility |
| Easier cleanup | Light soils | Use proper rags |
Planning a Painting Schedule Around Gloss Drying Times
Because gloss paint dries differently than flat or satin finishes, planning your painting schedule around its drying times saves you frustration and rework. You’ll set realistic windows for tack-free, recoat, and full cure stages, factor in humidity and temperature, and coordinate Color mixing so batches match across sessions. Use consistent Brush techniques to avoid lap marks when you resume.
- Start with small test panels to confirm dry times
- Schedule longer gaps for high-gloss or oil-based formulations
- Plan trims and corners last to minimize handling
- Batch mixing reduces color variation between coats
- Allow full cure before heavy use or hardware reinstall
Handling Windy or Cold Jobsite Conditions With Gloss Paint
When you’re facing wind or cold on a jobsite, adjust your approach so gloss paint can dry and cure properly without trapping dust or blushing. Control airflow, raise temperature slowly, and limit humidity.
Use temporary windbreaks, sealed enclosures, or portable heaters with proper ventilation to maintain manufacturer-recommended conditions. Check local environmental regulations before using heaters or solvents outdoors.
Wear appropriate safety gear and monitor oxygen levels and VOCs. Allow extended tack and full cure times, testing discreet spots before recoating.
If conditions can’t be controlled, postpone work to avoid finish defects and wasted labor and materials.
Speed-Drying Gloss on Trim, Doors, and Cabinets
Before you try to rush gloss on trim, doors, or cabinets, make sure surfaces are clean and sanded so the paint bonds and dries evenly.
You can thin certain gloss paints slightly or use approved fast-drying additives to speed cure times without ruining the finish.
Also control temperature, humidity, and airflow—drying fans, a warm room, and low humidity will shave hours off drying time.
Prep And Surface Cleaning
To get gloss paint to dry fast and look professional, start by thoroughly prepping and cleaning the surface so the coating can adhere evenly. You’ll remove dirt, grease, and loose finish, and evaluate if sanding or primer selection is needed for adhesion and uniform sheen. Also consider color mixing impacts on opacity before you paint.
- Wipe surfaces with TSP or mild degreaser
- Sand glossy finishes to dull the surface
- Clean dust with tack cloths
- Patch holes and sand smooth
- Apply appropriate primer based on substrate
Do these steps, and your gloss will dry evenly and resist peeling.
Thinner And Faster-Drying Additives
If you need gloss paint to dry quicker on trim, doors, or cabinets, you can thin the paint slightly and add a fast-drying catalyst or solvent to speed curing without sacrificing finish quality. You’ll follow manufacturer ratios, mix thoroughly, and test on scrap to confirm sheen and adhesion.
Thinners improve leveling for smoother edges, aiding color blending across panels, while catalysts accelerate crosslinking for a tougher film. Use additives sparingly to avoid blush or wrinkling; strong solvents can alter texture enhancement and gloss.
Work in small batches, apply consistent thin coats, and allow recommended flash times between layers for best results.
Controlled Drying Conditions
Thinning and catalysts can speed dry time, but controlling the environment will give you the most consistent, professional results on trim, doors, and cabinets. You’ll manage temperature, humidity, and airflow to speed curing without harming finish or color.
Consider how color mixing affects heat absorption and drying rate, and factor environmental impact into ventilation and solvent choice.
- Keep temperature steady (65–75°F)
- Maintain 40–50% relative humidity
- Use gentle air circulation, not direct blasts
- Limit dust and contaminants during cure
- Choose low-VOC products to reduce environmental impact
Follow these steps and you’ll get faster, reliable gloss results.
When to Postpone Painting Due to Poor Drying Conditions
When humidity’s high or temperatures dip below the paint’s recommended range, you should postpone painting until conditions improve. Wet or cold air slows solvent evaporation and prevents gloss paints from curing evenly. Check environmental factors like humidity, temperature swings, and airflow before you start.
Don’t paint during rain, fog, or overnight cold snaps. Also inspect paint storage: cans left in cold garages or hot vehicles can thicken or separate, affecting drying. If conditions are marginal, wait for a stable 24–48 hour window within the manufacturer’s specified range.
Delaying reduces runs, tackiness, and the need for later corrections.
Fixing Cloudy or Uneven Gloss After Slow Drying
If your gloss looks cloudy or patchy after slow drying, first identify the cause—moisture, contamination, or incomplete curing—so you know how to fix it.
You can smooth uneven areas by lightly sanding and cleaning before re-coating or applying a compatible clear topcoat.
Finally, restore an even gloss by using the correct finish product and allowing proper drying conditions to fully cure.
Identify Cloudy Causes
Curious why your gloss looks cloudy or patchy after a slow dry? You’ll diagnose causes before fixing them. Check these common issues to spot the root:
- Poor ventilation causing moisture retention and milky haze.
- Contaminants (dust, oil) disrupting color blending and finish.
- Incorrect thinning or old paint altering gloss and adhesion.
- Incompatible primers or coatings creating bloom or whitish patches.
- Temperature swings that affect curing and leave uneven sheen.
Inspect surface, smell for solvent, and test a small scrape.
Once you identify the cause, you’ll choose targeted remedies instead of guessing and risking further damage.
Smooth Uneven Surfaces
Once you’ve pinpointed why the gloss went cloudy—poor ventilation, contaminants, wrong thinner, incompatible coatings, or temperature issues—you can start restoring a smooth, even surface.
First, let the paint fully cure; rushing causes more defects. Use gentle surface sanding with fine grit to level orange peel or blushing, removing high spots without cutting through the film.
Clean thoroughly, then assess adhesion. If bare areas or staining show, choose primer selection that bonds to substrate and blocks bleed-through.
Apply thin, even coats and allow proper flash times. Recoat only when recommended, and maintain good ventilation and temperature to prevent recurrence.
Restore Gloss Finish
When slow drying has left your gloss cloudy or uneven, you can restore a smooth, reflective finish by patiently correcting surface defects and rebuilding the paint film in thin, controlled layers. Start by assessing dew, contamination, or solvent pockets, then dry fully before touching up.
Use careful sanding and light scuffing to level orange peel or blushing. For color blending and matching, feather new coats into surrounding areas to preserve finish sheen. Follow with polish and non-abrasive glaze.
- Wait for proper cure time
- Clean surface with solvent
- Sand with fine grit
- Apply thin, even coats
- Polish to restore shine
Signs Gloss Paint Failed to Cure and How to Recover
If your gloss paint doesn’t feel right after the expected drying time, you’ll notice clear signs that it failed to cure; catching these early lets you take steps to fix the finish before the problem worsens.
You may see tackiness, fingerprints, or a soft film; poor color blending or uneven sheen level can indicate solvent trapped beneath the surface.
To recover, ventilate the area, raise temperature slightly, and allow extra cure time.
For persistent softness, thinly sand glossy spots with fine grit, clean residue, then apply a compatible thin topcoat or recoat following manufacturer directions to guarantee proper adhesion and hardness.
How Long Before Regular Use of Gloss-Painted Furniture
Although gloss paint can feel dry to the touch within a few hours, you shouldn’t put furniture back into regular use until the finish reaches sufficient hardness—typically 24 to 72 hours for light handling and up to 7 days for full use.
You’ll want to *take into account* factors like humidity, temperature, and coat thickness.
Follow these quick guidelines:
- Wait at least 24–72 hours before light use (shelving, gentle items).
- Avoid heavy use or placing fragile objects for up to 7 days.
- Test inconspicuous spots before full use.
- Keep items in well-ventilated areas; control humidity.
- Store leftover paint properly; good paint storage and careful color mixing matter.
Gloss Paint Maintenance: First 30 Days After Painting
After the initial drying period, you’ll want a clear plan for caring for gloss-painted surfaces during the first 30 days to protect the finish as it hardens. Check daily for tackiness and avoid heavy use for at least a week. Clean gently with a soft cloth and mild soap; don’t scrub. Monitor how light and shadows reveal color shifts—basic color theory helps you spot uneven sheen. Keep humidity and temperature steady to aid finish durability. If blemishes appear, wait until curing advances before spot-sanding and retouching.
| Task | When |
|---|---|
| Light cleaning | Every 3–7 days |
| Inspect sheen | Daily |
| Avoid heavy use | First 7–14 days |
| Control environment | Continuous |
| Touch-up | After 14 days |
Estimating Total Project Time (Prep + Drying + Curing)
Because gloss paint involves multiple stages—surface prep, drying between coats, and long-term curing—you should plan your timeline before you start to avoid surprises.
Estimate prep (cleaning, sanding, Color mixing) at 1–3 hours for small projects, longer for repairs.
Account drying times between coats and allow tack-free vs. handle times. Curing can take days to weeks depending on conditions.
- Prep: surface repair, sanding, masking
- Color mixing: tinting and testing small patches
- Brush selection: choose appropriate bristle type and size
- Drying: film becomes touch-dry, schedule recoats
- Curing: final hardness development
How to Read Manufacturer Drying and Recoat Instructions
When you read a paint can’s drying and recoat instructions, focus on the specific terms—dry-to-touch, tack-free, recoat window, and full cure—and the conditions those times assume, because following them lets you plan recoats and avoid adhesion problems.
Check temperature, humidity, and ventilation notes; they affect times more than sheen or pigment. Note minimum and maximum recoat windows to prevent wrinkling or poor bonding.
Check temperature, humidity, and ventilation—they influence dry and recoat times more than sheen; respect recoat windows to avoid wrinkling.
Manufacturers sometimes list cure times for different substrates—follow those.
Also consider Color psychology when scheduling occupancy and finishing touches, and weigh Environmental impact of faster-drying additives before altering the recommended process.
Contractor Tips for Reliable Gloss Paint Drying
If you want consistent, fast-drying gloss finishes on every job, prioritize surface prep, controlled environment, and the right tools. You’ll manage drying by controlling temperature, humidity, and airflow, choosing fast-curing formulas when needed, and using proper thinner ratios.
Consider color theory for tinting choices that affect opacity and drying perception. Refine brush techniques to minimize brush marks and thin, even coats.
Quick checklist:
- Prep surfaces: clean, sand, and prime
- Control environment: heat, dehumidifier, and fans
- Choose compatible primers and gloss paint
- Thin and mix per label
- Use quality brushes and proper brush techniques
Common Mistakes That Delay Gloss Paint Drying and Finish
Although you’ve followed basic prep and product instructions, a few common mistakes can still slow gloss paint drying and wreck the finish. You’ll overwork wet paint by brushing or rolling too long, leaving brush marks and extended tack time; proper brush techniques matter.
Skipping recommended thin coats or thinning incorrectly—especially during color mixing—creates uneven film thickness that won’t cure evenly. Painting in high humidity, on dirty surfaces, or over incompatible primers traps moisture and solvents.
Using cheap tools or contaminated tins introduces dust and skinning. Don’t rush recoats; follow drying times and inspect between layers to protect sheen and hardness.
Quick Checklist: Before You Paint Gloss (Conditions & Tools)
Because gloss highlights every imperfection, you’ll want to confirm conditions and gather the right tools before you open the can.
Because gloss reveals flaws, check conditions and have the right tools ready before you open the can.
Check room temperature (ideally 10–25°C) and humidity; high moisture slows drying.
Prepare surfaces: clean, sand, and prime where needed.
Verify Color matching by testing a small swatch under the room’s light.
Review paint storage: bring cans to room temp and shake well before use.
Gather tools and safety gear:
- Fine sandpaper and tack cloth
- Quality brush or foam roller for smooth finish
- Primer suited to substrate
- Drop cloths and masking tape
- Respirator and gloves
Now you’re ready to paint.
FAQ: Fast Answers to Common Gloss Paint Drying Questions
When you need quick answers about gloss paint drying, this FAQ gives clear, practical responses you can act on right away; expect times for tack-free, recoat, and full cure, plus tips to speed drying and troubleshoot common problems.
How long until tack-free? Usually 30 minutes–2 hours depending on temperature and humidity.
Recoat time? Often 4–6 hours for water-based, 8–24 for oil-based.
Full cure? Expect 7–30 days.
Can you speed it up? Increase ventilation, raise temperature, use low-humidity conditions, or try approved paint additives.
Will color theory affect drying? Not much, but pigment density can slightly change times.
Frequently Asked Questions
Can Gloss Paint Be Safely Applied Over Wallpaper Seams?
You can, but you shouldn’t; gloss highlights seams. You’ll avoid problems by prioritizing wallpaper removal or careful surface preparation, filling and sanding seams, priming, then applying gloss for a smooth, durable finish.
Will Gloss Paint Yellow Over Time in Shaded Areas?
A vintage storefront owner noticed subtle yellowing over years; you won’t always see gloss paint yellow in shaded areas, but paint durability and color fading depend on pigment quality, UV exposure, and surface preparation—choose stable formulas.
Can You Use Gloss Paint Outdoors Without UV Stabilizers?
You can, but without UV stabilizers your gloss paint’s outdoor durability will suffer; you’ll see faster fading, chalking and breakdown. Use UV-stabilized formulations or add stabilizers to extend gloss, color and substrate protection outdoors.
Does Gloss Paint Attract More Dust Than Satin Finishes?
Yes — you’ll notice gloss paint shows more dust because its surface smoothness reflects light and highlights particles; dust accumulation is more obvious than on satin, even if both attract similar amounts of grime over time.
How Long After Gloss Painting Can You Apply Wax or Polish?
You can usually apply wax or polish after 24–48 hours, but wait for full drying time; for best results, allow 7 days curing before wax application to avoid trapping solvents and guarantee durable shine and protection.
Conclusion
You’ve got the facts: gloss paint may feel dry in an hour but often needs days to cure fully, and oil-based versions take longer than water-based. Remember, “haste makes waste”—rushing recoat or use can mar that shiny finish. Take your time, control temperature and humidity, thin and ventilate correctly, and test before heavy use. Do that, and your glossy surfaces will look sharp and last longer.