How Long Does Spray Texture Take to Dry Before Painting
You can usually expect spray texture to be ready to paint in about 24–48 hours, though light textures may be dry in a few hours and heavy builds can take 24–72+ hours depending on thickness, temperature, and humidity. Use fingertip tests and a moisture meter to confirm it’s firm and not tacky before priming. Improve drying with steady warmth, ventilation, and a dehumidifier. Keep going for tips on timing, testing, and prepping for paint.
How Long Does Spray Texture Take to Dry? Quick Answer
If you’re wondering how long spray texture takes to dry, the short answer is usually 24 to 48 hours for a surface to be paint-ready under normal indoor conditions.
You’ll find drying hinges on humidity, temperature, and thickness you applied. With proper texture application using clean spray equipment, thin even coats dry faster.
High humidity or low heat extends drying times; good ventilation speeds them up.
Touch tests help: feel for tackiness and firmness rather than relying only on hours.
Plan for at least a full day, inspect visually and by touch, then proceed to priming and painting when fully dry.
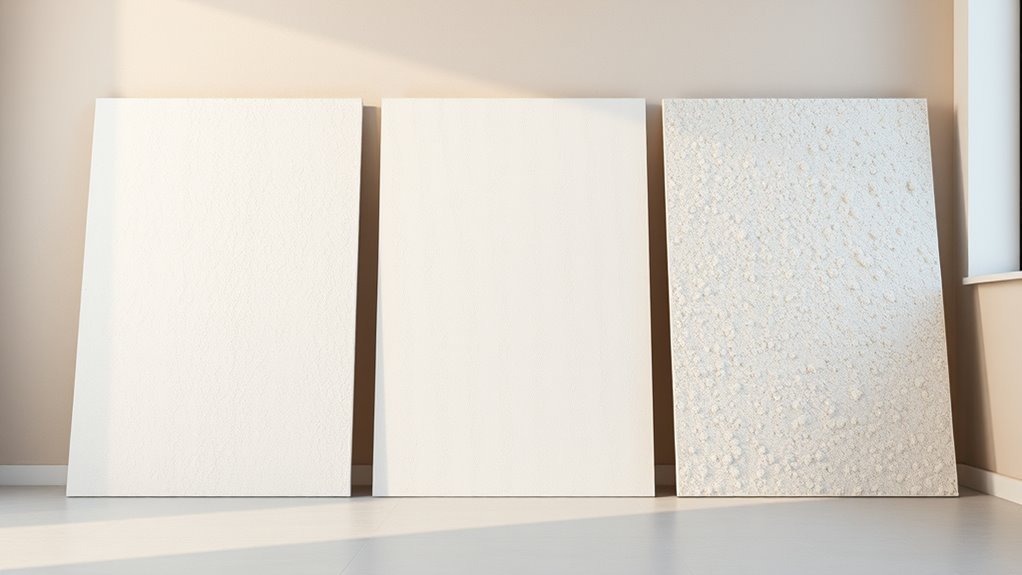
Typical Drying Times for Light, Medium, and Heavy Spray Texture
You’ll notice drying differs by texture weight: light sprays can feel dry to the touch within an hour, while medium textures typically need several hours to set.
Heavy spray textures take the longest and may require 24 hours or more to cure fully, especially in cooler or humid conditions.
I’ll walk you through drying benchmarks and tips for each type so you know when it’s safe to prime and paint.
Light Spray Texture Dry Time
Because light spray texture uses less material and sits thinner on the surface, it generally dries fastest of the three textures, often becoming paint-ready within 1 to 4 hours under ideal conditions.
You’ll notice texture consistency affects drying: thinner mixes with proper water ratio dry quicker than dense batches. Adjust the spray nozzle to produce fine droplets for even coverage and faster evaporation.
Airflow, temperature, and humidity still matter — aim for 70°F and 40%–50% humidity if you can.
Check dryness by touch in several spots; if no tackiness remains, you can prime and paint with confidence.
Medium Spray Texture Drying
When you apply a medium spray texture, expect it to take longer than a light coat but dry noticeably faster than a heavy one—typically about 4 to 8 hours under ideal conditions.
You’ll gauge drying by touch and uniform color; moisture pockets mean more time. Maintain proper texture consistency so the finish evens out without sagging.
Use even application techniques—steady distance, overlapping passes, and controlled pressure—to avoid thin spots that dry too fast or thick ridges that trap moisture.
Temperature and humidity affect timing, so adjust technique or drying time accordingly before sanding or priming and painting.
Heavy Spray Texture Cure
Although heavy spray texture gives a deep, durable finish, it also needs the longest cure time—plan on about 24 to 72 hours under good conditions before sanding, priming, or painting.
You’ll find heavy textures retain moisture longer due to thicker buildup and varied texture patterns, so check several spots for firmness.
Use consistent spray techniques and maintain airflow, moderate heat, and low humidity to speed curing safely.
Avoid rushing; premature sanding gouges peaks and ruins the pattern.
Once dry to the touch and firm throughout, you can lightly sand high spots, apply primer, and paint for a lasting, uniform result.
Can You Paint Spray Texture the Same Day?
Whether you can paint spray texture the same day depends on factors like thickness, humidity, and temperature.
If the texture is light and conditions are warm and dry, you might be able to prime and paint within hours.
However, heavier texture usually needs more time.
Always check that the surface feels dry to the touch and follow manufacturer drying recommendations before painting.
Drying Time Factors
If you’re trying to paint over spray texture the same day, several key factors will determine whether the surface is dry enough—material type, layer thickness, room temperature, humidity, and airflow all play a role.
You should assess the texture patterns: coarse or dense patterns hold more moisture and need longer cure times. Consider spray application method; heavier or multiple passes increase thickness and slow drying.
Higher temperature and good ventilation speed evaporation, while high humidity and poor airflow prolong it. Also note substrate porosity and joint compound brand—they affect absorption and setting.
Check dryness with touch and a moisture meter before painting.
Same-Day Painting?
When you’re tempted to paint the same day, remember that only a fully dry, firm spray texture will accept paint without problems; touch tests and a moisture meter are your best checks. You can paint same-day only if texture is dry, no tack, and adhesive bond feels solid. If not, resist—rush leads to peeling, orange peel, or trapped moisture. Consider surface preparation or even texture removal if flaws persist. Use good ventilation and recheck spots. Quick reference:
| Check | Action |
|---|---|
| Dryness | Touch + moisture meter |
| Firmness | Press test |
| Flaws | Prep or texture removal |
How Temperature Affects Spray Texture Drying
Although spray texture can seem to dry the same way in every room, temperature has a direct impact on how fast the water in the compound evaporates and how the binder sets, so you’ll see noticeable differences between cool and warm conditions. You should control temperature to protect texture durability and guarantee consistent color matching when you paint.
Cooler air slows setting, risking indentations; warmer air speeds drying but can trap moisture if too rapid. Aim for steady, moderate temperatures. Consider these effects:
- Low temps: slower cure, softer texture
- Moderate temps: ideal curing, reliable finish
- High temps: fast skinning, risk of cracking
How Humidity Slows Spray Texture Drying (And What to Control)
Temperature and humidity work together to determine how quickly spray texture dries, so after managing temperature you’ll want to focus on moisture in the air.
High humidity slows evaporation, extending cure time and risking sagging or soft spots. You should monitor relative humidity with a hygrometer and aim for 30–50% when possible.
Use dehumidifiers or run HVAC to pull moisture out, and increase ventilation with fans to speed drying without disturbing the texture pattern.
Adjust drying time in your schedule, and apply proven texture techniques. These DIY tips help you avoid rework and guarantee paint-ready surfaces.
Does the Surface (Drywall, Plaster, Wood) Change Drying Time?
Yes — the substrate matters.
You’ll notice drywall soaks up moisture quickly and can speed surface drying, while plaster takes longer to cure through and may need extra wait time.
Wood’s porosity varies, so some species pull moisture fast and others hold it, affecting overall dry time.
Drywall Absorption Rate
Because different materials soak up moisture at different rates, the surface you spray—drywall, plaster, or wood—directly affects how long the texture takes to dry. You’ll notice drywall absorbs quickly, thinning wet texture and altering texture consistency, which can speed surface drying but may require touch-up to maintain profile and guarantee paint adhesion.
Consider substrate differences:
- Drywall: fast absorption; may need primer to stabilize.
- Plaster: slower soak; surface stays workable longer.
- Wood: variable; grain and porosity change drying and adhesion.
You should test a small area, adjust mix or primer, and wait until texture firms before painting.
Plaster Cure Time
If drywall soaks up texture faster and wood varies by grain, plaster behaves differently because it cures chemically as well as by moisture loss. You’ll notice plaster’s cure time depends on mix, thickness, and ambient conditions; it can feel dry yet still undergo chemical set. That means you should wait longer before painting compared with drywall.
Pay attention to texture patterns and application techniques: skim coats cure faster than thick crowns, and stipple patterns trap moisture. Test multiple spots for hardness rather than surface dryness.
Follow manufacturer cure recommendations and allow extra time in cool or humid environments to avoid trapping moisture under paint.
Wood Porosity Effects
Wood’s porosity plays a big role in how quickly spray texture dries compared with drywall or plaster: porous, open-grain species like oak or pine absorb water and binder from the texture, speeding surface drying but often leaving more moisture deeper in the wood.
While dense, closed-grain woods like maple slow absorption and keep moisture on the surface longer, you’ll see drying and surface adhesion vary by species and finish; adjust wait times and prep accordingly.
Consider:
- Sealers: block deep moisture and improve Surface adhesion.
- Sanding: opens grain for better bond on dense woods.
- Moisture testing: confirm internal dryness before painting.
Premixed vs. Powder Compound: Which Dries Faster?
When you’re choosing between premixed and powder joint compound, drying time often decides which one you pick. You’ll find premixed compounds convenient: they’re ready to use, consistent for varied texture patterns, and typically dry slower because of higher moisture content and additives.
Powder compounds mix to your preferred thickness and can dry faster if you blend them thinner and account for ambient conditions. For either type, surface preparation matters — clean, primed, and slightly absorbent surfaces speed drying.
Choose powder when you need quicker set times and control; pick premixed for ease and predictable finish despite longer drying.
How Texture Thickness and Coat Count Change Drying Time
Because thicker texture holds more moisture, it takes longer to set and fully dry than a thin skim, so you’ll need to factor coat thickness and count into your timeline.
Thicker texture retains more moisture and takes longer to set and fully dry, so factor coat thickness into your timeline
You’ll notice drying shifts with each layer: more coats increase cure time and can affect Texture durability if rushed. Good Surface prep helps layers bond and evaporate evenly, reducing hidden damp spots.
Consider these points to plan drying and painting:
- Single thin coat: dries fastest, easier to sand and paint.
- Multiple medium coats: improves texture depth but adds drying hours.
- One heavy coat: longest cure, risks cracking or trapping moisture.
Ventilation and Airflow: Speed Up Spray Texture Drying Safely
To speed drying, you’ll want to increase cross ventilation by opening windows and using fans to move air across the textured surface.
Keep humidity in check with a dehumidifier or HVAC adjustments so moisture doesn’t slow curing.
Use safe air movers—position fans to avoid blasting the texture directly and choose units with temperature and speed controls.
Increase Cross Ventilation
If you want spray texture to dry faster without risking cracks or dust settling, increase cross ventilation by creating airflow paths through the room. Open windows or doors on opposite sides and use fans to push fresh air across the ceiling. You’ll speed drying and maintain texture consistency so paint adhesion and later color matching stay predictable.
Position fans thoughtfully and avoid direct blasts that can deform wet texture.
- Place an exhaust fan at one opening to draw moist air out.
- Use a box fan opposite to create a gentle through-flow.
- Angle fans to sweep across the ceiling, not toward it.
Control Humidity Levels
Opening windows and running fans helps, but you’ll also need to control humidity to speed drying without causing cracks or adhesion problems. You should monitor RH and use dehumidifiers when levels stay above 50%. Humidity control gives predictable drying acceleration and prevents surface tackiness. Aim for 40–50% relative humidity and stable temperature. Check texture edges and perform touch tests before priming. Reduce moisture sources (wet materials, open containers) and keep doors closed to isolated areas. Use the table below to track conditions and decisions.
| RH (%) | Action | Expected Result |
|---|---|---|
| >60 | Dehumidify | Slow dry |
| 50–60 | Ventilate | Moderate |
| 40–50 | Maintain | Ideal |
| <40 | Humidify | Prevent cracking |
Use Safe Air Movers
When you position fans and air movers strategically, you’ll speed drying without creating dust clouds or damaging the fresh texture. You’ll want to balance airflow so the Texture application cures evenly; too-strong gusts can deform peaks while stagnant air prolongs tackiness.
Consider Surface preparation—clean, dust-free surfaces dry more predictably and reduce rework.
- Aim airflow across, not directly at, textured walls to encourage gentle evaporation.
- Use low-speed, wide-angle air movers for even circulation in corners and ceilings.
- Monitor temperature and humidity while moving air so you don’t over-dry or trap moisture.
Which Fast-Dry Methods Actually Work (Heaters, Dehumidifiers, Fans)
Although speeding up spray texture drying can be tempting, not every fast-dry method actually helps—you’ll need to choose based on the job, the material, and the environment. You’ll rely on Texture techniques and Color matching later, so don’t rush curing. Heaters speed evaporation but can blister wet texture if too hot. Dehumidifiers remove moisture steadily and work well in enclosed spaces. Fans improve air circulation but won’t dry deep layers alone. Combine methods cautiously: moderate heat, continuous dehumidification, and directed airflow.
| Method | Best use |
|---|---|
| Heater | Quick surface drying |
| Dehumidifier | Steady moisture removal |
| Fans | Circulation only |
| Combo | Balanced, safest approach |
Using a Moisture Meter to Test Spray Texture Readiness
You can use a moisture meter to check whether your spray texture has the right moisture level before painting. Look for the meter’s recommended range for drywall or joint compound and compare your reading to that spec.
If the reading is within range, you can proceed; if it’s higher, give it more drying time and recheck.
Moisture Meter Basics
Before painting, you’ll want to confirm the spray texture has reached an appropriate moisture level, and a moisture meter gives you a quick, objective reading to do that. You’ll use it after texture application and during surface preparation to avoid sealing in dampness.
Choose a meter suited for drywall or plaster, check batteries and calibration, and test multiple spots for consistency.
To use it effectively:
- Hold probes flat against the texture, avoiding heavy pressure.
- Take readings from high, low, and center areas to spot moisture pockets.
- Record values and retest after drying intervals before painting.
Interpreting Meter Readings
Now that you’ve checked multiple spots with the meter, it’s time to interpret those numbers so you can decide if the spray texture’s truly ready for paint. Compare readings across texture patterns—high spots may dry faster than recesses.
Look for consistent low moisture values within the manufacturer’s recommended range; isolated higher readings mean wait longer. If readings are uneven, target those areas with ventilation and time before painting.
Factor in paint compatibility: oil-based paints tolerate slightly higher moisture than some latex finishes, but follow product specs. When readings are stable and within limits across patterns, you’re safe to begin painting.
Visual and Tactile Signs That Spray Texture Is Fully Dry
When the spray texture’s surface looks uniformly matte and feels dry to the touch without tackiness, it’s a strong sign it’s ready for painting.
You’ll also check edges and recessed areas where moisture hides. Use touch, sight, and light angles to confirm even drying before worrying about color matching or texture smoothing.
- Press a fingertip lightly; no imprint or residue means dry.
- Hold a flashlight at a low angle; consistent shadows show uniform texture.
- Smell for lingering solvent odor; absence suggests cure.
Trust combined cues rather than one test alone to avoid premature painting and uneven finishes.
How Long to Wait Between Texture and Primer
If you let the spray texture fully cure—typically 24 to 72 hours depending on product, humidity, and temperature—you’ll give primer the best chance to adhere evenly and avoid trapping moisture. After that cure, wait at least another 24 hours before priming if conditions were cool or humid.
Inspect the surface: firm, dry texture and consistent color mean it’s ready. During texture application you should’ve minimized contaminants; now perform surface preparation—clean, sand loose peaks, and remove dust. Tack clothing helps.
If you follow these steps, you’ll guarantee primer bonds properly and prevent future adhesion or finish issues.
How Long to Wait Between Primer and Final Paint
After the primer has had time to cure and you’ve checked for a smooth, dry surface, you’ll need to know how long to wait before applying the final paint to guarantee proper bonding and an even finish.
After primer cures and surface is smooth and dry, wait the recommended time before final painting.
Generally wait 24 hours for latex primers and 48–72 hours for oil-based or high-build primers, adjusting for humidity and temperature. Make certain primer shows no tackiness and maintains texture consistency with the substrate.
Good paint adhesion depends on full cure and proper sanding if needed.
Quick checklist:
- Confirm primer cure and no tack
- Lightly sand for uniform profile
- Follow manufacturer recoat window
Common Mistakes That Cause Paint Failure After Short Drying Times
Because you rushed the job or skipped key steps, paint that hasn’t fully dried often blisters, peels, or fails to bond properly. You might apply paint over tacky spray materials, ignore recommended cure times, or use incompatible primers that trap moisture.
Poor ventilation and high humidity slow drying, yet you sometimes paint anyway. Heavy application and re-coating too soon seal solvents in the texture, undermining adhesion.
Using wrong texture techniques or mixing batches inconsistently creates uneven porosity, so paint won’t hold. Check labels, wait proper times, and plan for conditions; avoid shortcuts that guarantee premature paint failure.
What to Do If Texture Is Still Tacky After 24 Hours
You rushed the job once and now the texture still feels tacky after 24 hours, so don’t paint yet. You’ll need patience and a plan: stop heating or sealing the area, increase ventilation, and avoid touching the surface. Review your Spray texture techniques and inspect Texture application tools for clogged nozzles or leftover compound that slowed drying.
If texture feels tacky after 24 hours, don’t paint—improve airflow, avoid sealing, and wait to test.
- Improve airflow: open windows, run fans, use dehumidifiers.
- Lightly test: press a clean fingertip in an inconspicuous spot; if it smudges, wait longer.
- Remove excess: gently scrape glossy ridges, then sand when fully dry.
Recheck every few hours before priming and painting.
Adjusting Drying Timelines for Commercial vs. Residential Jobs
When you’re planning spray texture work for a commercial site versus a residential job, factor in differences in scale, HVAC, and acceptable downtime—these directly affect drying timelines and scheduling.
For commercial projects, you’ll account for larger surface areas, continuous HVAC cycles, and stricter turnaround, so textures may seem dry faster but internal moisture can linger. Plan extra cure time to safeguard texture durability.
Residential jobs let you control ventilation and humidity more easily, so you can often paint sooner.
In both settings, confirm full cure before painting to ensure even color matching and long-term performance.
How Contractors Estimate Spray Texture Drying and Schedule Work
Although many variables affect drying, contractors rely on a few predictable factors to estimate spray texture cure times and schedule follow-up work. You’ll learn how they blend texture techniques, job pacing, and environment readings to plan painting windows. Contractor insights help you expect realistic timelines and avoid premature coatings.
Contractors use technique, environment, and scheduling cues to predict texture cure times and plan painting windows.
- Climate and ventilation: temperature, humidity, and airflow determine cure rate.
- Material and technique: joint compound type and applied thickness change dry time.
- Job sequencing: crew availability and overlap with taping/painting influence schedule.
You’ll get clearer expectations when you ask for these specifics up front.
Protecting Fresh Spray Texture From Dust and Damage
Because fresh spray texture can stay soft for hours or days depending on conditions, you’ll want to protect it right away from dust, bumps, and airborne debris that can ruin the finish. You should rope off the area, post signs, and limit traffic. Use soft barriers—drop cloths, plastic sheeting hung away from the surface—and avoid leaning ladders or tools against textured walls. Consider ventilation to speed curing without stirring dust. Note texture variations and match protection to pattern height; protect complex textures more carefully. Choose Application tools gently when trimming edges to prevent gouges.
| Area | Protection | Action |
|---|---|---|
| Low | Cloth | Cover |
| Medium | Sheet | Block |
| High | Barrier | Restrict |
When Can You Safely Repaint or Touch Up Textured Areas?
After you’ve protected fresh spray texture and allowed it to cure, you’ll want to know the right time to repaint or touch it up so paint adheres and the finish stays intact. Wait at least 24–72 hours for light textures; denser texture patterns need up to a week. Check firmness by lightly pressing an inconspicuous area.
Allow fresh spray texture to cure—typically 24–72 hours for light textures, up to a week for denser patterns.
When ready, follow proper painting techniques to match sheen and avoid soaking.
- Test a small patch first to confirm adhesion and color match.
- Match spray texture direction and pattern when feathering edges.
- Use thin coats and let each dry fully before the next.
Pre-Paint Readiness Checklist for Spray Texture
Before you start painting, run a quick pre-paint readiness check to make certain the spray texture is fully cured, secure, and compatible with your chosen products. Check moisture with a probe or touch; ensure spray texture techniques were applied evenly. Verify adhesion by pressing a corner; look for cracking or loose bits. Confirm surface preparation: cleaned, sanded, and free of dust or oil. Test a small patch with your primer and paint. Use the table to note pass/fail items.
| Item | Action |
|---|---|
| Cure Time | Measure moisture/note days |
| Adhesion | Press/test patch |
| Cleanliness | Vacuum/wipe |
| Compatibility | Primer/paint patch |
Frequently Asked Questions
Can Spray Texture Be Painted Over With Oil-Based Paint Immediately?
No, you shouldn’t paint spray texture with oil-based paint immediately; you’ll wait for full cure, perform texture removal if needed, and handle spray gun maintenance beforehand so surfaces are clean and adhesion won’t fail.
Will Texture Drying Times Differ With Colored vs. White Primers?
Yes — like a sun warming different stones, you’ll notice priming considerations and drying time variability: colored primers can alter surface absorption and cure rates, so you’ll often wait longer compared to white primers before painting.
Can Textured Ceilings Trap Moisture and Cause Mold Later?
Yes — textured ceilings can trap moisture buildup and increase mold risk if ventilation’s poor; you’ll need to control humidity, fix leaks, and clean or treat affected areas promptly to prevent spores from taking hold and spreading.
Do Additives or Accelerants Change Long-Term Texture Adhesion?
Yes, additives and accelerants can alter texture bonding; you’ll see faster curing but additive effects may weaken long-term adhesion or change flexibility, so you’ll want tests and manufacturer guidance to guarantee durable texture performance.
How Does Wallpapering Over Spray Texture Affect Drying Needs?
About 60% of installers note longer waits; you’ll guarantee textured wall is fully cured before wallpapering, because the drying process affects adhesive bond and prevents bubbling, so you’ll allow extra time for stable adhesion.
Conclusion
You’ll usually wait a few hours to a couple of days for spray texture to dry before painting, depending on thickness, temperature and humidity. Don’t rush—measure twice, cut once—because painting too soon traps moisture and invites bubbling or poor adhesion. Control heat and ventilation, protect the surface from dust, and confirm dryness with touch and a moisture meter if needed. When it’s fully dry, prime and paint for best, long-lasting results.