How Long Does Treated Lumber Need to Dry Before Painting
You’ll want treated lumber to reach about 8–14% moisture before you prime or paint, which means waiting varies: KDAT boards often dry in 2–6 weeks, while green-treated pieces can take several months to a year in humid climates. Use a calibrated pin or pinless meter and check multiple spots, especially ends and knots. Prep, sealing end cuts, and good airflow speed drying. Keep going for testing methods, timelines, and finishing tips.
Quick Answer: When to Paint Treated Lumber
Although the exact wait varies, you can usually paint pressure-treated lumber once its surface feels dry and the moisture content drops below about 12–15%. You’ll check with a moisture meter or the simple touch test; if water beads or wood feels cool, wait.
Painting too soon traps moisture, causing peeling or mildew. Consider project timing: drying affects lead times and lumber pricing, so plan purchases and storage accordingly.
For trim and decorative accents, make certain ends and cut surfaces are especially dry or sealed before coating. When in doubt, prioritize dryness over speed to achieve a durable, attractive finish.
What Paint and Stain Manufacturers Require Before Coating
Now that you know to wait until pressure‑treated lumber is dry, check the specific pre‑coat requirements from paint and stain manufacturers before you start. They’ll outline surface prep, recommended primers, and acceptable moisture conditions to protect finish adhesion and longevity.
Follow label guidance for lumber preservation products, compatible coatings, and any required neutralizing or rinsing steps after treatment. Manufacturers often insist on clean, dry, and instrument‑tested wood; they’ll specify acceptable moisture ranges and curing times to ensure proper moisture regulation before coating.
Adhering to these instructions avoids finish failures and preserves warranty coverage, so don’t skip reading and following the label.
Target Moisture Percentage for Painting Treated Lumber
You’ll want treated lumber to be within an ideal moisture range—typically 12% to 15%—before you paint to guarantee adhesion and prevent peeling.
Use a reliable moisture meter or weight-dry test to confirm the wood’s moisture content.
Always check the paint manufacturer’s specific moisture recommendations, since some products tolerate slightly higher or lower levels.
Ideal Moisture Range
How dry should treated lumber be before you paint it? Aim for an ideal moisture range of 8–14% before applying paint. At that level, lumber color evens out and paint adheres without trapping excess moisture.
You’ll preserve visible wood grain and avoid peeling, blistering, or mold that wetter boards can invite. Exterior pieces might be acceptable a bit higher near 15% in humid climates, but lower is safer.
If the wood’s too dry below 6%, some finishes can flake, so balance matters. Stick to the 8–14% target to ensure durable, attractive results and predictable drying behavior.
Moisture Testing Methods
With your target range of 8–14% in mind, you’ll want to verify moisture before painting by using reliable testing methods. Use a pin-type meter for internal readings and a pinless meter for quick surface scans; both help guarantee lumber durability by preventing trapped moisture that can rot or peel coatings.
Take multiple readings across boards and seasons to spot variability. Complement meters with the plastic-bag (or electrical outlet) test for localized checks.
Accurate testing reduces wasted paint and limits environmental impact from rework and premature replacement. Record readings and only paint when values consistently fall inside your target range.
Paint Manufacturer Recommendations
Because paint manufacturers set the standards you’ll follow, check their recommended target moisture percentage—typically 8–12% for most exterior and interior paints—before you start coating treated lumber. You should match their specs because lumber preservation and the performance of coatings depend on moisture equilibrium after chemical treatments.
Measure moisture with a reliable meter, then compare to the paint label. If readings exceed the target, wait or accelerate drying.
- Follow the paint label’s exact percentage range.
- Confirm compatibility with the treated wood species.
- Account for residual moisture from chemical treatments.
- Re-test before priming and painting.
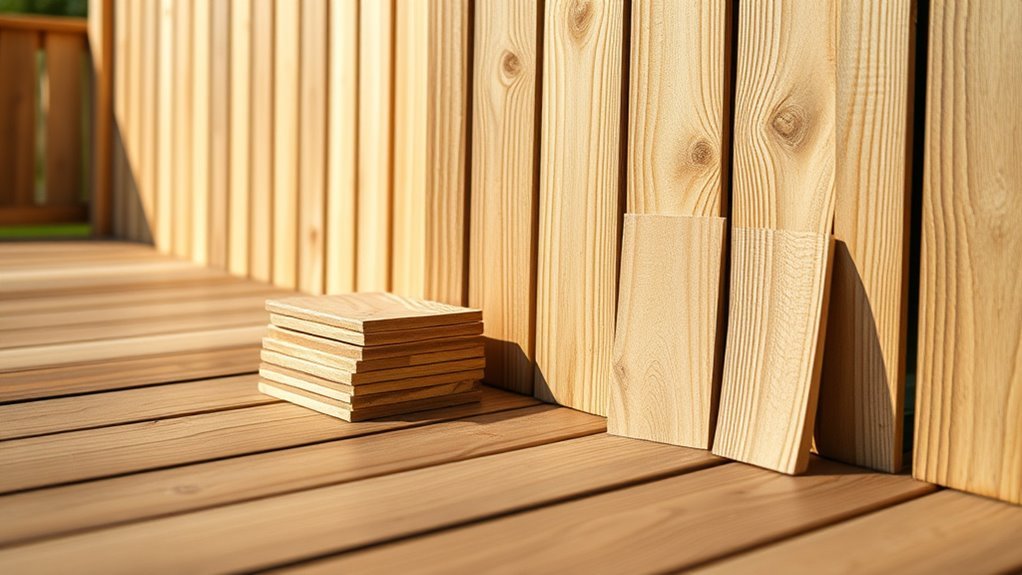
How to Test Moisture With a Pin Meter on Treated Lumber

Before you paint, you’ll want to check the wood’s moisture content with a pin meter to guarantee proper adhesion and finish. You’ll insert pins into several spots—ends, center, and near knots—to get representative readings. Aim for levels recommended by paint specs; lumber preservation depends on Moisture reduction before coating. Clean pins, test depth consistency, and average readings. If high, wait and retest later. Use readings to decide drying time and prep. Visualize sampling points:
| End | Center | Knot |
|---|---|---|
| Top | Middle | Bottom |
| Edge | Face | Grain |
| Near cut | Near seal | Corner |
How to Use a Non‑Destructive Moisture Meter Correctly
If you want quick, noninvasive readings, hold the meter flat against several spots on the treated lumber and follow the manufacturer’s calibration for wood species and density. You’ll get surface and near-surface readings that help judge readiness to paint without penetrating the wood.
Check multiple boards and depths, note trends, and record readings over days. Remember lumber durability relates to proper moisture before finishing, and weather impact can change readings quickly.
- Take readings in shaded, consistent locations
- Compare readings across grain and end grain
- Allow instrument warm-up and recalibration
- Average multiple readings for reliability
Simple Drip and Touch Tests That Indicate Dryness
When you need a quick, low-tech check of treated lumber, simple drip and touch tests give fast, actionable clues about surface dryness. You’ll blot a small area with a paper towel; a wet-looking spot means more drying. Touch the wood: if it feels cool or damp, wait. Combine observations with color matching—fresh treatment often darkens wood—so compare with an untreated sample. Think like weather forecasting: recent rain or humidity delays readiness. Use this quick reference:
| Test | What it tells you |
|---|---|
| Paper towel drip | Surface moisture present |
| Touch coolness | Damp below surface |
| Color match | Treatment still wet |
| Smell | Chemical off-gassing ongoing |
Typical Drying Ranges for Newly Installed Treated Lumber
Although drying times vary by climate and treatment, you can generally expect newly installed pressure‑treated lumber to reach paintable surface dryness in about 2 to 6 weeks and to fully equilibrate (for best long‑term finishes) in 3 to 6 months.
Expect pressure‑treated lumber to be paintable in 2–6 weeks, and fully settled in roughly 3–6 months.
You’ll want to monitor moisture content and appearance; lumber aesthetics improve as boards dry and settle. Consider these practical points:
- Exterior exposure speeds surface drying but can cause checking.
- Humidity slows equilibration; indoor storage tips include elevated, ventilated stacking.
- Use a moisture meter to confirm readiness before priming.
- Delay finish coats until MC is consistently low for lasting results.
Expected Drying Time for KDAT Lumber After Installation
Because KDAT (Kiln-Dried After Treatment) lumber has been dried following pressure treatment, you can usually expect it to reach paintable surface dryness much faster than freshly pressure-treated boards—often within a few days to two weeks after installation, depending on local humidity and ventilation.
You’ll find consistent moisture readings because KDAT’s drying is controlled and tied to lumber grading standards that limit defects. Still, check with a moisture meter before priming.
If you add a moisture barrier or install in shaded, poorly ventilated spots, allow extra time. Proper storage and airflow speed completion and protect finish performance.
Drying Timeline for Green‑Treated Boards in Warm, Dry Climates
KDAT boards dry quickly, but green‑treated lumber behaves very differently, so expect a longer wait before painting in warm, dry climates. You’ll notice moisture leaves faster than in humid areas, yet treatment salts and deep saturation slow surface readiness. Consider Lumber preservation and Climate impact when planning.
- Monitor moisture with a reliable meter to confirm readiness.
- Allow 4–12 weeks for typical boards; thicker pieces need more time.
- Store boards elevated, shaded, and cross‑stacked to speed even drying.
- Test a small painted patch to ensure adhesion before committing.
You’ll protect finish longevity by waiting for stable, low moisture content.
Drying Timeline for Green‑Treated Boards in Humid Climates
When you’re dealing with green-treated boards in humid climates, expect drying to take noticeably longer than in dry areas because moisture in the air slows evaporation and the preservative salts hold water inside the wood.
In humid climates, pressure-treated boards dry much slower—air moisture and preservative salts trap water inside the wood.
You should plan for several months to a year depending on thickness, airflow, and local humidity.
Use lumber grading to pick straighter, lower-moisture boards when possible; higher grades often dry more evenly.
Accelerate drying with good ventilation, raised storage, and fans; avoid covering tightly.
Test moisture with a meter before priming.
Consider waterproofing techniques only after the wood reaches proper paintable moisture levels.
How Seasonal Timing (Spring vs Fall) Affects Paint Readiness
If you plan painting in spring or fall, seasonal temperature and humidity swings will strongly influence how quickly treated lumber dries and how well paint adheres. You should time projects to avoid rapid dew or freeze cycles that trap moisture.
Spring often brings rising humidity, while fall nights cool faster. Check moisture content before painting and consider product cure times.
Also be aware that lumber pricing and grading standards affect availability of properly dried stock.
- Spring: warmer days, higher humidity
- Fall: cooler nights, lower daytime humidity
- Test boards for moisture
- Pick higher-grade, dry stock
How Wood Species Changes Drying Expectations
Because different species absorb preservatives and lose moisture at different rates, you should expect drying times to vary considerably by wood type. You’ll notice tight wood grain species dry slower than open grain ones; that affects when you can apply a natural finish or paint. Inspect moisture content and test a small area. Pine, cedar, oak and others respond differently, so don’t assume one timetable fits all.
| Species | Typical Drying Speed | Finish Note |
|---|---|---|
| Pine | Moderate | Accepts paint quickly |
| Cedar | Fast | Great for natural finish |
| Oak | Slow | May need longer cure |
| Spruce | Moderate | Watch grain absorption |
How Treatment Type Affects Drying Time
Though the preservative used will largely determine how long treated lumber needs to dry, you can usually speed your timeline by understanding the treatment’s chemistry and application method.
Knowing the preservative and application method helps you predict and hasten drying time for treated lumber.
You’ll see oil‑based treatments shed moisture differently than waterborne ones, so plan your lumber seasoning accordingly and check moisture with Moisture meters.
Consider these factors:
- Waterborne preservatives penetrate quickly and need longer surface drying.
- Oil‑borne formulas sit in cells and may feel dry faster but retain internal moisture.
- Treatment concentration affects drying duration.
- Application method (pressure vs. surface) changes how deep moisture travels.
Use moisture meters to confirm readiness before painting.
KDAT vs Green‑Treated: What to Expect
If you choose KDAT, you’ll get lumber kiln-dried after treatment and typically see moisture content around 15% or less, so it’s usually ready for paint much sooner.
Green‑treated boards, by contrast, are saturated with preservative and can register 30% or higher, so you’ll need to wait longer for them to dry.
Expect KDAT to shorten waiting time markedly while green‑treated pieces may require weeks or months depending on conditions.
KDAT Moisture Content
When you compare kiln-dried after treatment (KDAT) lumber to green-treated stock, the biggest difference you’ll notice is moisture content. KDAT arrives at generally 16% or lower, so you can paint sooner and expect better wood grain clarity and easier color matching. You should still check with a moisture meter, but KDAT dries predictably.
- Paint adheres faster on low-moisture KDAT
- Less cupping, shrinking, and dimensional change
- Stains and primers penetrate more evenly
- Reduced risk of paint blistering or peeling
Trust measurements over guesses; aim for manufacturer-recommended targets before finishing.
Green‑Treated Characteristics
Because green-treated lumber is shipped with high moisture and KDAT has been dried after preservative treatment, you’ll notice clear differences in handling and finishing.
Green-treated boards feel heavier, are more prone to warping and surface checking as they acclimate, and hold preservatives on the surface longer. You’ll need to plan for blunting of fasteners and avoid immediate painting; sealers may not adhere.
Green-treated often suits projects prioritizing sustainable sourcing since pressure treatment preserves wood life.
When you choose finishes, consider eco-friendly finishes formulated for higher-moisture wood that breathe and resist peeling, mildew, and solvent breakdown.
Drying Time Expectations
Having noted how green-treated boards behave compared to KDAT, you should expect quite different drying timelines that affect when you can paint or seal.
You’ll see immediate differences in lumber coloration: green-treated stays darker and wetter longer, while KDAT looks uniform and feels drier. That alters paint adhesion and treatment durability expectations.
Expect weeks to months depending on climate, storage, and thickness. Check moisture content: below 15% is ideal.
- KDAT: short wait, consistent coloration, quicker paint readiness
- Green-treated: longer dry, variable coloration, delayed sealing
- Measure MC, don’t guess
- Consider sheltering to speed drying
How Climate and Weather Alter Drying Speed
If you live in a humid, cool region, expect treated lumber to take much longer to dry than in hot, dry climates; moisture in the air slows evaporation and keeps wood fibers saturated.
You’ll notice lumber color stays darker longer and grain pattern may look muted until moisture leaves.
Sunny, windy days speed drying; shade, rain, and high humidity delay it.
Temperature swings matter too: warm days and cool nights can draw moisture out faster than steady cold.
Monitor moisture content with a meter rather than guessing.
Plan painting for consistently low readings, and shelter boards from wet weather during drying.
How Board Thickness and Profile Affect Drying Speed
Climate and moisture conditions are only part of the story; the lumber itself strongly controls how fast water leaves. You’ll notice thicker boards hold moisture longer, while thin profiles dry faster.
Board shape and profile change airflow around the piece, and wood grain direction guides internal movement. Surface texture alters evaporation: rough sawn faces dry unevenly compared with planed smooth ones.
- Thicker boards = slower internal drying
- Narrow or grooved profiles increase edge exposure
- Wood grain orientation affects capillary flow
- Surface texture (rough vs smooth) changes evaporation rates
Choose profiles with drying in mind to speed prep.
How End Cuts and Holes Change Drying and Prep Needs
Because end grain and holes expose fresh wood, they act like open drains that speed moisture loss and can create uneven drying, so you need to treat and monitor them differently than long faces.
Seal end cuts and drilled holes with a preservative or sealer right after cutting to slow rapid drying and reduce checking.
Sand lightly for consistent surface prep only after moisture evens out; premature sanding risks rough grain and poor adhesion.
When painting, check sealed areas for hue shifts and do test patches to achieve color match between end cuts, holes, and faces.
Recheck moisture before final coats.
How Deck vs Fence vs Siding Use Changes Readiness Needs
End cuts and drilled holes demand special sealing and monitoring, but how you prepare treated lumber also depends on how you’ll use it: decks, fences, and siding each stress and weather wood differently, so they’ll reach painting readiness on different schedules.
You’ll consider exposure, wear, and desired Lumber durability when timing painting. For example, decking often needs longer drying and inspection for foot-traffic wear, siding must dry and be checked for flashing gaps, and fences require attention for Fence maintenance and ground contact.
Think use-case, then test moisture content before priming.
- Decks: heavy wear, frequent checks
- Fences: ground contact, routine maintenance
- Siding: vertical runoff, flashing detail
- High-exposure: extended drying time
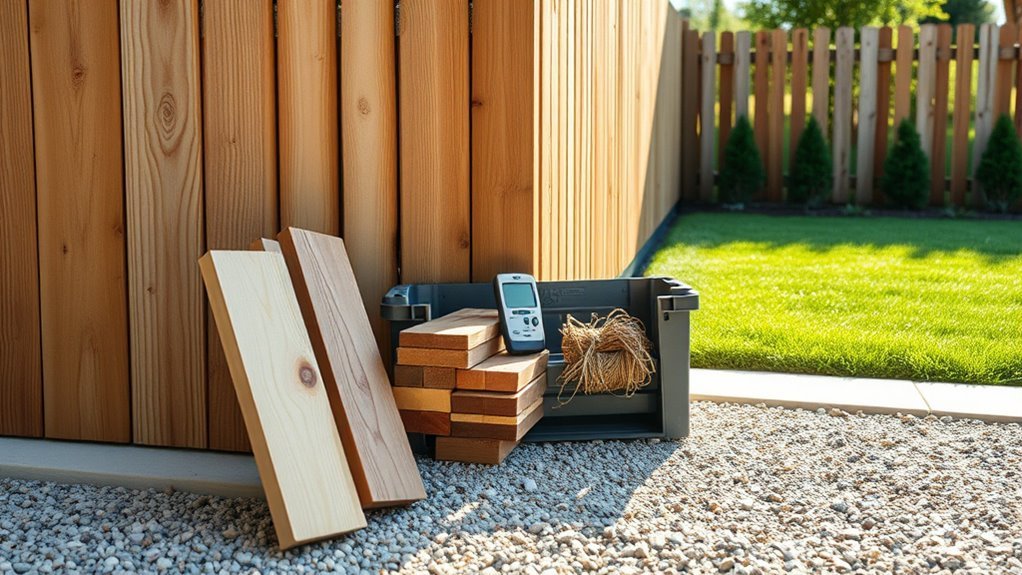
Best Ways to Store Treated Lumber Before Installation
When you store treated lumber before installation, make sure it has proper air circulation so moisture can escape.
Keep the stacks elevated off the ground on joists or pallets to prevent ground moisture and pests.
Cover the top to keep rain off but leave the sides open for airflow.
Proper Air Circulation
If you want your treated lumber to stay straight and dry quickly, store it off the ground in a well-ventilated area with space between each board for airflow. You should prioritize airflow to speed drying and protect wood preservation treatments.
Consider lumber grading when stacking to separate premium boards for visible work. Use stickers to keep boards parallel and gaps consistent. Rotate stacks occasionally to equalize exposure.
- Use evenly spaced stickers (3–4 per board span)
- Leave end grain exposed for moisture escape
- Avoid tight bundles that trap humidity
- Monitor and adjust for prevailing winds and sun
Elevated, Covered Storage
Because treated lumber needs to stay dry and off the ground, store it on a raised platform under a simple cover to keep moisture and soil contact away while still allowing airflow. You’ll stack boards flat with spacers between layers so air moves freely; don’t cram them against walls.
Keep the cover sloped to shed rain and allow ventilation at the sides. Position the stack away from mulch and soil to reduce rot and for effective pest prevention.
If you’re prepping material for outdoor furniture, label bundles and rotate older pieces forward so you use drier stock first during installation.
How to Prepare Treated Lumber Surface Before Painting
Before you paint, make the surface sound and clean so the finish will stick and last. Inspect for raised grain, mold, or residue from lumber preservation treatments. Remove dirt and salts with a stiff brush and mild detergent, then rinse and let dry completely.
Sand gloss or rough spots smooth, and spot-repair cracks or knots with exterior filler.
Test moisture with a meter before coating.
- Clean: remove dirt, salts, mold
- Sand: smooth raised grain for adhesion
- Repair: fill cracks, replace rotten bits
- Test: confirm proper dryness and compatibility
Consider wood staining only after wood is fully dry and clean.
Which Primers Bond Best to Treated Lumber
When you’re ready to prime treated lumber, pick a primer formulated for chemically treated wood and high moisture content so the coating bonds and resists tannin bleed and preservative oils. You’ll want an oil-based or high-quality acrylic latex primer labeled for pressure-treated lumber; shellac-based primers also tackle severe tannin stains.
Check product specs for adhesion to damp substrates and compatibility with your topcoat. Consider lumber grading when selecting primer—lower grades may need stain-blocking formulas.
Install proper moisture barriers and allow drying time per manufacturer directions before priming. Test a small area to confirm bond and appearance before completing the project.
Painting vs Staining: When to Choose Each for Treated Lumber
If you want long-lasting protection and a specific look, choose paint for treated lumber; if you prefer highlighting the wood grain and easier re-coating, choose a stain. You’ll weigh appearance, maintenance, and how treatment chemicals affect adhesion.
Paint gives a durable barrier that hides imperfections and boosts lumber durability, while stain soaks in and shows grain.
- Paint: superior weatherproofing, hides flaws.
- Stain: natural look, simpler touch-ups.
Consider treatment chemicals: some require special primers or stains.
Location & maintenance: high-traffic/exposed areas favor paint; decks and natural aesthetics favor stain.
Match choice to use and upkeep.
How Long to Wait After Priming Before Topcoat
Because primers need time to cure, you should wait the manufacturer’s recommended dry time—usually 24 hours for oil-based primers and 1–4 hours for fast-drying latex—before applying the topcoat. Extend that window in cool, humid, or low-ventilation conditions.
Check adhesion and surface dryness with a light touch; tackiness means wait longer.
For treated lumber, proper cure preserves treatment effectiveness and supports lumber preservation. Choose compatible topcoats labeled for treated wood and consider eco-friendly finishes to reduce VOCs.
If you see blistering, lifting, or uneven sheen after coating, strip and re-prime rather than adding more coats.
How to Accelerate Drying Safely With Ventilation and Sun
You can speed up drying by combining airflow and sun exposure while still protecting the wood and finish. Position boards off the ground, tilt them for sun, and keep air moving across all faces.
Check lumber grading to match expected moisture targets and use weather forecasting to pick dry, sunny days. Limit direct, intense heat to avoid checking.
- Elevate to allow cross-ventilation
- Stagger boards for even sun
- Cover midday if heat spikes
- Monitor moisture with a meter
You’ll reduce wait time safely by planning exposure, inspecting regularly, and avoiding rapid moisture loss.
When Dehumidifiers or Fans Make Sense for Drying Lumber
When natural airflow and sun won’t cut drying time, bring in fans or a dehumidifier to control moisture more predictably and speed the process without stressing the wood.
You’ll use fans for gentle cross-ventilation on thinner boards; lumber thickness matters because thicker pieces hold moisture longer and benefit more from dehumidification.
In humid climates, a dehumidifier maintains lower ambient humidity so drying proceeds steadily; in dry climates, fans suffice to prevent surface trapping.
Position fans to move air across surfaces and place the dehumidifier nearby with drainage or a large tank.
Monitor moisture content and adjust equipment to avoid over-drying.
Why Heat Guns and High Heat Are Risky for Drying Treated Wood
Don’t use heat guns or high heat to speed up drying, because they can cause the wood to warp, crack, or split as moisture leaves too quickly.
High temperatures can also vaporize chemicals in treated lumber, releasing hazardous fumes you don’t want to breathe.
Stick to gentler methods so you don’t damage the board or expose yourself to toxic vapors.
Warping And Cracking
Although it might seem faster to blast treated lumber with a heat gun or place it in high heat, doing so can quickly warp and crack the wood because rapid moisture loss stresses the grain. You’ll ruin lumber aesthetics and amplify weather impact sensitivity if boards distort unevenly. Don’t force drying; let moisture exit slowly to preserve straightness and strength.
Consider controlled ventilation and shading instead of heat.
Quick reminders:
- Sudden shrinkage bends boards along the weakest grain.
- End checks open and run toward the center.
- Cracks reduce load capacity and finish adhesion.
- Distorted pieces waste material and time.
Chemical Fume Risks
If you heat treated lumber with a heat gun or other high-heat source, you risk releasing chemical fumes from the preservatives that were forced into the wood, and those vapors can be toxic or irritating.
You can inhale volatile compounds or get skin contact during brisk drying, increasing chemical exposure. Don’t assume ventilation alone solves it; elevated temperatures boost off-gassing.
Use safety precautions: work outdoors, keep your face upwind, wear an appropriate respirator, gloves and eye protection, and avoid prolonged exposure.
If you detect strong odors, stop and let the wood air-dry naturally before painting or sealing.
Cost vs Time: When Buying KDAT Saves You Time
When you weigh the up-front premium of KDAT against the time and labor you’d otherwise spend waiting for, monitoring, and sanding traditional treated lumber, the math often favors KDAT—especially on tight timelines or projects where paint-ready boards save contractor hours.
Paying a bit more for KDAT often saves time, labor, and uncertainty—ideal when predictable, paint-ready boards matter.
You’ll factor lumber pricing and drying techniques into bids; KDAT reduces uncertainty and site labor. If your schedule values predictability, paying more upfront often costs less overall.
- Faster install, less labor
- No on-site drying monitoring
- Reduced sanding and prep time
- Predictable finish windows for scheduling subcontractors
Choose KDAT when time is money.
Common Paint Failures From Painting Too Soon (And Why)
If you paint treated lumber before it’s dry, you’ll often see peeling and blistering as moisture pushes finish off the surface.
You’ll also get adhesion failure because the paint can’t bond to damp, contaminated fibers.
We’ll look at why these problems happen and how to prevent them.
Peeling And Blistering
Although treated lumber can feel dry on the surface, painting it too soon often causes peeling and blistering because trapped moisture and residual chemicals keep paint from bonding properly. You’ll see bubbles lift where vapor escapes or where lumber preservation salts migrate, and coating failure follows fast.
To prevent this, wait until moisture content and chemical treatments stabilize. Check wood before painting and address these risks:
- Trapped moisture creates steam pockets under paint
- Chemical treatments can inhibit proper sealing
- Temperature swings worsen blistering
- Thin or brittle films peel under stress
Patience guarantees a durable finish.
Paint Adhesion Failure
Because moisture and treatment residues keep paint from bonding to wood, you’ll often see whole sections lift away rather than just surface wear. If you paint too soon, trapped moisture and migrating wood preservatives prevent proper adhesion, so strips peel off and expose raw substrate.
That failure invites lumber pests, accelerates decay, and forces costly refinishing. You can avoid this by testing moisture content, rinsing excess preservative, and allowing adequate drying time recommended for the specific treatment.
Proper surface prep and choosing compatible primers and paints guarantee the coating bonds firmly instead of failing, saving time and protecting treated lumber long-term.
How to Test Painted Surfaces for Adhesion Problems
When you suspect peeling or poor hold, run a few simple adhesion tests before repainting to pinpoint problem areas and choose the right fix. You’ll inspect, perform a tape pull test, and try a crosshatch cut to see if paint detaches.
Note substrate moisture, finish type, and prior color mixing or brush techniques that might’ve left weak edges. Record results and mark failing spots for repair.
- Use a strong tape for a pull test
- Make a clear grid for a crosshatch test
- Try a small solvent swab in an inconspicuous spot
- Check for substrate softness or decay
How to Recoat or Repair Boards Painted Too Early
If a board was painted too soon, start by checking how well the paint is sticking and note any peeling or blistering.
You’ll then clean, sand, and prime the problem areas to create a sound surface.
Finally, recoat with a paint and primer suited for pressure-treated wood and follow the manufacturer’s cure times.
Assess Paint Adhesion
Once the paint’s dry to the touch, check adhesion before you decide to recoat or repair—poor bonding shows up as flaking, bubbling, or paint that peels away with light pressure. You’ll test small areas with a fingernail or tape to confirm failure zones.
Consider lumber humidity and drying techniques when judging whether failure came from moisture or haste. If adhesion’s sound, you can topcoat; if not, remove loose paint and let the wood dry fully.
- Scrape loose paint to expose stable edges
- Use tape test to map affected spots
- Note raised grain or bubbles signaling trapped moisture
- Reassess after proper drying methods
Prepare Surface Properly
After you’ve identified adhesion problems and removed loose paint, prepare the surface so new coatings will adhere properly. Sand blistered or glossy areas to feather edges, then clean with a stiff brush and mild detergent to remove dirt and residual chemicals from chemical treatment.
If boards show mold or efflorescence, treat and rinse thoroughly. Allow lumber seasoning to continue if wood feels damp; dry surfaces guarantee better bonding.
Fill cracks with a compatible exterior filler, sand smooth, and wipe dust away. Prime bare or repaired spots with a breathable primer suited for treated lumber before you proceed to repaint.
Recoat With Suitable Products
When boards have been painted too soon and the finish’s failing, you’ll need to strip or sand back unsound areas, then choose coatings formulated for treated lumber and high-moisture substrates. Breathable primers and alkyd or acrylic latex topcoats designed for exterior use will give the best adhesion and durability.
You’ll assess lumber coloration changes and test moisture absorption before recoating. Dryness, stable color, and uptake below manufacturer limits matter.
- Remove loose paint, check for rot and soft spots
- Sand to sound wood, feather edges for adhesion
- Use a moisture meter to confirm acceptable moisture absorption
- Apply breathable primer, then compatible exterior topcoat
Checklist: Is Your Treated Lumber Paint‑Ready?
Even if the lumber looks dry, you should run a quick checklist before painting to avoid adhesion problems and premature peeling.
Check lumber color for uniformity; dark or greenish patches may still hold moisture or preservative.
Check lumber color for uniformity — dark or greenish patches can still retain moisture or preservative.
Inspect wood grain—raised or fuzzy fibers mean sanding is needed.
Press a coin to test surface dryness; it should feel cool, not damp.
Smell for chemical or musty odors indicating incomplete curing.
Confirm screws or nails are flush and fill gaps with exterior filler.
Wipe with a damp (not wet) cloth and let it fully dry before priming and painting.
Real Project Timelines: 6 Examples of Drying Times
Use that checklist to confirm readiness, then compare real-world examples so you know what to expect for different projects. You’ll see how factors like thickness, climate, and finish choice affect timing, helping protect aesthetic appeal and minimize environmental impact.
Expect a range of drying windows so you can plan tasks, order paint, and schedule labor efficiently.
- Thin decking boards in summer: 2–5 days
- Thick fence posts in spring: 2–6 weeks
- Outdoor furniture after kiln treatment: 24–72 hours
- Pergola beams in wet climates: 4–12 weeks
Use these benchmarks to set realistic timelines.
Five Overlooked Mistakes That Slow Treated‑Lumber Drying
You can seriously slow drying by stacking lumber without spacers—trapped moisture has nowhere to go.
Don’t be tempted to paint over wood that still feels damp, because the finish won’t stick and the trapped moisture will cause failure.
Keep boards separated for airflow and always check moisture content before coating.
Excessive Stacking Without Spacers
When lumber’s stacked tightly without spacers, moisture gets trapped between boards and drying slows dramatically. You’ll want to avoid common stacking mistakes and follow smart storage tips so drying isn’t delayed. Create airflow, keep boards flat, and prevent mold.
- Use evenly spaced stickers to allow air circulation.
- Limit stack height to reduce compression and weight.
- Elevate lumber off the ground to avoid ground moisture.
- Rotate outer boards periodically to equalize drying.
If you stack properly, you’ll cut drying time and protect wood quality. These simple steps prevent overlooked slowdowns and keep your project on schedule.
Painting Over Wet Wood
Although it might seem quicker to slap on paint as soon as boards feel dry to the touch, painting over wood that’s still holding moisture can trap dampness, cause peeling, and prolong the overall drying time.
You’ll reduce lumber durability if you seal in moisture; stains and finishes won’t adhere, and mold can form beneath the coat.
Wait for moisture content to meet recommended levels, use a moisture meter, and allow good airflow and sun exposure before coating.
Proper timing improves weather resistance and extends service life.
Don’t rush; patience prevents costly rework and preserves treated lumber performance.
Quick Decision Guide: Paint Now, Wait, or Stain?
If your project deadline’s tight or the weather’s uncertain, decide based on moisture content, wood type, and desired look. You’ll check for lumber discoloration and test moisture absorption before choosing.
If timing’s tight or weather’s iffy, choose based on moisture, wood type, and the look you want.
If MC is low and surface looks uniform, paint for protection and color. If MC is high or knots bleed, wait to dry or use stain that tolerates dampness.
Consider maintenance, appearance, and timing.
- Paint now: immediate coverage, needs dry wood.
- Wait: avoids peeling, prevents trapped moisture.
- Stain: shows grain, tolerates slight dampness.
- Sealant first: bridges gaps, reduces absorption.
Resources: Meter Specs, Manufacturer Links, and Standards
You’ll want reliable tools and references before you test moisture or pick a finish, so here are the meter specs, manufacturer links, and standards that matter.
Choose a pin or pinless meter with ±1–2% accuracy and depth settings for treated lumber; look for ASTM or ISO calibration certificates.
Bookmark preservative and paint maker datasheets for recommended dry times and primers.
Check EPA, ASTM D4444, and local building codes for compliance.
Compare product life, warranty, and economic considerations like upfront cost versus longevity.
Factor environmental impact from preservatives and VOCs when selecting finishes and disposal methods.
Frequently Asked Questions
Can Pressure-Treated Lumber Be Painted Directly Over Mill Glaze?
No, you shouldn’t paint directly over mill glaze; you’ll need surface prep to scuff the wood grain, clean and deglaze, then prime. Once prepped, you can paint for proper adhesion and a lasting finish.
Do Preservatives in Treated Wood Affect VOC Limits for Paints?
Yes — preservatives can influence VOC regulations because their chemical emissions can raise total solvent readings; you’ll need low-VOC or compliant coatings and check product labels and local standards to guarantee combined emissions meet limits.
How Long After Painting Can I Seal Treated Wood With a Clear Coat?
Think of the finish as a handshake: wait 24–72 hours after paint’s dry time before sealing. You’ll guarantee proper surface preparation and respect drying times so the clear coat bonds, avoiding trapping moisture or causing blushing.
Will Treated Lumber Off-Gas Chemicals That Harm Indoor Air Quality?
Yes — treated lumber can off-gas chemicals that harm indoor air quality, especially when fresh or wet; you should ventilate, let wood dry thoroughly, and use low-VOC finishes to minimize chemical off-gassing risks indoors.
Are There Special Disposal Rules for Scrap Treated Lumber After Prep?
Yes — you should follow local lumber disposal and scrap regulations; you’ll often need to treat treated scrap as special waste, avoid burning, bag or label it, and take it to designated disposal or recycling facilities per rules.
Conclusion
Quickly check the moisture, then paint when wood’s properly primed and dry. Manufacturers mostly mandate under 15–20% moisture; aim for about 12–15% for best bond. Use a pin meter for accuracy or a non‑destructive meter correctly placed; real projects show drying can be days to months depending on climate and treatment. Avoid errors like painting too soon, poor ventilation, or skipping priming. Decide: paint now only if readings are right; otherwise wait.