How Long for Paint to Dry Before Removing Tape
You should pull painter’s tape while latex paint is still slightly tacky—usually 30–60 minutes for thin coats, 2–4 hours for thicker or high‑humidity conditions; oil‑based paints take much longer (surface dry 6–8 hours, full cure days to weeks). Always peel at a 45° angle, support the edge, and score if fully cured to avoid lifting. Adjust times for temperature, humidity, and fast‑dry formulas, and keep going for tips on technique and troubleshooting.
Quick Rule: When to Remove Painter’s Tape
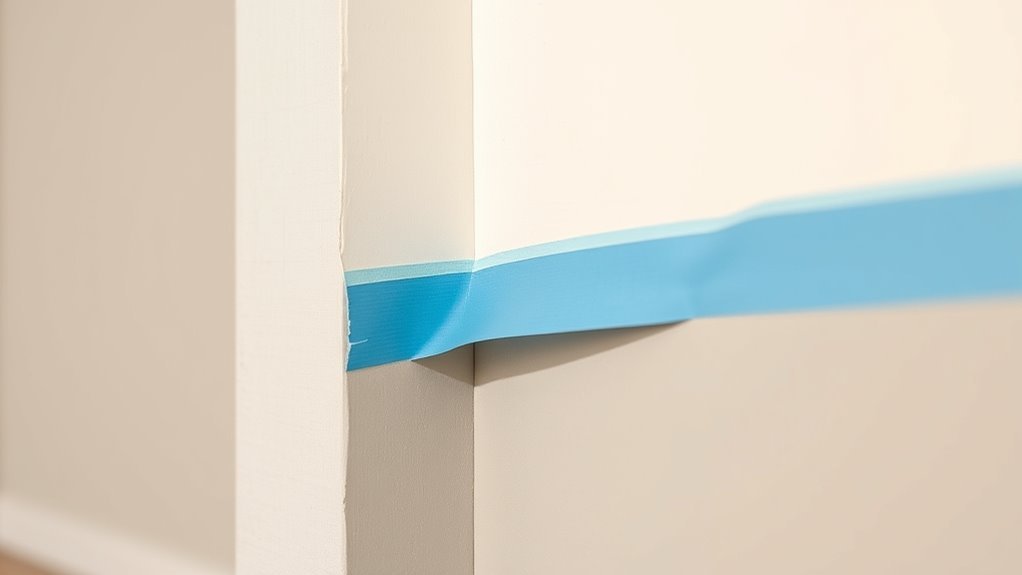
If you want crisp lines, pull the tape while the paint is still slightly tacky—usually 30 to 60 minutes after a latex coat and a bit longer for oil-based paints—so the edge lifts cleanly without peeling fresh paint. You’ll watch edges reveal sharp contrast, avoiding ragged borders.
Work steadily, angling the tape back on itself and pulling at a 45-degree angle. If you notice slight bleed or color blending, score the edge with a utility knife and lift again.
For surfaces with texture variation, take extra care: pull slower so paint doesn’t snag on bumps or pores and disturb the finish.
Exact Dry Times : Latex vs Oil‑Based Paint
For latex paint, you’ll usually be safe removing tape after about an hour for touch-dry paint. Though full cure can take up to two weeks.
Oil-based paints feel dry to the touch in 6–8 hours but need several days to a week to cure enough for clean tape removal without lifting.
Know which type you’ve used so you can time removal to avoid peeling or smudging.
Latex Paint Dry Times
While latex paint often feels dry to the touch within 30 minutes to an hour, you’ll need about 2 to 4 hours before you can safely remove painter’s tape without lifting the finish. You should consider temperature, humidity, and coat thickness; thin coats dry faster. Use proper brush techniques for clean edges and apply color theory when planning layers to avoid rework. Test a small taped edge first.
| Condition | Typical Dry Time | Tip |
|---|---|---|
| Warm/dry | 1–2 hours | Ventilate |
| Cool/humid | 4–6 hours | Thin coats |
| Heavy coat | 6+ hours | Wait longer |
Oil-Based Paint Cure
Although oil-based paints feel tacky longer than latex, they undergo a slower chemical cure that can take days to weeks to reach full hardness. So you should wait far longer before removing painter’s tape or subjecting the surface to heavy use.
You’ll notice surface dry times shorter than cure times; tack-free may arrive in 6–8 hours, but full cure often needs 7–30 days depending on temperature and humidity.
When planning, factor in color psychology and paint color schemes: darker or glossy oils may show imperfections if disturbed.
Be patient—wait the full cure window to avoid lift or damage.
How Humidity Changes Drying and Tape Timing
If the air’s humid, your paint will take longer to dry and tape removal can lift or smear fresh edges.
In dry conditions, paint sets faster and you can usually take tape off sooner without risking tears.
Use a dehumidifier, increase ventilation, or wait longer in damp weather to protect clean lines.
High Humidity Effects
Because moisture in the air slows solvent evaporation, high humidity can considerably extend paint drying times and change when you should remove tape. You’ll notice humidity impact immediately: tackiness lingers, edges don’t cure, and paint can lift when tape’s pulled too soon.
Don’t fall for drying myths that claim “surface dry equals ready”; under humid conditions the surface may seem dry while underlying layers remain soft. Wait longer, test with a gentle touch, and remove tape at a shallower angle to minimize pulling.
If possible, raise ventilation or use a dehumidifier to shorten wait time safely.
Low Humidity Benefits
When humidity’s low, paint solvents evaporate faster so your paint skins over and cures more quickly, letting you remove tape sooner without risking blushing or lifting.
You’ll notice lower humidity levels speed surface drying while deeper layers still cure, so test a small edge before pulling tape.
Low moisture helps maintain paint consistency, preventing sagging or runs and yielding sharp edges when tape is removed.
Because drying is more uniform, you can follow shorter wait times than in humid conditions, but still allow enough cure to avoid film failure.
Always check manufacturer recommendations and a discreet test strip before committing.
Tips For Humidity Control
Although humidity can sneak up on you and slow paint curing, you can control it with a few simple steps to keep tape removal predictable and clean.
Monitor humidity fluctuations with a hygrometer and plan painting when levels stay between 40–50%. Use dehumidifiers or air conditioners to pull excess moisture from the room, and run fans to improve air circulation without blowing directly on fresh paint.
Seal off damp areas and install moisture barriers where needed to prevent new humidity from entering the workspace.
Remove tape only after the surface feels dry to the touch and the environment has stayed stable for several hours.
How Temperature Speeds or Slows Drying
If you raise the temperature in the room, paint solvents evaporate faster and the film sets more quickly. Lower temperatures slow that evaporation and can leave paint tacky for much longer. You’ll notice temperature effects immediately: warmer air and warmer surfaces shorten tack time, while cold rooms stall curing.
Use gentle heat or approved drying accelerators if you need faster removal, but avoid hotspots that blister paint. Check manufacturer temperature ranges.
Visual cues matter—sheen, tack, and odor tell you readiness.
Imagine conditions:
- A sunny bay window warming a freshly painted wall
- A chilly basement where paint feels gummy
- A heater blowing warm, even air
How Coat Thickness & Number of Coats Affect Timing
Because thicker coats trap solvents and slow evaporation, you’ll need to wait longer before removing tape than you would with thin, even layers. You should apply thin coats, let each dry fully, and consider surface preparation to guarantee adhesion and uniform drying. Higher paint sheen often dries faster on the surface but can stay soft underneath, so don’t rush tape removal. More coats mean cumulative drying time; test a small edge before peeling. Use this simple guide:
| Coats | Thickness | Expected Wait |
|---|---|---|
| 1 | Thin | Short |
| 2+ | Medium/Thick | Longer |
Tape Types That Give the Cleanest Edges
To get the sharpest lines, pick high-quality painter’s tape designed for crisp release.
Match the tape’s adhesive to your surface—delicate adhesives for freshly painted drywall, stronger ones for textured or rough areas.
If you’re worried about pulling paint, use low-tack options that lift cleanly without damaging the finish.
Painter’s Tape Quality
When you want razor-sharp paint lines, the quality of your painter’s tape matters more than technique alone. You’ll choose tape that matches paint color contrast and won’t lift delicate finishes when you peel it.
High-grade tapes seal edges, resist bleed, and complement your brush techniques so you get a crisp border. You’ll test a scrap strip on an inconspicuous area, press down edges firmly, and remove it at a low angle after the recommended dry time.
Picture results with different tapes:
- A clean white wall with a perfect blue stripe.
- A hardwood trim untouched by bleed.
- A glossy accent edge, sharp and even.
Surface-Specific Adhesives
If you want the cleanest edges, pick tape made for the specific surface you’re painting—each adhesive is formulated to grip differently on delicate wallpaper, rough masonry, or glossy trim.
You’ll choose tapes labeled for wallpaper to avoid paper tears, masonry tape that sticks in textured pores, or trim tape that won’t lift glossy varnish.
Prioritize surface preparation so tape adheres evenly—clean, dry, and dust-free.
After painting, remove tape at the proper angle and speed to prevent paint pull.
If adhesive residue remains, use recommended adhesive removal methods to protect finishes and keep edges crisp.
Low-Tack Options
Although a gentler adhesive may seem like a small choice, picking a low-tack tape can make the difference between razor-sharp lines and ragged edges. You’ll get cleaner pulls on delicate surfaces, reduce paint peel, and preserve Texture smoothing where subtle finishes matter.
For color blending edges, choose tapes labeled low-tack or painter’s delicate; they peel without lifting paint. Test a small strip first.
Visualize the outcome:
- a crisp stripe separating two hues, no bleed
- a soft gradient preserved, showing careful color blending
- a smooth, unblemished surface with Texture smoothing intact
Remove tape at a 45° angle for best results.
Choosing Painter’s Tape for Your Surface
Picking the right painter’s tape for your surface makes the difference between crisp lines and damaged paint, so match the tape’s adhesive and backing to the material you’re working with. You’ll choose low-tack paper for delicate wallpaper, medium-tack for painted drywall, and high-tack for rough brick or metal.
Consider edge-sealing qualities when you’re doing precise color mixing or worried about bleed-through, and pick tape that peels cleanly after your expected dry time.
Think about texture: flexible crepe conforms to trim, while thicker vinyl resists moisture. Test a small strip first, and remove slowly at a 45-degree angle.
Quick Test to Check If Tape Is Safe to Remove
After you’ve matched tape to the surface, run a quick peel test before removing all the tape: press a small section of tape back down, wait the recommended dry time, then lift a corner slowly at a 45-degree angle.
You’ll judge adhesion and paint set; if paint lifts, leave tape longer. Look for clean edges, no streaking, and tactile firmness.
This helps you avoid tearing thin layers and preserves color blending and texture smoothing.
- A crisp edge like a razor
- A tiny lifted flap of paint
- A smooth, even surface beneath the tape
Removing Painter’s Tape While Paint Is Still Wet: When to Do It
If you’re working with wet paint, you’ll want to know the narrow timing window when tape removal won’t smear the finish. Use the wet-edge technique to keep a continuous, blendable strip of paint.
Pull the tape back slowly at a low angle. Doing it right—peeling within that window and at about a 45-degree angle—helps you get a clean line without waiting for full dry time.
Timing Window Basics
When you remove painter’s tape while the paint’s still tacky, you can get a cleaner edge—so aim to pull tape during the window when the paint hasn’t fully cured but has lost its wet sheen. You’ll watch paint sheen and substrate temperature, and use color theory to judge contrast so edges read crisp.
Pull slowly at a 45° angle, keeping tension low to avoid lifting. Time varies by formula and humidity, so test a corner first.
- A soft satin drying to dull, still flexible
- A fingertip tack without smudging
- A contrasting stripe revealing the true hue
Wet-Edge Technique
Though the paint still feels tacky, pull the tape during its wet-edge window to get the sharpest line—this is when the paint has lost its glossy surface sheen but hasn’t set enough to lift or peel.
You’ll watch the edge stay clean if you remove tape before skin forms. Time it after final brush techniques smooth the film and after any quick color mixing touch-ups so hues settle uniformly.
Work steadily along one run, supporting the edge with your free hand if needed. If paint starts to string or peel, stop and let it firm slightly before trying again.
Tape Removal Angle
Pull the tape at a shallow angle to the painted surface to preserve that wet-edge crispness you just maintained. You’ll want Angle precision: pull slowly, keeping the tape close to the plane of the wall so the paint peels cleanly without stretching or lifting. This protects Tape aesthetics and prevents ragged lines.
If paint is still tacky, use a sharp blade to score along the tape before pulling. Trust your wrist and take steady, even motion.
- imagine the tape sliding away like satin
- picture a clean, razor-sharp line emerging
- feel the tension release under your hand
Removing Tape After Paint Fully Dries: Risks & Fixes
If you wait until paint is completely dry before removing the tape, you risk peeling cured paint off with the tape or leaving jagged edges that need sanding and touch-ups.
You should score the paint-film edge lightly with a utility knife before pulling, especially when contrasting hues matter for color theory applications.
If peeling happens, feather the edge with fine sandpaper, clean dust, and apply thin touch-up coats using controlled brush techniques to blend.
For stubborn lifts, re-tape just beside the damaged line and repaint the tiny strip, then remove tape while paint’s still tacky to preserve a crisp boundary.
How to Angle the Pull for the Sharpest Line
When you peel the tape, tilt it back on itself at about a 45-degree angle and pull slowly along the line so the adhesive releases without lifting the paint film. You’ll keep edges crisp by maintaining that low angle and steady speed; don’t jerk.
If paint bled slightly, gentle feathering with matching brush techniques can tidy the edge. Think about how adjacent hues meet — careful removal preserves meant color blending.
Visualize the motion as a ribbon sliding away, not a peel.
- A slow, steady ribbon unmasking a clean stripe
- A soft edge rescued by precise brush techniques
- Two colors meeting with deliberate color blending
Preventing Lift: Use a Razor or Knife Correctly
Before you pull the tape, run a razor or utility knife along the edge at a low, controlled angle so the blade just severs the paint film. Use short, light scoring strokes rather than heavy cuts to avoid gouging the surface or slipping.
That careful technique keeps the paint from lifting and gives you the cleanest line.
Proper Blade Angle
Although it may seem minor, the angle you hold a razor or utility knife at makes a big difference in preventing paint lift; aim for a shallow, controlled angle—about 30 to 45 degrees—so the blade slices the paint film cleanly along the tape edge without gouging the substrate.
You’ll maintain Tape adhesion while cutting the paint film rather than pulling it. Hold the handle steady, use light pressure, and keep your wrist aligned so the Blade angle stays consistent. Visualize the cut and trust small adjustments.
- A skimming bird slicing air
- A surgeon’s steady incision
- A coin edge tracing a line
Safe Scoring Technique
If you want to prevent paint lift, score the paint film right along the tape edge with a sharp razor or utility knife. Keep the blade shallow and steady so it severs the film without digging into the substrate.
You’ll hold the blade at a low angle, use light continuous strokes, and replace dull blades promptly to avoid jagged cuts. Work in natural light, steady your hand, and follow the tape line closely.
Scoring complements good brush techniques and awareness of color theory when masking changes. After scoring, peel tape back slowly at a 45-degree angle to reveal a clean edge.
What to Do If Paint Peels When You Remove Tape
When paint peels as you pull off the tape, don’t panic—you can usually salvage the edge with a few quick fixes.
When paint lifts with the tape, stay calm—you can usually fix the edge with a quick, careful touch-up.
Gently sand the lifted area with fine-grit paper, feathering into surrounding paint to aid color blending and match paint sheen. Clean dust, then recoat a thin line with a steady hand or a small artist brush. If peel is large, fill, sand, and repaint the whole section for uniform finish.
- A soft sanding block smoothing a ragged edge
- A tiny brush laying down a precise touch-up
- A barely wet sponge blending fresh paint
Remove Adhesive Residue Without Damaging Paint
After you’ve fixed any peeled edges, you’ll likely spot sticky residue left by the tape; remove it carefully so you don’t harm the new paint. Work gently with a soft cloth dampened in warm soapy water, testing a small inconspicuous area first.
For stubborn tack, try a tiny amount of rubbing alcohol or adhesive remover on a cloth, blotting rather than scrubbing. Use fine nylon pads only if needed, following your brush techniques for feathering any disturbed paint edges.
If solvent dulls the finish, rinse, let dry, and touch up with matching color mixing to recreate seamless coverage.
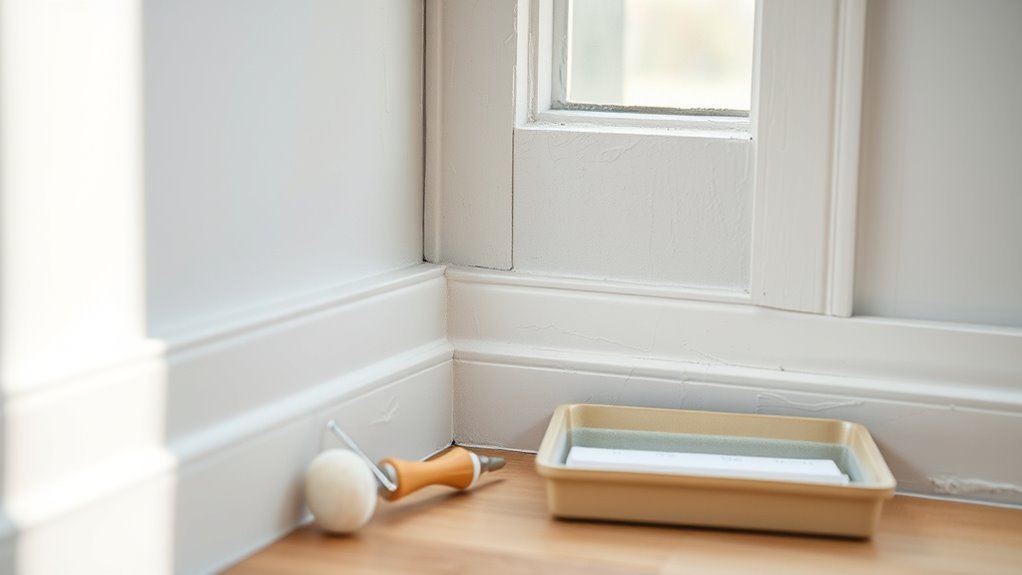
Trim & Baseboards: Recommended Wait Times
Because trim and baseboards are high-touch and show every imperfection, let the paint cure longer than the walls before you remove tape or reinstall hardware. You’ll wait for proper adhesion, especially with glossy paint sheen or fresh color mixing that can alter drying times.
Generally, wait 24–48 hours before light tape removal, and 72 hours before heavy handling. If humidity’s high or you used oil-based or high-gloss finishes, extend curing to a week.
- A child’s hand on baseboard corners
- A vacuum brushing against glossy trim
- Fresh color mixing edges between wall and trim
Check for tackiness before proceeding.
Doors, Windows, and Cabinetry: Timing Tips
If you’ve painted doors, windows, or cabinets, give the surfaces extra time to set before removing tape or rehanging hardware so hinges and seals don’t stick or pull paint away. You’ll wait longer than for walls: schedule 24–48 hours before delicate tape removal, and 72 hours to a week before rehanging or heavy use depending on paint sheen and temperature. Test corners gently. For color matching, avoid touching nearby surfaces until full cure prevents scuffs. Use the table below to track minimum times and reminders.
| Task | Minimum wait |
|---|---|
| Tape removal | 24–48 hours |
| Light use | 72 hours |
Low‑Ventilation or High‑Humidity Rooms: Best Practices
Those longer wait times for doors and cabinets matter even more in rooms with poor airflow or high humidity, where paint takes longer to dry and tackiness can persist. You should boost ventilation, use dehumidifiers, and wait longer before removing tape to avoid lifting edges.
In humid, poorly ventilated rooms, extend drying time, increase airflow or dehumidify, and remove tape slowly to prevent lifting.
Monitor air quality and limit paint fumes by airing the space and using low‑VOC products when possible. Check paint film by touch at unnoticeable spots, peel tape slowly at a 45° angle, and recoat only after full cure.
These steps help preserve crisp lines and prevent sticky finishes in challenging environments.
- A closed bathroom with steam on mirrors
- A basement with damp corners and slow drying
- A kitchen after long simmering, trapping humidity
Adjusting Timing for Fast‑Dry and Quick‑Dry Paints
When you’re using fast‑dry or quick‑dry paints, shorten your tape‑removal window—but not so much that tacky edges get pulled up. These formulations set on the surface faster, so check small test strips and peel a few minutes earlier than you’d with standard paint, watching for tackiness and film formation.
You’ll still monitor color blending at edges—fast cures can reveal seam lines sooner—so remove tape when the film resists indentation but before full cure stresses the edge. Test different paint sheens, since gloss dries differently than matte; adjust timing per sheen and ambient conditions.
Plan Your Painting Sequence to Minimize Tape Issues
Because you’ll want clean edges and fewer touchups, map out your painting sequence before you put tape down. Decide which surfaces you’ll tackle first, plan paint sheen progressions, and factor in surface preparation so tape adheres properly.
Plan your painting sequence before taping: choose surfaces, sheen progressions, and prep so tape sticks and edges stay clean.
Work from ceilings to walls to trim, doing areas that dry slower earlier. Tape only when the adjacent area is ready so you won’t lift fresh paint.
- Ceiling first, then high walls, then lower walls
- Trim and doors last for crisp lines
- Use lighter coats near taped edges to avoid seepage
This sequencing minimizes tape issues and speeds clean removal.
Common Timing Myths That Ruin Paint Jobs
Although timing seems straightforward, a few persistent myths can ruin crisp edges and force extra touchups if you follow them blindly. You might think thicker paint dries slower so you should wait longer, but surface tack and paint chemistry matter more than thickness alone.
Don’t assume all finishes behave the same; gloss dries differently than flat.
Believing temperature or humidity alone dictates removal time ignores ventilation and substrate.
Avoid confusing color mixing concerns or brush techniques with drying time — they affect appearance and coverage, not cure.
Test a small taped edge and peel at recommended intervals to confirm before removing all tape.
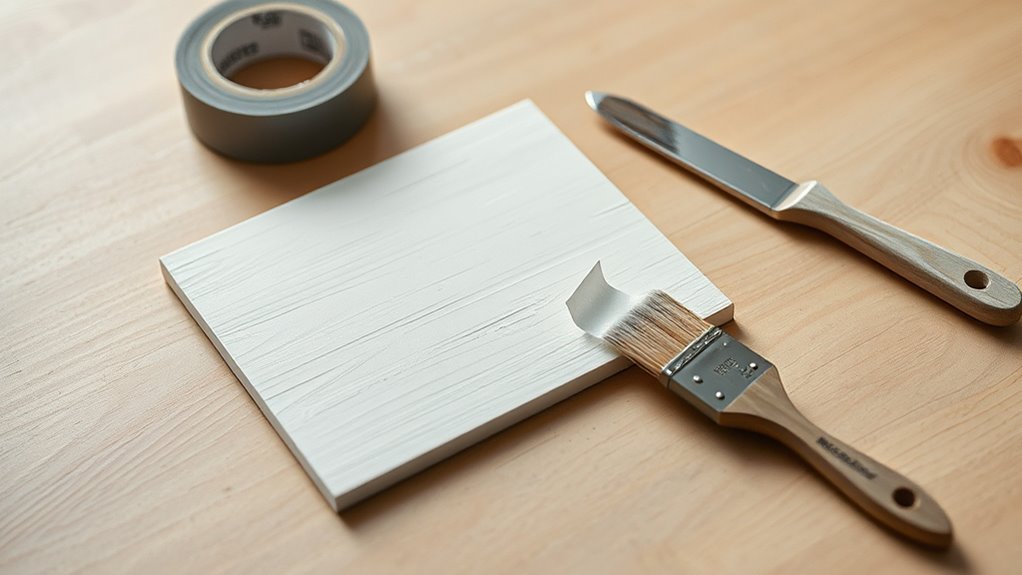
Tools and Products That Help Get a Crisp Tape Edge
To get razor‑sharp paint lines you’ll want the right tape and a few handy tools that make application and removal predictable and clean. You’ll pick a quality low‑tack painter’s tape, a plastic putty knife to firmly burnish edges, and a sharp utility knife for scoring multilayered trims.
Use eco friendly paints to avoid swelling tape edges, and consider how color psychology influences border choices—contrasts need cleaner lines. Prepare, press, paint, and remove at the proper time.
Visualize these tools:
- A blue roll of low‑tack tape on your counter
- A small plastic scraper hugged to the wall
- A slim utility knife poised at the seam
Frequently Asked Questions
Can You Remove Tape From Painted Trim After Sanding Between Coats?
Yes — you can remove tape after sanding between coats once the paint feels dry to touch; you’ll preserve paint adhesion, avoid lifting, and reduce tape residue, but peel slowly and at an angle to prevent damage.
Will Low-Voc Paints Change Tape Removal Timing?
Yes — low-VOC paints can alter tape removal timing because their slower solvent release affects paint adhesion and tape adhesion; you’ll often wait longer, test a small area, and remove tape slowly to avoid peeling or lifting.
Should You Tape Over Textured or Popcorn Ceilings?
About 65% of homes still have ceiling texture; you shouldn’t tape directly onto popcorn ceilings because it’ll damage the texture when removed, so use corner guards, low-tack tape on flat trims, or avoid taping altogether.
How Long to Wait Before Rehanging Hardware After Taping?
Wait 24–48 hours before rehanging hardware; you’ll guarantee paint’s cured enough for screw holes. While rehanging, you’ll do paint touch ups as needed and tackle brush cleaning promptly to keep tools ready.
Does Primer Require Different Tape Removal Timing Than Paint?
Yes — primer often needs different tape removal timing: you’ll watch tape adhesion and drying time closely, since primers can remain tackier longer; wait until it’s dry to the touch and tape lifts cleanly to avoid lifting.
Conclusion
You can usually remove tape after paint’s dry-to-touch but before fully cured, yet that rule isn’t absolute — test it. If you pull too early, you’ll smudge; wait too long and the edge can lift with the tape. Latex often lets you remove tape within an hour; oil can take 6–24. Humidity, temperature, film thickness and fast-dry formulas change timing, so always peel a small corner to verify rather than trusting a single rule.