How to Remove Paint From Exterior Door Safely
You can safely strip paint from an exterior door by first identifying its material, testing for lead, and removing or masking hardware; use a heat gun, chemical stripper, or sanding matched to wood, metal, or fiberglass, and wear gloves, eye protection, and a respirator. Contain debris with drop cloths and plastic sheeting, neutralize and dispose of waste per local rules, then prime and refinish with compatible products — keep going to learn step-by-step tips and safety details.
Quick Overview: Remove Paint From an Exterior Door Safely
When you’re ready to remove paint from an exterior door, start by evaluating the door’s material, the paint type, and the surrounding area so you can choose the safest, most effective method.
You’ll plan steps: protect nearby surfaces, gather safety gear, pick a removal technique, and prepare for cleanup.
Balance creative inspiration with practical limits—you might restore original trim or repaint boldly, but respect the door’s historical significance if applicable.
Work methodically, test a small area, and adjust technique to avoid damage.
With careful prep and controlled effort, you’ll remove paint efficiently while preserving the door’s character.
Identify Your Door Material and Paint Type
Curious what your door’s made of and what’s under the paint? First, inspect edges, jamb and any chips to tell wood, metal, fiberglass or composite. Tap lightly—hollow sounds suggest metal or hollow-core.
Sand a small test spot to see original door color and grain. Check for multiple layers, lead risk (older homes), or textured primers. Note visible rust, rot or seams that affect stripping choices later.
Remove or protect hardware: hinges, knobs and mail slots before any aggressive work to avoid damage. Photograph current finish and document hardware removal for easy reassembly.
Quick Decision: Best Removal Method for Your Door
Though you could try multiple approaches, pick the removal method that matches your door’s material, condition and how much paint you need to strip.
For solid wood with thick layers, sanding or a chemical stripper works; for veneered or decorative accents, use gentler methods like heat or gel strippers to avoid damage.
Metal and fiberglass respond well to heat guns or orbital sanders with fine discs.
If old paint’s failing, more aggressive stripping’s justified; if it’s a fresh coat, light sanding may suffice.
Also consider future finishes and paint color trends so your chosen method supports the look you want.
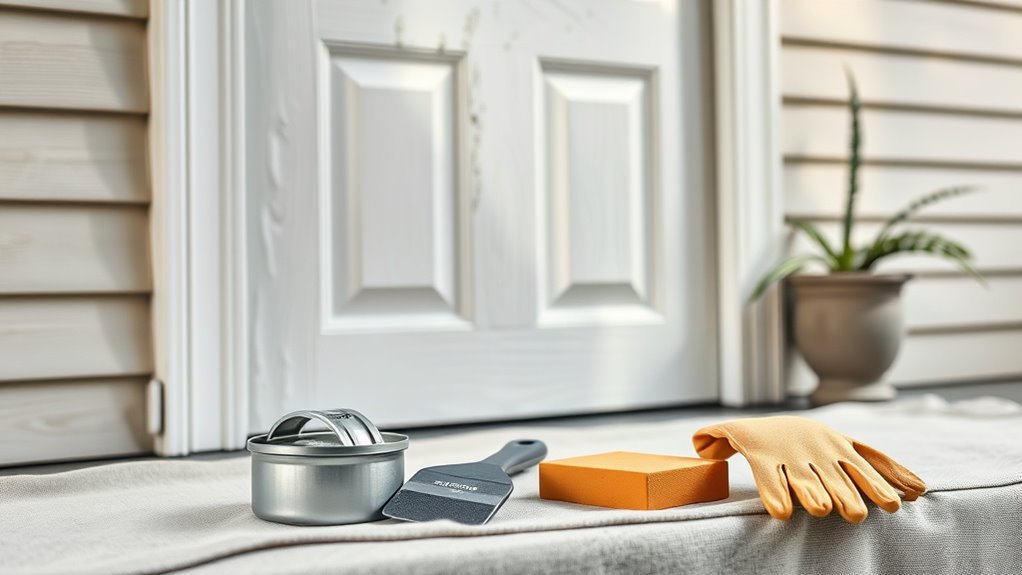
Safety Gear You Need and Why
Before you start stripping, suit up with the right protective clothing—long sleeves, gloves, and a disposable coverall—to keep solvents and paint chips off your skin.
You’ll also want a respirator rated for organic vapors or dust, depending on your method, to avoid inhaling fumes and particles.
Don’t forget safety goggles to shield your eyes from splashes and flying debris.
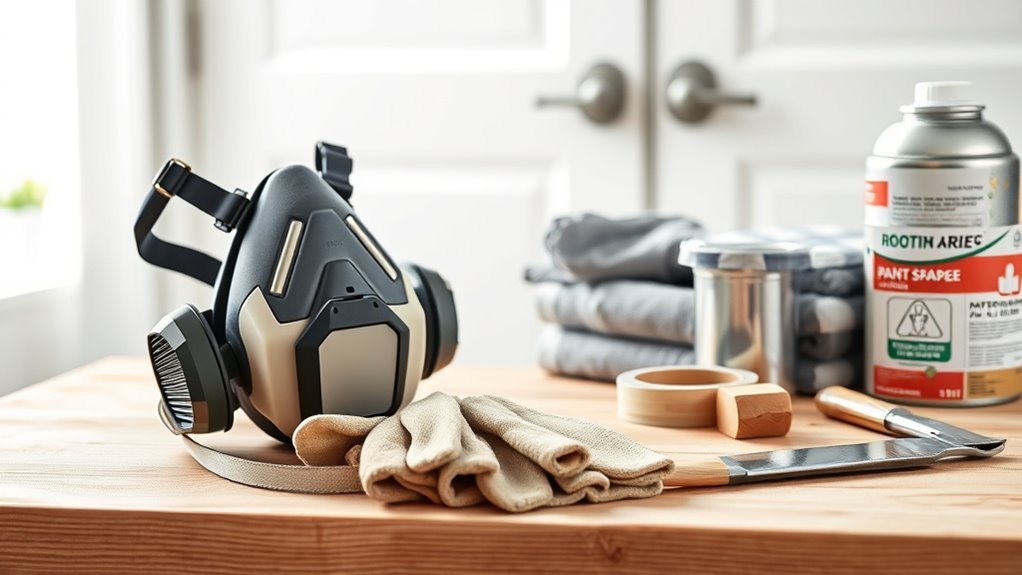
Protective Clothing Essentials
Because solvents, dust, and sharp edges can all threaten your health while you strip paint, wearing the right protective clothing is essential—gloves, eye protection, a respirator, and durable outerwear each guard a specific risk and let you work safely and efficiently. You’ll follow protective gear and safety protocols by choosing items that fit and resist solvents. Focus on coverage, comfort, and easy cleaning.
- Chemical-resistant gloves — protect hands from solvents and scrapers.
- Long-sleeve, heavy-duty shirt and pants — prevent cuts and splatter.
- Closed-toe, slip-resistant boots — shield feet and provide stability.
- Disposable coveralls — contain dust and paint chips for easy removal.
Respiratory And Eye Protection
You’ve already covered clothing that keeps paint and dust off your skin—now focus on what protects your eyes and lungs. Wear a NIOSH-rated respirator for solvent fumes and fine dust; Respiratory safety prevents headaches, dizziness, and long-term harm. Use wraparound safety glasses or goggles for Eye protection against chips, splashes, and chemical mist. Replace filters and clean lenses between jobs. Keep ventilation on and avoid breathing vapors.
| Gear | Purpose |
|---|---|
| N95/NIOSH respirator | Blocks dust |
| Cartridge respirator | Solvent fumes |
| Safety goggles | Splash protection |
| Face shield | Heavy impacts |
| Maintenance | Clean/replace filters |
Protect Nearby Surfaces and Weatherproof the Work Area
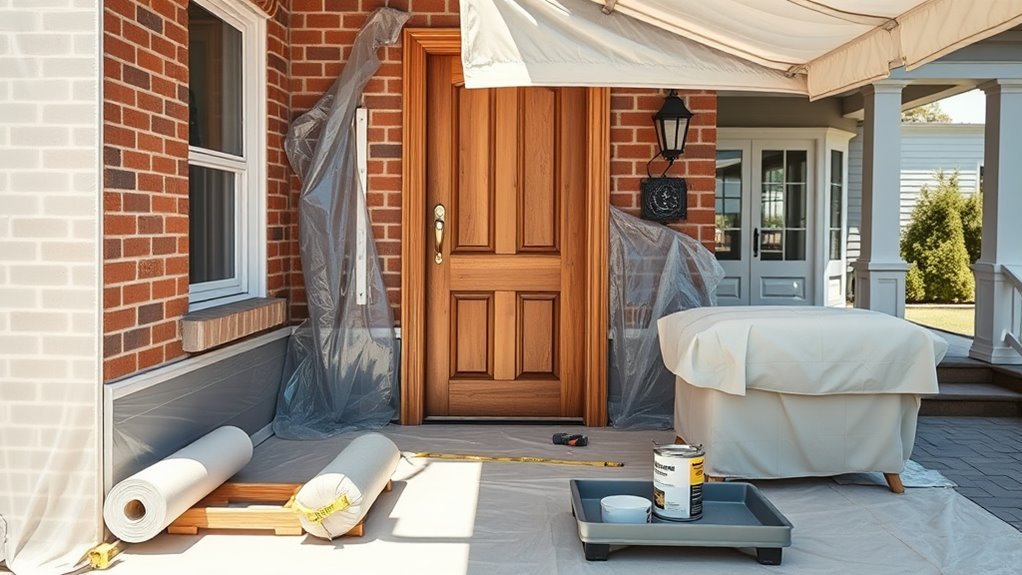
When you’re removing paint from an exterior door, shield surrounding surfaces and block drafts to keep debris, solvents, and moisture from spreading. You’ll want clear weatherproofing tips and reliable surface protection so wind or rain won’t ruin work or carry contaminants.
Tape, drop cloths, and temporary barriers seal off trim, hardware, and nearby plants. Check seals frequently, replace torn coverings, and monitor ventilation to avoid trapped fumes.
- Apply painter’s tape to trim and hardware.
- Lay weighted, waterproof drop cloths.
- Hang plastic sheeting to block drafts.
- Secure edges with caulk or low-tack adhesive.
When to Use Chemical Paint Strippers
If the door has many layers of old, stubborn paint or delicate trim that could be damaged by sanding, reach for a chemical paint stripper—it’s often faster and gentler than aggressive mechanical methods. Use strippers when layers resist sanding, on carved details, or to preserve original wood. Prioritize Chemical safety: read labels, ventilate, and isolate the area. Wear Protective gear—gloves, goggles, respirator—and dispose of waste per regulations. Choose a stripper matched to paint type and substrate.
| Situation | Benefit | Caution |
|---|---|---|
| Multiple layers | Efficient removal | Follow label |
| Delicate trim | Preserves detail | Test first |
| Lead paint | Requires care | Professional help |
How to Apply a Chemical Stripper Safely on Doors
Start by choosing a stripper formulated for exterior wood or metal and compatible with any existing finish.
Put on proper PPE—gloves, goggles, and a respirator—and work in a well-ventilated area or outdoors.
After the stripper lifts the paint, remove residues with a scraper.
Then neutralize and rinse according to the product instructions.
Choose The Right Stripper
Because chemical strippers vary widely in strength and formulation, you’ll want to pick one that matches your door’s material, existing finish, and your safety comfort level. Choose a gel for vertical surfaces, a solvent for tough coatings, or a biodegradable option if ventilation is limited.
Consider finish restoration goals like color matching and plan for hardware removal before you begin.
- Test a small hidden area to check effectiveness and substrate reaction.
- Match stripper type to wood, metal, or painted laminate.
- Prefer low-odor or soy-based products for less toxicity.
- Read label directions and disposal instructions carefully.
Protect Yourself Properly
Now that you’ve chosen the right stripper, protect yourself before you touch the product: wear chemical-resistant gloves (nitrile or thicker solvent-rated gloves), eye protection, and a respirator rated for organic vapors if the label suggests it or you’re working indoors.
Work outdoors or in a well-ventilated area, cover nearby interior decor and plants with plastic sheeting, and move delicate items away.
Wear long sleeves, closed-toe shoes, and avoid jewelry. Keep a fire extinguisher nearby for solvent-based strippers, and have clean water and first-aid supplies ready.
Read the SDS, follow label directions, and never smoke while stripping.
Remove And Neutralize Residue
After the stripper has softened the paint, you’ll remove the loosened material and neutralize any caustic residue before it can damage the wood or interfere with new finishes. Work outdoors or in a ventilated area, protect door hardware, and test a small area to check underlying paint color.
Scrape gently with a plastic scraper, then wipe with a shop rag.
- Wet-vac or brush away debris.
- Apply manufacturer-recommended neutralizer; follow dwell time.
- Rinse with clean water and blot dry to prevent grain swelling.
- Inspect for leftover residue and repeat neutralization if needed.
Allow full drying before repainting.
When to Use a Heat Gun vs. a Chemical Stripper
When choosing between a heat gun and a chemical stripper, consider the paint type, the door material, and your comfort with safety precautions; a heat gun works fast on single-layer, oil-based paint and on solid wood, while a chemical stripper is better for multiple layers, intricate profiles, or surfaces that could scorch. Do historical paint analysis when lead is possible, and weigh environmental impact of solvents versus waste. Use a heat gun for quick, flat areas; choose a stripper for detail or stubborn layers. Protect surroundings, use PPE, and follow disposal rules.
| Option | Best use |
|---|---|
| Heat gun | Flat, single layers |
| Stripper | Layers, profiles |
Strip Paint With a Heat Gun Without Damaging Wood
If you want to strip paint with a heat gun without scorching the wood, work methodically and keep the tool moving so heat never concentrates in one spot. Hold the gun 2–3 inches away, use a low-medium setting, and peel softened paint with a flat scraper at a shallow angle. Protect nearby door hardware and mask off areas where paint color changeover matters. Ventilate and wear gloves, eye protection, and a respirator for older finishes.
- Test a small hidden area first.
- Keep the gun moving in sweeping motions.
- Remove softened paint promptly.
- Cool and inspect for any scorching.
Sand an Exterior Door for Paint Removal and Prep
Once you’ve lifted most of the loose paint with the heat gun, move on to sanding to smooth remaining edges and prep the surface for primer. You’ll wear a dust mask and goggles, then choose grits: start with 80–100 to remove stubborn paint, follow with 120–150 to blend, finish with 180–220 for a smooth finish.
Use a random-orbit sander on flat panels and sanding blocks for recessed areas, applying even pressure and following the grain. Keep dust vacuumed and inspect for missed spots.
These sanding techniques speed paint removal, prevent gouges, and guarantee primer and new paint adhere properly.
Use a Scraper or Multi-Tool Without Gouging the Door
Pick a sharp, thin blade made for paint scraping so you can cut under the paint without digging into the wood or metal.
Hold the scraper at a low angle and use controlled, short strokes to lift paint rather than forcing long pulls.
If you feel resistance, switch to a fresher blade or soften the paint first to avoid gouges.
Choose The Right Blade
Because the right blade shapes how cleanly you remove paint, choose one that strips without gouging the wood or denting metal. You’ll protect the underlying finish, preserve door hardware, and avoid exposing awkward paint color patches. Match blade type to surface and finish hardness.
- Thin, flexible scraper blades for delicate wood and old paint films.
- Stiff, angled blades for flaking or thicker topcoats.
- Carbide or oscillating multi-tool blades for stubborn paint on metal or fiberglass.
- Hooked or safety blades near glass, seams, and around door hardware to avoid slips.
Test on an inconspicuous spot first.
Scrape With Controlled Strokes
When you start scraping, keep the blade flat and move in short, controlled strokes so you lift paint without digging into the door. You’ll hold the scraper at a low angle, letting the edge catch loose layers while preserving wood or metal beneath.
Work with the grain and test pressure frequently; if you see gouges, reduce force or switch blades. Use brush techniques afterward to remove dust and flaky remnants before any primer—proper prep helps tackle remaining paint adhesion.
Clean the blade often, and pause to inspect progress so you don’t overwork one area or damage the surface.
Low‑VOC and Eco‑Friendly Paint Removal Methods
If you’d rather avoid harsh chemicals and strong fumes, low‑VOC and eco‑friendly methods let you remove paint safely while protecting your health and the environment. You can combine mechanical and gentle chemical approaches, choose low VOC alternatives, and use eco friendly solvents made from citrus or soy.
Work outdoors, wear a respirator rated for organics, and contain debris.
- Use heat with care: a low-temp heat gun softens paint without toxic fumes.
- Try eco friendly solvents: citrus or soy strippers break down paint with minimal odor.
- Sand with dust extraction to reduce particles.
- Dispose of residues per local regulations.
Lead‑Paint Testing and Legal Requirements
Before you remove old paint, check whether it contains lead—older homes often used lead‑based paint and handling it improperly can create hazardous dust. You should arrange professional lead testing or use EPA‑approved test kits to confirm presence before work begins.
Know local and federal rules: renovation in homes built before 1978 often requires certified contractors and specific notifications to occupants. Keep records of test results and any notifications to guarantee legal compliance.
If tests are positive, stop and consult certified abatement services or follow mandated procedures—don’t assume DIY measures meet regulatory standards or protect occupants adequately.
Safe Lead‑Paint Removal Practices
Since lead dust can harm people even in tiny amounts, you should treat any paint-removal task as a containment and cleanup challenge: seal the work area, shut off HVAC, cover floors and landscaping with heavy-duty plastic, and use HEPA-equipped vacuums and respirators rated N100/P100.
You’ll follow practices that minimize Lead hazards and avoid methods that create fine dust. Wet methods, encapsulants, and hand-scraping over drop cloths reduce airborne particles.
Avoid chemical strippers that might trigger unexpected chemical reactions unless labeled safe for lead paint and you’ve read instructions.
Dispose of waste per local regulations.
- Wet-scrape gently
- Use HEPA tools
- Bag and seal waste
- Test air clearance
Repair Surface Damage After Paint Removal
After you’ve controlled dust and removed loose paint, inspect the door for gouges, rot, and uneven surfaces so you can plan repairs. Remove all soft rot and damaged wood back to solid material; treat remaining wood with a preservative if needed.
Use epoxy or wood filler for gaps, shaping it to match contours while following manufacturer guidance on material compatibility. Sand repaired areas smooth, feathering into surrounding surfaces for even adhesion.
Replace any irreparably damaged trim or panels. Your surface preparation now guarantees durable repairs and proper bonding, reducing future deterioration and supporting a long-lasting repaint.
Clean and Neutralize Surfaces Before Repainting
When the repairs are dry and sanded, clean and neutralize the door so paint will adhere and corrosion won’t return. You’ll remove dust, grease, and residue to guarantee proper surface preparation and test for paint compatibility.
Use mild detergent, rinse thoroughly, then a solvent or trisodium phosphate substitute for stubborn spots. Neutralize any chemical cleaners and let the door dry fully.
Finally, inspect for remaining contaminants and feather any rough edges.
- Wash with mild detergent and water.
- Rinse and dry completely.
- Spot-treat with appropriate solvent, then neutralize.
- Final wipe with tack cloth for clean surface.
Choose the Right Primer and Paint for Exterior Doors
Now that the door is clean, dry, and free of residue, pick primers and paints that match the door’s material and the local climate to guarantee long-lasting protection. You’ll choose adhesion primers for metal, stain-blocking for wood, and flexible coats for fiberglass. Consider UV resistance, mildew inhibitors, and Color matching for trim and decorative accents. Test small swatches, note sheen preferences, and follow manufacturer recoat times.
| Primer Type | Best For |
|---|---|
| Bonding primer | Metal, slick surfaces |
| Stain-blocking primer | Wood, tannin bleed |
| Flexible primer | Fiberglass |
Refinish or Seal Wood, Metal, and Fiberglass Doors
Although the steps differ by material, you’ll want to strip any loose finish, sand smooth, and apply a product formulated for the door type so the new finish adheres and lasts.
Strip loose finish, sand smooth, and use a product made for your door material so the new finish adheres and lasts
For wood, use exterior-grade stain or paint and a clear sealer; for metal, choose rust-inhibiting primer and enamel; for fiberglass, use products labeled for fiberglass.
Remove or mask door hardware before finishing. Confirm edges and thresholds get attention for weather protection.
- Clean surface thoroughly.
- Sand to recommended grit.
- Apply primer/finish in thin coats.
- Reattach hardware and check seals.
Dispose of Paint Waste and Leftover Stripper Responsibly
When you’re done stripping paint, check your local hazardous waste program for drop-off rules and collection days.
Put leftover stripper and paint chips into sealed, clearly labeled containers so handlers know what’s inside.
Ask about recycling options for paint cans and follow municipal disposal guidelines for the rest.
Local Hazardous Waste
Wondering what to do with leftover paint and used stripper? You should treat them as local hazardous waste and avoid regular trash or drains. Contact your municipal hazardous waste program for accepted drop-off sites and scheduled collection events. Follow their rules for paint disposal to prevent contamination and fines.
- Find your city or county hazardous waste facility.
- Confirm accepted materials and any prep steps.
- Transport containers upright, sealed, and in secondary containment.
- Ask about recycling options for leftover latex or solvent recovery.
Doing this keeps your community safe and follows local regulations.
Proper Container Labeling
How should you label containers holding leftover paint and used stripper? Clearly mark contents, date, and hazard level on each sealed container. Note the paint color, batch if known, and whether solids or solvent remain. Add “used stripper” plus any active chemical name if available.
Include your contact info and project location (e.g., front door, remove door hardware first) so handlers know origin and potential contamination. Use waterproof labels and permanent marker; cover labels with clear tape.
Keep containers upright, capped, and stored separately from household waste. Follow local pickup requirements but don’t mix incompatible wastes.
Recycling And Disposal Options
Where can you take leftover paint and used stripper so they’re recycled or disposed of safely? You should seek local recycling options and approved disposal methods to avoid hazards. Don’t pour liquids down drains or into soil. Use labeled containers, keep materials sealed, and transport them to proper facilities.
Consider these steps:
- Household hazardous waste (HHW) collection events — they accept paint and stripper.
- Local recycling centers — some offer paint reuse programs.
- Paint take-back programs at retailers — they’ll handle recycling options responsibly.
- Licensed hazardous waste haulers — use for large volumes or oil-based products.
Estimate Time and Cost and Decide: DIY Versus Hiring a Pro
Before you pick up a scraper or call a contractor, set clear expectations for time and cost so you can choose the smarter route. Estimate hours: stripping, sanding, filling, priming, and repainting each add time. Factor door color changes and paint sheen removal difficulty—dark colors or high-gloss layers often need more passes.
Tally materials (strippers, sandpaper, primer, paint), tool rental, and disposal fees. Compare to pro quotes that include labor, warranty, and cleanup.
If you value speed, consistent finish, or lack tools, hire a pro.
If you have time, skills, and a modest budget, DIY saves money.
Frequently Asked Questions
Can Paint Removal Damage Door Hardware, and Should It Be Removed First?
Yes — paint removal tools can damage hardware, so you should remove it when possible. If you can’t, use hardware protection like tape and covers, and work carefully to avoid scratches, corrosion, or chemical exposure.
How Do I Prevent Paint From Seeping Into Door Edges and Jamb Gaps?
Contrast precision with care: you’ll seal gaps with paint sealing compound and use edge masking tape tightly along jambs; you’ll press edges, smooth seals, and wipe excess so paint can’t seep into edges or gaps.
Can I Remove Paint From a Door While It’s Still Installed on Hinges?
Yes — you can remove paint with the door on hinges, but you’ll use gentler paint removal techniques and follow strict safety precautions: cover hardware, protect surrounding jambs, work slowly, ventilate, wear PPE, and avoid aggressive stripping.
Will Seasonal Temperature Changes Affect Paint Stripping or Drying Times?
Yes—you’ll notice temperature fluctuations will affect paint stripping and paint curing; colder, humid conditions slow drying and chemical strippers, while heat speeds reaction and evaporation, so you’ll schedule work during stable, moderate temperatures for best results.
Are There Special Considerations for Painted Glass Panels in Doors?
You’ll treat painted glass panels like a fragile relic—protect glass protection with heavy tape and drop cloths, test paint compatibility with a small solvent spot, avoid heat guns, and use plastic scrapers to prevent scratching.
Conclusion
You’ve got this—like a sculptor revealing a statue, stripping paint uncovers your door’s true character. Match the method to the material, suit up in your safety gear, and shield nearby surfaces like a fortress. Work patiently, seal or refinish promptly, and toss waste responsibly. Whether you DIY or call a pro, measure time and cost before you begin. Your door will thank you with renewed beauty and long-lasting protection.