Is It Better to Spray or Brush Exterior Paint?
You’ll usually get the fastest, smoothest results by spraying large, flat exterior areas and brushing trim, edges, porous wood, and small repairs. Spraying covers quickly and blends sheen, but needs careful masking and a compatible sprayer; brushing gives control, better adhesion on grainy or textured surfaces, and easier touch-ups. Match method to siding, scale, and weather, and combine both for best results—keep going to see practical tips, common mistakes, and a simple decision checklist.
Who This Guide Is For (DIYers, Pros, Homeowners)
Whether you’re tackling a weekend project or managing a crew, this guide’s for anyone deciding between spraying and brushing exterior paint. You’ll get practical info whether you’re a DIYer, pro, or homeowner overseeing work.
You’ll learn what skills and gear suit each approach, when to prioritize speed over control, and how factors like color matching and paint sheen affect finish choices. If you value tidy edges and detailed trim, brushing might fit; if you need fast coverage on large surfaces, spraying could win.
You’ll leave knowing which method matches your time, budget, and desired results.
Quick Decision: Spray vs Brush for Exterior Paint
You’ll choose spray when you need maximum speed and a smooth, even finish, but you’ll pick a brush when you want precise control around trim and textured surfaces.
Spraying covers large areas fast but can overspray and needs masking; brushing gives touchable control and better coverage in crevices.
Think about whether finish quality or fast coverage matters more for your project.
Speed Vs Control
If speed matters more than perfect edges, spraying will cut your labor and finish time dramatically; but if you need precise control around trim, windows, and tight spots, brushing gives you that accuracy without overspray.
You’ll choose spraying when large surfaces and tight schedules matter, accepting masking and setup for fast coverage.
You’ll choose brushing when detail, touch-ups, or matching existing color matching matters, since a brush lets you blend edges and control paint sheen more easily on complex areas.
Balance your priorities: faster overall progress with spray, or careful, controlled work with a brush for tricky sections.
Surface Finish Quality
When finish quality is your top priority, spraying usually delivers the smoothest, most uniform coat over large exterior surfaces.
While brushing lets you control texture and blend edges where needed. You’ll get a factory-like evenness with a sprayer, minimizing brush marks and helping paint sheen read consistently in sunlight.
But when you need precise color matching at trim, corners, or repairs, a brush lets you feather changeover and correct small discrepancies without overspray.
Use spraying for broad, seamless coverage and switch to a brush for detail work, edge blending, and spot touch-ups to guarantee flawless results.
Key Factors You Must Weigh Before Choosing
Because your project’s surface, time constraints, and finish expectations all differ, choosing between spraying and brushing comes down to weighing specific trade-offs: coverage speed versus control, equipment cost versus labor, and the material you’re coating versus weather and cleanup needs.
You’ll consider Color options and environmental impact, plus budget, skill, and access. Match method to project scale, desired texture, and nearby plants or furniture. Be realistic about cleanup time and overspray risk. Decide whether speed or precision matters more.
- Project size and access
- Desired finish consistency
- Nearby landscaping and overspray risk
- Cleanup time and waste disposal
Surface Type: Best Method by Siding Material
Although the right technique depends on the siding, you can quickly match method to material by weighing texture, porosity, and profile.
For smooth fiber cement or metal, spraying speeds coverage and guarantees consistent color matching; follow with light back-brushing only where runs occur.
On porous wood, brush to work paint into grain for better paint durability and to seal knots.
Vinyl’s low porosity accepts spray for even finish but use brush for edges and trim to avoid overspray.
Rough stucco or masonry needs brush or roller to force paint into crevices, improving adhesion and long-term performance.
Project Size: Small Touch-Ups to Whole-House Jobs
For small spot repairs you’ll probably reach for a brush or a small touch-up sprayer to control coverage and blend precisely.
Mid-sized surfaces often justify a handheld sprayer or a combination of brushing and rolling to balance speed with finish.
For whole-house coverage, a professional-grade airless sprayer will save time and give the most consistent results.
Small Spot Repairs
Need a quick fix or prepping for a full repaint? For small spot repairs you’ll want precision and minimal disruption. Match color contrast and paint sheen to surrounding areas so patches vanish. Use a brush for tight spots; a small roller can blend texture. Clean, sand, and prime before touching up. Keep tools and small-quantity paint handy for future nicks.
- Match primer and finish to surrounding surface
- Feather edges to avoid visible lines
- Work in similar light to judge color contrast
- Test sheen on a scrap before applying
You’ll save time and keep the exterior cohesive with targeted care.
Mid-Sized Surfaces
After handling small spot repairs, you’ll face different choices when working on mid-sized surfaces—from a few siding panels to an entire elevation.
You’ll weigh speed versus control: spraying covers fast and yields smooth texture, while brushing or rolling gives precision around trim and helps with color matching.
For visible areas, test spray passes and brush blending to avoid lap marks.
Consider paint branding and recommended thinning—some brands spray better, others stick to brushes.
Prep, masking, and practice panels matter more here than tools alone.
Choose the method that balances finish quality, time, and the specific product’s guidance.
Whole-House Coverage
When you’re tackling whole-house coverage—from a few touch-ups to an entire exterior—plan around logistics as much as technique: spraying saves huge time on broad expanses but demands more prep, masking, and weather windows, while brushing or rolling gives control for edges, texture matching, and problem areas. You’ll choose based on scale, access, and finish goals. Factor Color selection early to guarantee consistent batches. Pay strict attention to Weather considerations; wind, humidity, and temperature affect spray success. Prioritize prep, equipment, and crew size to hit schedules and maintain quality.
- Prep and masking strategy
- Batch-matching paint
- Wind and humidity limits
- Crew coordination and timing
Budget: Equipment, Rentals, and Paint Waste
Because spraying usually demands a bigger upfront outlay, you’ll want to compare tool costs, rental fees, and paint waste before choosing a method. You’ll pay more for a quality sprayer or a rental, plus masks and tarps; brushes and rollers cost less upfront and are reusable.
Spraying can overspray and waste more paint unless you mask carefully, so factor paint storage and leftover disposal.
Brushing lets you control usage and simplifies color matching touchups.
Tally total expenses: equipment purchase or rental, protective gear, extra gallons lost to overspray, and any short-term storage solutions for leftovers.
Desired Finish: Smooth vs Textured Results
Decide whether you want an ultra-smooth, factory-like coat or a bit of texture that hides imperfections.
Spraying usually gives the most even coverage, while brushing can leave visible brushstrokes and add subtle texture.
Remember that thorough surface preparation affects how smooth the finish will look, no matter which method you pick.
Smooth, Even Coverage
If you want a truly smooth, factory-like finish, spraying usually gives the most even coverage with fewer brush marks and lap lines. You’ll cover large areas quickly and maintain consistent sheen, but you’ll need good masking to protect trim and plants.
Consider color choice carefully—lighter tints can show imperfections less—while weighing environmental impact from overspray and VOCs. Proper technique minimizes waste.
- Spraying reduces visible strokes
- Thin, even coats dry uniformly
- Masking limits environmental impact
- Clean equipment to avoid clogging
You’ll get a professional-looking surface faster when you control spray pressure and distance.
Brushstrokes And Texture
When you want a sleek, modern look, brushing lets you control texture and eliminates the subtle stipple or orange-peel that spraying can leave behind; you’ll guide each stroke to smooth seams and reduce visible overlap.
Brushing also helps with color blending on large panels, letting you feather gradations for a uniform appearance. For porous materials, brushes aid stain penetration, pushing pigment into grain for lasting coverage.
Sprayers create fast, even films but can accentuate wind texture and require technique to avoid orange-peel. Choose brushing when you want tactile control and a refined, low-texture finish; spray for speed and fine misting.
Surface Preparation Effects
Although surface prep might feel like busywork, it determines whether your finish reads silky-smooth or shows texture. You’ll see that sanding, cleaning, and priming control paint adhesion and color consistency, so don’t skip steps.
Match prep to substrate: rough wood needs more filling; metal needs de-rusting. When you prep properly, spraying gives ultra-smooth results; brushing can still look flawless if surface is uniform.
- Remove loose paint and dirt
- Sand high spots and feather edges
- Use appropriate primer for adhesion
- Wipe and let surfaces fully dry
Good prep makes your final choice matter less.
Paint Type: Latex, Oil, Elastomeric and Sprayability
Choosing the right exterior paint—latex, oil, or elastomeric—directly affects how well you can spray or brush it and how the finish will perform over time.
Latex dries fast, cleans up with water, and sprays smoothly for even coverage. It’s forgiving for bigger surfaces and lets you adjust color selection and paint sheen easily.
Oil offers longer open time, leveling well when brushed, but needs solvents and can be harder to spray without expert thinning.
Elastomeric seals and bridges hairline cracks. It’s thicker, often requiring heavy-duty sprayers for uniform application.
Match type to substrate and equipment for best results.
Trim and Detail: When Brushing Is Essential
If you want crisp edges and smooth corners, reach for a brush rather than the sprayer—brushes let you control paint flow on trim, molding, window casings, and other tight spots where overspray or pooling would ruin the look. You’ll rely on brush necessity for trim detailing that demands accuracy: build thin, even coats, work into corners, and avoid drips.
Use sash or angled brushes for control, keep a wet edge, and feather strokes for seamless joins. Brushing also helps with small repairs and textured profiles that spray can’t fill neatly. Choose brushing where precision matters most.
- Precision over coverage
- Control paint flow
- Work tight corners
- Fix small defects
Large Flat Areas: When Spraying Saves Time
When you’re covering broad, flat surfaces like siding, garage doors, or fence panels, spraying dramatically cuts time and gives a more uniform finish than brushing or rolling. You’ll cover more square footage quickly and avoid lap marks that show up with rollers.
Sprayers help blend slight variations, which matters if you’re trying to achieve seamless color matching after replacing boards. Pick a sprayer tip and technique suited to your paint branding and surface texture, and thin or strain only as recommended.
Mask carefully, work in consistent passes, and keep spray distance steady to guarantee an even, professional result.
Weather, Temperature and Drying Basics
You’ll want to pick days when the temperature falls within the paint’s ideal range—usually between 50°F and 85°F—to guarantee proper adhesion.
Watch humidity, because high moisture slows drying and can cause milky or tacky finishes.
Plan your spraying or brushing schedule around forecasted conditions so each coat has enough time to dry before the next.
Ideal Temperature Range
Wondering what temperature makes exterior paint behave best? You’ll want conditions between about 50°F and 85°F for most latex and oil-based products. That range helps with color consistency and proper primer selection, preventing premature film formation or poor adhesion.
Paint applied too cold may sag after a slow cure; too hot and solvents evaporate too fast, causing brush marks or spray orange peel. Plan work for stable days, early morning or late afternoon shade, and follow manufacturer limits printed on cans.
- Aim for consistent daytime highs
- Avoid direct midday sun
- Keep surfaces within the product’s temp range
- Monitor sudden drops at night
Humidity And Dry Time
Having the right temperature helps, but humidity strongly affects how fast exterior paint dries and how the film forms. You’ll check humidity levels before starting: high moisture slows solvent evaporation, extends dry time, and raises the risk of blooming or tacky finishes.
Low humidity can speed evaporation, causing brush marks, laps, or poor adhesion. Aim for moderate humidity recommended on the paint can—usually between 40–70%—and avoid painting during rain or heavy dew.
If you must work in marginal conditions, use slow-dry formulations, thin coats, and plan longer cure times so the finish fully hardens.
Surface Condition: Prep Differences for Spray vs Brush
Because spray and brush finish differently, the prep you do has to match the method. You’ll assess surface texture and fix imperfections differently: spraying hides minor flaws but shows dust; brushing tolerates slight roughness but needs smoother edges for visible strokes.
Focus on cleaning, sanding, and repairing so paint adhesion is reliable for your chosen tool. For spray, you’ll aim for ultra-clean, feathered edges; for brush, remove loose fibers and level seams.
Consider these prep priorities:
- Remove dirt, chalk, and mildew thoroughly
- Sand glossy spots and rough gradations
- Fill cracks and gouges smoothly
- Mask and protect surrounding areas
Prep Checklist Before Any Exterior Paint Job
After you’ve matched your prep to the application method, set up a concise checklist so nothing gets missed before you open the paint can. You’ll verify surface cleanliness, fix damaged trim, mask adjacent areas, confirm weather, and plan disposal. Note color blending needs and confirm tint batches match; check paint mixing instructions and stir thoroughly. Review tools, ladders, and safety gear.
| Task | Quick Check |
|---|---|
| Clean surfaces | Pressure wash or scrub |
| Repair | Fill, sand, replace |
| Masking | Tape, drop cloths |
| Weather | Temp, humidity OK |
| Paint | Color blending, mixing done |
Prep for Spraying: Step-by-Step
Before you start spraying, you’ll want to clean every surface thoroughly—remove dirt, mildew, and loose paint so the coating sticks.
Next, mask windows, trim, plants, and anything you don’t want overspray on, and use drop cloths for the ground.
Taking these steps upfront will save you time and keep your finish professional.
Surface Cleaning Essentials
A clean surface is the foundation of a successful spray job, so you’ll want to remove dirt, mildew, chalking, and loose paint before you even think about the sprayer. You’ll wash with a mild detergent or a mildew cleaner, rinse thoroughly, and let everything dry fully.
Scrape and sand flaking areas, then spot-prime bare wood or metal. While prepping, check paint cans for proper color mixing and confirm paint storage hasn’t degraded labels or seals.
- Use a soft-bristle brush or power washer on low
- Treat mildew with a bleach solution
- Sand glossy spots smooth
- Remove all dust before priming
Masking And Protection
When you’re ready to spray, protect everything you don’t want painted by thoroughly masking windows, trim, fixtures, plants, and ground surfaces—use high-quality painter’s tape, plastic sheeting, and drop cloths so overspray and splatters stay contained.
Work methodically: tape edges, secure sheeting with weights, and cover landscaping with breathable fabric. Remove or wrap fixtures, and mask vents to prevent clogging.
Check color matching by testing small masked areas to confirm spray appearance.
Consider weather considerations—avoid spraying in wind, rain, or extreme heat.
Recheck seals before you start, and keep extra tape and sheeting handy for quick fixes.
Masking Plants, Windows and Fixtures for Spraying
Since overspray can travel farther than you expect, you’ll need to protect plants, windows, and fixtures with a tight masking plan before you start spraying. You’ll mount drop cloths and plastic sheeting, secure edges with painter’s tape, and keep shrubs back with stakes.
Emphasize plant protection and check equipment calibration so spray patterns are predictable. Work from top to bottom, keeping walkways clear and using temporary barriers for wind.
Remove or cover outdoor fixtures; label anything you can’t remove.
- Use breathable cloths for plants
- Tape glass edges tightly
- Shield light fixtures completely
- Anchor plastic against gusts
Prep for Brushing and Rolling: Step-by-Step
Before you load a brush or roller, you’ll clean the surface, scrape loose paint, and make any necessary repairs so paint adheres properly.
Then you’ll mask trim, tape edges, and cover plants, hardware, and walkways to protect them from drips and splatter.
Follow a logical sequence—clean, fix, tape, and cover—to keep the job tidy and efficient.
Surface Cleaning & Repairs
If you want your brush or roller to lay down smooth, long-lasting paint, start by cleaning and repairing the surface so paint can adhere properly. You’ll remove dirt, mildew, and loose paint with a scrub, pressure washer (low setting), or sanding.
Fill cracks and gouges, sand smooth, and prime bare wood or metal. That boosts paint durability and helps with accurate color matching when you touch up or repaint.
- Remove mildew and chalk with a cleaner
- Sand loose paint to feather edges
- Use exterior filler for gaps and holes
- Prime bare or repaired areas before painting
Masking, Taping, Covering
Now that surfaces are clean, repaired, and primed, protect trim, windows, fixtures, and landscaping so your brush and roller work stays neat and efficient. Start by taping edges with quality painter’s tape, pressing firmly for crisp lines.
Cover plants and walkways with drop cloths or plastic sheeting weighted at edges. Mask windows and hardware, removing tape while paint is tacky, not fully dry.
For color matching and consistent paint sheen, label masked areas and keep separate cans for trim versus body coats. Inspect seams and re-tape any gaps before you load your brush or roller and begin painting.
Protecting Surroundings When Brushing or Rolling
When you’re brushing or rolling exterior paint, take a few minutes to shield nearby surfaces so splatters and drips don’t create extra work later; lay down drop cloths, tape off trim and windows, and cover plants with breathable plastic or burlap to prevent paint damage.
You’ll also plan for color matching touchups and minimize environmental impact by containing stray paint. Secure tarps, seal gaps, and keep cleanup supplies handy.
Use breathable covers for vegetation and avoid washing paint into storm drains.
- Lay heavy canvas drop cloths
- Tape edges with painter’s tape
- Cover plants and soil
- Keep a damp rag for drips
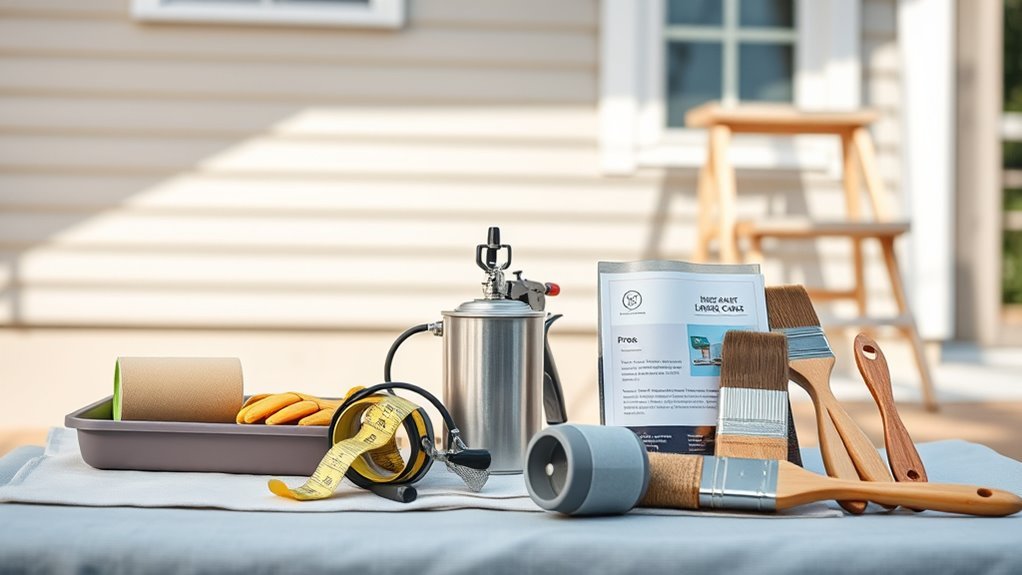
Choosing the Right Sprayer for Your Project
You’ll want to compare HVLP, airless, and compressed-air sprayers to see which fits your budget and finish needs.
Match the sprayer to the surface — airless for large, rough siding; HVLP for smooth trim and cabinets.
Consider portability and cleanup too, since those factors affect how practical a sprayer is for your job.
Sprayer Types Compared
Picking the right paint sprayer can make the job faster, cleaner, and give you a more professional finish—if you match the tool to the project. You’ll choose between airless, HVLP, compressed air, and handheld mist sprayers based on scale, desired texture, and control.
Consider how each affects color blending and paint adhesion; some atomize better for smooth gradients, others lay thicker coats for durability. Match transfer efficiency to material and finish needs.
Think about cleanup time, overspray, and portability before buying.
- Airless: fast, thick coats
- HVLP: fine control, low overspray
- Compressed air: smooth finish
- Handheld: touch-ups
Match Sprayer To Surface
Now that you’ve compared sprayer types, match the sprayer to the surface you’re painting to get the best coverage and finish. You’ll choose based on surface texture, access, and paint viscosity. Smooth siding favors a fine-tip HVLP for even coats; rough stucco needs an airless for penetration. Consider equipment maintenance: simpler pumps are easier to clean after thick exterior paints. Test on scrap, adjust tip size, and keep consistent overlap. Visualize choices:
| Surface | Recommended Sprayer |
|---|---|
| Smooth wood | HVLP |
| Rough wood | Airless |
| Stucco | Airless |
| Trim/detail | Handheld HVLP |
Choosing Brushes and Rollers That Perform
Because the right brush or roller makes the job faster and the finish cleaner, choosing tools that match your paint and surface matters. You’ll pick synthetic brushes for water-based paints and natural-bristle for oil-based, and match nap length to texture.
Choose brushes and rollers to match paint and surface—synthetic for water-based, natural for oil, nap to texture.
For trim, use angled brushes; for siding, a medium to long-nap roller. Pay attention when doing color matching or paint mixing—tool choice affects coverage and sheen. Test a small area to confirm appearance.
- Use synthetic brushes for latex
- Choose nap by surface roughness
- Keep multiple sizes handy
- Clean tools thoroughly after use
Thinning Paint for Sprayers : When and How
After you’ve chosen the right brushes and rollers, you’ll also need to think about thinning when you switch to a sprayer—spray equipment requires a different viscosity than hand tools. Check manufacturer guidelines for thinning ratio and test on scrap first.
Use the recommended thinner—water for latex, mineral spirits for oil—adding small amounts until the spray pattern is even. Work with ventilation to disperse paint fumes and wear a mask.
Strain mixed paint to prevent clogs, clean filters, and flush the system after use.
For safe equipment storage, empty containers, dry parts, and store in a cool, dry place away from flames.
When Not to Thin Paint for Spraying
When shouldn’t you thin paint for spraying? You shouldn’t thin if the manufacturer says it’s spray-ready, since altering viscosity can hurt paint adhesion and void warranties.
Don’t thin when spraying detailed trim or textured surfaces—thinning can change coverage and compromise color consistency.
Avoid thinning for detailed trim or textured surfaces—it can alter coverage and throw off color consistency.
Avoid thinning high-build or specialty coatings that rely on formulation for durability.
- Manufacturer label specifies no thinning
- Concern for reduced paint adhesion on rough substrates
- Need to maintain original color consistency and coverage
- Working with high-build, enamel, or specialty coatings
Stick to recommended fluids only; testing on a scrap proves whether thinning’s truly needed.
Optimal Spray Technique to Avoid Runs and Drips
To avoid runs and drips, keep your gun moving at a steady pace and hold it the correct distance from the surface—usually 8–12 inches for HVLP and 10–18 inches for airless systems—so each pass lays down an even, wet film without overloading any spot.
You should overlap passes by about 30–50% and work in consistent, parallel strokes. Watch for sagging edges and back-roll lightly with the spray pattern when needed to control buildup.
Adjust pressure and tip size for substrate porosity to manage paint absorption, maintain color consistency, and prevent rewetting previously applied areas.
Proper Brushing and Rolling Technique to Minimize Marks
If you want a smooth, mark-free finish, use the right brush or roller and keep a light, consistent touch—load the tool sparingly, work in manageable sections, and maintain a wet edge so overlaps blend seamlessly.
You’ll choose quality nylon or natural-bristle brushes for trim and a dense, shed-resistant roller for flats. Keep strokes even, don’t press hard, and back-roll to level nap marks.
Mind temperature and humidity; they affect leveling. Store leftover paint properly to preserve color matching and viscosity for touchups—seal cans tightly and label them.
- Load less, apply more passes
- Keep a wet edge
- Use consistent strokes
- Maintain proper paint storage
Blending Sprayed Areas With Brushed Edges
Moving from brushing technique to blending sprayed areas with brushed edges, you’ll focus on matching texture, sheen, and paint thickness so the repair or overlap disappears. You’ll use precise Blending techniques and Edge smoothing to feather sprayed edges into brush strokes. Work wet-on-wet, adjust spray distance, then soften gradations with light brush strokes. Check under varied light and correct low spots or heavy ridges quickly. Practice on scrap material to dial settings and stroke pressure before tackling trim or siding.
| Step | Tool | Goal |
|---|---|---|
| 1 | Sprayer | Even mist |
| 2 | Brush | Feather edge |
| 3 | Light | Inspect finish |
Drying Times and Recoating: Spray vs Brush
Because spray and brush lay down paint differently, their drying profiles and safe recoat windows often differ, and you should plan your schedule accordingly. Sprayed coats are thinner and dry fast, letting you recoat sooner but demanding careful timing to preserve color consistency.
Brushed or rolled layers are thicker, slower to cure, and can hide imperfections if you wait longer. Humidity, temperature, and product specs still govern timing, and you should follow manufacturer guidelines to limit environmental impact.
- Check tack-free and recoat times on the can
- Test a small area before full recoating
- Adjust timing for humidity and temperature
- Keep ventilation adequate during drying
Sprayer Cleanup and Maintenance
When you finish a spraying job, clean the sprayer immediately to prevent dried paint from clogging tips, seals, and hoses — prompt flushing and proper disassembly will keep the unit working reliably and extend its life. Rinse with appropriate solvent, inspect seals, and store parts dry. Check sprayer calibration after reassembly and adjust for paint viscosity each time you change products.
| Step | Action | Tip |
|---|---|---|
| 1 | Flush lines | Use solvent |
| 2 | Disassemble | Inspect seals |
| 3 | Clean nozzle | Remove buildup |
| 4 | Reassemble | Test spray |
| 5 | Store | Dry, protected |
Cleaning Brushes and Rollers to Extend Life
Although it’s tempting to toss used brushes and rollers aside, you’ll save money and get better results by cleaning them properly after each job. You’ll protect paint longevity and minimize brush wear if you rinse thoroughly, remove excess paint, and reshape bristles before storing.
Clean brushes and rollers after every job—rinse, remove excess paint, reshape bristles—to save money and improve results.
Use the right solvent for your paint type, work the ferrule, and spin rollers to shed water.
- Flush with solvent or warm soapy water until clear
- Comb bristles and remove trapped hairs or debris
- Spin or shake rollers to remove water
Store brushes flat or hanging to keep shape.
Maintain tools; they’ll perform longer.
Time Savings: Spray vs Brush on Common Exteriors
If you’re racing against a deadline, spraying usually shaves hours off a job compared with brushing or rolling—especially on large, flat surfaces—because a sprayer covers more square footage per pass and eliminates the frequent back-and-forth of cutting in and blending.
You’ll finish siding, fences, and trim faster with a sprayer, though prep and masking add time.
Brushing gives more control on detailed trim and areas with variable paint absorption, which can slow you but prevents runs.
For consistent results, spraying tends to deliver better color consistency across broad areas, while brushing helps on spots that soak up paint.
Cost Comparison: Rental, Equipment, and Waste
You’ll want to weigh rental equipment costs against buying a sprayer or sticking with brushes and rollers.
Consider how much paint and materials you’ll waste with each method, since overspray and backrolling can add up.
Also factor labor time — faster spraying might cut hours but raise rental and cleanup expenses.
Rental Equipment Costs
Renting a professional sprayer can cut upfront costs and speed the job, but you’ll need to weigh rental fees, required accessories, and potential waste from over-spraying against the convenience.
You’ll compare rental costs and equipment fees to buying, factoring hours rented, deposit, and pickup time.
Consider your project size: a day or weekend rental often makes sense for large surfaces, while small jobs may not justify the cost.
You’ll also need hoses, tips, and protective gear—sometimes sold separately.
Budget for cleanup supplies and plan to return equipment on time to avoid extra charges.
- Daily vs. weekly rates
- Deposit amounts
- Accessory rentals
- Late-return penalties
Paint And Material Waste
Having weighed rental fees and gear needs, you should also factor how much paint and supplies you’ll waste with different application methods.
Spraying covers fast but overspray, backrolling, and hose loss raise material use; you’ll need more paint to maintain color consistency across surfaces.
Brushing and rolling cut overspray, so you’ll likely buy less, but touch-ups can be trickier and affect paint durability if applied thinly.
Factor wasted primer, masking, and cleanup solvents when renting sprayers.
Balance initial waste against long-term durability and consistent color — sometimes buying a bit extra prevents rework that costs more in materials and frustration.
Time Vs Labor Expenses
When you factor in both time and labor, spraying can shave hours off a job but often shifts costs from hourly work to equipment rental and extra prep. You’ll save on labor but may pay more for a sprayer, hoses, and masking; you’ll also need to manage overspray and paint storage.
Renting once might be cheaper than buying, yet inefficient color matching or waste raises total expense. Compare time saved to added overhead before choosing.
- Rent sprayer for big, fast jobs
- Buy brushes for small, precise work
- Factor color matching costs
- Plan secure paint storage
Overspray Risks and Prevention
Overspray can turn a quick exterior paint job into a costly cleanup if you don’t plan for it. You need to recognize overspray hazards—furniture, windows, vehicles, and plants can all suffer.
Use proper masking: high-quality tape, plastic sheeting, and drop cloths secured against wind. Work with a laydown pattern that minimizes drift and keep the sprayer pressure and nozzle size appropriate for the paint.
Check wind and humidity before starting. Wear protective gear and shield adjacent surfaces with rigid panels when possible.
After spraying, remove masking carefully and inspect surfaces, touching up any stray spots promptly to avoid permanent damage.
When Spraying Isn’t Worth the Setup or Risk
If your project is small, detailed, or surrounded by delicate landscaping, spraying can cost you more in prep, masking, and risk than it saves in time. You’ll spend hours protecting nearby plants, windows, and fixtures, and you may struggle with color matching when touch-ups are needed.
Weather considerations like wind or humidity can ruin a spray finish or spread overspray. Choose brushing when control matters and setup eats your labor savings.
Consider situations where spraying isn’t worth it:
- Tight trim, corners, or intricate millwork
- Proximity to plants or vehicles
- Unpredictable wind or humidity
- Need for exact color matching
Best Method for Painted Wood Siding and Clapboard
For most painted wood siding and clapboard, brushing or rolling gives the best control and adhesion, letting you work paint deep into seams and along overlapping boards without excessive overspray or waste. You’ll get superior paint adhesion by back-brushing after rolling, forcing coating into grain and joints.
Rolling covers broad flats quickly while angled brushes finish edges and detailed trim. That combo helps maintain color consistency across sun- and shade-exposed faces, minimizing streaks or mottling.
Take time to prep and prime bare spots, work in manageable sections, and dry between coats so each layer bonds properly and lasts.
Best Method for Stucco and Textured Surfaces
Moving from siding to stucco, you’ll need a different approach because textured surfaces demand more paint and better coverage in crevices. You’ll usually spray to get into nooks, then back-roll or brush to force paint into pores and guarantee adhesion.
Switching from siding to stucco requires spraying into crevices, then back-rolling or brushing for full penetration and adhesion
Prioritize paint selection for durability and breathability; stucco needs thicker, elastomeric or masonry-grade coatings. For color matching, sample swatches and test patches on textured areas to judge appearance after application and drying.
Prep is crucial: clean, repair cracks, and prime porous spots. Use proper equipment and technique to avoid runs while filling texture.
- Spray first for penetration
- Back-roll to even coat
- Test color matching
- Choose masonry-grade paint
Best Method for Brick, Stone, and Masonry
When you’re working on brick, stone, or masonry, proper surface prep — cleaning, repointing, and letting everything dry — is nonnegotiable.
You’ll weigh spray for speed and even coverage against brushing for greater control in joints and textured areas.
Also consider long-term durability: the right primer, breathable masonry paint, and application method will determine how well the finish holds up.
Surface Preparation Needs
Although brick, stone, and masonry can look rugged, they demand careful surface prep before you spray or brush paint to guarantee adhesion and longevity. You’ll clean, repair, and assess porosity so coatings bond and color coordination stays true; consider environmental impact when choosing cleaners and primers.
Remove dirt, efflorescence, and loose mortar; replace or tuckpoint damaged joints. Test small areas for sealer or primer absorption, and pick breathable masonry products to avoid trapped moisture.
- Pressure-wash gently to avoid damage
- Use masonry-specific cleaners
- Repair mortar and cracks first
- Test primer and paint compatibility
Spray Versus Brush Control
Now that the masonry’s clean, repaired, and primed, you’ll need to choose the application method that gives you the control to protect texture and detail.
For brick, stone, and masonry, brushing lets you push paint into crevices and adjust coverage for varied textures; it also helps you manage color selection precisely by layering tones.
Spraying covers fast and evenly but can overshoot fine details and waste paint, so mask carefully.
Consider weather impact: avoid spraying in wind or extreme humidity, which causes drift or poor adhesion.
Choose brushing for tight control, spraying for speed when conditions and prep allow.
Long-Term Durability Factors
Because brick, stone, and masonry face constant exposure to moisture, freeze-thaw cycles, and UV, the application method you pick directly affects long-term durability. You want penetration, adhesion, and breathable coatings. Spraying gives uniform color consistency on textured surfaces, while brushing or rolling forces paint into pores for better mechanical grip.
Consider substrate sealing, mortar joints, and maintenance cycles. Also weigh environmental impact: overspray waste versus solvent choice. Balance technique with material needs.
- Confirm proper surface prep and compatible masonry primers
- Choose breathable masonry paints
- Limit overspray with masking and low-VOC products
- Schedule periodic inspections and touch-ups
Best Method for Vinyl, Aluminum, and Metal Siding
When you’re choosing between spraying and brushing vinyl, aluminum, or other metal sidings, consider how each method handles thin, non-porous surfaces.
You’ll usually get faster, more even coverage with a sprayer, which reduces visible brush strokes and helps reach seams.
Brushing lets you press paint into small gaps and control drips on vertical panels.
For successful spraying, practice consistent overlap and protect nearby landscaping.
Pay attention to color mixing for uniform batches and label cans clearly; proper paint storage prevents settling and contamination between coats.
Choose the method that balances speed, finish quality, and your comfort with equipment.
Handling Trim, Windows, and Doors When Spraying Walls
If you’re spraying exterior walls, take extra care around trim, windows, and doors to avoid overspray and uneven edges. Mask trim and glass precisely with low-tack tape and paper; use a thin edge guard where paint adhesion matters.
When spraying exterior walls, carefully mask trim, windows, and doors to prevent overspray and ensure clean, even edges
When spraying near painted trim, feather sprays to maintain color matching and avoid visible overlaps. For doors and windows, remove hardware when possible and spray from a consistent distance to prevent runs.
- Mask glass and hardware thoroughly
- Use back-brushing for tight corners
- Check spray angle for clean lines
- Test a small patch for color matching and adhesion
Safety: PPE and Outdoor Ventilation
While you’re spraying or brushing exterior paint, protect yourself with proper PPE and prioritize ventilation—your skin, eyes, lungs, and hearing all face real risks from fumes, particulates, and noise.
You should follow clear safety protocols: read labels, avoid enclosed spaces, and keep bystanders upwind.
Use PPE gear: NIOSH-rated respirator, chemical-resistant gloves, eye protection, and hearing protection for long spray sessions.
Position ladders and work areas so fresh air flows across you; use fans only to improve ventilation, not to spread mist toward others.
Inspect and maintain PPE gear, and stop if you feel dizzy or irritated.
Environmental and Neighborhood Overspray Considerations
Because overspray can travel farther and settle on unintended surfaces, you need to plan spraying with your neighbors and the environment in mind. You’ll assess Environmental impact by choosing low-VOC paints, shielding plants, and covering cars and windows.
Communicate with neighbors to protect property and preserve Neighborhood safety.
Pick calm weather, use windbreaks, and set up containment like drop cloths and masking.
After finishing, clean equipment responsibly to avoid runoff.
- Use low-VOC or water-based coatings
- Notify neighbors before work begins
- Install physical barriers and tarps
- Dispose of wash water and rags properly
When to Hire a Pro Spray Job vs DIY Brushing
If your project covers a large, intricate surface with lots of trim or high areas, you’ll probably want a pro sprayer to handle the scope and complexity.
Consider how much time and physical labor you can commit—spraying saves hours but pros move faster and safer.
Finally, weigh cost and equipment: renting or buying a sprayer plus prep gear can add up, so DIY brushing may be smarter for small jobs.
Scope And Complexity
When a project involves tall walls, intricate trim, or multiple access challenges, you’ll quickly see why a pro spray job becomes worth the cost. They handle large surface areas faster and reach awkward spots that’d slow you down with a brush.
You should weigh scope and complexity: extensive siding, textured surfaces, or delicate details push you toward pros. They’ll optimize color options and finish for paint longevity while minimizing overspray and maskwork.
If you’re confident, small flat areas suit brushing. Consider these complexity cues:
- Height and scaffolding needs
- Number of architectural details
- Surface texture variation
- Access and containment challenges
Time And Labor
Wondering whether to hire a pro sprayer or tackle the job with a brush? You’ll weigh time and labor: spraying covers large surfaces fast, so a pro cuts days off work and mess.
While brushing suits small areas and detailed trim where you want control. If you’re short on free time or can’t manage ladders safely, hire help.
DIY brushing saves money but demands patience and breaks for proper paint storage and cleanup. Also consider color mixing complexity—pros handle blends and touch-ups quickly.
Choose based on your schedule, skill, and tolerance for physical effort.
Cost And Equipment
Because spraying needs more specialized gear and setup, your budget and access to equipment often decide whether you hire a pro or brush it yourself. You’ll weigh rental or purchase costs for sprayers, compressors, masks, and tarps against pro quotes that include labor, cleanup, and warranty.
Pro spraying speeds big jobs and guarantees consistent finish, helpful when color selection and paint branding matter. DIY brushing saves on gear but demands time and skill for smooth results.
- Compare rental vs hire fees
- Factor in maintenance and cleanup
- Verify pro insurance and references
- Match paint branding to warranty requirements
Estimating Paint Quantity for Spraying vs Brushing
If you’re planning to spray instead of brush, you’ll need to adjust your coverage estimates because spraying uses more paint due to overspray and thinner application. Measure surface area, count coats, and add 10–25% for overspray depending on nozzle and technique.
Spraying can aid color blending across large walls, but thinner layers may require extra coats to match brushed opacity and maintain paint durability.
For trim and tight spots, plan to brush or back-roll, which uses less paint per square foot. Buy a little extra to avoid color mismatches between batches and to guarantee full, even protection across the exterior.
Common Sprayer Mistakes DIYers Make and Fixes
When you spray exterior paint you can waste time and finish quality with poor technique, the wrong tip, or skipping surface prep.
Each of those mistakes has a quick fix—practice consistent speed and distance, match the tip to your material, and clean/repair the surface first.
Fixing them up front will save paint and give you a professional-looking result.
Poor Spray Technique
Even with a good sprayer, poor technique will turn a fast job into a mess, but most mistakes are easy to fix once you recognize them.
You’ll see uneven coverage, overspray, and paint drips if you move too slowly, hold the gun at inconsistent distances, or overlap improperly. Keep a steady rhythm, maintain a fixed 6–12 inch gap, and trigger before you start each stroke.
Practice on scrap wood to match speed and overlap. Use these quick checks:
- Maintain consistent gun distance and speed
- Start and stop off the workpiece to avoid blobs
- Overlap passes 30–50%
- Wipe excess drips immediately
Improper Tip Selection
Because the spray tip determines droplet size and flow rate, picking the wrong one will wreck your finish before you even start. You’ll get heavy blobs or a dry, dusty mist if tip size or fan pattern don’t suit your coating or surface.
Match tip specs to material—latex, stain, or primer—and to spray gun pressure. Test on scrap and adjust until you nail coverage and edge control; that also helps with color matching before committing.
Clean and store tips properly to avoid clogs; label for paint type and date during paint storage so you pick the right tip next time.
Inadequate Surface Prep
If you skip proper surface prep, your sprayer can’t fix what’s underneath — paint will peel, drip, or hide blemishes instead of delivering a smooth, durable finish. You’ll waste paint and invite color fading when you don’t remove dirt, chalking, or loose old coatings.
Sand, clean, and use appropriate primers so the finish bonds and maintains weather resistance. Check for mildew and repair caulk or trim gaps before you spray.
Prep also controls absorbency, preventing blotchy coverage.
- Degloss glossy surfaces
- Power-wash siding
- Patch and sand imperfections
- Apply primer where needed
Common Brushing and Rolling Mistakes and Quick Fixes
When you’re brushing or rolling exterior paint, small mistakes can quickly ruin a smooth finish, but most are easy to fix on the spot. Check color consistency before you start and ventilate to reduce paint odor.
If you get lap marks, feather the edge with light strokes while paint is still wet.
Drips and sags? Brush them out immediately, then roll gently to blend.
Dry brush marks call for sanding and a thin touch-up coat.
Roller texture too heavy—backroll with a loaded, evenly distributed roller.
Keep a clean brush, maintain wet edges, and work in consistent sections.
Decision Matrix: Choose Spray or Brush and Next Steps
Although both methods can deliver a durable finish, choose spray for speed and uniform coverage on large, intricate surfaces, and choose brush/roll for control and touch-ups on trim or small areas.
Choose spray for fast, even coverage on big or detailed surfaces; use brush/roll for precise control and trim.
Use this decision matrix: pick spray when surface area, time, and consistent texture matter; pick brush/roll when precision, penetration, and repairability matter.
Consider Color matching needs, substrate porosity, and Eco friendly options when selecting products and cleanup methods.
Next steps: test on a small patch, confirm finish, ventilate, and protect surroundings.
Keep tools clean to extend life and maintain consistent results.
- Test patch first
- Prioritize ventilation
- Use low-VOC paints
- Maintain tools
Frequently Asked Questions
Can I Spray Paint Safely Near Neighbors’ Homes and Cars?
Yes — you can, but you shouldn’t be careless. You’ll protect neighborhood safety by using tarps, masking, wind checks, low-pressure sprayers, and proper ventilation to prevent paint overspray from damaging neighbors’ homes, cars, or landscaping.
How Do Permits or HOA Rules Affect Spray Painting Exteriors?
Think of a lighthouse guiding ships: you’ll check Permit restrictions and HOA regulations before you spray. They’ll dictate when, how, and whether you can paint, and you’ll avoid fines or forced repainting.
Will Spraying Affect My Home’s Warranty or Insurance Coverage?
Yes — spraying can affect warranty implications and insurance coverage if it voids manufacturer warranties or violates policy conditions; you’ll want to check your warranty terms and speak with your insurer before spraying to avoid denied claims or coverage gaps.
Can I Use Leftover Sprayed Paint Later for Touch-Ups?
Yes — you can if you store leftover sprayed paint properly: seal containers, label batch and color, keep cool and stir before use. Color matching may shift slightly, so save extra for future touch-ups to guarantee consistency.
How Does Spray Painting Impact Indoor Air Quality if Windows Are Open?
Spray painting with windows open still risks indoor ventilation shortcomings; you’ll inhale paint fumes unless you increase airflow, use masks, and seal off areas. Open windows help but won’t eliminate airborne particulates and VOCs completely.
Conclusion
You’ll pick spray when speed and a smooth, even finish matter, brush/roll for control, cutting in, and textured surfaces. Weigh siding type, project size, prep time, overspray risks, and paint volume before deciding. If you’re unsure, test a small area with both methods. Tackle big jobs like a seasoned carpenter, but don’t forget old-school patience — your house will thank you with a pro-looking coat that lasts.