Can Latex Paint Be Thinned With Water? Proper Method
Yes — you can thin most water-based (latex) paints with clean water, but do it slowly and sparingly so you don’t ruin coverage or adhesion. Stir thoroughly, add water in small increments (start 1%–5%), strain and test on a scrap or with your spray/roller, and follow manufacturer limits (often up to 5–15% for interiors, more for some exteriors). Keep notes, avoid overthinning, and follow cleanup/disposal rules; continue for tips on tools and troubleshooting.
Who This Guide Is For And What It Answers

If you’re new to thinning latex paint or just want cleaner results, this guide’s for you.
You’ll learn which paint types respond to thinning, when dilution helps, and which scenarios to avoid.
It explains safe water ratios, tools, and simple application techniques so you can adjust viscosity without ruining coverage.
You’ll get practical steps, troubleshooting tips, and clear decision points.
Quick Answer: Can You Thin Latex Paint With Water?
Short answer: yes — you can thin most water-based latex paints with water to improve flow and sprayability, but only in small, controlled amounts.
You’ll dilute gradually, test paint consistency, and avoid overthinning.
Use measured thinning techniques, stir thoroughly, and check coverage on a scrap surface.
Thin only as needed for the application and equipment you’re using.
Why Thinning Latex Paint Matters For Finish And Adhesion
When you thin latex paint correctly, your brush and roller will lay down a smoother, more even coat with fewer streaks and lap marks.
It also helps the paint flow into the surface, improving wetting and adhesion for a longer-lasting finish.
Just don’t over-thin, or you’ll sacrifice coverage and bonding.
Improved Brush And Roller Performance
Because thicker latex paint resists smooth spreading, you’ll get better brush and roller performance by thinning it slightly to the manufacturer’s recommended limits.
You’ll notice improved brush techniques—smoother strokes, less dragging, cleaner edges—and greater roller efficiency with even nap saturation and fewer splatters.
Thin only enough to improve flow; over-thinning ruins coverage and increases drying time.
Enhanced Surface Adhesion
If you want a durable, professional-looking finish, thinning latex paint just enough can help it wet out the substrate more uniformly and bond better to the surface.
You’ll improve adhesion by following proper surface preparation, removing dust and gloss, and choosing compatible primers.
Use gentle adhesion techniques like light sanding and tack cloths, then apply thin, even coats for consistent bonding and reduced peeling.
Why Water Changes Latex Paint (Formulation Basics)
Since latex paint is an emulsion of polymer particles suspended in water, adding more water changes how those particles interact and how the paint flows, dries, and adheres.
You’ll alter paint chemistry and water interaction: viscosity drops, pigment and binder distribution shifts, drying slows, and film strength and coverage can weaken.
Small, controlled thinning preserves performance; excessive dilution compromises adhesion and durability.
Tools And Materials To Thin Latex Paint
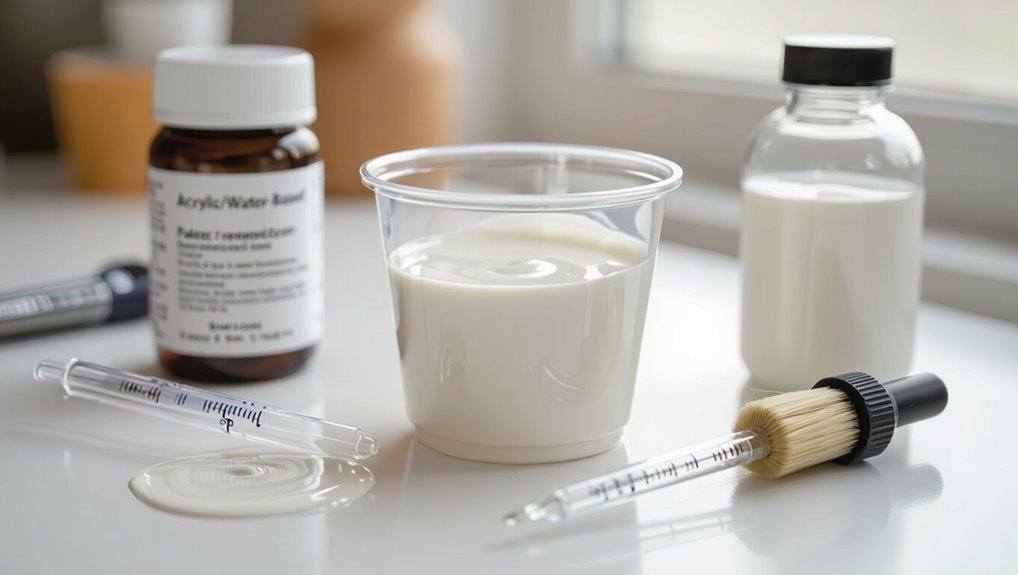
When you’re ready to thin latex paint, gather a few basic tools and the right materials so the job goes smoothly: a clean bucket, stir stick, measuring cup, water source, add-on paint conditioner (optional), dropper, and gloves.
These let you control paint consistency and compare thinning methods.
Keep rags and a small strainer nearby to remove debris and avoid clumps during mixing.
How To Test Paint Consistency Before Adding Water
Start by scooping a small amount of paint onto a clean stirring stick and watching how it moves: you want it to flow smoothly without running off in a thin stream or staying in a tight, globby bead. Use simple testing methods—drip, draw, and tilt—to gauge paint viscosity before adding water.
| Calm | Frustrated |
|---|---|
| Hope | Panic |
| Control | Chaos |
Target Viscosities For Brushing, Rolling, And Spraying
Different applications call for distinct paint consistencies, so aim for the right viscosity before you work.
For brushing, you want a slightly thicker body to avoid runs; for rolling, a medium viscosity for smooth laydown; for spraying, a thinner, flowable mix to atomize cleanly.
Know your target viscosities and match them to application techniques to get consistent coverage and finish.
How To Thin Latex Paint For Brushing (Step-By-Step)
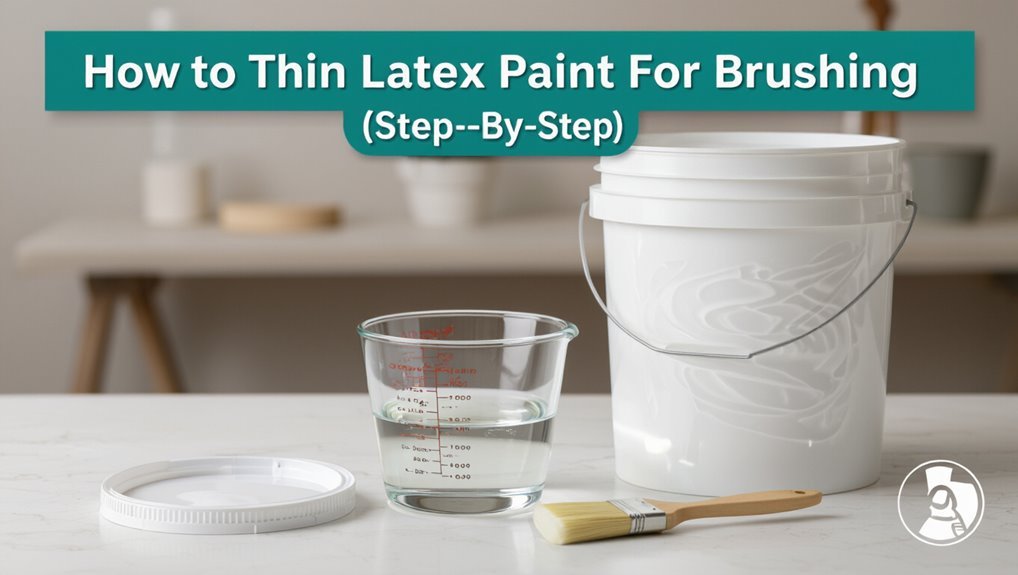
1 simple tip before you mix: thin latex paint only enough to improve brush flow without making it run. Measure small: add water in 1%–5% increments, stir, test on cardboard.
Check Paint Consistency—should coat without sagging.
Check paint consistency — let it coat evenly without sagging for smooth, professional results.
Use proper Brush Techniques: dip one-third, load evenly, stroke smoothly.
Repeat tiny adjustments until coverage and control meet your standard.
How To Thin Latex Paint For Rolling (Step-By-Step)
Before you start rolling, make sure you’ve stirred and strained the paint so it’s free of lumps and evenly mixed.
Add small amounts of water or paint conditioner and test the flow on a sample board until the nap loads smoothly without dripping.
Keep adjusting the consistency gradually—too thin causes runs, too thick gives poor coverage.
Prepare Paint Properly
Start by checking your paint’s consistency—too thick paint won’t spread evenly with a roller, while over-thinned paint will drip and lose coverage.
You’ll handle paint preparation and use sensible mixing techniques. Follow these steps:
- Stir thoroughly to reincorporate pigments.
- Strain to remove lumps.
- Add small water increments.
- Re-stir and test on scrap wall.
Adjust Consistency Gradually
When your paint’s slightly too thick for rolling, thin it in small steps so you keep control over coverage and drying—add no more than a few tablespoons of water per quart, stir thoroughly, then test a rollerful on scrap to judge flow and hide.
Keep notes of paint thickness after each consistency adjustment, repeat sparingly, and stop once the roller loads evenly without sagging.
How To Thin Latex Paint For Spraying (Step-By-Step)
Thinning latex paint for spraying is a simple, step-by-step process you’ll follow to achieve smooth flow, consistent atomization, and fewer clogs in your sprayer.
Follow these concise steps focusing on spraying techniques and paint viscosity:
- Stir paint thoroughly.
- Add small water increments while mixing.
- Test spray on cardboard, adjust.
- Strain paint before loading sprayer.
Recommended Dilution Ratios For Latex Paint
For most interior latex paints, you’ll typically dilute 5–15% by volume (about 1/4 to 3/4 cup of water per gallon) for a high-volume low-pressure (HVLP) or airless sprayer; heavier exterior or high‑solids formulations may need up to 20% but rarely more.
You should test small batches, adjust dilution techniques to reach the right paint consistency, and note manufacturer limits to avoid performance loss.
Add Water Safely And Mix Without Bubbles
Measure the water carefully so you don’t over-thin the paint.
Stir slowly and gently to incorporate the water without creating bubbles.
Keep checking consistency as you go and stop when the paint flows smoothly.
Measure Water Carefully
Start with clean, room-temperature water and a calibrated measuring cup so you add only what the label recommends; small errors compound quickly, so don’t guess—use the exact ratio and record it.
- Check water ratios on the label and plan additions.
- Use reliable measurement tools and note volumes.
- Add measured water incrementally, watching consistency.
- Keep a log of batch ratios for repeatable results.
Stir Slowly, Gently
Gently pour the measured water down the inside wall of the paint can and stir slowly with a flat stir stick, keeping the blade angled so you move paint in a smooth, rolling motion rather than whipping air into the mix. Use careful stirring techniques to judge paint consistency and avoid bubbles.
| Action | Speed | Result |
|---|---|---|
| Pour | Slow | Even |
| Stir | Gentle | Smooth |
| Angle | Tilted | Rolling |
| Check | Dip | Texture |
| Finish | Rest | Settled |
Avoid Over-Thinning
While a little water can improve flow, don’t add more than the paint needs—over-thinning weakens coverage and increases drying time.
- Check paint consistency before adding water.
- Add tiny amounts, mixing slowly to avoid bubbles.
- Test a small patch to assess over thinning risks.
- If it thins too much, let it rest or add unthinned paint to restore body.
How To Check Viscosity With A Cone Or Flow Test
Before you thin any paint, you’ll want to check its viscosity with a cone or flow test so you know exactly how it will behave when applied.
Set up a cone cup or simple funnel, pour paint, and time the flow. Use that viscosity measurement to compare with manufacturer specs.
Repeat after small water additions until you hit the target consistency.
How Thinning Changes Drying Time And Recoats
When you thin latex paint, you speed up its flow but also change how quickly water evaporates and the film sets.
So you’ll need to adjust drying and recoat timing accordingly.
- Expect faster drying effects with light thinning.
- Humidity slows evaporation; watch temperature.
- Extend recoating intervals if paint feels tacky.
- Test small areas to confirm drying effects and proper recoating intervals.
How Thinning Affects Coverage And How To Compensate
If you thin latex paint to improve flow, expect a thinner film that covers less per coat.
So you’ll need more passes or a touch-up strategy to reach full opacity.
Plan coverage adjustments: estimate extra coats, test a small area, and track spread rate.
Use compensation techniques like slightly heavier initial application, targeted touch-ups, and choosing higher-hide primers or paints to regain opacity without overworking the surface.
Troubleshooting Streaks, Poor Adhesion, And Drips
Although thinning can improve flow, you’ll sometimes see streaks, poor adhesion, or drips because the paint’s binder and solids have been altered — so diagnose each issue before adding more solvent.
Thinning improves flow, but can cause streaks, poor adhesion, or drips—diagnose first before adding more solvent.
- Check surface prep for adhesion issues; sand and clean.
- Reduce thinning; restore solids to prevent streaks.
- Adjust technique: thinner coats, proper brush/roller to avoid drips.
- Test small area, let cure, then decide if recoat or use a bonding primer.
When Not To Thin Latex Paint (Five Warning Scenarios)
Because thinning alters the paint’s balance of binder, pigment, and additives, you shouldn’t reach for solvent in certain situations — doing so can ruin finish, adhesion, or durability.
Don’t thin if manufacturer’s label warns against it, when repainting high-traffic surfaces, with aged or separating paint, when matching exact sheen, or if you need consistent color and film thickness.
Note thinning limitations and preserve paint consistency.
When To Use A Commercial Latex Thinner Or Extender
You’ve seen when thinning can cause problems, so now consider situations where a commercial latex thinner or extender actually helps.
- When spraying high-viscosity latex with commercial thinners for proper atomization.
- When extending open time in hot, fast-drying conditions using paint extenders.
- When improving flow for large, smooth surfaces.
- When correcting slightly thickened cured-in-can paint without compromising film integrity.
Thinning Specialty Latex Paints (Masonry, Trim, Fast-Dry)
Tackle specialty latex paints carefully: masonry, trim, and fast-dry formulations each behave differently when thinned, so you’ll need to tailor your approach to the product and application.
For masonry paint, add minimal water or use specialty thinners to preserve adhesion.
With trim paint, thin cautiously to avoid sagging.
Fast dry paint tolerates less thinning; consult manufacturer recommendations and test before large jobs.
Thinning Pre-Tinted Or Blended Latex Without Altering Color
When you need to thin pre-tinted or custom-blended latex, protect the color integrity by using only clear additives like water or manufacturer-approved extenders.
Always test on a small batch first so you can compare wet and dry tones before altering a full can. If the sample matches, proceed incrementally to avoid shifting the hue.
Preserve Color Integrity
Although thinning can make pre-tinted or custom-blended latex easier to apply, you’ll want to do it carefully so the pigment balance stays true; add only compatible thinner in small increments, mix thoroughly, and check color against a sample after each addition.
- Measure additions to protect color preservation.
- Stir uniformly to avoid streaks.
- Compare wet and dry samples.
- Use proper storage to guarantee paint longevity.
Test Small Batch
After you’ve confirmed pigment balance in a sample, make a small test batch before altering a full can—working with a pint or less lets you tweak thinner amounts without risking the whole blend.
Use controlled test methods: add tiny increments of water, mix thoroughly, and apply to a swatch.
Evaluate drying, adhesion, and paint quality before committing to larger volumes.
Use Clear Additives
If you don’t want to change a pre-tinted or blended latex’s color, use clear additives designed for latex—these let you thin the paint or adjust flow without diluting pigment.
- Choose manufacturer-recommended clear additives for compatibility.
- Add small increments, stir thoroughly.
- Test on scrap to confirm sheen and coverage.
- Wait recommended dry time for best results and adjust if needed.
How Temperature & Humidity Affect Thinning Latex Paint
When you thin latex paint, temperature and humidity directly change how fast it dries and how it flows, so you’ll need to adjust the amount of water or conditioner accordingly.
You’ll watch Temperature effects speed curing, Humidity impacts slow drying and raise tack.
Manage Consistency variations by adding small amounts, test on a board, and adapt Application techniques—roller, brush, or sprayer—based on conditions.
Color And Sheen Changes After Thinning: What To Expect
Although thinning latex paint can make it easier to apply, you’ll usually notice subtle changes in both color and sheen that matter for final appearance.
- Expect slight loss in color retention with heavier thinning.
- Sheen variations can shift flat to satin or reduce gloss.
- Test a sample patch before committing.
- Adjust thinning minimally to preserve tone and finish.
Store And Reuse Thinned Latex Paint Safely
You can store thinned latex paint for future touch-ups, but you’ll need to follow a few simple steps to keep it usable:
You can save thinned latex paint for touch-ups—just store it airtight, labeled, minimal air, and remix before use.
Transfer to a clean, airtight container, leave minimal air space, label with thinning ratio and date, and store cool and dry.
For reuse techniques, gently remix before use and strain to remove skin or debris.
Check consistency and shelf condition.
Safe Cleanup And Disposal Of Thinned Latex Paint
When you’re finished thinning and using latex paint, dispose of any leftover thinned paint according to local hazardous-waste guidelines or by solidifying small amounts for curbside trash if allowed.
Rinse and clean brushes with running water until the water runs clear, using a brush comb or mild soap to remove trapped paint.
Never pour thinned paint or rinse water down drains or into the environment.
Safe Disposal Methods
Because thinned latex paint can leach and clog drains, you should handle cleanup and disposal carefully to protect plumbing and the environment.
Follow safe disposal methods, consider environmental impact, and check local regulations before disposal.
- Solidify small amounts with kitty litter, then trash.
- Take large quantities to hazardous waste sites.
- Never pour down drains or storm sewers.
- Label containers for pickup or recycling.
Cleaning Brushes Properly
After disposing of excess thinned latex paint properly, clean your brushes to prevent clogs and contamination; rinsing and handling leftover wash water correctly keeps plumbing and the environment safe.
Use warm water and mild soap, work bristles gently, and comb out dried particles.
Capture rinse water, let solids settle, pour clear water down drain, and dispose solids with household waste.
Prioritize brush care and paint maintenance.
Quick Checklist For Thinning Latex Paint Correctly
1 simple pre-check will save you time and improve results: confirm the paint’s manufacturer recommendations, check the can for existing thinning notes, and make sure your surface, tools, and temp/humidity conditions match the label’s guidelines.
- Measure paint viscosity before you start.
- Use recommended thinning techniques and water amounts.
- Stir thoroughly and test on a scrap.
- Re-check finish, adjust gradually, and document ratios.
Frequently Asked Questions
Will Thinning Affect Paint VOC Levels or Odor Indoors?
Yes — thinning can raise VOC emissions and boost odor, so you’ll notice worse indoor air quality if you add solvents; thinning with water has minimal VOC impact, but it can still increase smell and off‑gassing.
Can Thinned Paint Be Used Over Oil-Based Primers Without Sanding?
Yes — you can, but tread lightly: thinned latex may politely struggle with oil primer compatibility. You’ll need proper paint application techniques like using a bonding primer or light sanding to guarantee adhesion and avoid peeling later.
Does Thinning Change the Paint’s Mildew Resistance Properties?
Thinning can slightly reduce mildew resistance and paint durability if you overthin; you’ll maintain properties by only adding small amounts per manufacturer instructions, using mildewcide when needed, and ensuring proper application and drying conditions.
Can You Thin Latex Paint in a Metal Can Without Corrosion Risks?
About 72% of canned paints tolerate brief water thinning; you can thin latex in a metal can if you check metal compatibility and avoid prolonged exposure to water, preventing paint corrosion by using liners or stirring and resealing promptly.
Is Thinned Paint Safe for Children’s Toys or Furniture Surfaces?
Yes — you can use thinned paint on kids’ toys or furniture, but you’ve got safety concerns: guarantee non-toxic, low-VOC paint, proper surface prep, thin by recommended application methods, dry fully, and seal with a safe topcoat.
Conclusion
Yes — you can thin latex paint with water, but don’t go overboard: a little water makes it smoother and easier to apply; too much turns it into soup that won’t stick. Stick to small, measured additions, stir thoroughly, and test on cardboard before committing. Thinning affects sheen and color slightly and can shorten shelf life, so store and label properly. Clean tools with water and dispose of leftovers responsibly. Follow the checklist to avoid ruined walls.