How to Clean Old Dry Paint Brushes and Restore Them
You can revive old dry paint brushes by first identifying the paint type, then soaking bristles in the proper solvent—warm soapy water for latex, mineral spirits for oil—until paint softens. Gently comb, tap the ferrule, and repeat solvent changes; use a brush restorer or ultrasonic cleaner for stubborn buildup. Rinse, reshape, and dry flat or upright. Wear gloves and ventilate the area. Keep going and you’ll find detailed tips on tools, repair, and when replacement makes more sense.
Quick Rescue: Revive a Dried Brush Fast
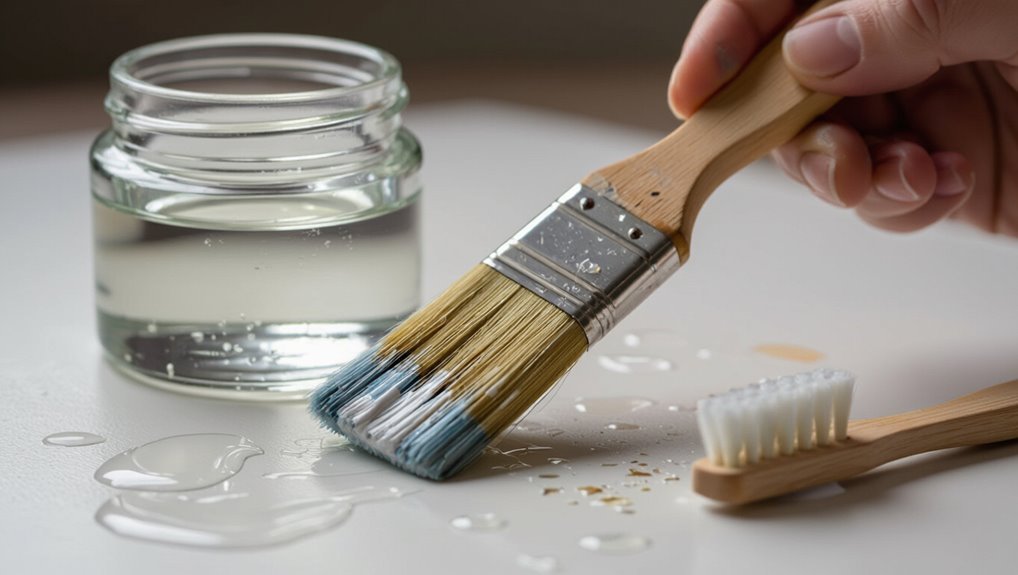
If your brush’s bristles have stiffened from dried paint, don’t toss it—soak it quickly to bring it back to life.
You’ll choose solvent based on paint type, then swish, comb, and repeat until bristles loosen.
Rinse thoroughly, reshape, and dry flat.
Rinse well, gently reshape the bristles, and let the brush dry flat to maintain its form and performance
These brush care quick fixes restore function fast, saving expense and preventing premature disposal while keeping performance reliable.
Which Brushes Are Worth Restoring
Most of the time it’s worth trying to restore brushes that have good-looking ferrules and intact bristle tips; you can usually revive natural-hair and high-quality synthetic brushes that haven’t been burned, melted, or permanently splayed.
Consider brush types and restoration benefits when deciding.
- Artist round or filbert: precision saved
- Quality flat: edge restoration pays off
- Natural-hair mop: softness retained
Identify What Paint Dried on the Brush
Want to know how hard the cleanup will be? You’ll check bristle stiffness, sheen, and odor to determine paint types—water-based (soft, milky smell) or oil/alkyd (stiff, solvent odor).
Use brush identification: look for natural vs. synthetic bristles, ferrule labels, and residue color. That tells you which solvents and restoration steps will work best without guessing.
Safety Gear and Workspace Setup
Before you start cleaning, put on protective gear and prepare a well-ventilated workspace so you don’t breathe fumes or get solvents on your skin.
Follow safety precautions and keep workspace organization simple:
- Wear gloves, goggles, and a mask to protect skin and lungs.
- Work near open windows or a fan for ventilation.
- Cover surfaces and dispose of waste properly.
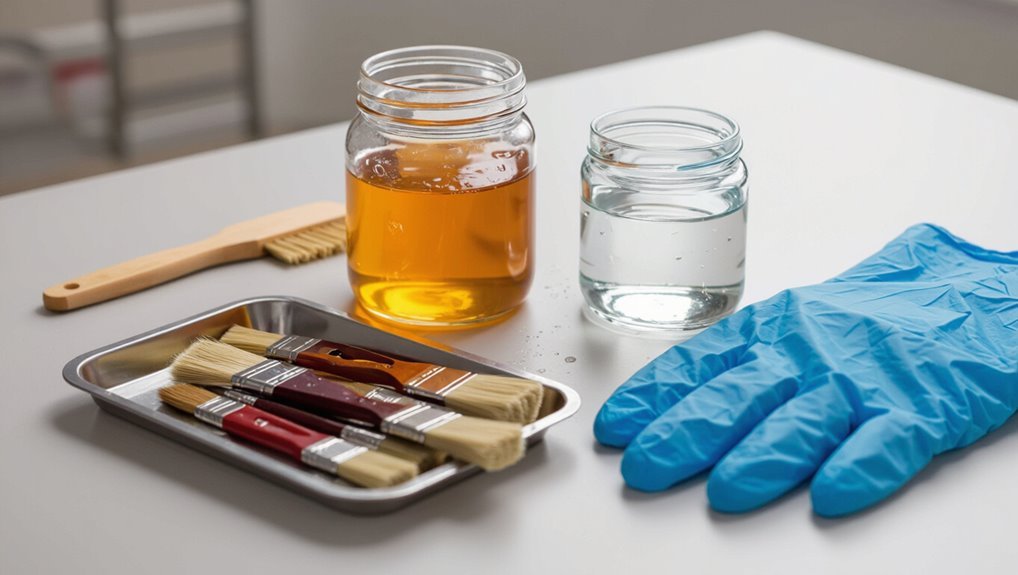
Essential Tools, Solvents, and Supplies
When you gather the right tools and solvents, cleaning old paint brushes becomes faster and less frustrating.
Stock essential supplies: solvent (mineral spirits or odorless thinner for oil, rubbing alcohol for shellac), brush comb, soft soap, jars, gloves, and rags.
Choose products suited to the paint type and follow appropriate cleaning techniques to dissolve paint, remove debris, and reshape bristles for reuse.
Soften Latex Paint on Bristles
Soften dried latex on your brushes by working warm water and a mild detergent into the bristles to loosen paint, then let them soak briefly to penetrate stuck-on film.
You’ll follow simple steps focused on paint thinning and bristle care:
- Gently comb bristles with your fingers to separate softened paint.
- Rinse until water runs clear.
- Reshape and air dry bristles flat or hanging.
Clean Oil Paint With Mineral Spirits Safely
If latex came off with water, oil-based paints need a different approach: mineral spirits will dissolve the dried film without damaging natural- or synthetic-bristle brushes when used correctly.
Work outdoors or in a ventilated area, wear gloves and eye protection, and use a sealed container. Swirl brushes gently, blot on rag, repeat until clean.
Dispose of solvents per local rules—mineral spirits safety is essential for proper oil paint cleanup.
Step-by-Step: Hot Water & Soap for Latex
Start by running a basin of very hot, but not scalding, water and add a few drops of dish soap to create suds; you’ll work the bristles gently to break up the latex rather than scrub aggressively.
Rinse, repeat, then reshape and dry.
Tips:
- Soak briefly, agitate gently for stubborn latex paint.
- Use a comb to remove debris.
- Store bristles upright for proper brush maintenance.
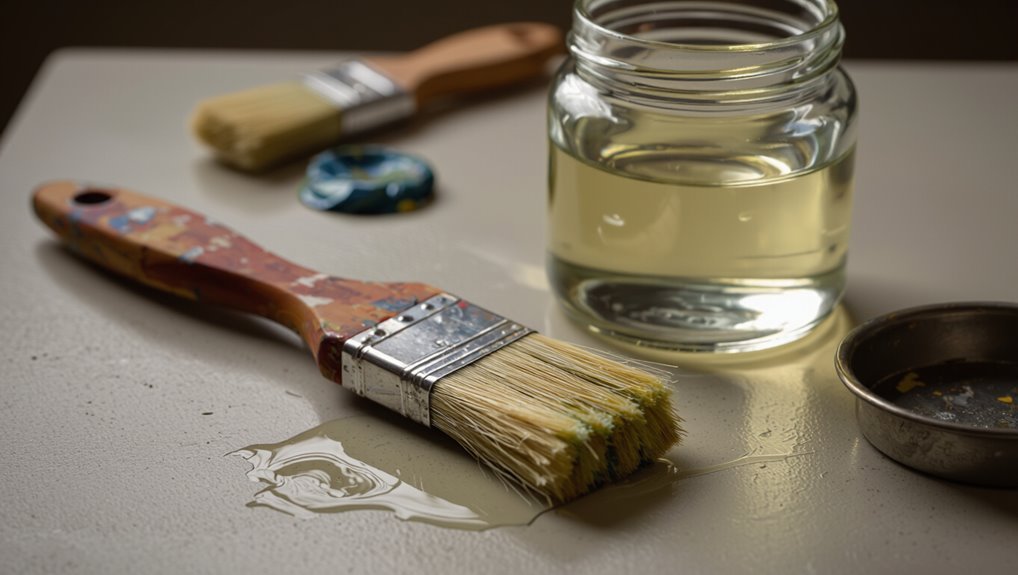
Step-by-Step: Mineral Spirits for Oil Paint
Grab a jar of mineral spirits and a clean, lint-free rag—you’re going to dissolve and lift oil paint rather than scrub it away.
Work outdoors or in a ventilated area, dip and swirl the brush, blot on the rag, repeat until paint clears.
Rinse with solvent, reshape bristles, check paint compatibility before use, and follow regular brush maintenance to prolong life.
Best Commercial Brush Restorers and When to Use Them
Once you’ve loosened most oil paint with mineral spirits, commercial brush restorers can undo matted bristles, hardened ferrules, and dried residue that solvents alone won’t fully remove.
Choose products for your brush type and use them sparingly as part of regular brush maintenance.
Options:
- Restorer gel for softened bristles
- Ferrule soak for stuck paint
- Deep-clean solution for residue and odor
Mechanical Methods to Loosen Stubborn Clumps
When softening doesn’t fully free the bristles, you’ll need to work mechanically.
Tap the ferrule against a hard surface and flex the bristles to break loose dried clumps.
Then use a stiff comb or an old fork to scrape remaining build-up from the base toward the tips.
Take care not to bend or splay the bristles as you work.
Tap And Flex Bristles
Tap the ferrule gently against a solid surface and flex the bristles with your thumb to dislodge dried paint clumps without splaying the tip.
You’ll preserve bristle flexibility and boost brush longevity by repeating controlled taps and bends.
- Work away from the tip, not through it.
- Use short, firm motions.
- Inspect and repeat until loosened.
Comb And Scrape Build-Up
After you’ve loosened clumps with gentle taps and flexes, use combing and scraping to remove stubborn paint that won’t rinse away.
Hold the ferrule, comb bristles with a metal brush comb or old fork, then gently scrape dried bits with a plastic razor or putty knife.
Work from tip to base, rinse frequently, and repeat until bristles move freely. This brush maintenance cleaning technique prevents damage.
Soaking Times and How to Tell When It’s Done
Because different paint types and brush conditions soak up solvents at different rates, you’ll want to match your soak time to what’s actually loosening the paint, not just the clock.
Check soaking duration against these visual indicators and your brush’s responsiveness:
- Softened edges and flaking paint coming away
- Bristles separating easily when you gently rub
- Liquid running clear, not cloudy with pigment
Avoid Damaging Bristles During Aggressive Cleaning
When you need stronger cleaning, pick a solvent that’s effective but won’t break down the bristle material.
Use controlled mechanical action—gentle swirls and light combing instead of hard scrubbing—to remove paint without splaying.
After cleaning, reshape the tip and let the brush dry flat or hanging to protect its form.
Gentle Solvent Selection
1 key decision in restoring old paint brushes is picking a solvent that loosens paint without shredding bristles or dissolving the ferrule glue, so choose gently: mild soap and water for latex, citrus or alcohol-based cleaners for small oil spots, and only pure mineral spirits or odorless turpentine for stubborn oil-based paints, used sparingly and briefly.
- Match solvent types to brush materials.
- Test on a hidden area.
- Rinse thoroughly and dry.
Controlled Mechanical Action
Work the bristles gently but deliberately: use short, controlled strokes with a soft-bristled brush comb or your fingers to coax old paint out without splaying or breaking hairs.
When you apply mechanical action, alternate solvent dips with careful combing, monitor tension, and stop if hairs resist.
Consistent brush maintenance and attentive bristle care extend life without resorting to harsh scrubbing that damages fibers.
Protecting Brush Shape
Although deep cleaning can be tempting, don’t let aggressive scrubbing or high-speed tools warp the ferrule or splay bristles; instead, support the brush’s natural taper by cradling the tip and using gentle, consistent motions.
You’ll preserve brush care and bristle maintenance by avoiding force.
Tips:
- Rinse with solvent, not pressure.
- Use a soft comb for knots.
- Reshape and dry flat or hanging.
Clean the Ferrule and Remove Dried Buildup
Now tackle the ferrule—the metal band that holds the bristles—because dried paint building up there will splay hairs and shorten the brush’s life.
For ferrule cleaning, soak just the metal in warm solvent or soapy water depending on the paint. Then use a brass brush or toothpick to lift stubborn paint buildup.
Rinse, dry thoroughly, and reshape bristles before storing.
Clean and Protect Wooden Handles
If your brush has a wooden handle, treat it gently but thoroughly: sand lightly to remove rough paint, wipe with a damp cloth, and let dry.
For proper wood care and handle maintenance, follow these quick steps:
- Sand with fine grit for smoothness.
- Rub mineral oil or wax to seal and protect.
- Store upright to avoid moisture damage.
Household Solvents: Safe Uses and What to Avoid
Many common household solvents—like rubbing alcohol, acetone, mineral spirits, and vinegar—can help dissolve paint and clean brushes, but you’ve got to use each for the right tasks and with proper precautions.
You should wear gloves, ventilate, and test solvents on bristles; avoid mixing chemicals. Choose eco friendly options when possible and follow solvent safety: dispose responsibly and store tightly sealed away from heat.
Using an Ultrasonic Cleaner for Caked Brushes
If you’re tackling caked-on paint, pick an ultrasonic cleaner that’s sized for your brush heads and has adjustable frequency and temperature settings.
You’ll place brushes in a mild detergent solution, keep bristles off the tank bottom, and run short cycles while checking progress frequently.
With the right machine and technique you’ll loosen stubborn buildup without damaging ferrules or bristles.
Choosing The Right Cleaner
Ultrasonic cleaners can revive brushes with hard, caked-on paint by using high-frequency vibrations to dislodge dried particles without mangling bristles.
You’ll want a unit sized for your largest brushes and one that accepts brush holders or racks to keep bristles aligned during cleaning.
Choose eco friendly cleaners and factor cost, noise, and brush maintenance needs.
- Capacity matters
- Detergent compatibility
- Durable construction
Ultrasonic Cleaning Technique
Start by securing your brushes in the cleaner’s rack so bristles stay aligned and don’t splay during the cycle.
Set an appropriate ultrasonic frequency adjustment for stiff, caked paint—higher for solvent-softened residues, lower for delicate natural bristles.
Monitor cleaning solution temperature; warm (not hot) helps loosen paint.
Run short cycles, inspect, repeat until bristles are supple, then rinse and reshape.
Restore Natural-Hair Versus Synthetic Bristles
Restoring brushes means treating natural-hair and synthetic bristles differently because their fibers respond to solvents, heat, and reshaping in distinct ways.
You’ll prefer gentle solvents for natural hair benefits and tougher cleaners for synthetic bristle advantages. Know which to protect or replace, and follow these quick steps:
- Use mild conditioner for natural hair.
- Apply solvent sparingly to synthetics.
- Store flat to avoid splaying.
How to Reshape Bristles After Cleaning
After cleaning, you’ll want to soften the bristles by soaking them briefly in warm water or brush conditioner to make reshaping easier.
Gently reshape the tip with your fingers or a comb to restore the original profile, working from ferrule to tip.
Let the brush dry flat or hanging with bristles down so the shape sets correctly.
Soften Bristles First
When bristles feel stiff from old paint, soften them before you try reshaping so they’ll respond without fraying; soak the brush in a suitable solvent or warm, soapy water depending on the paint type until the fibers relax.
Then gently work the bristles with your fingers to realign them into their original profile.
- Use proper soaking for solvent- or water-based paints.
- Prioritize bristle care to avoid pulling.
- Rinse and squeeze excess liquid gently.
Reform Brush Shape
Work the bristles back into shape while they’re still slightly damp and pliable from cleaning; use your fingers or the original cardboard sleeve to squeeze and taper the hairs so they form a neat, even tip. Then let the brush dry horizontally or hanging to keep shape. Good brush maintenance and proper storage prolong life.
| Step | Action |
|---|---|
| 1 | Squeeze |
| 2 | Taper |
| 3 | Dry |
| 4 | Store |
Condition Bristles to Extend Brush Life
Conditioning your brush bristles keeps them flexible, aligned, and better at holding paint, so you’ll get smoother application and a longer life from each tool.
You should practice bristle care with simple maintenance tips, using gentle soap, a fabric conditioner soak, and reshaping while damp.
- Rinse thoroughly after cleaning
- Apply a tiny conditioner dilute
- Store flat or hanging
Repair Splayed or Frayed Brushes
Anyone can bring a splayed or frayed brush back into shape with a few simple fixes; you’ll trim ragged tips with scissors or a sharp razor, then reshape with warm water and gentle soap.
For stubborn splayed bristles, wrap the brush with paper towel and rubber band overnight to realign.
Repeat conditioning and let dry vertically to prevent frayed ends returning.
Deal With Rusted Ferrules and Stuck Bristles
Once you’ve tamed frayed bristles, check the ferrule and base for rust or bristles stuck from old paint—these problems keep a brush from flexing and make cleaning harder.
You’ll address rust prevention and ferrule maintenance quickly:
- Use a wire brush for surface rust and loosen trapped hairs.
- Apply light oil to stop further rust.
- Gently pry out trapped bristles with tweezers.
Remove Old Paint Inside the Ferrule
You’ll want to soften any hardened paint trapped in the ferrule before trying to remove it.
Use a suitable solvent or brush cleaner to loosen the buildup, then flush the ferrule thoroughly with solvent and run clean water through it until it flows clear.
If paint is stubborn, repeat softening and flushing until the ferrule is free of residue.
Soften Hard Paint
If paint has crusted inside the ferrule, you can soften it so the bristles move freely again; use gentle softening techniques and prioritize bristle care to avoid damage.
Try:
- Warm soaks (short, controlled) to loosen deposits.
- Soft solvent swabs to dissolve stubborn bits.
- Gentle agitation with a wooden pick, avoiding force.
Rinse and reshape bristles promptly to preserve form and function.
Flush The Ferrule
Hold the brush upright, apply solvent into the ferrule gap, and work with a thin pick or brass brush to dislodge crust.
Rinse repeatedly, blot excess, and repeat until clear.
Proper ferrule care prevents buildup; thorough paint removal restores flexibility and prolongs brush performance.
Test a Restored Brush Before Your Project
Before you plunge into your project, give the restored brush a quick trial run on scrap material to confirm bristle alignment, paint pickup, and flow.
Before starting, test your restored brush on scrap to check bristle alignment, pickup, and flow.
You’ll test brush performance and assess project readiness quickly. Try these checks:
- Smooth stroke: no splaying or skipping
- Paint pickup: even loading, no blobs
- Flow control: consistent release, no drips
When Partial Restoration Is Enough
You’ve checked the brush and it performs well on scrap — but sometimes a full cleanup isn’t worth the time or risk to the bristles.
If the tip, flexibility, and paint pickup are adequate, opt for partial restoration benefits: remove crusty ends, reshape with a comb, and soak briefly.
Use quick fix techniques like spot-cleaning and conditioner to extend life without full disassembly.
Restore Multiple Brushes Cost-Effectively
If you’ve got a pile of worn brushes, you can save money by using budget-friendly cleaners and reconditioning tricks that work for groups, not just singles.
Set up a batch process—soak similar bristles together, work in stages, and reuse cleaning solution when it’s still effective.
With a simple routine you’ll cut costs and get more brushes back into service quickly.
Budget-Friendly Cleaning Methods
When you’re restoring several brushes on a tight budget, simple household items and a little technique go a long way; common solutions like dish soap, vinegar, and baking soda can remove dried paint, dissolve oils, and deodorize bristles without expensive solvents.
Use DIY solutions and thrift store finds, try homemade recipes and eco friendly options:
- Vinegar soaking + baking soda paste
- Fabric softener rinse with essential oils
- Cost effective alternatives: natural cleaners, diluted dish soap
Batch Restoration Tips
Having covered cheap, effective cleaners, let’s look at how to restore several brushes at once without wasting time or supplies.
Group similarly sized brushes, soak in appropriate solvent trays, and use a comb or pick to free bristles.
Rotate batches to maintain ideal cleaning frequency, label containers, reclaim solvent with filtration, and dry brushes upright.
These batch techniques save time and money.
Store Cleaned Brushes to Keep Their Shape
1 simple step after rinsing is to reshape the bristles and store the brush properly so it keeps its form.
For brush storage and shape preservation, do the following to prevent splaying and damage:
- Stand brushes upright with bristles up in a jar.
- Use a protective sleeve or paper roll to hold the tip.
- Lay larger brushes flat, supported to keep the ferrule straight.
Best Drying Methods to Avoid Mildew and Warping
After you reshape and store brushes properly, you’ll want to dry them in a way that prevents mildew and warping.
Hang brushes bristle-down or lay them flat with bristles over the edge for airflow. Keep them in a ventilated, shaded spot; avoid direct heat.
Rotate positions so moisture escapes. These steps help mildew prevention and protect bristle shape for long-term brush storage.
How Often to Clean Brushes During a Painting Session
You should rinse brushes briefly and often while you’re working to keep paint from building up.
Clean them thoroughly between color changes so hues don’t contaminate each other. Short, frequent rinses save time and make end-of-day cleaning easier.
Clean Between Color Changes
When switching colors during a session, clean your brush whenever leftover paint would noticeably alter the next hue—usually after every two to three strokes with a new color or whenever you can see tinting on the bristles.
Use quick cleaning techniques to protect pigments and for good brush maintenance.
- Rinse until color runs clear
- Wipe on rag between mixes
- Test on scrap before painting
Short Frequent Rinses
Regularly rinsing your brush during a session keeps bristles responsive and prevents paint buildup from muddying colors; aim for a quick rinse every few minutes or after every few strokes with thick or highly pigmented paint.
You’ll get cleaner edges and smoother blends if you do frequent rinses, scrub gently to remove paint residue, and reshape bristles before resting or switching hues.
Quick Emergency Fixes When Full Restoration Isn’t Possible
If full restoration’s out of the question, don’t toss the brush—use quick emergency fixes to get you through a job or two.
If full restoration isn’t possible, don’t discard the brush — try quick fixes to salvage bristles and keep working.
You’ll rely on emergency techniques and quick fixes to salvage bristles and maintain shape short-term:
- Soak tips briefly in solvent, then comb with a wire brush.
- Trim splayed ends for neater strokes.
- Wrap bristles with tape to mold a temporary edge.
Eco-Friendly Disposal of Solvents and Paint Residues
When you finish cleaning brushes, don’t pour solvents down the drain—use labeled containers and take them to a hazardous waste facility or community collection event.
Check if your leftover solvent can be reused or filtered for another round of cleaning to stretch its life and reduce waste.
For paint residues, scrape and store usable solids for recycling programs or let water-based paints dry and dispose of them according to local guidelines.
Proper Solvent Disposal
Because solvents and paint residues can harm waterways and soil, you should never pour them down drains or toss them in the trash; instead, collect waste in sealed, labeled containers and take it to a local hazardous-waste facility or community paint-recycling program for proper disposal.
Follow eco friendly practices and solvent safety:
- Store used solvent securely.
- Use designated hazardous drop-offs.
- Ask about local paint collection events.
Paint Residue Recycling
A lot of communities now offer paint residue recycling programs that let you dispose of leftover paint and solvents responsibly instead of sending them to landfills.
You should separate oil and water-based residues, store containers tightly, and take them to designated drop-off sites.
Using paint recycling and eco-friendly techniques reduces pollution and saves resources, so follow local guidelines and label materials before transport.
Prevent Brushes From Hardening in Future Projects
If you want brushes that stay flexible, develop a simple cleanup and storage routine you actually follow after every job.
Use brush preservation techniques to avoid preventing paint hardening and keep bristles soft.
- Rinse thoroughly until water runs clear, then spin out excess.
- Comb bristles and reshape before drying.
- Store upright or hang in a cool, dry place to avoid misshaping.
Choose Brushes for Longevity and Easy Cleaning
Once you’ve got a routine that keeps bristles soft, pick brushes designed to last and clean easily to save time and money.
Choose synthetic or high-quality natural brush types suited to your paint—synthetic for water-based, flagged natural for oils. Look for stainless ferrules and comfortable handles.
Follow simple maintenance tips: rinse thoroughly, reshape bristles, and store hanging or flat to prolong life.
Common Mistakes That Ruin Brushes and How to Avoid Them
Many common brush-care mistakes are easy to make but avoidable if you know what to watch for and how to act quickly. You’ll protect bristles by using proper cleaning techniques, avoiding harsh solvents, and keeping good maintenance habits.
Follow restoration tips and stop bad habits early:
- Leaving paint to dry on brushes
- Using incorrect solvents or hot water
- Storing brushes bristle-down or misshapen
When It’s Time to Replace a Brush
You’ll know a brush needs replacing when bristles are splayed, falling out, or no longer hold a sharp edge.
If cleaning won’t restore shape or performance, replacing it usually saves time and improves results.
Consider swapping brushes when repair costs or effort outweigh the benefit of keeping one.
Signs Of Irreparable Wear
A brush tells you when it’s done: splayed, stiff, or missing large clumps of bristles are clear signs it’s time to replace it.
Watch for wear patterns and brush fatigue — they reduce performance and waste paint.
- Bristles bent permanently
- Ferrule loosened or rusted
- Uneven stroke caused by lost tufts
Replace rather than fight declining results.
When Replacement Makes Sense
When a brush starts costing you time or ruining finishes, it’s smarter to replace it than keep trying to revive it.
You’ll weigh replacement criteria: persistent splaying, loose ferrules, or loss of bristle integrity.
Do a quick cost analysis—compare brush price versus repair time and performance loss.
Replace when buying saves time, improves results, or prevents repeated project setbacks.
Recommended Resources and Products for Brush Restoration
Before you start, gather a few key products and resources so you can restore brushes efficiently:
- Citrus or solvent cleaner, comb, and stiff brush — essential for brush care.
- Conditioning oil or fabric softener for bristle rejuvenation.
- Replacement ferrules and wire tool for reshaping and repairs.
Follow maintenance tips: read product instructions, wear gloves, ventilate, and test cleaners on a single brush first.
Frequently Asked Questions
Can Dried Brushes Be Sanitized for Food-Contact Surfaces or Kitchen Use?
You can’t safely reuse most dried paint brushes for food-contact surfaces; unless you know brush materials and fully remove all paint, contamination risks food safety. It’s better to buy new, food-safe brushes made for kitchens.
Will Restored Brushes Affect Paint Color or Finish Quality?
Yes — if you restore brushes properly, you won’t noticeably change color consistency or finish durability; you’ll revive bristles like combing out knots, but poorly cleaned or damaged brushes can streak, thin pigments, or reduce longevity.
How Long After Restoration Can I Safely Use a Brush With Babies/Children Around?
You can safely use the restored brush after safe drying for at least 48–72 hours; confirm no solvent fumes remain and store brushes sealed when not in use to maintain child safety and prevent exposure to residues.
Are There Insurance or Warranty Implications When Restoring Professional Brushes?
Yes — you’ll face liability concerns: insurers might void coverage and warranties if your restoration techniques alter brush specs. Don’t gamble; check policies, document procedures, and get written approval before using or reselling restored professional brushes.
Can Restored Specialty Brushes (E.G., Stain/Watercolor) Be Used Interchangeably?
Generally no — you shouldn’t swap specialty brush types freely. Restoration techniques can revive shape, but fiber, size, and finish suit specific media, so you’ll risk poor performance or damage if you use restored specialty brushes interchangeably.
Conclusion
You’ve saved a tool, preserved a craft, and honored your time — so don’t toss that brush yet. Clean with care, work with the right solvent, and test gently; learn when to repair and when to replace. Protect your hands, respect the chemicals, and store brushes properly. Restore one brush today, reuse it tomorrow, and remember: small effort now brings better results, less waste later, and more pride every time you paint.