How to Paint Exterior Door Trim: Clean Finish DIY Guide
You’ll get a clean, durable finish by prepping, priming, caulking, and painting in calm, mild weather. Sand and clean the trim, remove hardware, and fix soft spots or rot; apply primer to bare wood and problem areas. Use angled brushes and smooth strokes, allow proper dry time, then add a second coat and touch up drips or lap marks. Finish by removing protection and reattaching hardware, and keep going to learn tricks for longer-lasting results.
Quick Step-by-Step: Paint Door Trim in 8 Steps
Ready to refresh your door? You’ll prep surfaces, sand edges, and clean dust, then apply primer where needed.
Choose paint guided by color trends and match finish to exposure.
Pick a color that fits current trends and match the paint finish to the door’s exposure for best results.
Mask hardware, cut in crisp lines, roll or brush evenly, and allow proper drying between coats.
Inspect for drips, touch up, and consider durability factors when selecting final coat for long-lasting trim.
Should You Repaint or Restore the Trim?
Now that you know the basic steps for prepping and painting trim, you’ll want to decide whether to repaint or restore the existing trim—each option saves different amounts of time and money depending on the trim’s condition. You’ll weigh restoration benefits against painting considerations: restore if damage is minor; repaint if finish is failing.
| Option | When to Pick | Time/Cost |
|---|---|---|
| Restore | Minor damage | Low |
| Repaint | Major wear | Higher |
| Hybrid | Partial rot | Moderate |
Measure Door Trim and Estimate Supplies
Measure the height and width of each trim piece so you know the total square footage you’ll be painting.
Use those dimensions to calculate surface area and factor in doors with multiple sides or overlapping trim.
Then estimate paint and primer needed based on the manufacturer’s coverage per gallon.
Measure Trim Dimensions
Before you cut or buy anything, take precise measurements of each section of door trim so you know exactly what supplies you’ll need.
Measure height, width, and depth of casing and stool. Note miters, returns, and uneven jambs. Record lengths for each piece and list required trim materials.
Use reliable measurement tools—tape measure, combination square—and double-check before ordering.
Calculate Paint Needed
With your trim dimensions recorded, you can figure out how much paint and supplies you’ll need. Calculate total square footage, divide by the paint coverage per gallon, and add 10–15% for waste. Account for trim types (flat, beaded, molded). Estimate primer, brushes, tape.
| Trim Type | Sq Ft per Door | Notes |
|---|---|---|
| Flat | 12 | simple |
| Beaded | 14 | detail |
| Molded | 16 | complex |
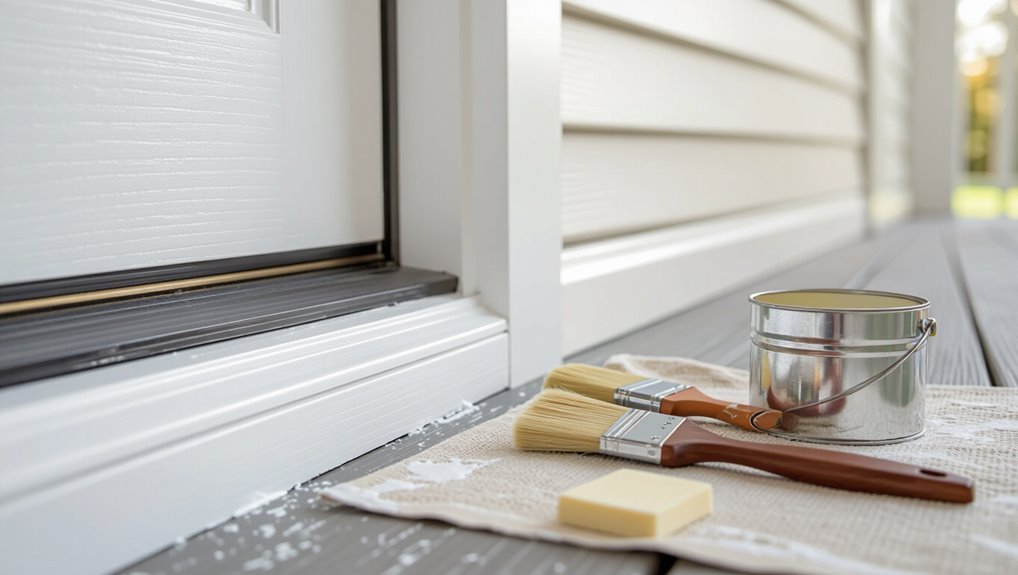
Tools for Painting Exterior Door Trim
Before you start, gather the essential painting tools—brushes, rollers, a paint tray, and quality exterior paint—so you won’t stop midway.
Prep supplies like sandpaper, a putty knife, and primer will guarantee a smooth, long-lasting finish.
Don’t forget safety and cleanup gear such as gloves, drop cloths, and a good brush cleaner to protect yourself and your surfaces.
Essential Painting Tools
Anyone tackling exterior door trim will want the right tools on hand to get clean lines, proper coverage, and a weatherproof finish.
Gather quality brush types (angled sash and synthetic), a roller for flat areas, painter’s tape, drop cloths, a smooth-edged putty knife, and exterior-grade paint suited to durable paint finishes.
Include a small trim pad for touch-ups and a sturdy ladder.
Surface Preparation Supplies
A clean, stable surface is the foundation of any lasting exterior trim paint job, so you’ll want the right prep supplies on hand: a stiff brush, mild detergent, and a scraper for old paint.
Sandpaper (80–220 grit), tack cloths, rust inhibitor, and exterior primer match your chosen paint types.
Have caulk and a small putty knife to seal gaps before painting.
Safety And Cleanup Gear
When you’re working on exterior door trim, wear basic safety gear—goggles to protect your eyes, a NIOSH-rated respirator or mask for dust and fumes, gloves for solvents and rough surfaces, and knee pads if you’ll be crouching for long periods.
Use safety goggles, respirator mask, protective clothing and gloves; set drop cloths, ventilation fans, and keep paint thinner stored safely.
Have first aid handy.
Best Exterior Paint and Primer for Door Trim
Because your door trim faces weather, wear, and frequent contact, choosing the right exterior paint and primer matters more than color alone.
You’ll prefer acrylic latex for flexibility and mildew resistance; oil-based works on slick surfaces.
Review exterior paint types and primer comparisons: use a high-quality bonding primer for bare wood or previously painted trim, and a stain-blocking primer where tannins or rust appear.
Pick Sheen and Color for Durability and Curb Appeal
You’ll want to choose a sheen that balances durability with how much texture and weathering you want to hide.
Pick a color that complements your door and siding while keeping maintenance in mind—darker, glossier finishes show wear differently than lighter, matte ones.
Next, we’ll compare common sheens and give quick color-selection tips to boost curb appeal.
Sheen Choices Explained
If you want trim that stays easier to clean and resists weathering, pick a higher sheen like satin or semi-gloss; these finishes shed dirt and hold up better than flat paints while still letting color pop against your siding.
Choose based on sheen types and sheen benefits: flat for hiding flaws, eggshell for low sheen, satin or semi-gloss for durability and easier maintenance.
Color Selection Tips
Now that you’ve picked a sheen that balances durability and cleanability, it’s time to choose colors that boost curb appeal and stand up to weathering.
Consider color psychology to evoke warmth or modernity, test swatches in different light, and pick hues that complement your home’s palette.
Account for seasonal trends but prioritize timeless contrast and UV-resistant pigments for long-lasting results.
Best Weather and Safety Tips for Exterior Painting
Pick a calm, mild day with low humidity and temperatures between 50–85°F, and you’ll make the job easier and the paint last longer. Check weather conditions, surface temperatures, humidity levels, and environmental factors. Follow safety precautions: wear protective gear, guarantee ventilation needs are met, and plan outdoor timing.
| Factor | Check | Action |
|---|---|---|
| Weather | Forecast | Reschedule |
| Temp | 50–85°F | Proceed |
| Humidity | Low | Ideal |
| Safety | Gear/vent | Comply |
Remove Hardware and Protect Surrounding Surfaces
Start by removing locks, knobs, and strike plates so you can paint cleanly around the trim without getting paint on moving parts.
Use painter’s tape to mask edges and a drop cloth or plastic sheeting to cover the door, threshold, and nearby siding or hardware.
That prep prevents splatters and gives you crisp lines for a professional-looking finish.
Remove Locks And Knobs
Remove the knobs and locks before you paint so hardware doesn’t get stained and the trim gets an even coat.
Use a screwdriver to remove screws, label parts, and keep fasteners in a small bag.
Note door hardware finishes and knob styles so you reinstall matching pieces.
Store components safely indoors to prevent loss or damage while you paint the trim.
Mask And Cover Surroundings
Before you reach for paint, cover everything you don’t want splattered or smeared: tape the edges of windows and glass, lay drop cloths over porches and walkways, and wrap nearby plants or doormats in plastic. Use masking techniques to remove hardware, secure edges, and create surrounding protection. Visualize placement:
| Drop Cloth | Painter’s Tape | Plastic Sheeting |
|---|---|---|
| Porch | Window | Plants |
| Walkway | Trim | Doormat |
| Steps | Glass | Pots |
| Lawn | Handles | Fixtures |
Clean Door Trim: Dirt, Mildew, and Chalk Removal
Tackle dirt, mildew, and chalk buildup on your exterior door trim so paint will stick and the finish lasts.
Use proper cleaning solutions comparison to choose mild detergent, diluted bleach, or commercial cleaners.
Try these steps and remember safety:
- Sweep loose debris
- Apply mildew removal techniques
- Rinse after scrubbing
- Use targeted dirt removal methods
- Test chalk removal solutions on inconspicuous area
Repair Wood: Fix Cracks, Rot, and Loose Joints
Inspect the trim closely for cracks, soft spots, or gaps where joints have pulled apart, because spotting damage early makes repairs quicker and more durable.
Remove rot with a chisel, dry the area, and apply appropriate wood treatments. Fill small cracks with epoxy or wood filler and clamp for joint reinforcement.
Replace severely rotted sections and seal all repairs before priming and painting.
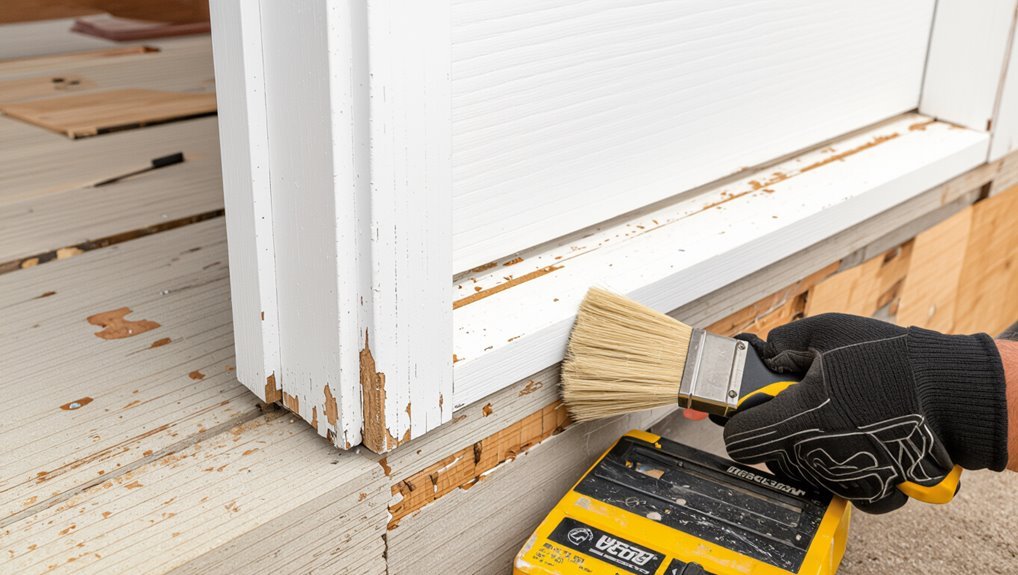
Sand Door Trim for Adhesion: Grit and Technique
Start with a clean, dry surface and sand along the grain to scuff the old paint and smooth any repaired areas so the primer will bond properly.
Choose grit selection based on damage: coarser for rough spots, finer for finish. Use steady sanding technique, light pressure, and overlap strokes.
- 80–120 grit for repairs
- 150–220 grit for final scuff
- Sand with the grain
- Use a sanding block
- Vacuum dust before priming
Caulk Seams and Gaps for a Seamless Look
Before you paint, pick a high-quality exterior caulk rated for paintability and movement so it sticks and stays flexible.
Apply a thin bead along seams and fill gaps, then use a wet finger or a caulking tool to smooth joints for a crisp line.
Let the caulk cure fully before priming or painting to guarantee a seamless, long-lasting finish.
Choose The Right Caulk
When you’re sealing trim seams and gaps, choosing the right caulk makes the difference between a durable, paint-ready finish and one that cracks or peels.
Pick a paintable, exterior-grade, flexible caulk. Consider caulk types and proper caulk application for adhesion and longevity. Remember surface prep.
Use:
- Silicone blend
- Acrylic latex
- Polyurethane
- Paintable silicone
- Low-VOC option
Smooth And Tool Joints
Run a bead of caulk along each seam, then smooth and tool it immediately so it bonds cleanly and paints uniformly.
Use a damp finger or a plastic spatula to create smooth joints, removing excess caulk as you go.
Check for gaps, refill if needed, and let cure fully.
Clean tools after use—tool maintenance prevents dried caulk buildup and guarantees neat results.
Prime Bare Wood and Problem Areas Correctly
Start by identifying all bare wood, patched areas, and exposed fasteners so you can prime them thoroughly; these spots absorb paint unevenly and will show through if you skip the primer.
Use proper priming techniques on problem areas, then proceed. Apply primer thinly, sand between coats, and spot-check for adhesion.
- bare wood
- patched spots
- exposed screws
- end grain
- filler seams
Cut In Crisp Edges Without Tape
Once your primer’s dry and smooth, it’s time to cut in clean edges without using tape. You’ll steady your hand, use an angled sash brush, and practice cutting techniques for precise edge control. Move slowly, keep a wet edge, and wipe excess paint.
| Tool | Motion | Tip |
|---|---|---|
| Angled brush | Pull | Light pressure |
| Small brush | Push | Short strokes |
| Cloth | Dab | Clean edge |
| Practice board | Repeat | Confidence |
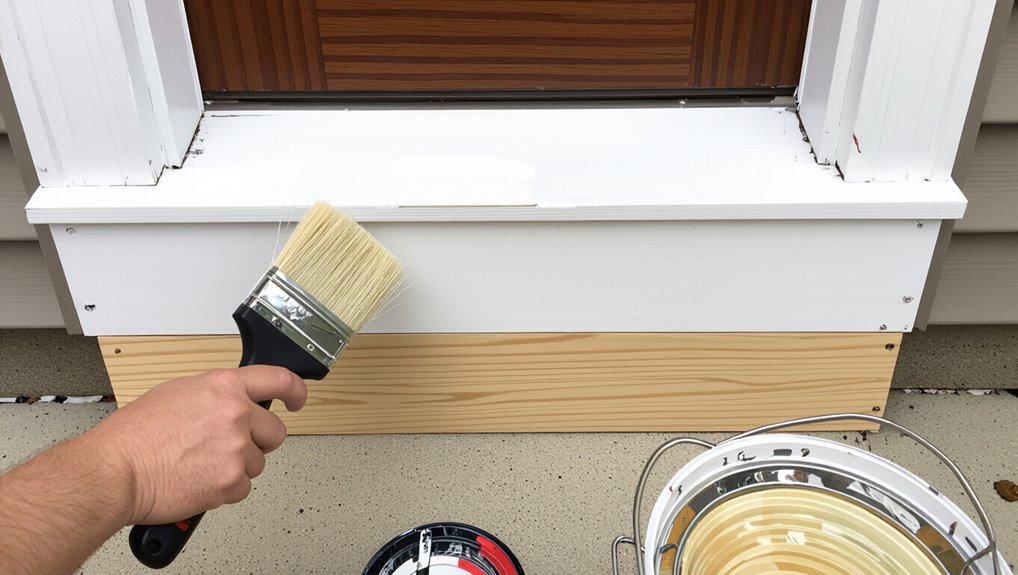
Brush and Roller Techniques for Even, Drip-Free Paint
Work the paint into the trim with smooth, controlled strokes so you get an even coat without drips. Use proper brush techniques for corners and roller methods for flat sections.
Keep a light load, maintain a wet edge, and tip off brush strokes. Follow these steps:
Keep a light load, maintain a wet edge, and tip off strokes for a smooth, drip-free finish.
- Load brush moderately
- Paint with the grain
- Use short roller passes
- Feather edges
- Inspect for runs immediately
When and How to Apply the Second Coat
2 hours to several—wait until the first coat is fully dry to the touch and no longer tacky before you apply the second coat. Check temperature and humidity; good second coat timing guarantees adhesion. For second coat application, use light, even strokes and keep a wet edge to avoid overlaps.
| Step | Wait Time | Tool |
|---|---|---|
| Prep | 2–6 hrs | Brush |
| Apply | short | Roller |
| Finish | smooth | Brush |
Fix Lap Marks, Drips, and Brush-Stroke Issues
If you spot lap marks, drips, or visible brush strokes, address them quickly while the paint’s still tacky—lightly drag a clean, damp brush or a high-quality finish brush over the flaw to blend edges.
Then smooth runs by tipping the paint downward with a barely loaded brush.
Use these lap mark remedies and drip prevention tips:
- Work wet edges
- Thin heavy areas
- Light pressure strokes
- Keep brush loaded correctly
- Inspect under light
Finish Up: Remove Protection, Reattach Hardware, Touch-Ups
When the paint’s fully dry, remove all masking and drop cloths carefully so you don’t mar the new finish.
Then reinstall hardware and handle any small touch-ups while the door’s accessible.
Work slowly during hardware reattachment to avoid scratching; use proper screws and alignment.
Inspect edges and joints for missed spots, then perform final touch ups with a fine brush and clean strokes for a seamless result.
Maintain Exterior Door Trim for Long-Lasting Results
Now that the door’s reassembled and touch-ups are done, keep the trim looking sharp with simple, regular care.
You’ll extend paint lifespan through routine trim maintenance and seasonal checks, plus basic weatherproofing techniques to prevent damage.
- Inspect caulk and seams
- Clean dirt and mildew
- Touch up chips promptly
- Reapply sealant yearly
- Trim nearby foliage
Frequently Asked Questions
How Do I Paint Trim on a Storm or Screen Door Still Attached?
You remove hardware or mask it, clean and sand for trim preparation, then use painting techniques like thin coats with a sash brush, paint hinges carefully, dry between coats, and reattach hardware for a clean, durable finish.
Can I Paint Over Lead-Based Exterior Trim Safely?
Yes — but you’ll need lead safety precautions first; studies show older homes have up to 87% likelihood of lead paint. You should use testing methods (kit or lab) and follow containment, PPE, and proper disposal.
How Long Before Reinstalling Decorative Trim Hardware After Painting?
You should wait 24–48 hours for paint to cure before reinstalling decorative trim hardware; longer for high-humidity or oil-based finishes. Check drying times on the paint can and choose corrosion-resistant hardware options for durability.
Will Humid Climates Affect Exterior Trim Paint Curing Time?
Absolutely — humidity effects slow curing time, so you’ll face curing challenges like paint taking forever to set; don’t expect overnight results, but work around it by painting on dry days, using fast-dry formulas, and ensuring airflow.
How to Match New Paint to Aged, Sun-Faded Trim Color?
You’ll color match by taking paint samples of the faded trim to a store, comparing swatches in natural light, blending small test pots, and applying samples to the trim until the new paint visually integrates with the aged finish.
Conclusion
You’ve cleaned, sanded, primed, and painted with care; you’ve smoothed brush strokes, fixed drips, and checked for laps. You’ve waited between coats, removed tape, and reattached hardware. You’ve kept a stash of touch-up paint, wiped down trim each season, and inspected for wear. Doing these simple steps gives you a crisp frame that brightens every arrival, protects against weather, and keeps your door looking fresh for years to come.