How to Get Dried Acrylic Paint Off Concrete Easily
You can remove dried acrylic paint from concrete by softening it, scraping, then rinsing: start by testing a small patch, then soak the paint with white vinegar or 70% rubbing alcohol to soften the binder, scrape with a putty knife or stiff brush, and finish with a pressure washer or mechanical abrasion for stubborn spots. Wear gloves, goggles, and a respirator when needed, rinse thoroughly, and repeat as required — keep going for step-by-step methods, safety tips, and tough-case fixes.
How This Guide Helps You Remove Dried Acrylic Paint From Concrete
This guide gives you clear, step-by-step methods for removing dried acrylic paint from concrete, whether you’re dealing with small splatters or large, stubborn patches.
You’ll find practical paint removal techniques, safety tips, and tool lists so you can act confidently.
It explains concrete surface preparation, sequencing tasks, and when to choose mechanical, chemical, or combined approaches for efficient, lasting results.
Quick Answer: Fastest Way To Remove Dried Acrylic Paint From Concrete
For the fastest removal of dried acrylic paint from concrete, use a combination of mechanical and chemical methods: scrape or pressure-wash loose paint, apply a household paint stripper or a concentrated detergent with a stiff brush, let it penetrate, then rinse and repeat until the stain lifts. You’ll focus on paint removal techniques and proper surface preparation to speed results.
| Step | Action |
|---|---|
| 1 | Scrape |
| 2 | Apply |
Assessing Paint Type and How Well It’s Bonded To Concrete
Before you start scrubbing, identify whether the paint is acrylic, latex, or oil-based since that affects which removers work.
Check adhesion by scraping a small area with a putty knife or pressing tape over the paint and pulling it off to see if it flakes.
That quick test tells you whether the paint is merely surface-bound or deeply bonded to the concrete.
Identify Paint Type
When you’re deciding how to remove dried acrylic from concrete, start by identifying the paint type and how firmly it’s bonded to the surface; that determines which methods will work and how aggressive you need to be.
Examine paint characteristics: color, sheen, and layer thickness. Note acrylic properties like flexibility and water resistance.
Photograph samples and test a small patch to confirm identification before proceeding.
Check Paint Adhesion
Although the paint might look solid from a distance, you need to check how well it’s actually bonded to the concrete before choosing a removal method.
Scrape a small area with a putty knife and press tape over another spot, then pull. Good paint adhesion resists lifting; weak bonding flakes or peels.
Testing on concrete surfaces lets you pick safe, effective removal techniques.
When And Why You Should Test A Small Patch First
Before you tackle the whole area, test a small patch to make sure the remover or method is compatible with your concrete.
You’ll see right away how the paint reacts and whether the surface gets damaged or discolored.
That quick check prevents bigger mistakes and helps you choose the safest, most effective approach.
Check Surface Compatibility
If you’re not sure how your concrete will react to a cleaner or scraper, test a small, out-of-the-way patch first so you don’t damage the surface or create a bigger mess. Use surface preparation tips and compatibility testing: try cleaner, solvent, and scraper on a hidden spot, wait, inspect, then proceed only if safe.
| Test | Action | Result |
|---|---|---|
| Cleaner | Apply | Observe |
| Solvent | Dab | Check |
| Scraper | Lightly | Inspect |
Assess Paint Reaction
1 quick spot check can save you time and prevent damage: test a small, inconspicuous patch of the painted concrete to see how the acrylic responds to your chosen remover, solvent, or scraping technique.
You’ll evaluate paint adhesion, watch for discoloration, and confirm the concrete tolerates the method. Surface testing prevents bigger mistakes, so proceed only after the patch behaves as expected.
Safety Gear To Wear When Removing Dried Acrylic Paint
Removing dried acrylic paint can stir up dust and fumes, so you’ll want to suit up with the right protective gear.
Follow safety precautions and wear protective clothing to limit exposure.
Use items below to stay safe:
- NIOSH-rated respirator for particles and fumes
- Safety goggles
- Chemical-resistant gloves
- Long-sleeve protective clothing
- Sturdy closed-toe shoes
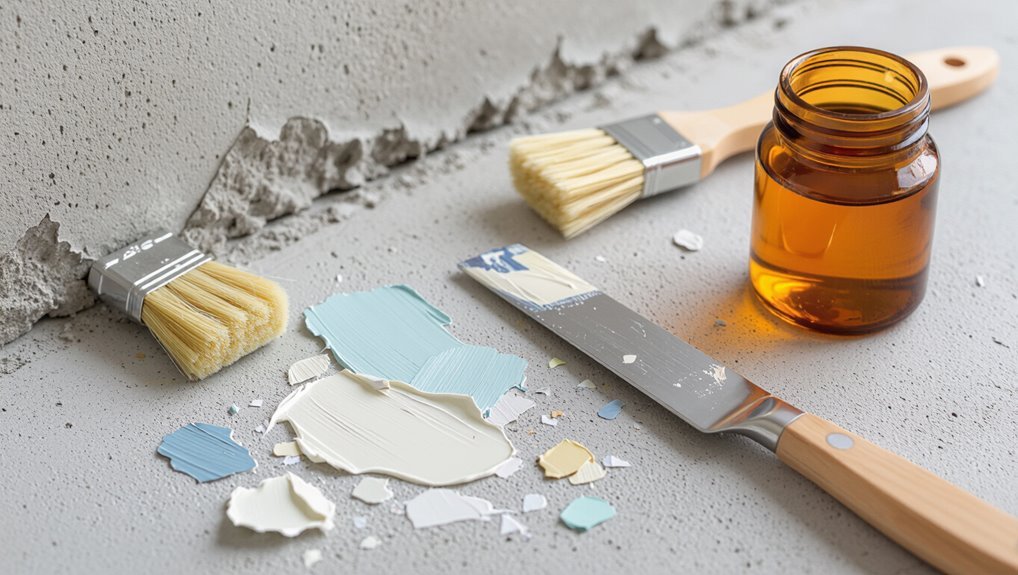
Tools You’ll Need For Basic Paint Removal
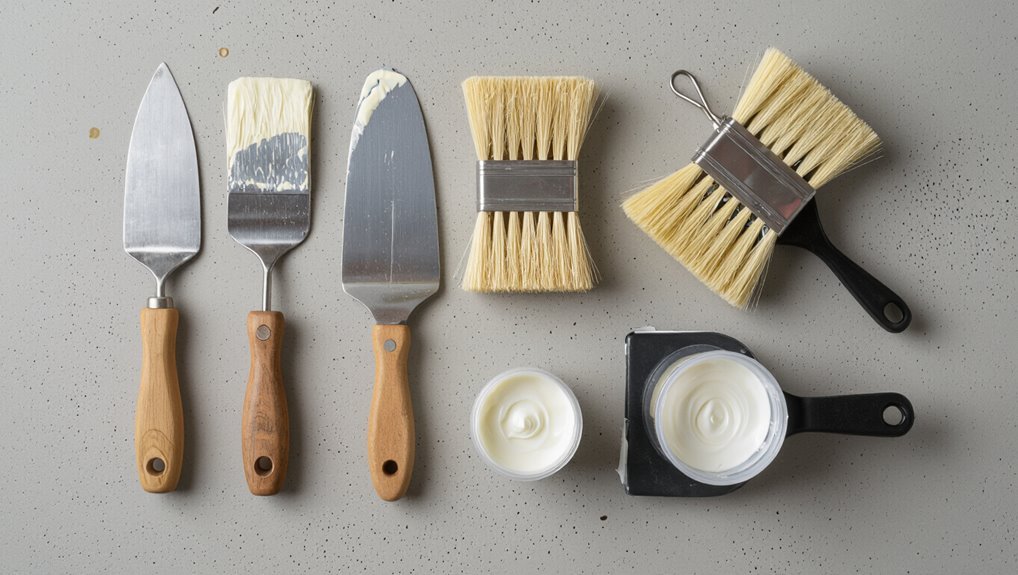
You’ll need a few basic tools to strip dried acrylic from concrete efficiently: a stiff nylon or wire scrub brush, a putty knife or floor scraper, a garden hose or pressure washer, plastic trash bags for debris, and a bucket for cleaning solutions.
You’ll also want gloves, safety glasses, and a stiff broom.
These tools support common paint removal techniques and smart concrete maintenance tips.
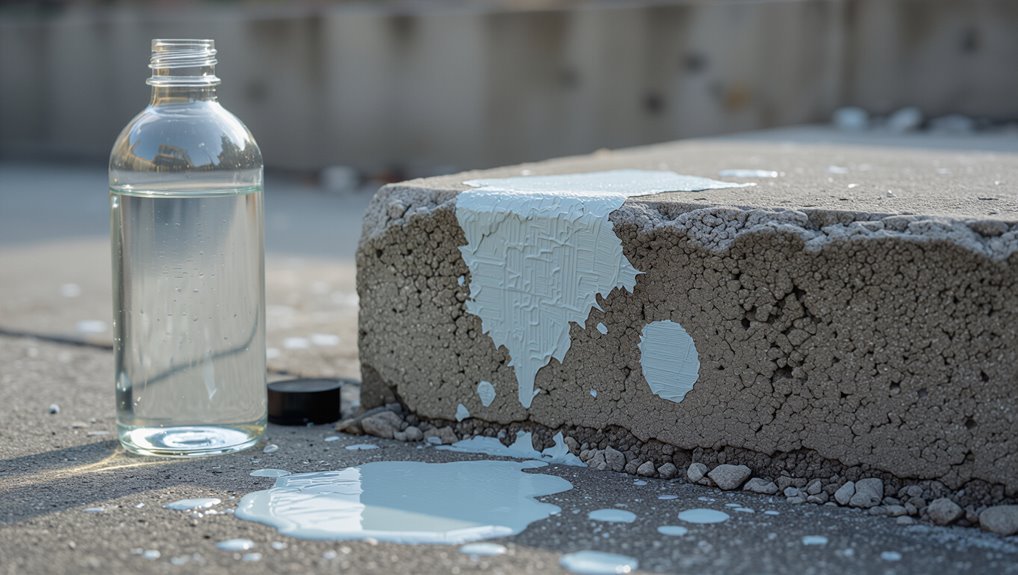
Household Cleaners That Soften Acrylic Paint
You can soften dried acrylic with common household cleaners like a vinegar-and-warm-water mix or rubbing alcohol.
Try a 1:1 vinegar-to-water solution first and let it sit a few minutes before scrubbing.
If that doesn’t work, apply rubbing alcohol to break down the paint, then scrub and rinse.
Vinegar And Warm Water
Saturate the dried acrylic with a warm vinegar-and-water solution to soften the film before scraping.
You’ll notice vinegar benefits as it loosens paint when mixed with warm water; let it sit, then scrub gently.
- Mix 1:1 white vinegar and warm water
- Apply with a spray bottle
- Let soak 10–15 minutes
- Scrub with a stiff brush
- Rinse and repeat as needed
Rubbing Alcohol Prep
One quick and effective option is to apply rubbing alcohol to soften dried acrylic paint before scraping; it breaks down the binder so the film loosens without harsh solvents. You’ll dab, wait a few minutes, then scrape gently. Rubbing alcohol benefits include faster lift and less abrasion. Try safe paint removal techniques and test a small patch first.
| Step | Action | Tip |
|---|---|---|
| 1 | Dab | Use 70% |
| 2 | Wait | 3–5 min |
| 3 | Scrape | Plastic tools only |
Use Warm Soapy Water And Scrubbing For Light Stains
Start by mixing warm water with a few drops of mild dish soap. Then apply it to the paint stain and let it sit for a couple minutes to loosen the film.
Use gentle scrubbing techniques with a stiff brush, balancing cleaning efficiency and paint adhesion risks.
- Warm water
- scrubbing methods
- cleaning supplies
- surface preparation
- safety precautions
Use Vinegar To Loosen Acrylic Paint (When And How)
If warm soapy water didn’t remove the stain or the paint’s partially set, reach for white vinegar to help loosen it.
Mix a 1:1 vinegar-to-water solution for mild spots or use straight vinegar on tougher patches. Then apply, let it sit a few minutes, and scrub with a stiff brush.
Rinse thoroughly with water and repeat as needed until the paint lifts.
When To Use Vinegar
When acrylic paint has begun to set but isn’t fully cured, reach for white vinegar to soften and lift it—vinegar’s mild acidity breaks the paint film without harsh chemicals.
Use vinegar for small spots, freshish splatters, and porous concrete where scrubbing helps; note vinegar benefits and vinegar limitations.
- small patches
- semi-cured paint
- textured surfaces
- before scraping
- sensitive areas
Vinegar Dilution Ratios
Because vinegar’s acidity does the softening, you’ll usually use it diluted so it loosens paint without over-etching the concrete: a common starting mix is 1 part white vinegar to 1–2 parts water for recent, thin splatters, while tougher, semi-cured spots benefit from straight (undiluted) white vinegar or a 2:1 vinegar-to-water mix applied briefly.
Always test a small inconspicuous area first and rinse thoroughly after treatment.
Vinegar benefits include safe, economical loosening; follow simple dilution techniques to match paint age and surface sensitivity.
Scrubbing And Rinsing Steps
Start by soaking the spot with your chosen vinegar mix and let it sit for 5–15 minutes so the acidity can soften the dried acrylic.
Then use these scrubbing techniques and rinsing methods:
- Scrub with a stiff brush in circular motions
- Apply more vinegar for stubborn areas
- Use a scraper gently
- Rinse with a hose or bucket
- Repeat until paint loosens
Applying Rubbing Alcohol (Isopropyl) Safely
One clear step is to work in a well-ventilated area and wear nitrile gloves and eye protection so you don’t inhale fumes or irritate your skin.
For safe application, saturate a cloth with rubbing alcohol, test a small concrete spot, blot gently, and avoid pooling.
Dispose of used cloths safely, keep alcohol away from flames, and ventilate until surfaces dry.
Using Acetone Or Nail Polish Remover On Stubborn Spots
If a stubborn spot won’t budge, you can try acetone or nail polish remover, but test it on a small, inconspicuous area first to check for discoloration.
Apply the solvent sparingly with a cloth or cotton ball, blotting rather than scrubbing to avoid spreading the paint.
Work in a well-ventilated area and rinse the spot with water once the paint loosens.
Test On Small Area
Before you apply acetone or nail polish remover to a visible stain, test it on a small, inconspicuous patch of concrete so you can see how the surface reacts; the solvents can lighten, etch, or remove sealers.
Use test methods and proper patch preparation.
Try:
- clean area
- apply small amount
- wait 5–10 minutes
- blot residue
- inspect for damage
Apply With Care
Work carefully when using acetone or nail polish remover on stubborn acrylic spots, since these solvents can lift paint but also harm concrete sealers and nearby finishes.
You’ll dab a small amount on a cloth, test after proper surface preparation, and gently rub. Limit contact time, ventilate the area, and rinse thoroughly.
Preserve surrounding paint application and finishes by protecting nearby surfaces.
Paint Removers And Strippers That Work On Concrete
While mechanical methods like scraping and pressure washing can help, chemical paint removers and strippers often deliver the cleanest results on dried acrylic paint in concrete’s pores.
Mechanical means help, but chemical paint removers often do the best job removing dried acrylic from concrete pores.
You’ll choose based on surface porosity and safety; proper PPE and test patches matter.
Options include:
- solvent-based removers
- gel strippers for vertical surfaces
- biodegradable formulas
- paint remover types for heavy jobs
- citrus cleaners for light spots
Choosing A Paint Stripper: Solvent, Gel, Or Biodegradable
When you’re deciding between solvent, gel, or biodegradable paint strippers, match the product to the surface, the thickness of the paint, and your safety priorities.
Choose solvent types for deep, stubborn acrylic on rough concrete but expect fumes and PPE.
Use gels for vertical or thin layers.
Pick biodegradable options when you want lower toxicity and easier cleanup, though they may require longer dwell times.
How To Apply Chemical Strippers Step-By-Step
Now that you’ve picked the right stripper for your concrete and project goals, get ready to apply it safely and effectively.
Now that you’ve chosen the right concrete stripper, prepare to apply it safely and effectively—follow instructions and test first
Follow directions, confirm paint compatibility, and prioritize chemical safety. Wear PPE, ventilate, and test a small area first.
- clear work area
- mix per label
- apply evenly
- wait recommended time
- scrape with plastic tools
How To Neutralize And Rinse After Chemical Stripping
After the stripper has done its job, neutralize and rinse the concrete promptly to stop any remaining chemical action and prevent surface damage. You’ll apply a neutralizing solution per product instructions, scrub gently, then use rinse techniques to remove residues. Wear gloves, work systematically, and repeat neutralization if pH tests show alkalinity.
| Step | Action |
|---|---|
| 1 | Mix neutralizer |
| 2 | Apply & scrub |
| 3 | Rinse thoroughly |
| 4 | Test pH again |
Pressure Washing Concrete For Acrylic Paint Removal
Grab a pressure washer and aim it carefully to blast away loosened acrylic without damaging the concrete surface.
You’ll combine mechanical force with prior scraping or chemical softening, then rinse thoroughly. Focus on pressure washing as part of routine concrete maintenance.
- Test a small area first
- Use appropriate nozzle
- Keep moving the wand
- Rinse residual debris
- Let concrete dry before sealing
How To Pressure Wash Concrete Without Causing Damage
When you pressure wash concrete, control and technique matter more than maximum power; adjust pressure washer settings to suit concrete surface types, test a small area, use a wide nozzle, and keep the wand moving to avoid etching. Rinse thoroughly and let dry before evaluating.
| Tip | Action |
|---|---|
| Test | Small inconspicuous area |
| Nozzle | Wide-angle (25°–40°) |
| Distance | 12–18 inches |
| Motion | Steady sweeping |
| Rinse | Thorough, low pressure |
Mechanical Removal With A Stiff Brush Or Wire Brush
Begin by choosing the right brush: a stiff nylon brush works for surface-level flakes and thin dried acrylic, while a wire brush—used gently—is best for stubborn, textured patches.
Choose the right brush: stiff nylon for surface flakes, gentle wire brushing for stubborn textured patches.
You’ll use stiff brush techniques to loosen paint, then test wire brush effectiveness on a small area. Work with short strokes, keep even pressure, and clean frequently.
- wear gloves
- test small area
- short strokes
- even pressure
- clear debris
Using A Scraper, Chisel, Or Putty Knife Safely
If paint flakes won’t budge with a brush, reach for a flat scraper, chisel, or sturdy putty knife to lift and pry without gouging the concrete. Use proper scraper techniques and chisel safety: keep blades shallow, angle low, and tap gently. Wear gloves and eye protection.
| Tool | Tip |
|---|---|
| Scraper | Hold flat |
| Chisel | Tap lightly |
| Putty knife | Angle low |
| Gloves | Protect hands |
Grinding Or Sanding Concrete To Remove Bonded Paint
If scraping and chiseling won’t remove stubborn, bonded paint, you’ll need to grind or sand the concrete to abrade the coating down to the substrate.
Assess paint thickness and bonding strength, complete surface preparation, and pick appropriate equipment choice.
Follow safety precautions and aim for finish restoration.
- Grinding techniques
- Sanding options
- Equipment choice
- Safety precautions
- Finish restoration
How To Use An Angle Grinder Or Floor Sander Correctly
Grab the right tool and set up deliberately: for small patches use an angle grinder with a diamond cup or paint-removal disc, and for larger areas choose a floor sander with coarse-grit sanding screens or diamond pads. Follow angle grinder safety: wear PPE, secure the disc, and work slowly. Apply floor sander tips: steady passes, overlap strokes, and change screens as needed.
| Tool | Key Point |
|---|---|
| Grinder | Slow, controlled |
| Sander | Even, overlapping |
| PPE | Mandatory |
Using A Heat Gun To Lift Acrylic Paint Safely
Before you touch the gun, make sure you’re wearing heat-resistant gloves, eye protection, and a respirator to avoid fumes and burns.
Hold the heat gun several inches from the paint, move it in slow, even strokes to soften the acrylic without scorching the concrete.
Once the paint bubbles, scrape it with a putty knife or wire brush, then wipe the residue with a solvent-soaked rag.
Safety Gear First
When you use a heat gun to lift dried acrylic paint, wear proper protective gear to keep yourself safe from burns, fumes, and flying debris.
You should always prepare before turning the tool on.
- protective gloves for heat and grip
- eye protection to block debris
- respirator or mask for fumes
- long sleeves and pants
- closed-toe shoes and no loose clothing
Proper Heat Technique
With your safety gear on, approach the heat gun confidently and keep the nozzle 4–6 inches from the paint so you warm without scorching the concrete.
Use steady, even heat application, sweeping the gun to soften the acrylic.
Watch for bubbling or gloss changes as cues for safe paint lifting.
Pause occasionally to avoid overheating and allow cooled checks before proceeding.
Paint Removal Methods
Start by heating a small section of the paint until it softens and slightly bubbles. Then scrape it away with a stiff putty knife or paint scraper held at a low angle to avoid gouging the concrete.
You’ll work methodically, avoiding overheating and keeping ventilation.
- Move slowly
- Keep gun moving
- Test small areas
- Watch for paint thinning
- Note color matching needs
When To Combine Chemical And Mechanical Methods
If a single approach isn’t removing the dried acrylic, combine chemical softeners and mechanical action to get the job done faster and with less elbow grease.
You’ll apply a targeted solvent, follow chemical safety steps, let it dwell, then use mechanical tools like a stiff brush or scraper to lift softened paint.
Work in small sections and rinse thoroughly to prevent residue.
Eco-Friendly Methods For Removing Acrylic Paint
You can remove dried acrylic from concrete without harsh chemicals by using gentle biodegradable solvents designed to break paint down safely.
Try hot water and firm scrubbing to lift softened paint, and consider plant-based paint removers for tougher spots.
These options protect your surface and the environment while still being effective.
Gentle Biodegradable Solvents
When you prefer an eco-friendly approach, gentle biodegradable solvents offer a safe middle ground between harsh chemicals and labor-intensive scrubbing. They break down acrylic binders without harming soil or plants and are usually low-odor and non-corrosive, making them suitable for outdoor concrete surfaces and areas with nearby vegetation.
- Choose certified biodegradable options
- Test small area first
- Apply, wait, blot residue
- Rinse thoroughly
- Assess solvent effectiveness
Hot Water And Scrubbing
Soak and scrub: hot water softens dried acrylic so you can lift it with minimal chemicals and elbow grease. You’ll use hot water techniques and focused scrubbing methods with a stiff brush, repeating soaks and rinses until paint lifts. Be patient, avoid harsh chemicals, and finish by rinsing thoroughly.
| Step | Action |
|---|---|
| 1 | Soak |
| 2 | Scrub |
| 3 | Rinse |
| 4 | Repeat |
| 5 | Inspect |
Plant-Based Paint Removers
If hot water and scrubbing aren’t removing stubborn acrylic, plant-based paint removers offer a gentler, eco-friendly alternative that still gets the job done.
You can choose products with natural solvents, apply, wait, then scrub or pressure wash.
Try these options:
- Citrus gel remover
- Soy-based stripper
- Molasses/pumice paste
- Vinegar soak (hot)
- Biodegradable poultice
Removing Paint From Textured Or Porous Concrete
Textured or porous concrete traps dried acrylic in tiny crevices, so you’ll need a more aggressive, targeted approach than you would on smooth slabs. Use stiff brushes, poultices, and repeatable solvent applications for textured surfaces and porous materials; test first and rinse well.
| Tool | Purpose |
|---|---|
| Stiff brush | Agitate |
| Poultice | Draw out paint |
| Solvent | Loosen residue |
Dealing With Large Spills On Driveways And Patios
Start by checking how thick the paint is so you can pick the right removal method — thin films often scrub off, while thick layers may need scraping or a stripper.
Use a pressure washer or chemical remover as appropriate, working in small sections and following safety directions.
Rinse the area and repeat the process until the stain is gone.
Assess Paint Thickness
Before you choose a removal method, take a close look at how thick the dried acrylic is across the spill — thin, patchy remnants clean up very differently than a few heavy, layered puddles.
You’ll assess paint thickness to plan work, tools, and safety. Check:
- Surface coverage
- Layer depth
- Hardness
- Edge adhesion
- Area size
Choose Removal Method
When you’re dealing with a large acrylic spill on a driveway or patio, pick a method that balances effectiveness with the least surface damage and effort; heavy layers will need mechanical or chemical approaches, while thinner coverage can often be removed with scraping and pressure washing.
For wide areas, choose paint removal techniques combining scrapers, grinders, or biodegradable effective cleaning solutions to minimize harm and time.
Rinse And Repeat
For large spills on driveways or patios, you’ll rinse and repeat until the paint’s gone, working in manageable sections so water and cleaning agents don’t run off into landscaping or drains.
You’ll use rinse techniques and repeat methods to loosen paint, scrub, and remove residue efficiently.
- Pre-soak edges
- Apply remover
- Scrub with brush
- Rinse thoroughly
- Repeat as needed
Removing Paint From Garage Floors Without Harming Sealers
If you want to remove dried acrylic from a garage floor without damaging the sealer, start by identifying the sealer type and testing your chosen cleaner on a small, hidden spot.
Different sealers—acrylic, epoxy, or polyurethane—react differently to solvents and abrasives, so that quick patch test will tell you what’s safe to use.
Use gentle solvents, plastic scrapers, and soft brushes.
Follow garage maintenance tips and concrete sealing techniques to protect finishes.
How Long To Wait After Paint Removal Before Resealing Concrete
Once you’ve removed the paint, let the concrete fully dry and cure before resealing—usually 24 to 72 hours for surface moisture to evaporate, but up to a week if you used water-heavy methods or live in high humidity; check with a moisture meter or tape test to confirm dryness.
Allow concrete to fully dry before resealing—typically 24–72 hours, or up to a week in high humidity; verify with a moisture meter.
- Wait recommended drying time
- Use a moisture meter
- Tape test for dampness
- Avoid sealing too soon
- Make certain surface is clean before resealing concrete
Fixing Surface Damage After Paint Removal (Scratches, Etching, Spalling)
After you confirm the slab is dry, inspect the area for surface damage left by paint removal—scratches from scrapers, chemical etching, or small patches of spalling—and plan repairs before resealing.
Use appropriate surface restoration techniques: grind or sand shallow scratches, apply a light acid neutralizer for etching, and patch spalled spots with a compatible concrete repair option.
Finish by feathering and cleaning.
How To Dispose Of Paint Waste And Used Solvents Legally
Because paint waste and solvents can harm people and the environment, you’re required to handle and dispose of them according to local hazardous-waste rules.
Follow these steps for legal, safe paint disposal and waste management:
- Store used solvents in labeled, sealed containers
- Don’t pour liquids down drains or on soil
- Use community hazardous-waste drop-offs
- Follow transporter and landfill rules
- Keep receipts for disposal records
Cost Comparison: DIY Versus Hiring A Pro For Concrete Paint Removal
When you’re weighing options for removing dried acrylic from concrete, cost usually drives the decision: weigh upfront expenses for tools, cleaners, and time if you use DIY Techniques against labor, equipment, and disposal fees charged by Professional Services.
DIY saves money for small spots but can cost time and mistakes; pros cost more yet finish faster and may prevent damage, depending on scope and complexity.
When To Call A Professional Concrete Cleaner
If the paint covers a large area or there are stubborn, multiple layers you can’t remove, you’ll want to contemplate a pro.
Professionals have the heavy-duty equipment and chemicals for safe, efficient removal.
Call them when the job risks your safety or needs tools you don’t have.
Extensive Paint Coverage
Even with stubborn spots you can tackle yourself, extensive acrylic coverage—large areas, multiple layers, or paint that’s soaked into porous concrete—usually calls for a pro.
You’ll want specialists who know extensive coverage techniques and how to address paint layering effects.
Consider pros when time, equipment, or risk is high:
- high square footage
- uneven porosity
- safety concerns
- decorative surfaces
- tight timelines
Stubborn Or Multiple Layers
Call in a professional when paint has baked on in multiple layers or won’t budge with standard scrubbing, because they’ve got the tools and chemical know-how to remove stubborn buildup without damaging the concrete.
You’ll save time and avoid DIY guesswork when advanced removal techniques are needed to overcome strong paint adhesion.
Pros assess layers, choose solvents or blasting, and guarantee effective restoration.
Safety Or Equipment Needs
When a job requires heavy-duty tools, strong solvents, or pressure-washing at high PSI, you should hire a professional concrete cleaner—these technicians bring certified equipment, proper training, and protective gear to handle hazards like toxic fumes, silica dust, and surface damage risk.
You’ll rely on their safety precautions and equipment checklist to avoid injury and costly mistakes.
- certified PPE
- high-PSI washers
- industrial solvents
- HEPA vacuums
- surface testing
Preventing Future Acrylic Paint Spills And Making Cleanup Easier
If you want to avoid future headaches, set up simple habits and a few inexpensive tools that keep spills contained and make wet paint easy to wipe away.
Use paint prevention tips like drop cloths, trays, and sealed lids. Keep a dedicated brush bucket and wipe rags nearby.
Adopt cleanup hacks: wipe spills immediately, tape edges, and store cans upright to prevent drips.
Best Products To Keep On Hand For Quick Spot Cleanup
Keep a small kit ready so you can tackle spots before they set: stain-specific solvents (like rubbing alcohol for water-based acrylics or a commercial paint remover for tougher residues), absorbent materials (paper towels, microfiber cloths, and kitty litter for soaking up drips), and basic protective gear (nitrile gloves, safety glasses, and a disposable apron).
You’ll save time and prevent bigger stains by responding quickly with the right supplies. Store the kit near your workspace so it’s always within reach.
Stain-Specific Solvents
One or two targeted solvents can make quick work of fresh or partially cured acrylic on concrete, so it’s worth keeping a small kit nearby.
Choose by solvent effectiveness and consider eco friendly options for indoor use. Keep gloves and test a hidden spot first.
- Isopropyl alcohol
- Citrus-based remover
- Acetone (small amounts)
- Commercial paint stripper
- Biodegradable solvent alternative
Absorbent Cleanup Materials
A small stash of absorbent materials will let you act fast and blot up wet or softened acrylic before it soaks in or dries further.
Keep microfiber cloths, paper towels, kitty litter, and absorbent pads handy for quick spot control.
Use a scraper with gentle pressure, then dab—don’t rub—to lift residue.
These cleanup tips minimize spread and speed solvent work.
Protective Gear Essentials
After you’ve blotted up as much paint as possible, gear up before reaching for solvents or scrapers to protect your skin, lungs, and eyes.
You’ll follow safety precautions and keep essential equipment handy for quick spot cleanup:
- Nitrile gloves (chemical resistant)
- Safety goggles (splash protection)
- N95 or respirator (fume control)
- Knee pads or coveralls (skin barrier)
- Disposable rags and sealable bag
How Temperature And Weather Affect Acrylic Paint Removal
Because acrylic paint reacts to heat and moisture, the weather you’re working in directly changes how easily it comes off concrete.
You’ll notice temperature effects: heat softens aged paint, making scrubbing and solvent work better, while cold hardens it.
Include weather considerations when planning removal—avoid rain, high humidity, or freezing conditions—and schedule work on dry, mild days for faster, cleaner results.
Common Mistakes That Make Acrylic Paint Harder To Remove
Common mistakes can turn a simple cleanup into a stubborn, time-consuming job, and you’ll usually spot them in the choices people make before they even start: letting paint cure fully instead of tackling it while tacky, using the wrong solvent or a weak brush, and skipping surface prep like sweeping or wetting down dust.
Don’t let avoidable mistakes—like waiting for paint to fully cure or skipping prep—turn cleanup into a long, stubborn chore.
- Believing water alone removes cured paint
- Using improper solvents
- Scraping with dull tools
- Ignoring manufacturer instructions
- Relying on removal myths and common misconceptions
Quick Fixes For Ghost Stains And Halo Marks
When paint’s mostly gone but faint halos or ghost stains remain, you can often lift them without heavy-duty stripping—start with gentler, targeted treatments that won’t damage the concrete.
| Tool | Use |
|---|---|
| Soft brush | Agitate residue |
| Mild detergent | Break film |
| Baking soda paste | Abrade gently |
| Poultice | Draw pigments out |
Work small, rinse, repeat until halo marks fade.
How To Test If Acrylic Paint Is Fully Removed
After you’ve treated ghost stains, you’ll want to confirm the surface is truly clean before moving on or sealing it.
Test the area using simple checks to verify your paint removal techniques and concrete surface preparation worked.
- Visually inspect in bright light
- Run a damp cloth test
- Feel for texture changes
- Try tape adhesion
- Use a small spot-clean repeat
Refinish Or Repaint Concrete After Cleanup
Now that the concrete’s clear of paint and residue, decide whether you’ll refinish the surface with a sealer or repaint it for a fresh look; both options restore protection and appearance but require different prep.
Decide whether to seal or repaint the cleaned concrete—both renew protection and appearance but need different prep.
For concrete refinishing, clean, etch, and repair cracks first.
If painting, use proper painting techniques: primer, breathable masonry paint, and thin, even coats.
Allow full cure before use.
Three Step-By-Step Before-And-After Workflows To Try (Garage, Driveway, Patio)
Pick the workflow that matches your space—garage, driveway, or patio—and follow these three concise, step-by-step plans to remove paint, prep the surface, and refinish for a durable, polished result.
Choose appropriate paint removal techniques, then focus on surface preparation and protection.
- Assess stain and choose method
- Apply remover or pressure wash
- Scrub and rinse clean
- Etch or sand for adhesion
- Recoat with suitable sealer
Troubleshooting: What To Do If Acrylic Paint Won’t Budge
If the methods above don’t loosen the paint, don’t give up—stubborn acrylic can usually be coaxed free with a few targeted tactics.
Inspect paint adhesion to determine if it’s cured or chemically bonded. Adjust solvent selection accordingly—try stronger commercial removers or a poultice.
Scrape with a plastic or carbide tool, reapply solvent, and rinse.
Repeat patiently; protect surrounding surfaces.
Frequently Asked Questions
Can Acrylic Paint Removal Damage Nearby Plants or Lawns?
Yes, it can harm plants and lawns if solvents contact roots or foliage; you should use plant protection and safe methods like screening, gentle scraping, biodegradable cleaners, and rinsing carefully so you don’t spread contaminants into soil.
Can Dried Acrylic Paint Be Removed From Painted Concrete Surfaces?
Like peeling wallpaper, yes — you can remove dried acrylic from painted concrete if paint adhesion was weak and surface preparation was poor. You’ll need gentle scraping, compatible solvent, and touch-up to preserve the existing finish.
Will Removing Paint Release Harmful Fumes Indoors?
Yes — removing paint can release harmful fumes, so you should prioritize fume safety. You’ll ventilate the indoor space thoroughly, use low‑odor removers or respirators, and open windows and fans to maintain strong indoor ventilation throughout.
How to Remove Acrylic Paint From Concrete Pavers With Gaps?
Want a clean paver look? You’ll use paint removal techniques like scraping, hot water pressure washing, and biodegradable solvent application, brushing joints and rinsing. Focus on concrete surface preparation to protect gaps and loosen stubborn paint effectively.
Can Pet-Safe Cleaners Effectively Remove Dried Acrylic Paint?
Yes, pet safe options can work, but you’ll need proper cleaning techniques: test a small area, use enzymatic or citrus-based cleaners, gentle scrubbing with a nylon brush, rinse thoroughly, and repeat until the dried acrylic paint lifts.
Conclusion
You’ve learned practical steps, but here’s a twist worth testing: aged acrylic sometimes bonds chemically, not just mechanically, to concrete minerals. That means aggressive scrubbing might fail until you alter the surface chemistry—using a mild acid rinse (vinegar) or an alkaline cleaner can break that bond. Try a small patch: if the paint softens after pH treatment, you’ll know chemistry mattered. With that insight, you’ll choose the right remover and finish the job faster and cleaner.