How to Remove Dry Paint From Vinyl Flooring Safely
You can remove dry paint from vinyl flooring safely by softening with warm soapy water or a hair dryer, then gently lifting with a plastic scraper or nylon brush to avoid gouging. Test rubbing alcohol or a vinyl-safe solvent in a hidden spot and use sparingly with good ventilation and gloves. Rinse and buff with a microfiber cloth, then dispose of solvents and rags properly. Keep going for step‑by‑step tools, methods, and trouble‑shooting tips.
Quick Overview: What This Guide Covers
If you’ve found dry paint on your vinyl floor, this guide walks you through safe, effective removal methods—from quick spot fixes for small drips to stronger techniques for larger flakes—plus the tools to use, how to test solutions, and how to avoid damaging the vinyl while you work.
You’ll get clear vinyl maintenance tips, paint prevention strategies, step priorities, and safety reminders to act confidently.
Safest Quick Method to Remove Dry Paint From Vinyl
Now that you know what the guide covers, start with the safest quick method: gently loosening and lifting the paint using a soft scraper and warm soapy water.
Use gentle motions and test a small area first. Follow these steps:
Use gentle motions and test a small area first — follow these simple steps for safe, effective paint removal from vinyl.
- Soak spot with warm soapy water.
- Gently scrape with a plastic scraper.
- Blot residue with a microfiber cloth.
- Rinse and dry for proper vinyl flooring care and effective paint removal techniques.
Identify the Paint Type on Your Vinyl Floor
Start by checking the paint’s finish—glossy, satin, or flat—since that affects how easily it lifts.
Test a small spot with an appropriate solvent to see if the paint softens or smears before you apply anything widely.
Also inspect the paint’s thickness and layers, because thicker or multiple coats may need stronger methods or repeated treatments.
Check Paint Finish
Before you grab solvents or scrapers, identify what kind of paint you’re dealing with—latex, acrylic, or oil-based—as that determines which removal methods will work and which might damage your vinyl.
Check the paint finish to guide your vinyl care steps:
- Gloss — hard, may chip.
- Satin — moderate adhesion.
- Flat — fragile layer.
- Enamel/oil — strongest bond; proceed cautiously.
Test Solvent Compatibility
How do you know which solvent won’t harm your vinyl?
Test small, hidden areas with different solvent types—water, rubbing alcohol, mineral spirits—using a cotton swab.
Wait several minutes, blot, and inspect for discoloration or softening.
Record results and repeat nearby spots.
Use compatibility tests to confirm a safe option before treating visible paint, minimizing risk to the flooring.
Inspect Paint Thickness
Once you’ve confirmed a safe solvent, check the paint’s thickness to help identify its type—thin, flaky layers usually mean water-based paint, while thicker, glossy films suggest oil- or enamel-based coatings.
Use a fingernail, a plastic scraper, or magnifying glass to feel and inspect the edge of the stain so you can choose the right removal approach.
- Note paint thickness.
- Try gentle scraping.
- Use magnification.
- Record inspection techniques.
Why Vinyl Needs a Delicate Removal Approach
Because vinyl is a thin, flexible material with a protective wear layer, you can’t treat it like hardwood or tile when removing dried paint; aggressive scraping or harsh solvents can gouge, lift, or discolor the surface. You’ll protect finish by respecting vinyl sensitivity and evaluating paint impact before acting.
| Risk | Cause | Result |
|---|---|---|
| Gouging | Hard blade | Visible damage |
| Lifting | Strong solvent | Seams separate |
| Discoloring | Harsh chemical | Stain remains |
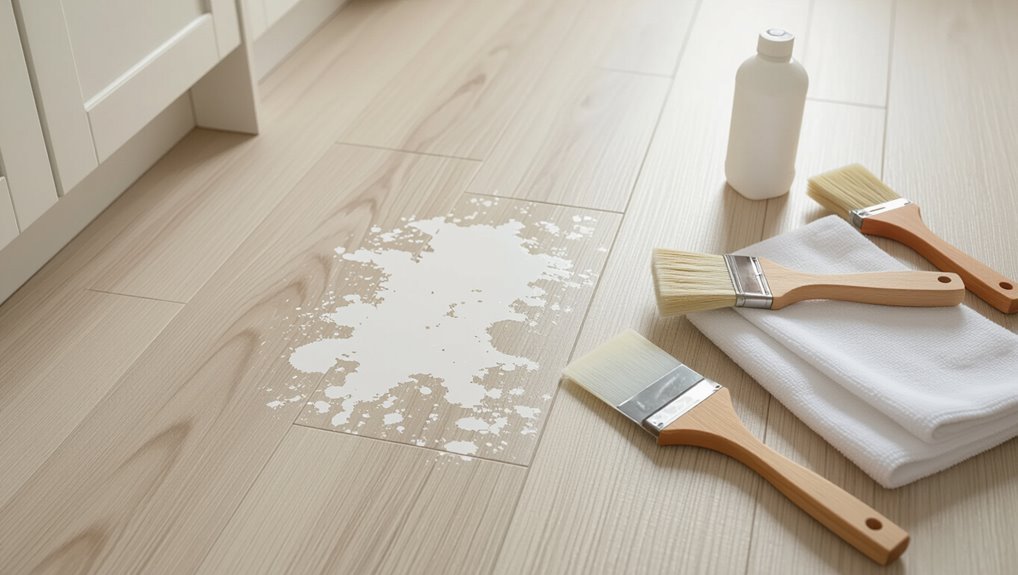
Tools and Supplies You’ll Need
Now that you know why vinyl needs gentle handling, gather the right tools and supplies so you don’t accidentally damage the floor.
You’ll need items that support safe paint removal techniques and compatible vinyl cleaning products.
- Plastic scraper
- Soft cloths and microfiber towels
- Mild vinyl cleaning products and rubbing alcohol
- Small nylon brush and disposable gloves
Prep the Floor and Work Area
Start by clearing furniture and obstacles so you have unobstructed access to the affected area.
Sweep loose dirt and debris, then run a vacuum to pick up fine dust that could scratch the vinyl while you work.
Keeping the floor clean before you begin makes paint removal easier and reduces the risk of damage.
Clear The Area
Clear the space around the affected vinyl so you can work safely and avoid spreading debris—move furniture, rugs, and loose items at least a few feet from the stain, and roll up any edges of baseboard trim or mats that might catch dust or paint chips.
- Lay down floor protection.
- Remove fragile items.
- Create an access path.
- Keep cleaning techniques tools nearby.
Sweep And Vacuum
Before you tackle the paint itself, sweep and vacuum the surrounding area so loose dirt, dust, and paint chips won’t scratch the vinyl or contaminate your cleaning supplies.
Use a soft-bristle broom for edges and a vacuum with a hard-floor setting or soft-brush attachment to lift finer debris.
Use gentle sweeping techniques, working toward a single pile, then choose vacuum settings that avoid scuffing and suction small particles.
Do a Spot Test to Protect Your Finish
Since cleaning products can react differently with vinyl finishes, you should always do a quick spot test in an inconspicuous area first.
Spot testing guarantees finish protection before wider use. Follow these steps:
- Choose a hidden corner.
- Apply a small amount.
- Wait 10–15 minutes.
- Check for discoloration or softening.
If safe, proceed cautiously; if not, try a gentler option.
Soften Latex/Water-Based Paint With Warm Soapy Water
If the spot test showed the finish’s safe, you can start loosening dried latex or water-based paint with warm, soapy water.
Mix mild dish soap and warm water, soak a microfiber cloth, and press gently on the paint to rehydrate it.
Repeat short cycles, refresh the solution as needed, and rely on gentle paint removal techniques and cleaning solutions before trying stronger methods.
Use a Plastic Scraper and Putty Knife Safely
Choose a flat plastic scraper or a flexible putty knife with a blunt edge to avoid gouging the vinyl.
Test the tool on a hidden spot first so you can apply the gentlest pressure that lifts paint without scratching.
Work slowly at a low angle, scraping in the direction of the grain to remove paint safely.
Choose The Right Tool
Pick a plastic scraper or putty knife that fits the job and handle it with care to avoid gouging your vinyl.
Choose based on blade width, edge softness, and handle grip for safe tool selection and effective scraping techniques.
- Narrow blade for tight spots
- Wide blade for large areas
- Rounded edges reduce risk
- Comfortable grip prevents slips
Scrape Without Damage
Start by holding the plastic scraper or putty knife at a low, shallow angle—about 30 degrees—to lift paint without gouging the vinyl.
Use controlled, short strokes and change angle slightly if paint resists. Keep edges clean and test a hidden spot first.
These scraping techniques focus on steady pressure and movement for damage prevention, avoiding sharp metal and excessive force.
Remove Paint With Rubbing Alcohol (Isopropyl) Safely
Isopropyl rubbing alcohol dissolves many dry paint types without damaging vinyl when used correctly, so you can often lift spots with minimal effort.
You’ll follow paint removal techniques and safe cleaning methods:
- Test in an inconspicuous area.
- Apply 70% isopropyl with a cloth.
- Gently rub until paint softens.
- Rinse and dry the floor.
Remove Oil-Based Paint With Mineral Spirits : Cautions
If rubbing alcohol doesn’t budge oil-based paint, you’ll need a stronger solvent like mineral spirits—but use it with care.
Wear gloves, ventilate the room, test a small hidden area, and blot gently to avoid spreading.
Follow cautionary measures: keep away from flames, dispose rags safely, and limit exposure.
Consider solvent alternatives for sensitive vinyl or persistent stains before proceeding.
Using Vinyl-Safe Commercial Paint Removers
Consider commercial paint removers formulated specifically for vinyl when household solvents fail; they’re designed to lift paint without warping or dulling the floor’s finish.
You’ll want commercial product recommendations and safe application techniques.
Steps:
- Test in an inconspicuous spot.
- Wear gloves and ventilate.
- Apply sparingly with a soft cloth.
- Rinse residue and dry promptly.
Use Heat (Hair Dryer) to Loosen Stubborn Spots
A hair dryer can gently warm and soften dried paint so you can scrape or blot it away without scratching the vinyl; hold the dryer a few inches off the spot on medium heat and move it steadily to avoid overheating the flooring.
Use heat application on stubborn spots, then gently lift softened paint with a plastic scraper or microfiber cloth, wiping residue with a damp cloth.
Poultice Method for Thick Paint Blobs
When heat and scraping don’t do the job, you’ll use a poultice to lift thick paint blobs without harming the vinyl.
Mix a paste that’s safe for vinyl, apply it over the paint, and cover so it can soften the residue.
Once it’s worked, gently remove the poultice and any loosened paint, then wipe the area clean.
Preparing The Poultice
Mix the poultice components into a spreadable paste that clings to the paint without running—this lets the solvent work down into the blob instead of just evaporating off the surface.
You’ll prepare poultice ingredients and adjust thickness for poultice application.
Follow steps:
- Measure solvent and absorbent.
- Combine to paste.
- Test small area.
- Transfer to applicator and use as directed.
Applying The Mixture
Start by scooping a generous dollop of the paste onto your applicator and pressing it firmly over the paint so the poultice makes full contact without gaps.
Smooth edges to seal, note mixing techniques used, and label stronger areas. Keep pressure even, avoid sliding.
For application tips, cover with plastic wrap and weight lightly so the paste cures against the paint for the recommended dwell time.
Removing Residue Carefully
Once the poultice has had its dwell time, peel back the plastic and lift one edge of the paste to check whether the paint has loosened; if it has, gently pull the poultice away while keeping pressure on the surrounding vinyl to prevent lifting.
You’ll use effective techniques and safe solvents.
- Test a corner.
- Scrape gently.
- Blot residue.
- Rinse and dry.
Removing Paint From Textured or Embossed Vinyl
When you’re dealing with textured or embossed vinyl, paint can hide deep in grooves and cling to raised patterns.
So you’ll need a gentler, more methodical approach than you’d use on smooth floors. Use a soft-bristled brush and mild solvent, working along textured surfaces to loosen paint without abrading embossed patterns.
Rinse frequently, blot with a microfiber cloth, and repeat patiently until clean.
Lift Paint From Seams, Grout Lines, and Edges
When paint has settled into seams, grout lines, or along edges, you’ll need precision tools to lift it without damaging the vinyl.
Use toothpicks or small picks to gently pry paint from tight crevices, working slowly to avoid gouging.
If you use a solvent, apply it sparingly with a cotton swab and test nearby first so it won’t harm the flooring.
Use Toothpicks Or Picks
Grab a toothpick or a small pick to carefully lift dry paint from seams, grout lines, and the edges where a scraper can’t reach.
Use gentle, angled motions; don’t gouge vinyl. Employ toothpick techniques and note pick advantages: precision, control, low cost, and accessibility.
- Work slowly
- Target edges
- Remove crumbs
- Inspect progress
Apply Solvent Carefully
Apply a small amount of solvent to a cotton swab or soft cloth and dab it precisely into seams, grout lines, and edges where scraping can’t reach.
You should test solvent selection on an inconspicuous spot first, then use gentle application techniques, letting the solvent loosen paint briefly.
Blot away softened paint with a clean cloth, repeating sparingly to avoid damaging vinyl.
Clean Residue and Restore Shine After Removal
After you’ve lifted the paint, you’ll want to get rid of any residual film and bring the vinyl’s sheen back; use gentle cleaners and soft cloths.
After lifting paint, remove residue and restore vinyl sheen using gentle cleaners and soft cloths.
Follow these shine restoration techniques and floor maintenance tips:
- Wipe with warm soapy water.
- Use a vinegar-water rinse.
- Buff with a microfiber towel.
- Apply a vinyl-safe polish sparingly.
Dry fully and inspect for streaks.
Handle Multiple Splatters or Large Spill Areas
When you’re facing multiple splatters or a large spill, first identify the paint type so you can choose the safest remover.
Protect adjacent surfaces and furniture with drop cloths or tape before you start working.
Tackle the area gradually, using gentle methods first and only escalating to stronger treatments if needed.
Assess Paint Type
1 key step if you’ve got multiple splatters or a large spill is to identify the paint type before you start cleaning, because removal methods differ for water-based versus oil-based paints.
You’ll assess paint properties to pick safe removal techniques.
Quick checklist:
- Smell test
- Rub a hidden edge
- Check drying pattern
- Review paint can or label
Protect Surrounding Areas
Before you start scraping or applying solvents, cordon off the affected zone and cover adjacent floors, baseboards, and furniture with drop cloths or plastic sheeting to prevent accidental damage or spreading of paint. Use protective coverings and tape, label zones, and keep tools contained for clear work area organization.
| Drop cloths | Plastic sheeting |
|---|---|
| Tape edges | Seal corners |
| Tool tray | Waste bin |
Use Gradual Removal Methods
If you’re dealing with multiple splatters or a large spill, tackle the paint in stages so you don’t damage the vinyl or overwhelm yourself.
- Start with gentle scraping and vacuum loose chips.
- Apply mild solvent in small sections, testing first.
- Use soft scrubbing and wipe frequently to monitor progress.
- Finish with gradual techniques and effective strategies, repeating steps if needed.
Avoid Common Mistakes That Damage Vinyl Floors
When you’re removing dry paint from vinyl, don’t rush into using harsh chemicals, abrasive tools, or excessive heat—those quick fixes often cause discoloration, scratches, or warping that are harder to repair than the paint itself.
You should test solvents in inconspicuous spots, avoid metal scrapers, follow paint application labels, and keep regular vinyl maintenance to prevent future problems and preserve the floor’s finish.
Protect Adjacent Surfaces and Baseboards While Working
Before you start scraping or applying solvents, tape off baseboards to prevent chips and staining.
Cover nearby furniture and use drop cloths or cardboard to protect adjacent flooring from drips and abrasive tools.
Taking these simple steps will keep the surrounding surfaces intact while you work.
Tape Off Baseboards
Start by masking off the baseboards and any nearby trim with painter’s tape so paint removal won’t damage adjacent surfaces. You’ll guarantee tidy tape application and strong baseboard protection.
Follow steps:
- Clean and dry the trim.
- Unroll tape along the edge.
- Press firmly to seal.
- Remove tape slowly after cleanup to avoid peeling.
Cover Nearby Furniture
Move items away for better furniture placement, then secure protective coverings with tape or clips.
Wrap fragile pieces, elevate small items on blocks, and check edges to prevent drips.
Remove coverings carefully to avoid spreading loosened paint back onto your vinyl.
Protect Adjacent Flooring
While you work on lifting paint from the vinyl, protect adjacent flooring and baseboards so cleaners and scraped flakes don’t create new messes or damage nearby surfaces.
Use these floor protection techniques and surface shielding methods:
- Lay rosin paper or drop cloths.
- Tape edges with painter’s tape.
- Prop cardboard along baseboards.
- Wear shoe covers and clean debris often.
When to Hire a Professional Flooring Restorer
If the paint’s stubborn despite your best efforts or the finish looks uneven after DIY removal, it’s time to call a professional flooring restorer.
You should get a professional assessment to evaluate damage, potential discoloration, and safe refinishing options.
Hire restoration services when DIY risks further harm, when large areas are affected, or when warranties, warranties, or textured finishes require expert care.
Reading “Vinyl-Safe” Labels and Product Claims
Look for specific wording and ingredient lists when a product claims it’s “vinyl-safe,” because that phrase isn’t regulated and manufacturers can mean different things.
You’ll check labels for true paint compatibility, test in an inconspicuous spot, and avoid harsh solvents.
Steps:
- Read ingredient list
- Look for vinyl mention
- Check compatibility notes
- Test small area
Dispose of Solvents, Rags, and Paint Waste Safely
After you’ve confirmed a cleaner is safe for vinyl and tested it, don’t forget how you’ll handle the solvents, rags, and paint you used.
Seal solvent containers, store used rags in metal with lid to prevent combustion, and label waste.
Follow local paint disposal techniques and take hazardous waste to drop-off sites.
Consider eco friendly options like water-based neutralizers and recycling centers for leftover cans.
Prevent Future Paint Spills on Vinyl Flooring
Because prevention is easier than cleanup, take a few simple precautions to keep paint off your vinyl in the first place.
Use these preventive measures and protective coverings to limit risk:
- Lay down heavy-duty drop cloths.
- Tape seams and edges securely.
- Set up a designated painting zone.
- Keep paint cans sealed and elevated.
You’ll avoid spills and save time on future cleanup.
Cost and Time Estimates for DIY Removal
A typical DIY dry-paint removal from vinyl will take you anywhere from 30 minutes for small drips to several hours for larger patches, and will usually cost under $30 if you already have basic supplies;
expect higher costs (around $50–$100) only if you need specialty removers or replacement materials.
Do a quick cost analysis, plan tools, and apply strict time management so you finish efficiently.
Troubleshooting: Stubborn Paint That Won’t Budge
Don’t panic if some paint refuses to come off — stubborn spots just need a different approach.
You’ll want targeted paint removal steps and patience.
Try:
- Warm soapy soak and gentle scraping.
- Rubbing alcohol on a cloth, test first.
- Nail polish remover (acetone) sparingly.
- Fine plastic scraper and repeat cycles.
If stains persist, consult a pro to avoid damaging vinyl.
Frequently Asked Questions
Can Paint Removal Void My Vinyl Floor Warranty?
Yes — certain paint types and aggressive removal methods can void warranty specifics if they damage the vinyl. You should check your warranty specifics, contact the manufacturer, and use approved, gentle removal techniques to avoid voiding coverage.
Will Baby Oil Remove Paint Without Harming Vinyl?
Gentle trick: yes, baby oil benefits include softening some paints, and you can use it as one paint removal technique; you’ll gently loosen spots without harsh damage, but test a hidden area first to be sure.
Can Steam Cleaners Remove Dry Paint From Vinyl?
Yes — steam cleaner effectiveness varies; you’ll loosen some dry paint but risk heat damage or adhesive weakening on vinyl. Use low steam, test a hidden spot, wipe promptly, and follow vinyl floor care guidelines to protect finish.
Is It Safe to Use Bleach to Clean Paint Residue?
No, you shouldn’t—bleach can damage vinyl and react with paint solvents, so avoid it; instead use safer cleaning techniques like mild detergent, isopropyl alcohol, or commercial solvent formulated for vinyl, testing a hidden spot first.
How Long Should Vinyl Rest After Solvent Use Before Walking?
“Measure twice, cut once.” You should wait at least 24 hours after solvent use for drying time, follow safety precautions like ventilation and gloves, and keep traffic off the vinyl until it’s fully dry and odor-free.
Conclusion
You’ve got this: picture the floor finally wiped clean, sunlight sliding across smooth vinyl where stubborn paint once sat like dried confetti. By testing solvents, working gently with a plastic scraper, and rinsing thoroughly, you’ll rescue that gleam without harming the surface. Tidy up waste responsibly, and keep a drop cloth handy next time so spills become a distant memory. With patience and the right tools, your floor will look refreshed and ready for company.