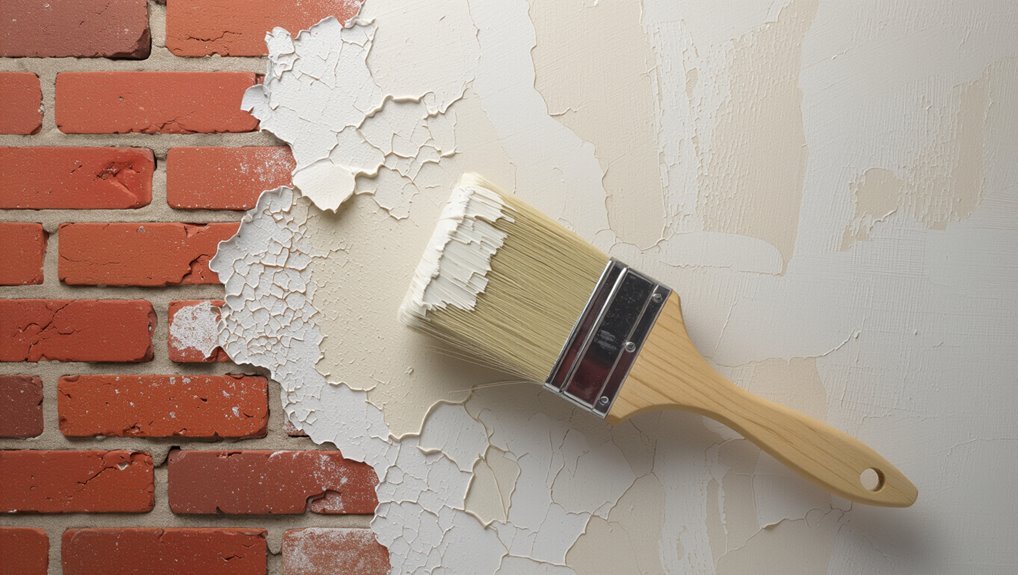
How to Remove Latex Paint From Brick Without Harsh Chemicals
You can remove latex paint from brick without harsh chemicals by testing a small area, then using warm water, a soft-bristle brush, a plastic scraper, and gentle steam or low-pressure washing to loosen paint; repeat scrubbing and rinsing, apply a non-toxic poultice for stubborn spots, protect surrounding plants, and inspect mortar for damage before repairing and sealing. Work top-to-bottom, wear basic PPE, and proceed cautiously—keep going to learn step-by-step techniques and tips.
Who This Guide Is For And What It Covers
Whether you’re a homeowner tackling a weekend cleanup or a contractor restoring a client’s masonry, this guide helps you remove latex paint from brick safely and effectively.
You’ll get clear brick maintenance tips, learn when to call a pro, and understand risks and tools for gentle cleanup.
Emphasis is on eco-friendly solutions, safety, and preserving mortar and brick integrity throughout the process.
Quick Steps: Safest Non-Chemical Paint Removal
Before you start, check the brick for loose mortar, fragile edges, or historic value—if anything looks delicate, call a pro.
Wear gloves, goggles, and a dust mask.
Test a small area with warm water, soft brush, and a plastic scraper.
Use steam or a low-pressure washer sparingly.
Prioritize eco friendly alternatives and brick preservation techniques to avoid damage while removing paint.
How To Decide Which Method Fits Your Brick Surface
Start by matching the paint-removal method to your brick’s condition, size, and finish so you don’t cause unnecessary damage.
Check for fragile mortar, textured surfaces, and large painted areas, then weigh gentle brick cleaning techniques like soft washing or steam against mechanical options such as low-pressure scraping.
Choose paint removal options that balance effectiveness with preserving brick integrity and ease of cleanup.
How To Assess Brick Type And Finish Before You Start
Because different bricks react differently to cleaners and tools, you’ll first want to identify the brick type and finish so you can choose the safest removal method.
Assess brick characteristics and paint compatibility by checking texture, porosity, finish, and age.
Look for signs like:
- Smooth vs. rough surface
- Glazed or sealed finish
- Soft, crumbly mortar
- Previous paint layers
How To Test Paint Adhesion With A Simple Scratch Test
Try a simple scratch test to see how firmly the latex paint is clinging to the brick: use a utility knife, a flathead screwdriver, or a stiff putty knife to scrape a small, inconspicuous area (about 1–2 inches) with moderate pressure.
Observe whether paint flakes, peels, or resists. Use varying scratch techniques during adhesion testing to gauge removal effort and choose an appropriate, gentle method.
How To Check Mortar Condition And Risk Of Damage
After you’ve checked how the paint adheres, inspect the mortar next—damaged or crumbly joints can make removal harder and risk further harm to the wall.
Do a mortar inspection and quick damage assessment:
- Probe joints gently with a screwdriver
- Look for gaps, powdering, or loose sand
- Tap for hollow sounds
- Note areas needing repointing before paint removal
How Weather And Age Affect Paint Removal Choices
You’ll want to contemplate how weather and age change the brick’s surface porosity, since wetter or freeze‑thaw cycles can open pores and affect how cleaners penetrate.
Older paint often bonds more tightly as it cures and weathers, so removal methods that worked on newer coatings might be less effective.
Match your technique to the brick’s porosity and the paint’s adhesion to avoid damage and improve results.
Surface Porosity Changes
Because brick absorbs and weathers over time, its surface porosity can change dramatically, and that affects how paint bonds and how easily you can remove it.
You’ll assess surface texture and paint absorption to pick gentler methods. Consider:
- Older, rough bricks: deeper paint absorption
- Smooth, newer bricks: shallower coating
- Frost-damaged: irregular porosity
- Mortar joints: different absorption rates
Paint Adhesion Over Time
While weather and time don’t just change a brick’s color, they also alter how firmly paint sticks to it. So you’ll need to factor adhesion history into your removal plan.
Check paint longevity by inspecting flaking, chalking, and underlying mortar. Cold, UV, moisture cycles, and previous coatings are key adhesion factors.
Match gentler removal methods to weakly bonded paint to avoid damaging brick.
Choose The Right Tools And Protective Gear For Non-Toxic Removal
Before you start scrubbing, make sure you’re geared up with a respirator or mask, chemical-resistant gloves, and eye protection to keep dust and fumes off you.
You’ll also want a few essential tools on hand—soft-bristle brushes, plastic scrapers, a low-pressure washer or garden hose, and non-toxic paint removers or poultices.
Choosing the right combo of protective gear and tools will let you work safely and effectively on the brick.
Proper Protective Gear
Anyone tackling latex paint removal should gear up with the right tools and protective equipment to keep the job non-toxic and safe.
You’ll want gear that protects skin, eyes, and lungs while staying chemical-free.
- protective gloves for scrubbing
- safety goggles to block splatter
- a dust mask or respirator
- knee pads or a cushioned mat
Essential Removal Tools
Now that you’re properly protected, pick tools that let you remove latex paint from brick without harsh chemicals. You’ll need scrapers, stiff nylon brushes, a plastic putty knife, and a hand sprayer for eco friendly options like vinegar or baking soda solutions. Choose tools matched to paint removal techniques and brick condition to avoid damage and speed the job.
| Tool | Use |
|---|---|
| Nylon brush | Agitates paint |
| Scraper | Removes softened paint |
| Sprayer | Applies solutions |
How To Protect Surrounding Plants, Windows, And Woodwork
While you get paint and stripper off the brick, take a few simple steps to shield nearby plants, windows, and woodwork so they don’t suffer stains or chemical damage.
Use targeted plant shielding and secure window covering before you start. Consider:
Shield nearby plants and windows first—cover shrubs, move pots, and tape or cloth over frames and trim.
- Move potted plants away from work area
- Drape breathable cloth over shrubs
- Tape thin plastic on window frames
- Cover wood trim with painter’s tape and cloth
How To Mask And Cover Surfaces Without Trapping Moisture
Moisture build-up can ruin brick and trapped paint stripper will damage masonry, so you’ll want to mask and cover surfaces in ways that shed water and allow airflow; use breathable fabrics for large areas, overlap seams to direct runoff, and leave small ventilation gaps where covers meet walls.
Apply temporary moisture barriers only where needed, avoid impermeable wraps, and test surface sealing to prevent trapped damp.
Preparing An Exterior Wall Versus An Interior Fireplace
When you’re prepping an exterior brick wall versus an interior fireplace, you’ll take different precautions: outside work demands weatherproofing, runoff control, and protection for plants and nearby surfaces, while indoor work focuses on dust containment, floor coverings, and ventilation to handle fumes.
- assess exterior wall considerations like coverings and wind
- isolate the fireplace opening
- protect floors and vents
- wear respirator for fireplace safety
Set Up Outdoor Drainage And Soil Protection
Before you start scrubbing or pressure-washing, plan how runoff will flow and shield nearby soil and plants so paint-laden water doesn’t spread; put down tarps or plastic sheeting anchored with rocks, create temporary berms or trenches to divert runoff into a containment area, and cover shrubs with breathable cloths or move potted plants out of the splash zone.
Then set simple drainage solutions and soil barriers to channel and trap contaminated water, keeping cleanup concentrated and plants safe.
How To Pressure Wash Brick Safely: The Basics
Now that runoff and plants are protected, you can move on to pressure washing the brick safely.
Wear eye protection, test a small area, and avoid mortar damage.
Follow basic brick care: check for loose bricks, keep a steady sweep, and rinse thoroughly.
- Wear PPE
- Test a hidden spot
- Work top-to-bottom
- Rinse and inspect
What Pressure, Nozzle, And Distance To Use For Brick
Although brick’s durable surface can handle higher PSI than wood, you should stick to a safe range—typically 1,200–2,000 PSI—for most exterior brick to blast away dirt and paint without damaging mortar.
Use wider-angle nozzle types (25°–40°) for general cleaning and a 15° for stubborn spots.
Keep the wand 12–24 inches away, and adjust pressure settings gradually.
How To Spot-Test Pressure Washing Before Full Application
Pick a small, inconspicuous patch of brick to test the pressure wash settings so you can see how the surface reacts.
Check adjacent surfaces like mortar, trim, windows, and landscaping for any overspray or damage before you proceed.
If the test area cleans well without harming nearby materials, you can move on with confidence.
Choose Test Area
Where should you start? Pick a small, hidden spot for test area selection to check paint compatibility and surface reaction before full pressure washing.
Try these places:
- behind downspouts
- under eaves
- near a corner
- low-visibility brick
Use low pressure, short bursts, and inspect for color loss, mortar damage, or paint softening before proceeding.
Check Nearby Surfaces
Before you start pressure washing the brick, check nearby surfaces to make sure the spray won’t damage windows, trim, plants, or painted siding.
Tape off fragile areas and cover vegetation.
Test a small patch considering brick condition and various paint types to see how pressure and angle affect adhesion.
Adjust pressure, nozzle, and distance before treating larger sections to avoid unintended damage.
How To Avoid Mortar Erosion When Pressure Washing
When pressure washing brick, you’ll need to control pressure, nozzle choice, and distance to protect the mortar from erosion.
Use gentle settings and test a small area first; follow mortar preservation techniques and basic pressure washing tips to avoid damage.
- Use low psi (500–800)
- Pick a wide-angle nozzle
- Keep 12–18 inches distance
- Work in short passes
How To Use Steam Cleaning On Brick Effectively
Pressure washing can loosen mortar if you’re not careful, so steam cleaning offers a gentler alternative for removing paint, mildew, and grime from brick without high PSI impact.
Use low-pressure steam techniques, keep nozzle perpendicular, and work in small sections.
Test an inconspicuous area first, blot excess moisture, and let masonry dry fully to guarantee brick preservation and avoid mortar weakening.
How To Rent Or Buy A Steam Cleaner For Masonry
One clear choice is to rent a commercial-grade steam cleaner if you only need it for a single project, but buying makes sense if you’ll clean masonry regularly.
If it’s a one-off job, rent a commercial steam cleaner; buy only if you’ll be cleaning masonry frequently.
Compare steam cleaner options, costs, warranties, and power. Follow masonry rental tips and check hoses, nozzles, and pressure ratings.
- rental duration
- unit capacity
- safety features
- transport needs
How To Combine Steam With Manual Scrubbing For Stubborn Spots
Start by steaming the stained area to loosen paint, then follow immediately with a stiff brush or scrubbing pad to lift softened latex from the brick’s pores.
Work small sections, alternate steam techniques with firm, controlled scrubbing methods, rinsing frequently to check progress.
Repeat until spots fade, avoiding over-saturation; finish by blotting dry and inspecting for remaining residue before repeating.
Use A Heat Gun Safely On Brick To Soften Latex Paint
If steaming and scrubbing haven’t fully removed the paint, a heat gun can soften stubborn latex so you can scrape it away more easily.
Use low heat and short passes; test a hidden spot first. Follow safety precautions: wear gloves, eye protection, and keep nozzle away from mortar joints.
Adjust heat settings for brick type.
- low, even passes
- protective gear
- keep distance
- test first
When To Avoid Heat Tools On Brick Or Near Flammable Trim
Before you grab a heat tool, check for nearby flammable trim like wood or vinyl and move or shield it.
Don’t use heat on bricks that are cracked, spalling, or have loose mortar since it can worsen the damage.
Also avoid applying heat near fresh or unknown paint layers that might release hazardous fumes or ignite.
Check For Flammable Trim
When you’re planning to use heat tools on brick, take a close look for any nearby trim or materials that could catch fire; wood, vinyl, and some composites can ignite or melt at relatively low temperatures.
Do a quick trim inspection for flammable materials and keep heat tools away if uncertain.
- Check wood siding
- Inspect vinyl trim
- Look for composite panels
- Note nearby debris
Watch For Brick Damage
While heat tools can speed paint removal, you should avoid using them on cracked, spalling, or loose brick because intense, uneven heat can worsen damage and cause mortar to crumble. You’ll protect masonry by choosing brick preservation techniques and paint removal alternatives like soft scrubbing, poultices, or pressure rinsing at low PSI.
| Risk | Sign | Alternative |
|---|---|---|
| Crack | visible | poultice |
| Spall | flakes | soft scrub |
| Loose | shifting | low PSI |
| Mortar | crumbles | repair |
Avoid Heat Near Paint
If brick around damaged areas shouldn’t see intense heat, you also need to keep heat tools away whenever nearby materials could catch fire or soften.
You’ll protect paint types and varied brick textures by avoiding heat near trim, old sealants, or vents.
Consider alternatives and these cautions:
- Don’t use torches near wood trim
- Avoid heat on peeling latex
- Watch for melted caulk
- Keep vents closed when working
Make And Use A Non-Toxic Poultice From Household Ingredients
Once you’ve softened the paint with a gentle cleaner, you can make a simple, non-toxic poultice from ingredients you likely already have at home: baking soda, dish soap, and water (or white vinegar for tougher spots).
Mix to a thick paste, spread over paint, cover with plastic, and tape edges. Leave 30–60 minutes, then scrape gently and rinse.
Use gloves and repeat as needed.
How Baking Soda Paste Works And When To Use It
A simple baking soda paste works by combining mild abrasiveness with gentle alkalinity to lift softened latex paint without damaging most brick surfaces.
A baking soda paste uses gentle abrasiveness and mild alkalinity to lift latex paint without harming most brick surfaces
You’ll use this when paint is fresh or partially removed; baking soda effectiveness shows on porous brick.
For paste application, try these steps:
- Mix baking soda and water to a spreadable paste
- Apply directly to paint
- Let sit briefly
- Agitate gently and rinse
Make A Sugar-Free Poultice Using Talc Or Clay
When baking soda paste doesn’t fully lift stubborn spots, try a sugar-free poultice made from talc or clay to draw out deeper paint residues without adding sticky mess. Mix talc properties or clay benefits with water to a thick paste, apply, cover, wait, then peel and rinse.
| Material | Texture | Action |
|---|---|---|
| Talc | Fine | Absorbs |
| Clay | Smooth | Draws |
| Water | Binder | Activates |
How To Use White Vinegar As A Mild Paint Softener Safely
You’ll want to mix white vinegar with water at about a 1:1 to 1:3 ratio depending on paint thickness.
Then test a small, hidden spot first.
Apply the solution with a spray bottle or soaked cloth, let it sit briefly to soften the latex, and gently scrape or brush the paint away.
Rinse the area thoroughly with clean water and a baking soda solution to neutralize any acidity and protect the brick.
Vinegar Dilution Ratio
If the paint is fresh or only slightly adhered, dilute white vinegar with water to soften it gently without damaging the brick; a safe starting ratio is one part vinegar to two parts water, which you can increase to equal parts for tougher spots.
Use vinegar effectiveness over harsh alternative solvents and remember to test first.
- Start mild
- Increase cautiously
- Rinse after use
- Repeat as needed
Application Methods
Start by applying the vinegar solution to a small, inconspicuous patch of brick to confirm it softens the paint without harming the surface.
Use a spray bottle or brush for controlled application, testing varied dwell times.
Scrape gently with a plastic scraper, repeating as needed.
Mind surface considerations like mortar joints and porous brick; choose application techniques that minimize saturation and abrasion.
Rinsing And Neutralizing
Once the paint has softened and you’ve loosened flakes with a scraper, rinse the area thoroughly to remove vinegar residue and lifted paint.
Use gentle rinsing techniques and follow with neutralizing agents to protect brick and mortar:
- Hose with low-pressure stream
- Soft brush to dislodge particles
- Mild baking soda solution as neutralizer
- Blot excess moisture and air-dry before inspecting
How To Use Oxygen Bleach (Sodium Percarbonate) As A Gentle Cleaner
Oxygen bleach (sodium percarbonate) is a safe, non-chlorine cleaner you can use to lift latex paint from brick without damaging masonry or surrounding plants.
Mix per package directions, apply with a brush or low-pressure sprayer, let sit 10–15 minutes, then scrub and rinse.
Note oxygen bleach benefits for color-safe cleaning; sodium percarbonate application works best on fresh or lightly bonded paint.
Using Biological (Enzyme) Cleaners On Aged Latex Paint: When And How
1 reliable option for breaking down stubborn, aged latex paint on brick is a biological (enzyme) cleaner formulated to digest organic binders and pigments.
You’ll assess enzyme effectiveness, apply per label, rinse gently, and repeat as needed.
Consider these steps:
Consider these steps: test first, apply with care, let dwell 30–60 minutes, then rinse and reassess
- Test on a hidden spot first
- Apply with brush or low-pressure sprayer
- Let dwell 30–60 minutes
- Rinse and inspect for retreatment
How To Scrape Paint Mechanically Without Chipping Brick
If enzyme cleaners soften the paint but leave flakes or stubborn patches, you’ll need careful mechanical removal to finish the job without damaging the brick.
Work with flat, flexible scrapers at low angle, use gentle tapping with a plastic mallet, and keep the surface damp.
Focus on incremental paint removal, preserve mortar joints, and prioritize paint removal techniques that respect brick surface care.
Which Brushes And Scrapers Work Best On Rough Vs. Smooth Brick
When you’re working on rough brick, choose stiff, high-penetration bristle brushes and rigid-edged scrapers to get into pits and crevices; for smooth brick, switch to softer nylon brushes and flexible putty knives to avoid gouging the surface while still lifting softened paint.
- Use stiff brush types for mortar lines.
- Pick narrow scrapers for tight spots.
- Favor flexible scraper techniques on smooth faces.
- Test tools on a small area first.
How To Use Nylon And Brass Brushes Correctly On Masonry
Start by choosing the right brush for the job: use nylon brushes with soft to medium stiffness on painted or delicate masonry to avoid scratching, and switch to brass-bristled brushes for tougher, baked-on paint or efflorescence where you need more abrasion without chipping the brick.
Use Nylon brush techniques: scrub gently with the grain, rinse frequently.
Follow Brass brush maintenance: clean and dry to prevent corrosion.
How To Use A Masonry Chisel Without Damaging Joints
One clear rule to follow is to work slowly and deliberately with a masonry chisel so you remove mortar or paint without nicking brick edges or loosening joints.
Use proper masonry chisel techniques and joint protection methods:
- Hold chisel flat, angle shallow
- Tap gently, increase force gradually
- Support adjacent bricks with a pry bar
- Clean chips away frequently to inspect joints
Low-Impact Abrasive Media Options For Brick
When you need a gentler approach, start with soft-bristle brushing to lift loose paint and dirt without abrading the brick.
If residue persists, consider walnut shell blasting, which strips paint more aggressively but still minimizes surface damage compared with harder abrasives.
Test either method on an inconspicuous area first so you can judge effectiveness and adjust pressure.
Soft Bristle Brushing
Lightly scrub the paint with a soft-bristle brush to lift loose latex without damaging the brick’s surface or mortar.
You’ll see soft bristle benefits on delicate brick surface types, preserving texture while removing film. Use gentle, consistent strokes and rinse often.
- Choose nylon or natural fibers
- Test in an inconspicuous spot
- Work along mortar lines
- Avoid excessive pressure
Walnut Shell Blasting
If soft brushing doesn’t remove stubborn latex, consider walnut shell blasting as a low-impact abrasive option for brick.
You’ll direct crushed shells at low pressure to peel paint without etching mortar. Walnut shell applications work well on historic or delicate surfaces, reduce dust, and rinse clean.
As one of several eco friendly alternatives, it limits chemical use while preserving brick texture and color.
Renting Low-Impact Abrasive Tools For Masonry
Because brick is porous and easily damaged, you’ll want low-impact abrasive tools that strip paint without gouging mortar or etching the surface.
Rent equipment from local centers; ask about eco friendly options and nozzle sizes.
Consider:
- Soft media blasters
- Low-pressure sanders
- Handheld rotary brushes
- Dust-containment attachments
Inspect tools before checkout, and follow safety and manufacturer guidelines.
How To Combine Methods For Stubborn, Layered Paint
When paint’s built up in multiple layers, you’ll get the best results by sequencing techniques so each method prepares the surface for the next; start with the gentlest option that removes the topcoat and work toward stronger measures for deeper layers.
You should test mild chemical strippers, low-pressure washing, and gentle abrasive tools in stages, balancing paint removal techniques with brick surface considerations to avoid damage.
How To Clean Residue And Rinse Brick After Treatment
Brush away loosened flakes and rinse thoroughly to prevent chemical residues or paint fragments from re-adhering or staining the brick.
Brush away loosened flakes and rinse thoroughly to keep chemical residues or paint fragments from re-adhering to the brick
Use gentle cleaning techniques and deliberate rinsing methods to finish the job. Then:
- Sweep or brush loosened debris into a dustpan.
- Apply low-pressure water from bottom up.
- Spot-clean stubborn residue with a soft brush.
- Allow full drying before inspecting for missed spots.
How To Treat Mortar Stains Left After Paint Removal
After you remove paint from the brick, check the mortar for any etching, crumbling, or discoloration so you know how much repair it needs.
Try gentle cleaning first—soft brush, mild detergent, or a poultice—before using stronger treatments.
Once stains are gone and the mortar’s sound, reseal the joint and consider a breathable masonry sealer to protect against future staining.
Assess Mortar Damage
Mortar often absorbs pigment and solvent residues during paint removal, leaving darker or discolored patches that won’t lift with brick cleaners alone.
You should inspect joints for crumbling, depth loss, staining, and weakened mortar integrity. Note areas needing repair techniques before cleaning.
- Check for cracks and gaps
- Tap for hollow sounds
- Measure joint depth
- Photograph damage for reference
Gentle Cleaning Methods
When you’ve identified joints that absorbed paint or solvent residues, start with gentle cleaning methods to avoid further damage to the mortar.
You can use soft-bristled brushes, mild detergent, and warm water to loosen stains. For tougher spots, try eco-friendly options like diluted vinegar or baking soda paste.
These DIY solutions lift residue without harsh chemicals; rinse thoroughly and repeat as needed.
Reseal And Protect
If paint removal left stains or weakened joints, you’ll want to treat and reseal the mortar to restore protection and prevent moisture intrusion.
Clean stained mortar, let it dry, then apply a compatible sealer. Choose protective coatings that allow vapor exchange and deliver a resilient finish.
Steps:
- Assess damage
- Use poultice or gentle scrub
- Rinse and dry thoroughly
- Apply sealer per instructions
How To Dry And Inspect Brick For Hidden Damage
Once the paint’s gone, let the brick air-dry thoroughly—this usually takes 24–48 hours depending on temperature and humidity—so you can spot any hidden damage without false positives from dampness. Do a brick inspection and moisture assessment, look for efflorescence, spalling, or soft mortar, and document locations for targeted repairs.
| Area | Condition |
|---|---|
| Wall A | Good |
| Wall B | Efflorescence |
| Wall C | Soft mortar |
| Wall D | Spalling |
How To Repair Minor Mortar Damage After Paint Removal
Start by evaluating the mortar damage you found during the inspection and decide which areas need simple patching versus full repointing.
You’ll use basic mortar repair techniques after your paint removal strategies to avoid further harm. Follow these steps:
- Remove loose mortar and clean joints
- Mix matching patch mortar
- Apply and compact with a pointing tool
- Cure and brush to blend
How To Match Mortar Color When Repointing Small Areas
When matching mortar color for small repointing jobs, you’ll focus on tint, texture, and weathering so new patches blend with the old work. You’ll sample existing mortar, mix pigments into matching sand-cement blends, and test cures. Use gentle repointing techniques to avoid damage.
| Step | Action | Tip |
|---|---|---|
| 1 | Sample mortar | Photograph color |
| 2 | Mix small batches | Adjust pigment |
| 3 | Test patch | Let cure |
Prep Brick For Repainting Or Sealing
After matching and repointing mortar, you’ll want to prepare the surrounding brick before repainting or sealing to guarantee a uniform finish and proper adhesion.
Clean, dry, and inspect surfaces using basic brick preparation techniques, then choose appropriate sealing options. Follow these steps:
- Remove loose debris with a stiff brush
- Wash with mild detergent
- Let bricks fully dry
- Repair small defects before coating
How To Choose A Breathable Sealer That Won’t Trap Moisture
Because trapped moisture can cause spalling and mold, pick a sealer that actually lets vapor pass through while still repelling liquid water.
Choose breathable sealers labeled “vapor-permeable” or “water-repellent breathable” and check vapor transmission ratings.
Choose only vapor-permeable, water-repellent breathable sealers and verify their vapor transmission ratings before applying.
Prioritize breathable masonry products designed for moisture management, UV stability, and compatibility with previously cleaned brick.
Test a small area to confirm no darkening or vapor trapping before full application.
How To Estimate Time And Cost For DIY Non-Toxic Removal
Start by sketching a time breakdown so you know how many hours to expect for prep, application, dwell time, scrubbing, and cleanup.
Add up cost components like cleaners, brushes, protective gear, rental tools, and any waste disposal fees.
With those estimates you’ll decide if a DIY non-toxic approach fits your schedule and budget.
Time Breakdown Estimate
Estimate time and cost by breaking the job into clear tasks—surface prep, product application, dwell time, scrubbing, rinsing, and touch-ups—and assigning realistic durations and material needs to each so you can plan labor and buy right-sized supplies.
Use time management and project organization to stay efficient. Plan per-section timings:
- Prep: assess, mask, and gather supplies
- Apply: safe remover, methodical coverage
- Dwell/scrub: wait then agitate
- Rinse/touch: clean, inspect, repeat if needed
Cost Components Summary
Begin by listing the specific cost components you’ll encounter so you can budget accurately: supplies (biodegradable cleaners, scrapers, brushes), rentals (pressure washer), safety gear, disposal, and unexpected repairs.
For clear cost analysis, estimate unit prices and time per task. Factor labor, replacement bricks, and contingency.
Use budget considerations to set a realistic total and avoid surprises.
When To Call A Pro (And What To Expect)
If the paint’s soaked deep into the mortar, covers a large area, or you’re dealing with historic brick, call a professional—trying aggressive removal yourself can damage the brick or its structural joints.
Contact paint professionals experienced in brick restoration. They’ll assess, quote, and use gentle methods.
Expect:
- inspection and test patches
- tailored chemical-free techniques
- protective measures
- cleanup and final guidance
How To Avoid Common Mistakes That Permanently Damage Brick
Because most mistakes happen from haste or using the wrong tools, take a methodical approach: test cleaners on a hidden area, use only recommended soft brushes and low-pressure rinsing, avoid wire brushes or high-pressure washers that pit brick and erode mortar, and never mix chemical strippers unless directed—these steps prevent permanent surface damage and costly repairs.
Stick to proven brick preservation techniques, reject paint removal myths, and proceed slowly.
How To Protect Yourself From Dust And Airborne Particles
When you’re removing paint from brick, you should wear a rated respirator to keep harmful dust and fumes out of your lungs.
Also protect your eyes and skin with goggles, gloves, and long sleeves.
Finally, control dust with good ventilation or a HEPA-filtered fan to keep particles from spreading.
Wear A Rated Respirator
Before you start scraping or sanding paint off brick, put on a properly rated respirator to protect your lungs from dust, paint particles, and any lead or other contaminants that might be present.
Choose according to respirator types and safety standards, fit-test it, and replace filters as needed.
- N95 or P100 for particulates
- Half-mask with cartridges
- Fit-check every session
- Store clean and dry
Use Eye And Skin Protection
If you’ll be chiseling, sanding, or blasting paint from brick, protect your eyes and exposed skin—dust and paint chips can cause irritation, cuts, and chemical burns.
Wear sealed goggles for eye safety and a face shield when impact risks are high.
Cover arms and legs, use disposable sleeves, and apply barrier cream for basic skin care.
Cleanse promptly after work.
Control Dust With Ventilation
Protecting your eyes and skin is only part of the job—you also need to keep dust and airborne paint particles out of your lungs and off surfaces.
Use ventilation and simple dust control to stay safe:
- Open windows to boost air circulation
- Run a box fan exhausting outward
- Wear an N95 for fine particles
- Seal off adjacent rooms with plastic sheeting
How To Dispose Of Paint Flakes And Poultice Waste Responsibly
When you finish scraping or using a poultice, treat the resulting paint flakes and residue as potential hazardous waste and handle them deliberately: bag scraps in heavy-duty, sealed plastic; label containers; keep them dry.
Contact local paint disposal or household hazardous waste programs for proper paint disposal instructions. Don’t dump residues down drains or in regular trash.
Follow waste management rules to protect soil and water.
How To Maintain Restored Brick To Prevent Future Paint Buildup
After you’ve cleaned up and disposed of paint flakes properly, keep restored brick looking good by setting up a simple maintenance routine.
Use these brick maintenance tips and paint prevention strategies to avoid buildup:
- Inspect annually for peeling or drips.
- Clean gently with a soft brush and mild detergent.
- Reseal porous areas with breathable masonry sealer.
- Trim vegetation and control runoff to prevent paint adhesion.
Frequently Asked Questions
Can Latex Paint Removal Change Historic Brick’s Appearance or Value?
Yes — you can alter historic brick’s appearance and value if you aren’t careful. You’ll affect historic preservation goals and surface patina; inconsistent paint removal or wrong paint consistency can damage mortar, texture, and documented authenticity.
Will Non-Toxic Methods Remove Paint Between Brick Pores Fully?
Sometimes you will remove surface paint, sometimes you won’t; non toxic solutions can loosen layers, but they can’t always extract paint deep in pores. You’ll need persistence, soft abrasion, and attention to paint adhesion differences.
How Long Before Repainting After Using Oxygen Bleach?
You should wait 24–48 hours before repainting after using oxygen bleach; you’ll guarantee paint drying and proper surface preparation by confirming the brick is dry, residue-free, and slightly porous so new paint will adhere well.
Are There Pet-Safe Residues Left After Poultice or Enzyme Treatments?
Yes — you’ll usually find pet safe options that minimize residue concerns, but you should rinse thoroughly and test a small area; if any residue remains, it’s usually low-toxicity and can be removed with extra rinsing.
Can Repeated Gentle Removal Methods Weaken Brick Over Years?
Yes — gentle methods repeated over years can gradually erode mortar and surface, yet they’re less damaging than harsh abrasives; you’ll trade immediate force for slow wear, so monitor long term effects on brick integrity.
Conclusion
You’ve peeled back paint like unwrapping an old story, and your brick’s true voice is ready to sing. With gentle tools, patience, and the right tests, you’ve avoided harsh chemistry and preserved character. Keep the mortar’s memory by tending to runoff, storing remnant flakes, and sweeping regularly so paint doesn’t creep back. Treat restoration like gardening—small, steady care prevents weeds; your brick will repay you with timeless warmth and quiet, durable pride.