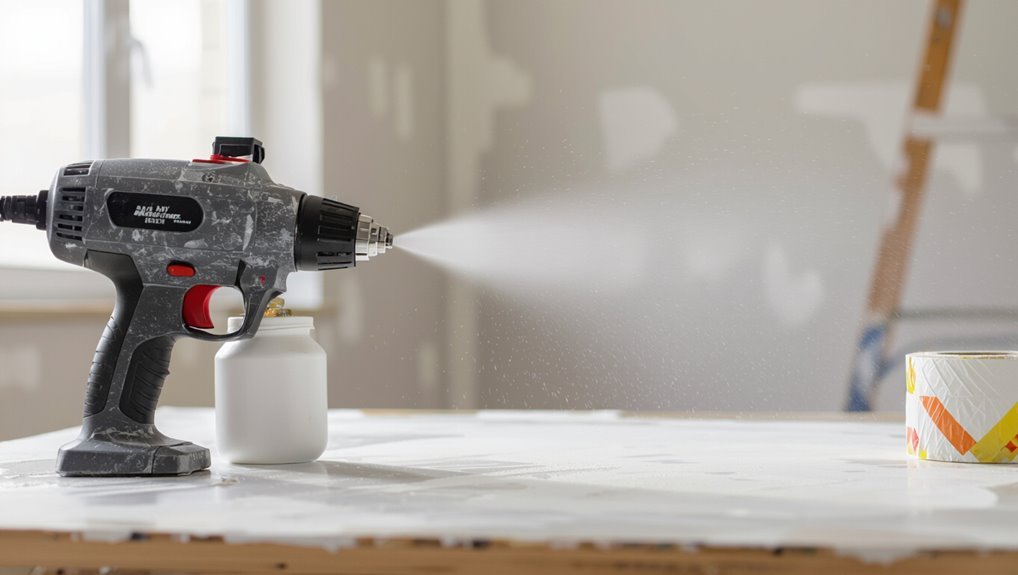
How to Spray Latex Paint for Smooth Professional Finish
To get a smooth, professional latex finish, prep the surface well—clean, patch, and sand—then mask off surrounding areas. Choose a sprayer suited to the job (HVLP for trim, small airless for walls), thin paint to the recommended viscosity, and use a 50% overlap with thin, even passes. Hold the gun 8–12 inches away, keep steady speed and pressure, and sand between coats for flawless buildup; follow the next steps for tips, tools, and troubleshooting.
Step-By-Step: How to Spray Latex Paint for a Smooth Professional Finish
Gather your tools, prep the surface, and set the sprayer — then you’re ready to apply latex paint like a pro.
Start with thin, even passes, keeping the nozzle parallel and moving steadily to control paint flow. Overlap each pass by about 50%, adjust spray technique for edges, and sand between coats lightly.
Finish with a uniform, consistent coverage.
Why Spray Latex Paint for a Professional Finish
When you spray latex paint, you’ll cover large areas much faster than with a brush or roller.
The fine mist gives even, smooth coats that hide brush marks and texture. That results in a durable, professional-looking finish that lasts.
Faster, Even Coverage
Because spraying lays down paint in a fine, consistent mist, you’ll cover large areas much faster than brushing or rolling, and the finish will look smoother and more professional.
You’ll use proper spray techniques, sprayer calibration, and nozzle maintenance to control coat thickness and paint application.
Consider surface preparation, environmental factors, and drying times to guarantee paint adhesion and finish durability.
- Wide, even strokes
- Overlap passes
- Steady distance
- Adjust pressure
Smooth, Durable Finish
One key reason pros choose spray equipment is that it lays down ultra-fine, uniform coats that level out as they dry, giving you a smooth, factory-like surface with fewer visible brush or roller marks. You’ll get consistent coverage, faster curing, and better durability after proper surface preparation and durability testing.
| Step | Benefit | Tip |
|---|---|---|
| Prep | Adhesion | Clean |
| Spray | Evenness | Thin coats |
| Cure | Hardness | Ventilate |
| Test | Longevity | Scratch test |
| Finish | Shine | Polish |
When to Spray Versus Roll or Brush Latex Paint
Want a smooth, fast finish or are you painting a small trim piece? You’ll weigh sprayer types against brushes or rollers based on project surfaces, finish quality, spray control, application techniques, paint additives, equipment maintenance, and environmental effects.
Choose spraying for large, detailed or textured areas; roll or brush for tight spots, touch-ups, or delicate trim.
- Large walls and ceilings
- Intricate trim and moldings
- Textured exteriors
- Small repairs and corners
Choosing the Right Latex Paint Type for Spraying
When you’re choosing paint for spraying, consider the base and sheen since they affect flow and final appearance.
Check viscosity and whether the paint needs thinning to pass cleanly through your sprayer.
Also weigh pigment load and coverage so you don’t need extra coats.
Paint Base And Sheen
Because the base and sheen you choose affect coverage, drying time, and finish durability, pick a latex formulated for spraying rather than brushing or rolling.
Choose satin or semi-gloss for durability; flat for hiding flaws. Consider paint types, color selection, application techniques, drying times, environmental factors, maintenance tips, and storage solutions.
- Satin: durable, easy clean
- Semi-gloss: high durability
- Eggshell: subtle sheen
- Flat: hides imperfections
Viscosity And Thinning
Viscosity determines how well latex paint flows through your spray gun, so you’ll need to thin thicker formulas to prevent clogging and secure an even atomization.
Test viscosity with manufacturer charts and a viscosity cup, adjust slowly using recommended water or specific paint additives, and practice spray technique on scrap.
Proper thinning keeps edges sharp, reduces overspray, and guarantees consistent coverage without altering color.
Pigment And Coverage
1 key factor in choosing latex for spraying is pigment concentration, since it directly affects hiding power and how many coats you’ll need.
You’ll want balanced pigment selection for tint stability and sprayability. Match paint type to substrate, test coverage techniques, and plan coat count to avoid overspray. Consider sheen and solids for durability.
- high-pigment for covering stains
- light tints for smooth laydown
- test spray pattern
- adjust thinning
Picking the Right Paint Sheen for a Sprayed Finish

Wondering which sheen will give your sprayed latex the look and durability you want? You’ll weigh paint finish options—flat, satin, semi-gloss—by appearance, cleanability, and surface flaws. Use a quick sheen comparison to match room function: low sheen hides imperfections; higher sheens resist scuffs. Choose based on traffic, light, and desired sheen level.
| Sheen | Best for | Durability |
|---|---|---|
| Flat | Ceilings | Low |
| Satin | Trim/Rooms | Medium |
How to Choose Between HVLP, Airless, and Turbine Sprayers
Now that you’ve matched sheen to room and traffic, pick a sprayer that delivers the finish and speed you need.
Consider HVLPCost Comparison for fine detail, AirlessSprayer Benefits for high output, and TurbineSprayer Features for portability.
Consider HVLP for fine detail, airless for high output, and turbine options when portability matters.
Check SprayerMaintenance Tips and UserExperience Reviews.
Balance EfficiencyVersusQuality, weigh ProjectSize Considerations, and explore SprayerVersatility Options.
- HVLPCost Comparison
- AirlessSprayer Benefits
- TurbineSprayer Features
- SprayerMaintenance Tips
Matching Sprayer Tip Size to Latex Paint and Project
You’ll want to match tip size to the paint’s viscosity so the nozzle can lay down a smooth, even coat without clogging.
Pick larger tips for thicker latex and big, rough surfaces, and smaller ones for thin finishes or detailed work.
Consider both the paint consistency and the surface texture when choosing a tip so you get the right flow and coverage.
Tip Size Basics
When you pick a sprayer tip, match its orifice size to both the latex paint’s viscosity and the job’s scale — thin stains and lacquers need much smaller tips than heavy exterior latex or textured coatings.
You’ll select tip size by desired flow and spray patterns to control coverage, atomization, and overspray.
- Fine tip: narrow fan, detailed work
- Medium: smooth interior walls
- Wide: fast exterior coverage
- Extra wide: textured coatings
Paint Viscosity Match
Because latex paint comes in different thicknesses, pick a sprayer tip that matches the paint’s viscosity and the scale of your project so you get even atomization and minimal clogging.
Test varying tip sizes with your paint thickness and thinner if needed to reach target spray consistency.
Use larger tips for heavier paints and broader work, smaller tips for fine detail, and always strain before spraying.
Project Surface Considerations
Looking to match tip size to both your latex paint and the surface you’re coating?
You’ll choose tips based on surface materials, texture considerations, and adhesion properties.
Do pre paint inspections, confirm substrate stability, and prioritize surface cleanliness and surface preparation.
Account for environmental factors like humidity and temperature to guarantee consistent atomization and adhesion.
- Smooth wood
- Rough masonry
- Textured drywall
- Metal with primer
Calculating Spray Capacity and Power for Your Job Size
Anyone tackling a spraying project should match the sprayer’s output and air power to the job’s size and materials; that means calculating required flow rate (GPH or ounces/minute), pressure, and hose/nozzle specs so you don’t under- or overbuy equipment.
For sprayer selection, estimate surface area, coat thickness, and material viscosity. Balance flow and PSI to maximize job efficiency, minimize passes, and avoid clogging.
Essential Safety Gear for Spraying Latex Paint
Before you start spraying, make sure you’ve got the right respiratory protection—an N95 or respirator with organic vapor cartridges for heavier solvents—and know how to fit it properly.
Protect your skin and eyes with gloves, long sleeves, and splash-resistant goggles.
Also keep the area well ventilated or use forced exhaust so fumes don’t build up while you work.
Respiratory Protection Essentials
Spray painting kicks up fine mist and vapors that your lungs can’t safely ignore, so you’ll want the right respiratory protection anytime you’re spraying latex paint.
Choose respirator types meeting safety standards, check filter ratings, and follow safety protocols to limit paint fume exposure and health risks. Use protective gear and ventilation systems to maintain air quality within exposure limits.
- NIOSH-certified respirators
- P100 or N95 filters
- Local exhaust ventilation
- Fit testing and maintenance
Skin And Eye Protection
Respiratory protection keeps paint fumes out of your lungs, but you also need to shield your skin and eyes from overspray and splashes.
Wear chemical-resistant gloves and coveralls for reliable skin protection, and choose splash-proof safety goggles or a full-face shield for eye safety.
Rinse immediately if contact occurs, and replace contaminated gear—keeping a dedicated, clean set prevents cross-contamination and irritation.
Ventilation And Respiratory Safety
Because latex paint fumes and fine mist can build up quickly in enclosed spaces, you need effective ventilation and the right respiratory protection whenever you spray.
Use ventilation techniques and ventilation systems to control air quality and minimize chemical exposure. Choose respiratory masks rated to safety standards and include protective equipment in your workspace setup.
- Open cross-ventilation and exhaust fans
- HEPA filtration units
- NIOSH-rated respirators
- Monitor air quality sensors
Tools and Extras You Should Have Before Starting
Before you start, gather a few essential tools and extras so you won’t interrupt the job to hunt for them: a quality HVLP or airless sprayer suited to latex, assorted tips and filters, extension hoses or poles, drop cloths and masking materials, and personal protective equipment like goggles, gloves, and an NIOSH-approved respirator.
Plan projects, follow safety precautions, perform sprayer maintenance, use paint additives wisely, test surfaces, and account for environmental factors.
Preparing Interior Surfaces for Spraying Latex Paint
1. You’ll handle surface preparation for spraying: start with wall cleaning, dust removal, and moisture control, then do texture assessment and damage repair to guarantee paint adhesion and surface smoothing.
Choose primer selection carefully for interior priming. Follow these concise steps:
Choose primer wisely for interior surfaces—follow concise steps to prep walls and apply the proper primer before spraying
- Wipe walls, vacuum trim
- Patch holes, sand rough spots
- Check for dampness, fix leaks
- Apply proper primer before spraying
Preparing Exterior Wood and Siding for Spraying Latex Paint
When you’re prepping exterior wood and siding for a latex paint spray job, focus on cleaning, damage repair, and priming so the finish lasts and adheres properly.
Inspect for rot, loose boards, and old peeling paint; replace or secure damaged pieces.
Sand glossy areas, apply appropriate primer, and follow wood surface preparation best practices.
Regular siding maintenance extends paint life and prevents costly refinishes.
Cleaning and Repairing Surfaces to Avoid Texture Issues
If you want a smooth, even finish, clean and repair surfaces thoroughly so dirt, loose paint, and imperfections won’t telegraph through the spray coat.
You’ll use surface inspection and damage assessment to plan surface preparation, apply targeted cleaning techniques, and choose repair methods that prevent texture issues.
- Remove mildew and grime
- Strip loose paint
- Fill cracks and gouges
- Prime repaired areas
Sanding Tips to Create a Smooth Sprayed Substrate
Sand the surface evenly with progressively finer grits to knock down high spots and feather edges so your sprayed coat lays on smoothly; use proper sanding techniques and grit selection for surface preparation.
Work with sanding blocks and sanding tools, follow sanding intervals, and perform dust removal between passes.
Wear safety precautions—mask and goggles—and inspect for uniformity before priming or spraying.
Masking Strategies to Protect Windows, Fixtures, and Floors
Before you start spraying, you’ll want to shield windows and frames with painter’s tape and plastic sheeting so you don’t get overspray on glass or trim.
Cover floors with drop cloths or rosin paper and weigh edges down to prevent paint tracking.
For light fixtures and outlets, remove what you can and wrap the rest tightly to keep paint out of crevices.
Protecting Windows and Frames
Someone who wants clean lines and no unexpected drips should take masking seriously: cover window glass, trim, hardware, and nearby floors with the right tape and paper before you start spraying.
You’ll do pre painting prep: surface cleaning, glass coverings, frame masking, edge sealing, and choose spray tape.
Mind weather considerations for adhesion and plan paint removal if needed.
- tape window edges
- protect frames
- secure drop cloths
- inspect seals
Covering Floors and Fixtures
1 simple strategy for keeping floors and fixtures spotless is to plan your masking layout before you load the sprayer: start with drop cloths and rosin paper for floor protection, secure seams with tape, and cover vents and hardware with plastic.
Use low-tack masking for windows and painter’s tape for trim to guarantee steady fixture coverage, removing tape before paint fully cures for clean edges.
Set Up a Simple Spray Booth or Controlled Spray Area
When you’re ready to spray, carve out a dedicated, well-ventilated area—indoors or outdoors—where overspray won’t contaminate other surfaces.
Plan a simple spray booth design to maintain a controlled environment: seal edges, use drop cloths, and control airflow. Prepare tools and safety gear before you begin.
- plastic sheeting
- box fan with filter
- clamp lights
- respirator and goggles
How to Thin Latex Paint Correctly for Your Sprayer
Before you start spraying, you’ll want to measure the paint’s viscosity with a cup or meter so your sprayer gets a consistent flow.
If the paint’s too thick, adjust the thinner ratio gradually—add small amounts, mix thoroughly, and retest until you hit the manufacturer’s recommended range.
Keep notes of the exact ratios that work for your sprayer and the environmental conditions so you can repeat the result.
Measure Viscosity Properly
If your sprayer’s tip clogs or the finish looks uneven, you likely need to check paint viscosity and thin the latex until it flows correctly.
Use viscosity measurement techniques and target ideal thinning ratios for your sprayer type. Measure with a flow cup or viscosity cup, watch spray pattern, test on cardboard, and record results to repeat successful mixes.
- flow cup reading
- spray pattern check
- test panel trial
- documented mix ratios
Adjust Thinner Ratios
Although adjusting thinner ratios seems fiddly, getting the mix right is essential for smooth atomization and a uniform finish.
So start by consulting your sprayer’s manual and the paint manufacturer’s guidelines, then thin incrementally—small additions, test spray, and record results—until the flow cup reading and spray pattern match the ideal for your gun.
Use recommended thinner types, note viscosity changes, and refine application techniques.
Testing Viscosity: How to Use a Viscosity Cup and Flow Test
When you’re getting ready to spray latex, testing viscosity with a viscosity cup and a simple flow test tells you whether the paint will atomize evenly and avoid runs or clogging.
You check viscosity measurement and flow consistency by timing cup drain and observing bead spread; adjust until steady, then retest.
- Time cup drain
- Inspect bead edge
- Note spray pattern
- Repeat after tweaks
Mixing Paint, Additives, and Extenders Safely
After you’ve confirmed the paint thins and flows correctly, it’s time to mix and measure additives and extenders with care.
You should wear gloves and goggles, follow manufacturer ratios, and add paint additives slowly while stirring consistently.
Keep containers labeled, avoid over‑thinning, and use clean tools.
Practice safe mixing to preserve finish quality and prevent compatibility issues or equipment damage.
Strain Latex Paint to Prevent Clogs and Orange Peel
Before you spray, strain your latex paint to remove lumps and debris that can clog the gun or cause orange peel.
Pick a strainer sized for your sprayer—fine mesh for HVLP and slightly coarser for airless systems—and don’t force paint through a screen that will tear or stretch.
Use a clean container, pour slowly, and replace strainers if they clog to keep flow smooth and finish even.
Choose The Right Strainer
Although it’s tempting to pour straight from the can, you’ll want to strain latex paint to catch debris and skin that can clog a sprayer and cause orange peel.
Choosing the right strainer guarantees consistent flow and a smooth finish. You’ll pick strainer types and ideal mesh for paint filtering, learn strainer importance, common clogs, maintenance tips, and paint preparation.
- Fine mesh bags for smooth coats
- Metal cone for durable use
- Disposable cups for quick jobs
- Reusable screens for economy
Proper Straining Technique
You’ve picked the right strainer; now use it correctly to keep your sprayer clog-free and your finish smooth.
Pour paint slowly through recommended paint filtering methods, avoid overfilling, and tap the strainer to release trapped particles.
Change or clean straining tools between colors and sessions.
Strain into a clean container, inspect for debris, and strain again if needed to prevent orange peel and nozzle blockages.
Sprayer Set-Up: Filters, Hoses, and Pressure Settings
Getting your sprayer dialed in means paying close attention to filters, hoses, and pressure settings, since each affects flow, atomization, and finish quality.
Dialing in your sprayer starts with filters, hoses, and pressure—each one shapes flow, atomization, and the final finish.
Use sprayer maintenance tips and pressure adjustment techniques: clean or replace filters, inspect hoses for kinks, set coarse then fine pressure, and test on scrap. Maintain consistent pressure for even coats.
- Clean filters frequently
- Check hose integrity
- Adjust pressure gradually
- Test spray pattern
Loading and Priming Your Sprayer Without Air Pockets
Now that your filters, hoses, and pressure are sorted, it’s time to load and prime the sprayer so paint flows smoothly without trapping air.
Pour slowly, secure lids, and open bleed valves per manufacturer instructions. Run fluid until steady, watching for bubbles. Repeat if needed.
These sprayer maintenance steps prevent clogs; follow troubleshooting tips if sputtering or inconsistent flow appears.
Spray Gun Technique: Distance, Angle, and Speed
Keep the spray gun about 8–12 inches from the surface for an even coat and to prevent runs.
Hold the gun perpendicular to the work and move it in smooth, steady passes at a consistent speed.
If you keep distance and movement uniform, you’ll get uniform coverage without heavy edges.
Optimal Spray Distance
The sweet spot for spray distance is usually 6–12 inches from the surface — close enough for even coverage but far enough to prevent runs and heavy buildup; hold the gun steady, maintain a consistent distance as you move, and adjust slightly for texture or contour.
- Check nozzle adjustment and sprayer calibration for uniform fan.
- Match paint consistency and color matching needs.
- Monitor air pressure and drying conditions.
- Prioritize surface preparation and equipment maintenance considering environmental factors.
Consistent Gun Movement
Maintain a steady, deliberate motion with the gun so your strokes stay parallel and your distance, angle, and speed remain consistent; this gives an even coat, prevents runs, and cuts down on overlap marks.
You should practice a uniform spray technique, keeping gun positioning square to the surface and moving at a steady pace.
Adjust speed, not pressure, to control coverage and avoid pooling.
Overlap Patterns and Strokes for Consistent Coverage
When you overlap each pass by about 50% and keep your strokes steady and parallel, you’ll avoid streaks and uneven buildup; aim for smooth, continuous motions and let the sprayer do the work rather than chasing coverage.
Use consistent strokes and match spray patterns to the surface.
Use consistent strokes and match spray patterns to each surface for even, professional results.
- Hold gun perpendicular and steady
- Keep parallel, even passes
- Maintain same speed
- Blend edges on return
Managing Coat Thickness to Avoid Runs and Drips
If you apply thinner, even coats and keep the sprayer moving at a steady pace, you’ll prevent runs and drips while still building good coverage.
Watch spray patterns and adjust paint pressure to lay a uniform film. Back off if drips form, then sand and respray.
Multiple light passes beat one heavy coat. Inspect edges and overlap consistently for an even finish.
How Environmental Conditions Affect Sprayed Latex Paint
You’ll need to adjust for temperature because cold paint gets thicker and hot conditions thin it, which changes spray pattern and atomization.
Humidity affects how fast latex skins and dries, so high moisture can lengthen dry time and increase sag risk.
And if you’re spraying outdoors, wind blows overspray and makes control harder, so plan for wind protection or lower-wind windows.
Temperature And Viscosity
Although sprayable latex lets you work faster, temperature and humidity profoundly change its viscosity and drying behavior, so you’ll need to adjust your setup accordingly.
You’ll watch temperature effects on flow, make viscosity adjustments with reducer or heating, and modify gun settings to keep atomization consistent.
Consider:
- Warm air thins paint, speeding sag risk
- Cold thickens paint, causing spatter
- Preheat equipment moderately
- Test spray pattern often
Humidity And Drying Time
Because moisture in the air slows solvent evaporation, high humidity can dramatically lengthen latex drying time and increase the chance of runs, sags, and tacky finishes, so you should monitor humidity and adjust your timing and technique accordingly. Use humidity monitoring, humidity control, and proper air circulation; adjust temperature influence and drying techniques to minimize moisture impact on drying conditions.
| Factor | Effect |
|---|---|
| High humidity | Slower cure |
| Low airflow | Tacky finish |
| Warm temp | Faster drying |
| Dehumidifier | Improves cure |
Wind And Overspray Control
When wind picks up, it spreads spray beyond your target and can turn a neat job into a mottled, wasted mess.
So you should check forecasts, work in calmer windows, and set up windbreaks or masking to keep overspray under control. You’ll plan area preparation, choose windbreak options, adjust spray distance, use containment solutions, and employ proven overspray techniques to limit environmental impact during outdoor spraying.
- tarps and temporary fences
- directional spraying tips
- monitor climate considerations
- secure surrounding objects
Adjusting Technique for Humidity and Temperature
If you’re spraying latex paint, you’ll need to adapt your technique to the current humidity and temperature because both affect drying time, atomization, and adhesion.
Monitor humidity effects and make temperature adjustments: thin paint slightly in high humidity, slow passes in cold, speed up in warmth.
Consider environmental impact—ventilation and timing—to guarantee proper cure, avoid sagging, and achieve a smooth, even finish.
Spraying Trim and Edges Without Overspray
When you’re spraying trim and edges, prep the area with precise masking and tape to protect adjacent surfaces.
Keep the spray gun’s fan width narrow and controlled so you hit the trim without spreading paint onto nearby walls. Move steadily and overlap minimally to avoid buildup and reduce touch-ups.
Masking And Taping
Although spraying trim can be faster than brushing, you’ll need careful masking and taping to keep overspray off walls, floors, and hardware.
Use proper masking techniques and masking materials after thorough surface preparation. Focus on tape application for edge protection, plan the spray area, and allow controlled paint removal steps during project cleanup.
Remove tape cleanly after drying.
- Clean surfaces
- Secure drop cloths
- Apply painter’s tape
- Inspect edges
Controlled Fan Width
Set your sprayer’s fan to the narrowest practical width and test it on scrap material before you approach trim, because a tight, controlled pattern gives you precise edges without coating nearby walls.
Use fan adjustment, nozzle settings and air pressure to match paint consistency and spray patterns.
Prioritize surface preparation, sprayer maintenance and environmental factors to protect finish quality and stick to project timing.
Spraying Cabinetry and Doors for a Factory-Look Finish
Start by prepping thoroughly: remove doors and hardware, label each piece, and clean surfaces with a TSP substitute so paint adheres evenly.
Start by prepping thoroughly: remove doors and hardware, label pieces, and clean with TSP substitute for even adhesion.
For cabinet preparation, set up a dust-free spray area, hang doors, and mask cabinets. Reattach door hardware after curing.
Focus on thin, even passes and proper overlap.
- Hang doors for spraying
- Use tack cloths
- Maintain consistent distance
- Allow full cure time
How to Lay Down Smooth Base Coats and Build Color
With the doors hung and your spray area clean, you’re ready to lay down a smooth base coat that’ll give color depth and uniform coverage.
Start with even, overlapping passes using proper base coat techniques, keeping the gun moving. Apply thin, consistent layers to avoid runs, then use controlled color layering to build saturation.
Inspect between passes and correct flaws immediately.
Drying Times and How Long to Wait Between Spray Coats
Because drying depends on temperature, humidity and film thickness, you’ll want to check conditions before you spray another coat.
Expect touch-dry in 30–60 minutes, recoat in 2–4 hours under ideal conditions, longer in cool or humid spaces.
Touch-dry in 30–60 minutes; recoat after 2–4 hours in ideal conditions — expect longer in cool or humid spaces.
Adjust your spray techniques and thin coats for consistent drying.
- Thin sprays dry faster
- Warm, low-humidity helps
- Heavy films extend cure
- Follow manufacturer times
When and How to Sand Between Spray Coats
You’ll usually sand between coats only when you need to knock down dust nibs, smooth raised texture, or improve adhesion for the next layer; wait until the coat is dry to the touch and firm enough that sanding won’t gum (typically 2–4 hours under good conditions, longer if cool or humid).
Then lightly scuff with fine (220–320 grit) sandpaper or a sanding pad until the surface feels smooth but not through to the substrate.
Use proper sanding techniques and sanding tools, follow ideal grit and sanding intervals, perform finish inspection and dust removal, and practice sanding safety for clean surface preparation before the next coat.
Troubleshooting Orange Peel, Sagging, and Mottling
Spotting and fixing texture problems quickly keeps a sprayed latex finish looking smooth and professional.
You’ll adjust spray technique adjustments and consider environmental factors to apply orange peel remedies, use sagging prevention tactics, and try mottling solutions.
Check pressure, tip size, and overlap; control humidity and temperature; thin paint slightly; and dry between passes.
- Adjust gun distance and speed
- Control humidity/temperature
- Thin and test spray
- Allow proper flash time
Fixing Runs, Drips, and Overspray Blemishes
Tackle runs, drips, and overspray quickly to keep a latex-sprayed surface looking clean and even. You’ll sand small runs smooth, feather edges, then spot-prime and repaint. For overspray, wipe tack cloths or use a razor for stubborn flecks. These fixing imperfections and spray painting tips restore uniformity fast.
| Issue | Fix |
|---|---|
| Run | Sand, prime |
| Overspray | Razor, cloth |
Preventing and Addressing Blistering or Adhesion Failure
When paint blisters or peels away, it usually means the surface or application wasn’t right, so stop and assess moisture, contamination, and adhesion before you repaint.
You should address blistering causes with proper surface preparation, adjust for environmental factors, and refine paint application and spray technique to provide adhesion solutions.
- Remove loose paint and sand to sound substrate
- Dry and degrease surfaces
- Use primer suited to substrate
- Avoid painting in high humidity or direct sun
Cleaning and Maintaining Your Sprayer After Latex Jobs
After every latex job, you should clean your sprayer promptly to prevent clogs, corrosion, and costly downtime. Use proper cleaning techniques and solvents to flush paint residue, inspect nozzles, and follow nozzle care. Perform regular inspections, troubleshoot issues, and follow maintenance tips for sprayer longevity. Store dry, protected.
| Task | Purpose |
|---|---|
| Flush with solvent | Remove residue |
| Inspect nozzle | Prevent clogs |
Store Thinned Latex and Mixed Materials Safely
Because thinned latex and mixed materials can separate, settle, or react over time, you need to store them in ways that preserve their properties and keep everyone safe.
Use safe storage practices and clear material labeling to prevent accidents and waste.
- Airtight containers to prevent evaporation
- Cool, dry area away from ignition
- Original or labeled containers with dates
- Keep out of reach of children and pets
Cost vs. Hire: When to Save and When to Call a Pro
If you’re comfortable with basic prep, masking, and cleanup, spraying latex yourself can save a lot on labor costs.
However, you should call a pro for large jobs, difficult surfaces, or tricky finishes that demand expert technique and equipment.
For big jobs, tricky surfaces, or specialty finishes, hire a pro—those require expert technique and equipment.
Do a cost analysis comparing DIY projects versus professional services.
Weigh budget considerations, value assessment, project scale, skill level, and time investment before deciding.
Common Beginner Mistakes and How to Avoid Them
When you’re new to spraying latex, a few predictable mistakes—like holding the gun too close, using the wrong tip, or skimping on masking—can wreck the finish and waste paint; learning to control distance, pressure, overlap, and prep will prevent most problems.
- Wrong spray technique or tip choice
- Poor paint preparation or equipment setup
- Ignoring environmental factors and drying times
- Skipping practice sessions and troubleshooting tips
Quick Checklist for a Flawless Latex Spray Session
You’ve already learned what to avoid; now use a simple checklist to make sure every step’s covered before you spray. Confirm surface prep, mask areas, choose correct paint types, test spray techniques, and check ventilation. Calmly follow each item to prevent mistakes.
| Ready? | Action | Emotion |
|---|---|---|
| Yes | Prep | Relief |
| Yes | Mask | Confidence |
| Yes | Test | Calm |
Recommended Sprayers, Products, and Resources for Spraying Latex Paint
One good sprayer can cut your job time in half and give a far smoother finish than brushes or rollers.
For sprayer recommendations, read concise product reviews, choose an HVLP or airless model, and pick compatible tips and filters. Use manufacturer guides and community forums for troubleshooting.
- HVLP handheld for cabinets
- Small airless for walls
- Fine-tip for trim
- Disposable filters and masks
Frequently Asked Questions
Can I Spray Latex Paint Over Existing Oil-Based Finishes Without Primer?
No, you shouldn’t; latex won’t adhere well to oil-based finishes without primer. You’ll need thorough surface preparation, sanding and deglossing, then use proper spray technique and a bonding primer so the latex will stick and finish smoothly.
Will Sprayed Latex Paint Yellow Over Time in Low-Light Areas?
Like a slow sunset, yes — you’ll see some yellowing causes like oxidation and contaminants; low light effects don’t prevent it. You’ll limit yellowing by using quality acrylic latex, proper prep, and good ventilation during application.
Can I Mix Different Brands/Colors of Latex Paint in One Sprayer?
You can, but you’ll need to confirm paint compatibility first and test a small mix for color and sheen. Clean the sprayer thoroughly between brands; regular sprayer maintenance prevents clogs, cross-contamination, and finish problems.
How Do I Prevent Brush Marks When Combining Spraying and Brushing?
Like a whispering breeze, you’ll blend sprayed and brushed areas by using proper surface preparation, feathering brush techniques, working wet edges, matching spray sheen, and sanding between coats so shifts vanish and brush marks don’t stand out.
Is It Safe to Spray Latex Paint Near Pets or Indoor Plants?
Yes — you can, but you should prioritize pet safety and plant protection: move animals and sensitive plants away, reduce paint toxicity exposure, guarantee ventilation importance by opening windows and using fans, and mask nearby items to limit fumes and overspray.
Conclusion
You’ve learned the precision of spraying and the comfort of rolling, the speed of a sprayer and the control of a brush. You’ll save time and still care for detail, you’ll thin when needed and resist over-spraying. Practice makes neat edges and bold coverage, patience gives flawless layers while momentum keeps you moving. Trust your prep, trust your eye—balance caution with confidence, and you’ll finish fast yet finish like a pro.