How to Use Dried Acrylic Paint (Easy Ways to Revive It)
You can usually revive dried acrylics by testing a small blob first—scrape with a palette knife and add tiny drops of water or acrylic medium until it softens, then mix thoroughly to check consistency and adhesion. For hard pans mist or soak briefly, for tube crusts remove flaky edges and re-emulsify with medium, and use isopropyl for stubborn spots. Keep tools handy and store revived paint airtight. Keep going to learn practical tips and when to replace a stubborn jar.
Can This Dried Acrylic Be Revived? Quick Test
Wondering whether that crusty tube of acrylic can still work? You squeeze a bit onto a palette, check consistency, and test blendability.
If the dried paint flakes or won’t rehydrate, it’s beyond simple acrylic restoration. If it softens with a drop of water or medium and spreads smoothly, you can use it.
Record results so future tests go faster.
Quick Revive: Restore Slightly Crusted Paint
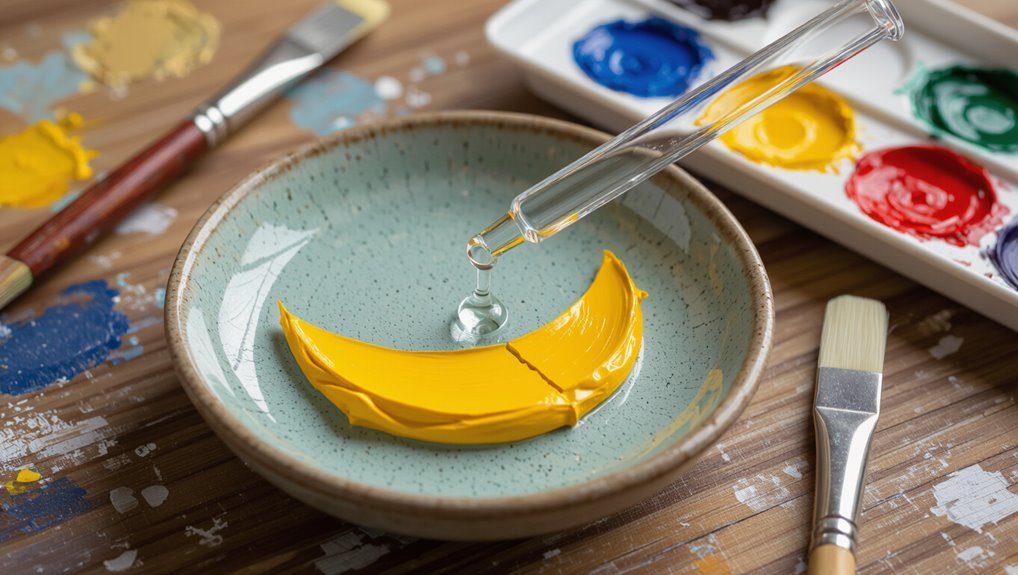
Grab a palette knife and a small jar of distilled water or acrylic medium—you’re going to soften the crust without watering the pigment down.
Gently scrape flaky edges, add tiny medium drops, stir to restore creamy body, and test viscosity.
Work fast, blend rescued bits into fresh paint for color mixing, and use recovered paint for texture experimentation on scrap before returning to your main piece.
Tools & Household Items You’ll Need
You’ll only need a few basic tools—scrapers, palette knives, clean brushes, and disposable rags—to handle most dried acrylic fixes.
Keep common household solvents like isopropyl alcohol and a little acetone on hand for stubborn spots, and use gloves and good ventilation when you do.
With these items ready, you can tackle crusty paint safely and effectively.
Basic Tools Needed
Before you start rehydrating dried acrylics, gather a few simple tools that’ll make the process smooth and safe: jars or shallow dishes for soaking, a palette knife or old credit card for scraping, soft brushes for testing rehydrated paint, a spray bottle or pipette for adding water gradually, gloves and wipes for cleanup, and newspaper or a drop cloth to protect your work surface.
- Jar or shallow dish
- Palette knife or old card
- Soft brushes
Use basic storage containers and label them to aid paint preservation and keep your workflow tidy.
Common Household Solvents
A few common household solvents can help dissolve or soften dried acrylics when water alone won’t do: isopropyl alcohol (70–99%), rubbing alcohol pads, denatured alcohol or high-proof ethanol, ammonia-free window cleaner, and a small amount of acetone (nail polish remover) used sparingly.
Choose solvent options based on surface and paint age, wear gloves, guarantee ventilation, avoid mixing chemicals, and follow safety precautions.
Softening Dried Paint From Tubes and Jars
Stubborn tube or jar paint can often be revived without wasting it — you’ll just need the right solvent and a little patience.
Use gentle agitation and small solvent drops; avoid flooding the paint. Remember paint preservation tips and tube storage techniques to prevent future drying.
- Loosen crust with a palette knife
- Add distilled water or medium sparingly
- Seal tightly after use
Reviving Hard Pan of Dried Acrylic on Palettes

If you’ve got a hard paint pan on your palette, start by softening the surface with a little water so it loosens up.
Use a palette knife to gently scrape off flaky top layers until you reach a more workable core.
Then rehydrate the remaining paint with a suitable acrylic medium to restore its consistency for use.
Soften With Water
When dried acrylic forms a hard pan on your palette, you can usually soften and lift it with nothing more than water and a little patience.
Gently mist or dab to increase water absorption and reduce paint viscosity, then wait and work with a brush or palette knife.
- Mist surface lightly
- Let water penetrate
- Rework softened paint
Scrape Off Layers
Grab a palette knife or a firm scraper and start lifting the dried acrylic in thin layers, working from the edges inward so you don’t gouge the palette surface.
Use controlled scraping techniques, angling the tool shallowly to peel away hard pan.
Collect usable flakes for mixing or discard stubborn buildup.
This method supports paint preservation and keeps your palette functional without chemical rehydration.
Rehydrate With Medium
Although it looks pretty set, you can revive hard pan on your palette by rehydrating it with a suitable medium; this softens the paint enough to lift or remix without damaging the surface.
Use rehydration techniques and compatible paint mediums, then:
- Apply a few drops with a brush to test softness.
- Wait a minute, then gently lift.
- Remix sparingly to preserve color.
Water vs. Acrylic Medium: What to Add and Why
Because dried acrylics have lost their original binder, you can’t just add water and expect the same adhesion or flexibility; you should use water sparingly for thinning and reach for an acrylic medium when you need to restore body, bind, or finish.
You’ll appreciate water benefits for flow and cleanup, but choose medium advantages to regain adhesion, flexibility, and finish stability so revived paint performs reliably.
Revived Paint for Brushwork, Glazing, or Impasto
1 simple test will tell you whether revived acrylic is ready for brushwork, glazing, or impasto: squeeze a small bead onto a palette, work it with your brush or knife, and watch how it responds.
You’ll judge texture and flexibility for brush techniques, glazing effects, or thick application.
Try these checks:
- Smooth flow for fine lines
- Translucent pull for glazes
- Peak retention for impasto
When and How to Thin Revived Acrylic for Consistency
When you need a specific working consistency—whether for smooth glazing, controlled brushwork, or buttery impasto—thin revived acrylic only after testing its current body and drying characteristics. Use gentle thinning techniques: add water sparingly or a flow improver, test and note drying. Make small consistency adjustments until desired feel and opacity match your technique.
| Step | Additive | Test |
|---|---|---|
| 1 | Water | Swipe |
| 2 | Flow improver | Layer |
| 3 | Retarder | Dry-time |
Fixing Texture and Adhesion After Revival
After you’ve revived dried acrylic, check and restore its flexibility so it won’t crack when you apply it.
You can add a small amount of acrylic medium or flow improver to loosen the film and make the paint more pliable.
Also roughen the substrate lightly and use a bonding primer to improve surface adhesion before repainting.
Restore Flexibility Quickly
Although you’ve revived dried acrylic and got it flowing again, you’ll often find the paint feels brittle, chalky, or lifts from the surface.
You can restore flexibility quickly by reworking the film with the right additives and gentle heat.
Use these flexibility restoration quick methods:
- Add a few drops of acrylic medium and mix gently.
- Apply low heat with a hairdryer while smoothing.
- Knead softened paint on a palette to rebond polymers.
Improve Surface Adhesion
If the revived acrylic still peels, beads, or shows uneven texture, you’ll need to focus on adhesion before repainting; proper surface prep and targeted additives will help the paint bond and lay smooth.
Use surface preparation techniques: sand glossy areas, clean grease, and prime porous sections.
Apply adhesion improving methods like acrylic binders or adhesion primers, thin coats, and light sanding between layers for a durable, even finish.
Creative Ways to Use Irreparably Dried Acrylics
Don’t toss those hardened tubes—turn them into texture, tools, and art in their own right.
You can repurpose dried acrylics for creative projects as gritty additives or sculptural elements, or mix shards into alternative mediums for collage and impasto accents.
Try these ideas:
- crumble into texture paste for raised surfaces
- glue chips as mosaic tiles
- grind for pigment in mixed-media pieces
How to Store Acrylics to Prevent Drying
Keeping your acrylics fresh starts with simple, consistent habits you can build into your studio routine.
Store tubes upright, seal jars and palettes in airtight containers, and group by pigment to avoid cross-contamination.
Maintain temperature control—cool, stable conditions slow drying.
Wipe rims, replace caps promptly, and use desiccant packs or damp sponges for moisture prevention in storage boxes to extend usable life.
When to Discard Dried Acrylic and Replace It
Even with careful storage habits, some acrylics will dry out or change consistency beyond useful repair, and you’ll need to know when it’s time to replace them.
Use clear discard criteria and consider paint lifespan when deciding.
- Texture is permanently clumpy or crusted.
- Color or binder separates and won’t re-emulsify.
- Paint consistently fails adhesion or cracks when dry.
Frequently Asked Questions
Can Revived Acrylics Be Mixed Safely With Oil Paints?
No, you shouldn’t mix revived acrylics directly with oil paints; their paint properties clash. You can layer instead, using proper mixing techniques like isolation layers and drying time management so each medium stays stable and compatible.
Will Reviving Paint Affect Archival Longevity or Yellowing?
Yes — reviving paint can alter archival properties and color stability: you’ll sometimes weaken binders or introduce solvents that speed yellowing, so test small samples and use archival mediums to minimize long-term deterioration.
Are Revived Paints Safe for Children’s Projects and Non-Toxic Labels?
Generally, you shouldn’t assume revived paints meet safety standards; you’ll need to check original paint compositions and non toxic guidelines. For children’s projects, use only paints labeled archival-safe and non-toxic, or buy certified replacements.
How Does Temperature/Humidity During Revival Impact Results?
Temperature effects matter: warmer temps speed rehydration but can thin pigments; cooler slows it. Humidity levels impact drying time—high humidity delays curing and helps softening, low humidity speeds evaporation, risking uneven texture and cracking.
Can Revived Acrylics Be Used With Airbrush Equipment?
Yes — you can, but test first: like thinning maple syrup for a fountain, one hobbyist found 15% thinner restored sprayability. You’ll adjust airbrush techniques and paint consistency to avoid clogging and splattering.
Conclusion
So you bravely tried resuscitating your fossilized blobs and, surprise, sometimes acrylics come back like a drama queen after espresso. If your paint still answers to a little water, happy days; if it’s a brick, mourn it and move on — cremation by palette knife is cathartic. Learn storage, stop being lazy with lids, and remember: art supply hoarding isn’t collecting, it’s premeditated palette murder. Don’t revive everything.