How to Use Latex Paint in a Spray Gun (Step-by-Step Guide)
You can spray latex like a pro by choosing the right gun and nozzle, thinning and straining the paint to the correct viscosity, and using proper PPE and ventilation. Prep surfaces, mask off areas, and test-spray on scrap to dial in pressure and pattern. Hold the gun 6–12 inches away, overlap passes about 50%, and apply thin coats with proper drying time between them. Keep tools clean and disposed of responsibly, and keep going to learn detailed setup, troubleshooting, and advanced tips.
Quick Start: Spray Latex in Five Steps
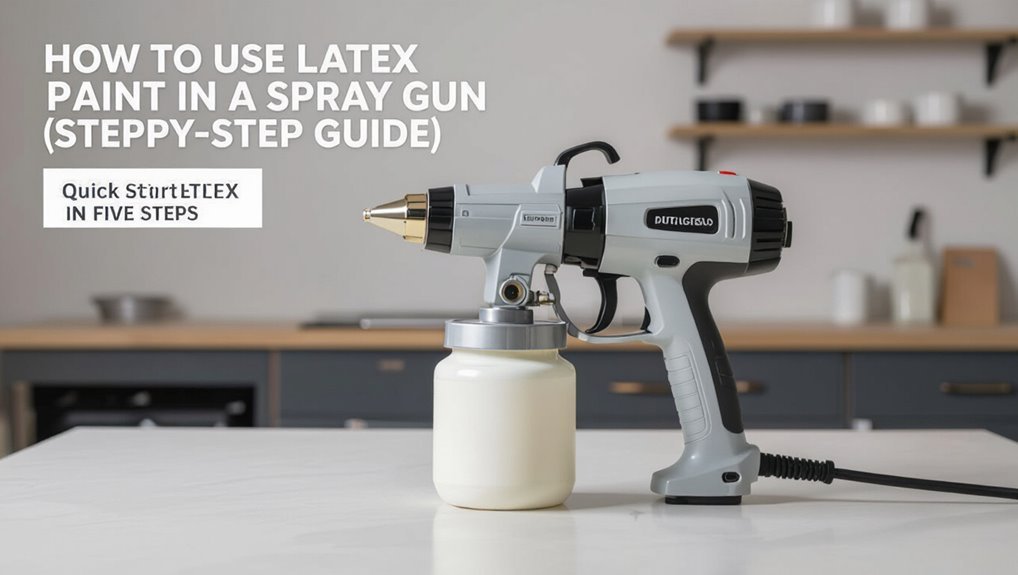
1. You’ll prep quickly: thin the latex to the recommended paint consistency, strain it, and test spray on cardboard.
Adjust the spray technique—fan width, pressure, and overlap—for even coverage.
Keep the gun moving to avoid runs, maintain 6–10 inches distance, and apply multiple thin coats allowing proper dry time between passes for a smooth, durable finish.
Essential Tools and PPE for Latex Spraying
Before you start spraying, make sure you’ve got the right PPE—respirator, eye protection, gloves, and coveralls—to protect yourself from mist and splatter.
You’ll also need the proper spray tools: a compatible spray gun, extension hoses, filters, and cleaning kits to keep performance consistent.
Finally, prep your work area with drop cloths, ventilation, and masking to protect surfaces and control overspray.
Personal Protective Equipment
You’ll need a few key pieces of personal protective equipment before you start spraying latex: a respirator with proper particulate/cartridge filters, chemical-resistant gloves, eye protection (goggles or a full-face shield), and coveralls or disposable clothing to keep overspray off your skin and clothes.
Follow safety protocols to reduce health risks, use protective gear for personal safety, practice proper storage, equipment maintenance, emergency response, and safe material handling.
Necessary Spray Tools
Start with a compact kit: a quality HVLP or airless spray gun rated for latex, a compatible compressor or pump, properly sized nozzles/tips, and a pressure regulator or cup with agitator if needed.
Also gather strainers, mixing sticks, a viscosity cup to check paint viscosity, extra seals, solvent-safe hoses, and replacement tips.
Wear respirator, goggles, and gloves while handling and spraying.
Work Area Preparation
Choose a well-ventilated, dust-free space and set up barriers to protect floors, furniture, and fixtures—latex spray creates fine mist that settles everywhere. Gather essential PPE: respirator, goggles, gloves; keep tools organized. Maintain workspace organization and clear routes. Use labeled containers for paint storage and waste.
| PPE | Tool | Storage |
|---|---|---|
| Resp. | Gun | Labeled |
| Gog. | Drop cloth | Sealed |
Preparing Your Workspace for Indoor Spraying
Before you start spraying indoors, make sure you set up strong ventilation and airflow to carry fumes and overspray out of the room.
Cover floors and furniture with drop cloths or plastic sheeting and tape edges to prevent paint from settling where it shouldn’t.
Keep electrical sources protected and eliminate ignition risks by unplugging nonessential devices and using explosion-rated lighting if needed.
Ventilation And Airflow
When you’re spraying latex indoors, set up clear airflow paths and keep fresh air moving to remove overspray and fumes; position an exhaust fan near an open window or door and draw air across the room toward it so contaminants don’t linger.
Conduct a ventilation assessment, plan airflow management, place intake and exhaust strategically, and run fans before, during, and after spraying to maintain safe air quality.
Floor And Surface Protection
Protect floors and nearby surfaces with heavy-duty drop cloths or plastic sheeting and secure edges with painter’s tape so paint overspray and drips stay contained.
Use floor protection methods like rosin paper or taped-down cardboard in high-traffic zones.
Wipe and clean surfaces before covering, apply surface preparation techniques to trim and fixtures, and remove hardware or mask edges to guarantee a neat, protected workspace.
Electrical And Fire Safety
Because latex fumes and fine spray particles can create ignition hazards and overload circuits, you should assess and control electrical and fire risks before you spray indoors.
Do a risk assessment, remove or cover outlets, and avoid extension cords to reduce electrical hazards.
Implement fire prevention: safe storage, equipment maintenance, safety training, protective measures, and clear emergency protocols so you and helpers respond fast.
Setting Up Outdoor Spray Zones Safely
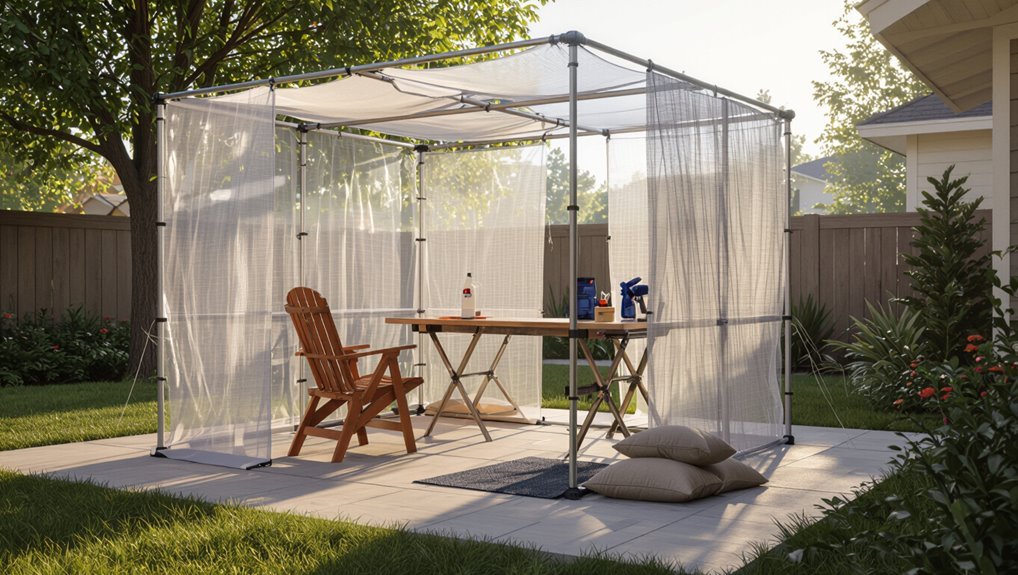
Although you’re working outside, you still need to control where overspray and fumes travel, so lay out a clear spray zone before you start.
Even outdoors, control overspray and fumes—establish a defined spray zone before you begin.
Use outdoor ventilation best practices, paint containment, and proper equipment setup.
Consider weather conditions, environmental considerations, noise control, and safety barriers.
- Mark spray zone preparation area
- Erect safety barriers
- Secure paint containment
- Check ventilation and noise controls
Choosing the Right Spray Gun for Latex Paint
Choosing the right spray gun makes the difference between a smooth, efficient job and constant clogging or wasted paint, so pick gear matched to latex’s thickness and your project’s scale. Consider spray gun types, nozzle selection, paint viscosity, air pressure, gun maintenance, safety features, brand comparisons, and budget considerations when choosing.
| Feature | Tip |
|---|---|
| Nozzle | Match viscosity |
| Pressure | Adjust for flow |
Turbine vs. Compressor: When to Use Each
You’ll want to weigh turbine pros and cons—turbines are portable and quieter but can struggle with heavy-bodied latex.
Consider compressor power differences, since compressors give more consistent pressure for high-output or extended jobs.
Match the tool to the task: use turbines for trim and small rooms, compressors for large surfaces and professional work.
Turbine Pros And Cons
When deciding between a turbine and a compressor for spraying latex, weigh power delivery, portability, and finish control—turbines give consistent air with less maintenance and lighter gear, while compressors offer higher pressure, greater material flexibility, and faster output for large jobs.
You’ll balance turbine performance, turbine maintenance, turbine efficiency, and turbine noise.
- Easier setup
- Gentler finish
- Limited pressure
- Quieter operation
Compressor Power Differences
If you’re weighing turbine convenience against compressor power, the next thing to look at is how their output differs and what that means for spraying latex.
You’ll compare compressor types, compressor sizing, and compressor efficiency to match required air pressure and air flow.
Consider compressor maintenance demands and duty cycle so you pick reliable, consistent performance for smooth atomization without overworking equipment.
Which Jobs Suit Each
Although both turbine and compressor systems can spray latex, each really shines on different jobs, so match the tool to the task:
you’ll pick turbines for interior projects, wall murals, cabinet spraying, and art projects;
compressors suit exterior jobs, fence painting, outdoor structures, and automotive detailing;
turbines also help furniture refinishing and touch up work.
- Interior projects vs exterior jobs
- Cabinet spraying vs fence painting
- Wall murals vs outdoor structures
- Art projects vs automotive detailing
Why HVLP, LVLP, and Airless Matter for Latex
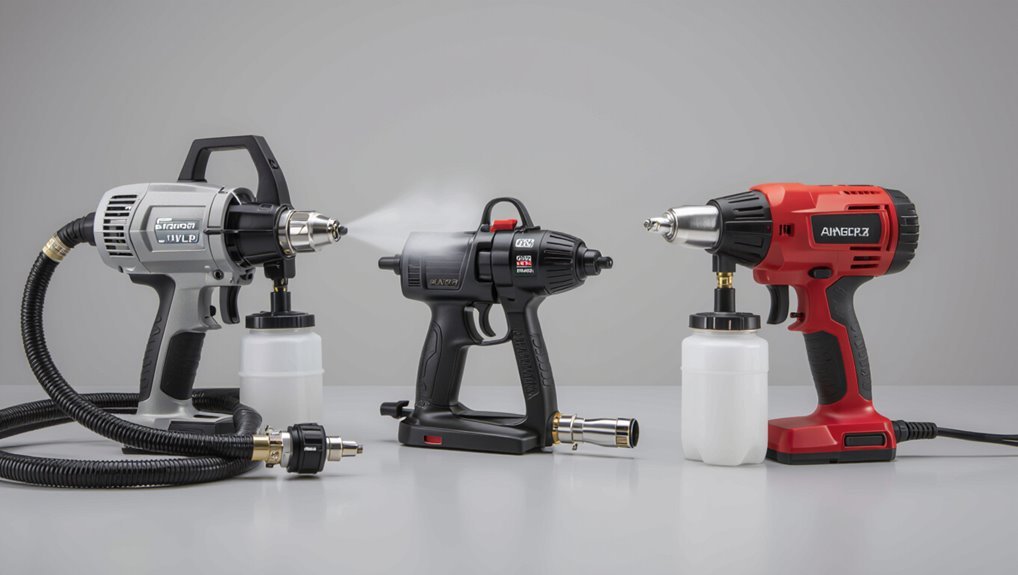
Because latex behaves differently from oil-based paints, choosing between HVLP, LVLP, and airless systems changes how well the paint atomizes, how much overspray you get, and how much thinning you’ll need.
You’ll match spray technology to paint viscosity and material compatibility, adjust pressure settings and spray patterns, consider nozzle selection later, follow equipment maintenance, and refine application techniques for consistent coverage and minimal waste.
Selecting the Correct Nozzle Size for Latex
Choosing the right nozzle size makes the difference between a smooth, even finish and a clogged, spattery mess when you spray latex. Pick too small and the paint won’t atomize; pick too large and you’ll waste material and get heavy orange-peel.
You should test nozzle types, match viscosity, adjust pressure, and perform regular nozzle maintenance to avoid clogging and uneven coats.
- Test sizes on scrap
- Note spray pattern
- Record settings per paint
- Clean immediately after use
How to Match Gun Type to Your Project Size
For small projects and touch-ups, you’ll want a compact touch-up gun or a small HVLP unit for precise control.
For medium jobs, a higher-capacity HVLP or a larger handheld gun balances speed and finish.
For large areas, use an airless sprayer to cover ground quickly and maintain consistent coating.
Small Projects, HVLP
Start small and grab an HVLP gun when you’re tackling furniture, trim, or other compact jobs—its low overspray and fine control make it ideal for precise, indoor work.
Use small project tips and focus on HVLP advantages to save paint and get smooth finishes.
- Prep surfaces thoroughly
- Thin paint per manual
- Maintain steady motion
- Clean immediately after use
Medium Jobs, Touch-Up Guns
When you’re tackling medium-sized work—like cabinets, doors, or a few chairs—a touch-up or detail gun gives you the reach and control you need without the overspray of larger setups.
Choose a gun with adjustable fan and flow, thin paint correctly, and practice medium job techniques for even coats.
That touch up efficiency reduces sanding and saves time while keeping edges crisp and controlled.
Large Areas, Airless Sprayer
Tackle large surfaces with an airless sprayer to cover walls, fences, and siding quickly and evenly; these pumps deliver high pressure and unthinned latex for fast laydown, so you’ll spend less time spraying and more time finishing.
Choose tip size for large area coverage and adjust pressure for consistent spray patterns.
Consider:
- Speed vs. control
- Surface texture
- Overspray management
- Cleanup time
Surface Preparation: Cleaning and Sanding Tips
Before you pull out the sprayer, clean and sand the surface so paint will adhere evenly and won’t show imperfections.
You’ll follow surface cleaning steps for different surface types, use proper sanding techniques and prep tools, and avoid common prep mistakes.
Check and respect drying times before spraying to guarantee paint adhesion and eliminate surface imperfections for a smooth, lasting finish.
How to Repair Holes and Prime for Spray
Start by patching holes with a suitable filler, then sand smooth so the surface is flush and feathered.
Wipe away dust, and inspect the repair to make sure it’s level with the surrounding area.
Finish with a compatible primer coat to seal the patch and provide an even base for spraying.
Patch And Sand
Repair any holes and smooth surfaces so the spray gun lays down an even coat. Use proper patching techniques and sanding methods to prepare the substrate.
Clean dust, apply filler, sand to feather edges, and wipe surface before painting.
- Assess damage and choose filler
- Apply filler and let cure
- Sand progressively finer grits
- Remove dust and inspect
Apply Primer Coat
Apply a primer coat to sealed holes and patched areas so the spray gun delivers a uniform finish and better adhesion. You’ll follow primer application techniques: thin coats, flash time, sanding between coats. Choose ideal primer selection for substrate—stain-blocking or bonding primer. Test spray pattern, adjust viscosity, and keep even passes for consistent coverage.
| Surface | Primer Type | Dry Time |
|---|---|---|
| Drywall | PVA | 1–2 hr |
| Wood | Bonding | 2–3 hr |
| Metal | Rust-inhibitor | 4+ hr |
| MDF | Shellac | 1–2 hr |
Choosing the Right Primer for Latex Spraying
Because primer creates the bond between your substrate and latex paint, you’ll want one formulated for spray application and compatible with both the surface and the topcoat.
Choose by primer types, surface compatibility, adhesion qualities and stain blocking; consider drying times, application methods, environmental factors and finish types.
Balance primer brands and cost considerations.
- Match substrate and finish
- Check adhesion tests
- Note cure and dry
- Compare prices
When to Thin Latex Paint and Why It Matters
You’ll need to thin latex paint when it’s too thick to flow smoothly through your spray gun or when the nozzle is clogging frequently.
Thinning improves atomization, giving you a finer, more even mist and reducing orange peel or spattering.
Do it carefully—over-thinning can cause runs, poor coverage, and longer drying times.
When To Thin
When spraying latex paint, thin it whenever the viscosity or the sprayer’s performance keeps the finish from laying down smoothly. Doing so prevents clogging, uneven atomization, and visible texture problems.
Use measured thinning techniques to restore flow and match your gun’s specs. Check test spray on scrap before application.
- Adjust gradually
- Note manufacturer limits
- Use proper reducer
- Record ratios
Effects On Sprayability
If your latex paint’s too thick for your gun, you’ll see it immediately: heavy orange-peel texture, sputtering from the tip, and frequent clogging that slows work and wastes material.
You’ll adjust spray viscosity and paint consistency by thinning appropriately, balancing nozzle selection, air pressure, and application distance to control drying time, finish quality, surface adhesion, pigment distribution, and guarantee material compatibility.
How to Thin Latex Paint Step by Step
Thinning latex paint properly lets it flow through a spray gun without clogging or losing coverage. You’ll consider latex paint properties, choose compatible thinners, and follow safe thinning techniques to maintain finish and adhesion.
- Start with clean paint and strain
- Add small amounts of water or extender
- Stir slowly to avoid bubbles
- Check viscosity and adjust as needed
Mixing Ratios and Test-Spray Methods
Start by mixing your latex paint with the recommended thinner—usually 5–10% water or a 10–15% latex-compatible reducer for heavier paints—and stir thoroughly.
Load a small amount into the gun and test-spray on cardboard or scrap material, watching for even atomization and no sputtering.
If the spray’s too heavy or too dry, adjust the ratio in 5% increments and repeat the test until you get a smooth, consistent pattern.
Recommended Thinner Ratios
1 key thing to get right is the thinner ratio: too thick and your latex will clog or spatter, too thin and coverage and finish suffer.
You’ll adjust based on latex paint viscosity and thinning techniques; start conservative, test, then tweak. Use measured additions and note results.
- Start 5–10% water
- Increase in 5% steps
- Prefer manufacturer limits
- Record each mix
Test-Spray Procedure
Before you commit to a full coat, mix a conservative test batch—typically the manufacturer’s max water recommendation or 5–10%—and run a short spray on a cardboard or scrap panel to evaluate atomization, pattern, and coverage.
You’ll practice test spray techniques, note fan width, droplet size, and sagging, then make test spray adjustments: tweak viscosity, pressure, or nozzle size until the spray is uniform and coverage meets your standard.
How to Strain Paint to Prevent Clogs
A simple mesh strainer or paint filter can save you from frustrating clogs and uneven spray patterns, so always filter your latex before it reaches the gun.
You’ll pour into a clean container through a 100–200 mesh filter, removing skin, debris, and lumps for effective paint filtering and clog prevention.
- Use fresh filters
- Strain slowly
- Wipe container rims
- Refilter mid-job
Best Thinners and Additives for Latex Paints
When thinning latex for a spray gun, you’ll usually choose between plain water and specialty solvents—water’s safest but solvents or commercial latex thinners can improve atomization when needed.
You’ll also find commercial latex thinners formulated to maintain binder balance and prevent issues like flocculation.
Finally, consider additives (like flow agents, retarders, and mildewcides) to boost leveling, slow drying, or protect the finish, but always follow manufacturer limits.
Water Versus Solvent
1 key decision for spraying latex is choosing between water and solvent thinners, because that choice affects viscosity, drying time, atomization, and cleanup.
You’ll favor water for easier cleanup and water based benefits; you’ll weigh solvent based drawbacks like stronger fumes and longer flash time.
Consider performance needs, nozzle size, ventilation, and substrate.
- Cleanup ease
- Atomization quality
- Dry time control
- Safety concerns
Commercial Latex Thinners
Although you can thin latex with plain water for small jobs, commercial latex thinners and additives give you predictable viscosity control, improved atomization, and targeted performance tweaks for spraying.
For commercial latex applications you’ll choose thinners formulated to maintain binder balance, reduce sag, and guarantee consistent spray patterns.
Know the benefits of thinning: smoother finish, fewer clogs, easier flow, and reliable gun performance.
Additives For Performance
Now that you know why controlled thinning matters for spray work, you’ll want to pick the right additives to get specific results.
Use additives to tune flow, leveling, and durability—additive benefits include reduced orange peel and faster cure.
Choose performance enhancers sparingly and test mixes.
- Flow improvers
- Retarders
- Mildewcides
- Bonding agents
How to Adjust Gun Pressure for Latex
When you’re spraying latex, getting the gun pressure right makes the difference between a smooth, even coat and runs or excessive overspray.
You’ll start at manufacturer-recommended pressure settings, then test on cardboard. Lower pressure to reduce overspray or increase for better atomization with thicker latex.
Adjust incrementally while refining your spray technique, watching for consistent coverage without spitting or sagging.
Setting Spray Pattern and Fan Width Correctly
Before you start spraying, set the pattern and fan width so the paint lands evenly and you minimize overlap and drips.
Adjust fan adjustment and nozzle selection to match paint viscosity and surface compatibility.
Adjust fan pattern and choose the right nozzle to suit paint viscosity and the surface you’re coating.
Tune pressure settings and practice trigger control for consistent spray technique; keep spray distance steady.
- Match nozzle selection to viscosity
- Fine-tune pressure settings
- Practice trigger control
- Check surface compatibility
Achieving Even Overlap and Correct Distance
Having set your pattern, fan width, and pressure, focus on overlap and distance to get a uniform finish.
You’ll use a consistent spraying technique and maintain gun distance for a correct overlap pattern.
Adjust paint consistency and nozzle choice for surface texture.
Consider drying time, environmental factors, and airflow control while following safety measures to prevent runs and guarantee an even coat.
Spraying Techniques: Passes, Speed, and Motion
Start with steady, overlapping passes and keep a consistent speed so each pass lays down the same amount of paint; move the gun parallel to the surface in smooth, controlled strokes and don’t linger in one spot to avoid runs.
- Maintain distance consistency and speed control.
- Adjust spray angles and pattern adjustments.
- Vary technique variations for corners.
- Use pass spacing and overlap strategy to guarantee motion fluidity.
How to Avoid Runs and Drips When Spraying
When you spray, keep the gun moving at an even pace and hold it the correct distance from the surface so paint doesn’t build up and run; slow, steady passes with proper overlap and a slightly reduced flow setting are your best defenses against drips.
Watch spray consistency, thin only to manufacturer specs, and adjust nozzle and pressure.
Manage surface tension by avoiding heavy starts, stopping, or pauses.
Minimizing Orange Peel and Getting a Smooth Finish
To minimize orange peel and get a smooth finish, you’ll want to start with proper paint thinning so the latex flows evenly through the tip.
Use a steady, overlapping spray technique and keep the gun perpendicular to the surface to avoid uneven texture.
Finally, adjust gun pressure and atomization until the spray feathers out smoothly without spitting.
Proper Paint Thinning
Getting the thinning right is essential for preventing orange peel and achieving a smooth finish, so you’ll want to match the paint’s viscosity to your spray gun and the project conditions.
Use latex viscosity adjustment and ideal thinning techniques to balance flow and atomization.
- Test small mixes
- Use recommended reducers
- Measure viscosity with a cup
- Adjust for temperature
Correct Spray Technique
Now that your paint’s viscosity matches the gun, focus on spray technique to minimize orange peel and produce a smooth finish.
Maintain consistent spray distance, usually 6–12 inches, and overlap passes by 50%. Move the gun at steady speed, avoid stopping mid-panel, and use smooth wrist motion.
Practice trigger control: start spray before the surface and release after passing to prevent buildup and runs.
Gun Pressure Adjustment
When you adjust the spray gun’s pressure correctly, you’ll reduce orange peel and get a smoother finish. Start by checking the manufacturer’s recommended PSI and then fine-tune while spraying a test panel.
You’ll dial gun pressure settings down or up to match viscosity, distance, and pattern for ideal pressure and atomization.
- Test on scrap
- Adjust small increments
- Watch for overspray
- Note conditions
Spraying Edges, Corners, and Trim Without Overspray
Because edges and trim catch overspray easily, you’ll use a tighter spray pattern, lower pressure, and controlled passes to keep paint where it belongs.
Use edge spraying techniques: short, angled strokes and a slightly reduced nozzle.
Employ corner coverage methods by feathering from each side.
Apply trim protection strategies like masking and shields.
Follow overspray prevention tips: maintain distance and steady speed.
How to Spray Cabinets and Furniture Evenly
Start by prepping surfaces—clean, sand, and prime any bare spots so paint sticks and lays flat.
Keep your spray motion steady and overlap each pass about 50% for consistent coverage.
Apply several thin, even coats rather than one heavy one to avoid runs and get a smooth finish.
Proper Surface Prep
Before you pull the trigger on your spray gun, prep every surface so paint adheres smoothly and dries evenly.
You’ll guarantee surface adhesion and proper finish preparation by doing surface cleaning, sanding techniques, priming surfaces, patch repairs, and dust removal while checking material compatibility.
- Clean grease and old finish
- Sand for tooth and smoothness
- Fill dents and flaws
- Prime porous or mixed materials
Consistent Spray Technique
Aim the gun level and move your whole arm, not just your wrist, to keep a steady distance and speed across cabinet doors and furniture panels; that consistent motion prevents heavy edges and blotchy coverage.
Keep overlap passes about 50%, maintain a 6–12 inch distance, and vary speed only slightly.
Focus on spray consistency, adjust fan width, and commit to technique practice before final pieces.
Thin Even Coats
When you spray cabinets and furniture, keep each coat thin and uniform so the finish builds smoothly without runs or orange peel; hold the gun 6–12 inches away, overlap passes about 50%, and move at a steady pace to lay down an even film that dries flat.
You’ll control spray consistency and adjust paint thickness for smooth coverage.
- Maintain steady speed
- Thin to recommended viscosity
- Test on scrap
- Light crosspasses
Best Practices for Spraying Ceilings and Walls
Because ceilings and walls demand different spray angles and coverage, you’ll want to adjust your technique and setup for each surface before you start. Use ceiling techniques like back-and-forth passes with an extended tip; for wall finishes use steady vertical strokes. Protect floors and tape edges. Aim for consistent overlap and keep tip distance steady.
| Surface | Tip |
|---|---|
| Ceiling | Extend |
| Wall | Vertical |
How Many Coats of Latex to Spray and Drying Times
Most projects need two coats of latex for even coverage and durability, though high-quality paints or light-touch primers can sometimes let you get away with one.
Most jobs require two coats of latex for even coverage and durability, though sometimes one will do.
You’ll plan for 2 coats, allow ideal drying between layers (typically 1–4 hours), and adjust for humidity or temperature during latex paint application.
- Two coats for uniformity
- Wait recommended drying time
- Thinner coats dry faster
- Inspect coverage before finishing
When to Sand Between Coats and How to Do It
You should sand between coats whenever the surface feels rough, shows runs or brush marks, or you need better adhesion for the next layer; light sanding improves smoothness and helps the next coat bond without removing too much of the previous finish.
Use proper sanding techniques with sanding tools, ideal grits (220–320), timing tips after cure, prioritize coat adhesion, surface smoothness, paint compatibility, and finishing touches.
Using Tack Cloths and Wiping for Dust Control
Before you spray, pick a tack cloth rated for fine dust so it won’t leave residue on the surface.
Wipe with light, overlapping strokes and change cloths as they load up to avoid smearing.
After wiping, keep the area clean and avoid handling the surface to prevent recontamination.
Choosing The Right Tack
When prepping a surface for latex paint, choosing the right tack method matters because it directly affects your finish by removing dust without leaving residue. Tack cloths and careful wiping are the two simplest, most reliable options you’ll use.
Pick based on surface, dust level, and paint type to guarantee a proper tack coat and maximize surface adhesion.
- Smooth vs textured
- Light vs heavy dust
- Reusable vs disposable
- Solvent-safe materials
Proper Wiping Technique
Start by working from the highest point down so dust doesn’t resettle on areas you’ve already cleaned. Use tack cloths and soft lint-free wipes, moving in straight strokes. Focus on consistent wiping techniques for reliable surface preparation before spraying.
| Tool | Use |
|---|---|
| Tack cloth | Light dabbing |
| Microfiber | Final wipe |
| Brush | Corners |
Preventing Recontamination
After you’ve wiped from top to bottom, keep dust from coming back by handling tack cloths and wipes carefully and working in small, controlled sections.
You’ll prevent recontamination, aid preventing overspray, and focus on maintaining cleanliness before each pass.
Change tack cloths when dirty, avoid dragging, wipe with light strokes, and seal cleaned areas until painting.
- Change tack cloths when soiled
- Use light strokes
- Work in small sections
- Seal cleaned areas
Managing Humidity and Temperature During Spraying
Because latex paint reacts to moisture and temperature, you should control both to get an even, durable finish; aim for a workspace between 50–85°F (10–29°C) and relative humidity under 60% while spraying and during the initial drying period.
Use dehumidifiers, fans, and HVAC for humidity control and temperature regulation.
Monitor moisture levels, air quality, and weather considerations to maintain ideal spraying conditions for proper paint drying.
Troubleshooting Common Spray Gun Clogs
When a spray gun clogs, you’ll notice sputtering, uneven spray patterns, or sudden stops that ruin the finish and waste paint. Pinpointing whether the blockage’s in the tip, nozzle, or fluid passages lets you fix it faster.
You’ll follow basic spray gun maintenance and check paint viscosity before cleaning.
- Clear tip and needle
- Flush fluid passages
- Inspect air cap
- Thin or strain paint
Fixing Orange Peel, Runs, and Sags After Spraying
After you spray, inspect the surface to identify orange peel, runs, or sags so you know what to fix.
For runs and sags, sand the excess and feather the edges before recoating to restore a smooth profile.
To minimize orange peel, adjust your gun settings, thin or strain the paint as needed, and keep a consistent spraying distance and speed.
Identifying Surface Defects
If your sprayed finish shows texture problems or drips, you’ll want to identify whether you’re dealing with orange peel, runs, or sags so you can choose the right fix.
Use inspection techniques and visual evaluation for surface analysis and defect identification.
Focus on paint adhesion when evaluating quality to plan defect repair.
- surface imperfections
- inspection techniques
- defect identification
- evaluating quality
Correcting Runs And Sags
Now that you’ve checked for orange peel, runs, and sags and evaluated adhesion, you can correct those defects to restore a smooth finish.
For minor run correction, sand lightly with fine grit, wipe clean, and feather in a thin touch-up coat.
For sag repair, lift excess with a sharp scraper, sand smooth, then spot-prime and re-spray thin layers to blend and cure properly.
Minimizing Orange Peel
When your sprayed finish shows orange peel, you can prevent and reduce it by adjusting technique, equipment, and material choices; you should focus on spray technique, surface preparation, paint consistency, and equipment maintenance.
Control humidity, monitor drying times, pick correct nozzle selection, and set proper air pressure to avoid texture.
- Check surface prep
- Thin for consistency
- Tune pressure/nozzle
- Maintain gun and filters
Fisheyes: What They Are and How to Prevent Them
Although small, fisheyes can ruin a smooth spray finish by leaving crater-like defects where paint retracts around contaminants.
Even tiny fisheyes can wreck a spray finish, leaving crater-like spots where paint retracts around contaminants.
You’ll learn fisheye identification and fisheye factors like oils, silicones, or improper cleaning.
Use fisheye prevention: clean, degrease, and strain.
For fisheye troubleshooting and fisheye repair, sand and recoat or use a compatible fisheye solution and follow product instructions carefully.
Save Paint: How to Filter, Reclaim, and Reduce Waste
One simple step that pays off is filtering and reclaiming leftover latex so you can cut costs and waste.
You’ll strain solids, store reclaimed paint correctly, and minimize trips to disposal sites. Use proper paint storage to extend life and follow eco friendly disposal for unusable residue.
- Strain into clean containers
- Label and rotate stock
- Reuse for touch-ups
- Filter before spraying
How to Test Spray Settings Before the Main Job
Before you start the main job, run a quick spray test to dial in pressure, tip size, and spray pattern so you avoid runs, overspray, and wasted material.
Set up a scrap panel, test spray, inspect coverage and atomization, then adjust settings incrementally until you get even, thin coats.
Record the final pressure and tip for consistent results on the job.
Cleaning Solvent Choices for Latex Spray Guns
When you finish spraying, choose a cleaning solvent that matches the latex formulation and your gun’s materials so you don’t damage seals or clog passages.
Choose a cleaning solvent compatible with your latex and gun materials to avoid damaging seals or clogging passages.
You’ll weigh cleaning methods, solvent alternatives, spray gun maintenance needs, environmental considerations, and safe disposal before picking one that balances effectiveness and safety.
- Water-based flush for fresh latex
- Mild detergent rinse
- Biodegradable solvent option
- Restricted harsh solvent use
Cleaning and Disassembly: Step-by-Step
Start by depressurizing the hose and removing the paint cup to prevent drips and accidental spray; then work in a clean, well-lit area so you can see seals and small parts. Use proper cleaning techniques and stepwise disassembly methods: flush, soak, and brush parts, inspect seals, and lay components out for reassembly.
| Step | Action |
|---|---|
| 1 | Flush solvent |
| 2 | Soak parts |
| 3 | Brush nozzles |
| 4 | Inspect seals |
Storing Your Spray Gun and Tips Between Uses
After you’ve cleaned and reassembled your gun, store it in a dry, dust-free spot with the needle retracted and the cup loosely capped to prevent pressure build-up; this protects seals, keeps tips from dinging, and makes the tool ready for the next job.
Follow basic spray gun storage and maintenance tips:
- Hang or cradle to avoid tip damage
- Label cleaned parts and date
- Keep spare tips sealed
- Inspect before next use
Maintaining Seals, Needles, and Nozzles Long-Term
Long-term care of seals, needles, and nozzles keeps your spray gun reliable and prevents costly downtime, so check and service these parts on a set schedule (monthly for frequent users, seasonally for occasional use).
For spray gun maintenance, perform regular inspections, nozzle cleaning, and lubrication techniques.
Monitor wear signs, practice needle care, schedule seal replacement, confirm part compatibility, and follow performance tips for long term storage.
When to Replace Parts or Upgrade Your Gun
Even with careful maintenance, parts will wear out and performance will drop, so you’ll need to know when to replace components or upgrade your gun.
Track issues, compare costs, and prioritize spray gun maintenance to avoid downtime. Consider upgrading components for performance enhancements, but confirm part compatibility first.
- Frequent clogging
- Visible wear or corrosion
- Loss of consistent spray pattern
- New project demands
Safety Checklist for Solvent and Paint Handling
Because solvents and paints can be hazardous if mishandled, you should follow a clear safety checklist before you start spraying:
wear safety goggles and respirator to limit paint fumes and chemical exposure,
guarantee proper storage and spill containment,
remove ignition sources to reduce fire hazards,
have first aid supplies and emergency procedures posted,
and keep ventilation adequate and a fire extinguisher nearby.
Cost: Spray vs Brush/Roller – Time and Material Breakdown
When weighing spray versus brush and roller, consider both upfront equipment costs and the time you’ll spend—spray systems cost more to buy or rent and need prep time, but they cut application time dramatically and can lower labor expenses on large jobs.
Use a cost comparison and efficiency analysis to choose.
- Faster coverage reduces labor hours
- Higher equipment cost upfront
- Material waste varies by method
- Prep and cleanup time matters
Disposing Leftover Latex: Eco-Friendly Steps
After you finish a paint job and compare the time and cost of spraying versus brushing, you’ll still need to handle whatever latex remains.
Don’t pour it down drains or toss cans in trash. Use eco friendly disposal: dry small amounts with kitty litter, take partially used cans to hazardous waste or community latex recycling events, or pass usable paint to charities or neighbors.
Common Beginner Mistakes and How to Avoid Them
Though spray guns make painting faster, beginners often trip up on a few predictable mistakes that cost time, finish quality, and money. You’ll avoid most common errors by checking paint viscosity, testing spray technique, and confirming equipment setup.
Follow cleanup procedures, respect drying times, and maintain paint consistency. Remember safety precautions like masks and ventilation to protect yourself and your finish.
- Skipping viscosity check
- Poor spray technique
- Rushed cleanup procedures
- Ignoring safety precautions
Advanced Tips for Professional-Level Latex Spraying
You’ve handled the basics, so now push your results toward a professional sheen by refining technique, tools, and materials for latex spraying.
Adjust spray technique: maintain consistent distance, overlap passes, and control speed.
Match paint viscosity to your gun and nozzle; thin sparingly and test.
Use quality tip sizes, pressure settings, and wet-edge work to minimize runs and guarantee even coverage.
Quick-Start Checklist to Start Spraying Today
1 quick checklist gets you spraying with confidence: gather your spray gun, the correct tip and needle size, a viscosity cup and filter, chosen latex paint thinned to the gun’s spec, personal protective equipment (respirator, goggles, gloves), drop cloths and masking materials, and a compatible compressor or HVLP turbine.
Quick start tips and Essential materials help you prep smartly.
- Confirm pressure and tip match
- Strain paint before filling
- Test spray on cardboard
- Secure ventilation and PPE
Frequently Asked Questions
Can I Spray Latex Paint Over Oil-Based Paint Without Full Stripping?
Yes—you can if you properly prep: you’ll guarantee paint adhesion by cleaning, deglossing or sanding, and applying a suitable bonding primer; surface preparation prevents peeling and secures latex bonds to the oil-based substrate.
How Do I Handle Paint Allergies or Sensitivities During Spraying?
You should stop if symptoms start, wear a respirator, gloves, and goggles, increase ventilation, and follow safety precautions; consider alternative coatings like low-VOC or water-based formulas, and consult a doctor for severe allergies or sensitivities.
Are There Spray-Friendly Latex Paints Formulated for Low-Voc Regulations?
Like a fresh breeze, yes — you’ll find spray friendly options that meet low voc benefits. You’ll choose water‑based, labeled “sprayable,” test for atomization, thin per manufacturer, and enjoy safer fumes and faster cleanup.
Can Color-Shifting or Metallic Latex Finishes Be Sprayed the Same Way?
Yes — you can spray color-shifting or metallic latex finishes, but you’ll need color shifting techniques and metallic finish applications like proper thinning, straining, multiple light coats, specialized pigments, controlled spray settings, and test panels to guarantee uniform effect.
How Do I Transport and Legally Ship a Partially Full Paint Sprayer Across States?
You’ll drain and secure the partially full sprayer, follow paint disposal rules, label contents, and comply with shipping regulations for hazardous liquids; check carrier/state rules, use approved packaging, and keep documentation for interstate transport.
Conclusion
You’ve learned the steps, gathered the gear, and prepped the space, so take a deep breath and start. Spray slowly, spray evenly, spray confidently. Thin when needed, clean when finished, dispose responsibly. Practice on scrap, adjust fan and pressure, perfect your distance. Protect yourself, protect your surfaces, protect the finish. Keep tools maintained, keep waste minimized, keep learning. With care and consistency, you’ll get professional results every time.