How to Use HVLP Spray Gun With Latex Paint (Beginner Guide)
You can get smooth, low-overspray results with an HVLP gun by thinning latex to the manufacturer’s range (about 5–15%), testing on cardboard, and keeping a steady 6–10 inch distance with 50% overlap. Set the correct tip and pressure, strain paint, and wear a respirator and eye protection. Clean the gun immediately after use and sand lightly between coats for a cabinet-quality finish. Follow these basics and you’ll find deeper tips on setup, troubleshooting, and finishes.
Quick Start: Spray Latex With HVLP (Step-by-Step)
1. You’ll prep the area, thin latex to manufacturer specs, and test spray on cardboard.
Wear protection, keep consistent distance, and move smoothly for even coats.
Clean immediately after use to protect finish and guarantee proper spray gun maintenance.
Label and seal leftover latex for proper paint storage.
Inspect tips and filters before next use to avoid clogs.
Why Choose HVLP for Latex Paint
You’ve learned the basic prep and spraying steps, and now it helps to pick the right tool for latex — which is where HVLP shines.
You’ll appreciate HVLP advantages: low overspray, precise control, and reduced waste.
For latex compatibility, HVLP handles thinned latex smoothly, giving even coverage and quicker touch-ups.
It’s efficient, cleaner, and ideal for indoor projects where finish quality matters.
Best HVLP Systems for Latex Projects
Choosing the right HVLP system makes your latex projects faster and neater; you’ll want a gun that matches your project’s scale, your tolerance for prep (like thinning), and the finish you’re aiming for.
Pick systems offering adjustable atomization, easy cleanup, and consistent flow.
Focus on HVLP advantages for latex paint, practice application techniques, and use beginner tips to match gun size to project and skill level.
Essential HVLP Accessories and Protective Gear
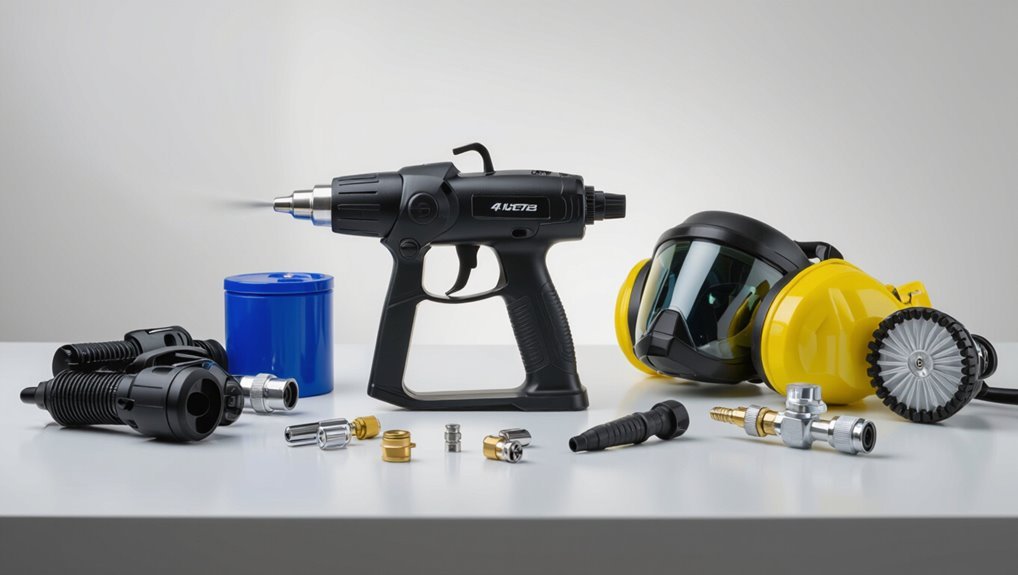
After picking an HVLP system that fits your latex project, you’ll want the right accessories and protective gear to get consistent results and stay safe.
Accessory essentials include fluid filters, extension wands, extra hoses, and solvent-safe cups.
Include fluid filters, extension wands, spare hoses, and solvent-safe cups for consistent, clog-free spraying.
For safety equipment, wear a respirator, eye protection, gloves, and coveralls.
Keep tack cloths and drop cloths handy to control dust and overspray.
Choosing the Right Spray Tip Size for Latex
Picking the right spray tip size for latex makes the difference between smooth, even coverage and a runny, uneven finish. You’ll focus on spray tip selection and latex compatibility to match tip orifice to paint viscosity and surface.
Choose larger tips for heavier latex, smaller for fine detail. Trust tests and adjust pressure to avoid runs.
- Relief when it’s perfect
- Frustration avoided
- Confidence in finish
- Pride in control
- Calm during touchups
Thinning Ratios: Where to Start by Paint Type
For interior latex, you’ll usually thin with 5–10% water to improve flow without losing hide.
Exterior latex often needs a bit more—start around 10–15% to help atomization and weatherproofing additives still perform.
Specialty latex blends (self-priming, high-build, or stain-blocking) vary widely, so check the manufacturer’s guidance and test on a card before you spray.
Thin For Interior Latex
Start by checking the paint can’s label for manufacturer guidance.
For interior latex, you’ll usually thin 5–10% with water to improve flow for your spray technique.
Test on cardboard, adjust for humidity, and keep tip size in mind.
- Excited to see smooth coverage
- Nervous about runs
- Confident with a test spray
- Frustrated by clogging
- Relieved at even finish
Exterior Latex Ratios
If you moved from indoor work to exterior surfaces, you’ll find exterior latex often needs a bit more thinning to handle thicker pigments and additives that improve durability. Start with small reductions, test spray application, and weigh weather considerations and surface preparation. Adjust by finish types and coat count for ideal paint durability.
| Paint Type | Starting Ratio | Notes |
|---|---|---|
| Acrylic | 10% water | Good balance |
| Elastomeric | 5% | Thicker, test |
| Satin | 8% | Smooth finish |
| Gloss | 6% | Fine atomization |
| Primer | 12% | Better penetration |
Specialty Latex Blends
When you’re working with specialty latex blends—such as stain-blocking, high-build, or mildew-resistant formulas—you’ll usually need different thinning approaches than with standard indoor or exterior latex; these paints often contain heavier binders, additives, or fillers that affect flow and atomization.
Start light: 5–10% water or manufacturer reducer, test spray, and adjust for viscosity. Use proper application techniques and treat specialty paint cautiously.
- Frustration eased
- Confidence rising
- Control regained
- Surfaces protected
- Results celebrated
How to Strain and Filter Latex Paint
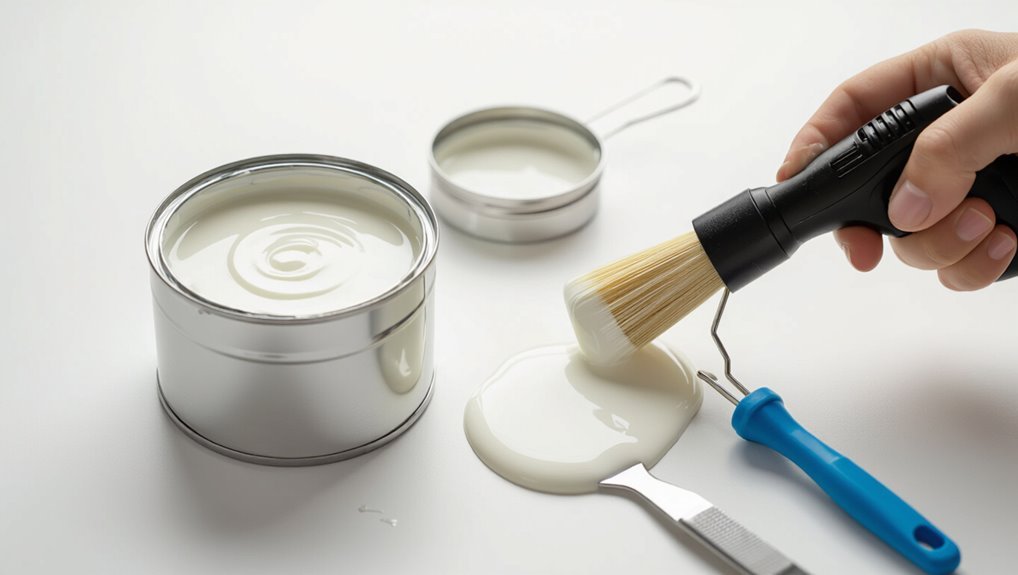
Before you load your HVLP gun, you’ll want to prepare the latex by stirring, checking consistency, and straining out lumps or skin.
Use a proper paint strainer or fine mesh filter when pouring into the gun’s cup to catch particles that could clog the nozzle.
Changing or double-filtering for older or reclaimed paint will keep your spray pattern smooth and your gun running trouble-free.
Prepare Paint For Spraying
Start by thinning and straining your latex paint so it flows smoothly through the HVLP gun and won’t clog the tip.
You’ll adjust paint viscosity using recommended mixing techniques, stirring gently and testing spray pattern. Strain into the cup, remove lumps, and keep consistency steady for even coverage.
- Relief when it sprays perfectly
- Pride in smooth finish
- Confidence in control
- Satisfaction with neat prep
- Calm before spraying
Use Proper Filters
Now that your paint is thinned and smooth, strain and filter it to remove skin, grit, and dried bits that can clog the HVLP tip.
Use mesh, nylon, and cone paper filter types for cups and funnels.
Pour slowly, replace disposable screens, and clean reusable strainers after each job.
Regular filter maintenance prevents clogs and guarantees consistent spray patterns.
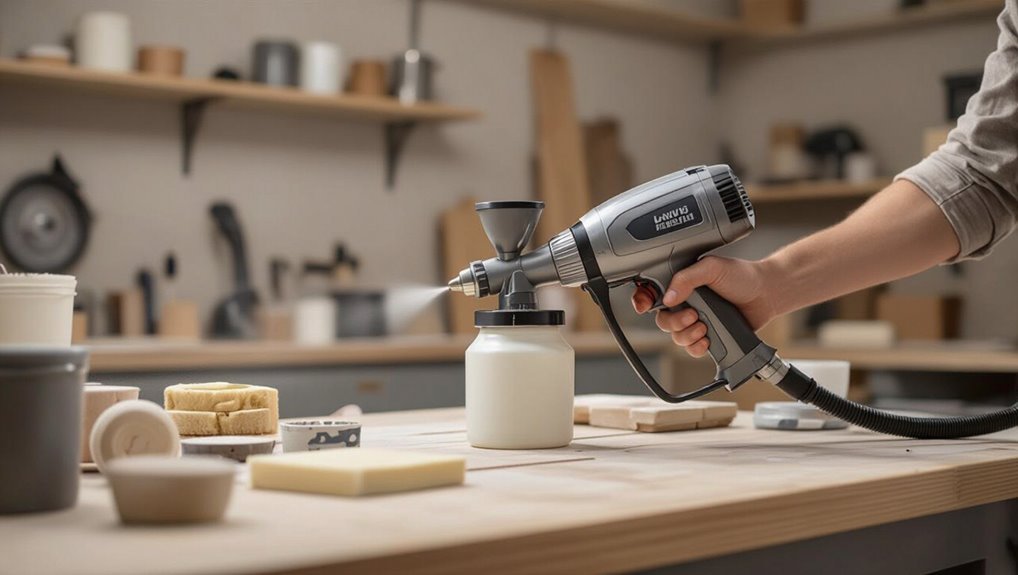
Set Up Your HVLP Gun and Pressure
1 key step in getting crisp, even coats is properly setting up your HVLP gun and pressure; you’ll want to assemble the gun, attach the correct nozzle and tip, and confirm the air supply and regulator are secure before you trigger the spray.
Check paint viscosity, test pressure, and follow spray gun maintenance to prevent clogs and frustration.
- Confident
- Calm
- Excited
- Assured
- Relieved
Spray Technique: Distance, Overlap, and Speed
With your gun assembled and pressure dialed in, focus on how you move and where you hold the nozzle—distance, overlap, and speed determine whether a coat lays flat or shows runs and gaps.
Keep a consistent 6–10 inch distance, overlap strokes 50%, and move at a steady pace.
Watch spray pattern edges, adjust for even coverage, and practice gun maintenance to prevent clogs.
Prep for Spraying: Wood, Cabinets, and Walls
Preparing the surface correctly makes the difference between a pro-looking finish and a mess, so you’ll want to clean, sand, and mask each area before you spray.
You’ll focus on surface cleaning, wood preparation, cabinet sanding, wall priming, and repair imperfections so the finish smoothing goes on evenly.
- Relief at seeing flaws disappear
- Pride in crisp edges
- Joy of smooth grain
- Confidence in adhesion
- Satisfaction with pro results
Spraying Multiple Coats and When to Sand
Once you’ve laid down the initial coat and allowed proper dry time, apply additional thin, even coats rather than one heavy pass so each layer bonds and levels properly.
Light passes cut drips and speed up curing, while the right wait between coats prevents film lifting and trapped solvents.
Monitor spray timing and coat thickness; sand lightly between coats only when texture or dust nibs remain, then tack before recoating.
How Temperature and Humidity Affect Spraying
Because temperature and humidity change how paint flows, dries, and bonds, you’ll need to adjust your HVLP setup and timing accordingly; higher heat speeds drying and can cause orange peel or dry spray, while cold or high humidity slows solvent evaporation, increasing run risk and longer tack times.
You’ll monitor temperature effects and humidity impacts to time coats and thin appropriately.
- Frustration when mist skates
- Relief with quick adjustments
- Anxiety during humid days
- Satisfaction from smooth control
- Confidence in predictable results
Avoid Orange Peel, Runs, and Sags
Orange peel, runs, and sags all start from the same problems: wrong thinness, too much pressure, or holding the gun too close or too long—so you’ll focus on film thickness, gun distance, and motion to prevent them.
Prep the surface preparation, adjust spray patterns and application techniques, use proper paint additives, control environmental factors and drying times, and monitor finish quality for smooth results.
Preventing and Clearing Gun Clogs on the Job
If you want to keep your HVLP gun running smoothly on the job, start by preventing clogs before they occur and know quick clearing steps for when they do happen.
You’ll want routine nozzle checks, proper thinning, and clean filters. Use quick on job solutions for breaks and emergencies to avoid downtime and frustration.
- Relief: quick rescue tips
- Confidence: steady flow
- Control: simple checks
- Speed: fast clears
- Calm: less panic
Control Overspray and Protect the Workspace
Now that you’ve got clog prevention and quick clears under control, shift focus to managing overspray and protecting the area around your work. Use drop cloths, masking, and low-pressure settings for effective overspray control and workspace protection. Seal vents and move valuables. Check airflow so particles disperse safely.
| Item | Action |
|---|---|
| Drop cloths | Cover floors |
| Masking | Protect edges |
| Vent seal | Block airflow |
| Low pressure | Reduce mist |
| Move items | Clear area |
Clean and Maintain Your HVLP Gun
Keep your HVLP gun in top shape by cleaning it after every use and performing routine maintenance checks; that prevents clogs, maintains spray quality, and extends the tool’s life.
You’ll follow gun cleaning steps, inspect seals, and apply maintenance tips regularly to keep performance reliable.
- Relief: no clogged nozzle
- Pride: tool looks cared for
- Confidence: consistent finishes
- Calm: fewer surprises
- Satisfaction: longer lifespan
Troubleshooting: Uneven Coverage or Texture
If your finish looks blotchy or has an uneven texture, check and adjust the spray pattern first to guarantee an even fan and overlap.
Then verify the paint consistency—too thick or too thin will cause runs, orange peel, or poor coverage.
Make small adjustments and test on cardboard until the spray and viscosity match the material and gun settings.
Adjust Spray Pattern
1 key adjustment to fix uneven coverage or texture is changing the spray pattern; this controls how wide and dense the material lands and directly affects overlap, feathering, and edge buildup.
When adjusting nozzle and managing spray distance, you’ll get smoother laydown and fewer ridges.
- Frustration melts away
- Confidence grows
- Surfaces feel satisfying
- Mistakes seem smaller
- Results excite
Check Paint Consistency
Once your spray pattern looks right, check the paint consistency—thin or thick material often causes uneven coverage or texture.
You’ll assess paint viscosity with simple test methods: use a viscosity cup or toothpick drag to see flow. If paint beads or runs, thin slightly; if it clumps or splatters, add reducer per manufacturer.
Re-test until smooth, even spray results.
Pro Tips for a Cabinet- and Furniture-Grade Finish
When you’re aiming for a cabinet- or furniture-grade finish, focus on preparation, control, and consistency: sand smooth, remove dust, thin paint correctly, and spray even passes for cabinet finishes and furniture refinishing that last.
- Pride in every seam
- Joy when wood glows
- Calm from smooth coats
- Confidence in crisp edges
- Satisfaction at lasting beauty
When HVLP Isn’t Right: Hire a Pro or Use Airless
If your project is large, fast-moving, or needs thicker coatings than HVLP can reliably deliver, consider hiring a pro or switching to an airless sprayer.
You’ll avoid DIY headaches when HVLP limitations slow progress or require multiple passes. Pros or airless alternatives handle high-volume, thicker latex and reduce labor time.
Evaluate cost, access, and finish needs before deciding.
Frequently Asked Questions
Can I Spray Exterior Latex With HVLP in Direct Sunlight?
You shouldn’t spray exterior latex with HVLP in direct sunlight; it’ll dry too fast. You’ll need to adjust spray technique and thin paint consistency, work in shaded sections, and spray during cooler morning or late-afternoon conditions.
Are Water-Based Primers Compatible With HVLP Spraying?
Yes — you can spray water-based primers with an HVLP; they offer good water based compatibility. You’ll adjust tip size, thin appropriately, and follow proper primer application techniques to avoid clogging and guarantee even, smooth coverage.
How Long Should I Wait Before Reattaching Hardware After Spraying?
Think of it like waiting for a souffle — you should usually wait 24–48 hours for drying times, though for different hardware types (brass, chrome, painted) you might hold off 72 hours for full cure before reattaching.
Can I Tint Latex Paint for Spraying at Home?
Yes — you can tint latex paint for spraying at home; use tinting techniques like universal colorants, test spray consistency, thin gradually for proper atomization, and mix thoroughly so color and viscosity stay uniform before you spray.
Is Respiratory Fit-Testing Necessary for HVLP Use?
Yes — you should; don’t assume casual use’s safe. You’ll need proper respiratory protection and fit-testing to block paint fumes effectively, ensuring seal integrity and reducing inhalation risk during HVLP spraying with latex or other coatings.
Conclusion
You’ve got the basics down, and with practice you’ll spray latex as smoothly as a pianist glides over keys. Start with proper thinning, the right tip, consistent overlap, and steady passes. Protect surroundings, clean thoroughly after each job, and tweak settings for even texture. For cabinets and furniture, take time to sand between coats. If you hit persistent problems, don’t hesitate to call a pro or switch to an airless system for big jobs.