How to Use Latex Paint for Smooth and Even Wall Finish
Prep thoroughly: clear the room, clean and sand walls, fill holes and feather patches. Prime surfaces as needed and choose a latex with the sheen suited to traffic and room use. Use quality angled brushes for edges and a trim-quality roller, apply in “W” patterns, keep a wet edge, and sand lightly between coats for glassy smoothness. Dry in warm, low-humidity conditions, clean tools promptly, and store leftovers labeled—scroll down for full step-by-step guidance.
Quick Checklist: How to Paint a Smooth Wall
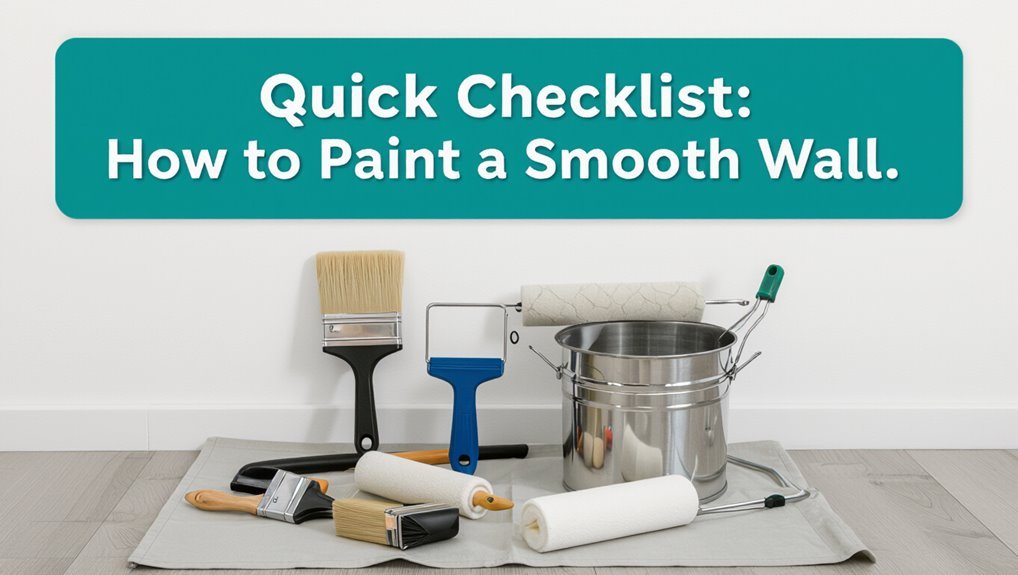
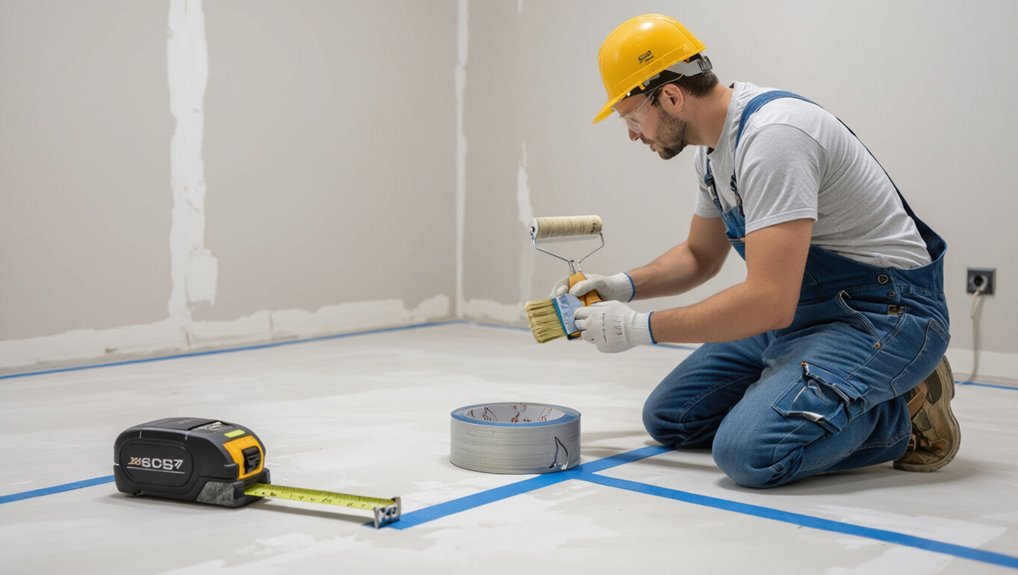
Start by prepping the room: clear furniture, lay drop cloths, and remove outlet covers and switch plates so nothing gets in the way.
Inspect for cracks, sand glossy spots, and fill holes for proper wall preparation.
Inspect for cracks, sand any glossy areas, and fill holes to ensure smooth, well-prepared walls.
Tape trim, dust surfaces, and prime if needed.
Choose the right paint technique—brush for edges, roller for flats—and maintain wet edges for a consistent, smooth finish.
Why Choose Latex Paint for Interior Walls?
Why pick latex paint for interior walls? You’ll get easy cleanup, quick drying, and durable coverage while considering latex paint benefits and environmental impact.
It’s practical for most rooms and simple to apply.
- Low VOC options reduce environmental impact
- Fast drying speeds projects
- Durable, washable surfaces
- Easy soap-and-water cleanup
Choose the Right Latex Paint Sheen for Smooth Walls
Sheen affects both the look and performance of your walls, so pick one that matches the room’s use and your desired finish. Consider satin or eggshell for living areas, semigloss for trim and moisture-prone rooms, and flat for hiding imperfections. Balance paint color selection and wall preparation to optimize sheen choice.
| Sheen | Best Use | Durability |
|---|---|---|
| Flat | Low-traffic | Low |
| Satin | Living rooms | Medium |
| Semigloss | Kitchens/baths | High |
Estimate Paint Quantity for a Room
To estimate how much latex paint you’ll need, measure each wall’s width and height, subtract windows and doors, then divide the total square footage by the coverage listed on the paint can (usually 350–400 sq ft per gallon) to get required gallons; round up to account for touch-ups and extra coats.
Use a paint quantity calculator and accurate room measurements to plan.
- Measure each wall
- Subtract openings
- Check can coverage
- Round up for extras
Essential Tools for a Professional Finish
A small set of quality tools will make the difference between a DIY job and a professional finish: gather angled brushes, trim-quality rollers, extension poles, a sturdy tray, quality painter’s tape, drop cloths, sandpaper and a good putty knife.
These let you execute precise paint application techniques and reliable wall preparation methods, so you work faster, cut clean edges and achieve a smooth, even finish.
Pick the Right Roller Nap for Your Wall Texture
Choose your roller nap based on the wall’s surface: use a short nap for smooth walls to get a sleek, even coat.
For textured or rough walls, pick a longer nap so paint reaches crevices without streaks.
Matching nap to texture cuts touch-ups and gives a more professional finish.
Smooth Walls: Short Nap
When you’re working with smooth walls, pick a short-nap roller (¼-inch to ⅜-inch) so the cover lays down paint evenly without trapping air or leaving texture behind.
You’ll get a consistent smoothing technique and precise paint application.
- Use even pressure
- Roll in overlapping W strokes
- Work quickly on small sections
- Lightly back-roll for uniform sheen
Textured Walls: Long Nap
If your walls have texture, reach for a long-nap roller (¾-inch to 1¼-inch) so the cover can push paint into crevices and create even coverage without missing high spots.
You’ll apply textured wall techniques that reduce back-rolling and stippling. Choose quality covers, work in overlapping passes, and enjoy long nap benefits: fewer passes, better fill, and a uniform finish with less touch-up.
Brushes That Reduce Streaks and Brush Marks
Because a good brush lays down paint smoothly, you’ll cut streaks and visible brush marks by picking the right type and using it properly.
Because a good brush lays down paint smoothly, choosing the right one prevents streaks and visible brush marks.
Use these brush selection tips and learn brush types to match finish and paint. Choose quality, avoid cheap bristles, and maintain brushes.
- Natural vs synthetic
- Width for trim vs wall
- High-quality ferrule
- Proper cleaning and storage
Selecting Primer for Different Wall Conditions

Before you start painting, pick a primer that matches your wall’s surface type—drywall, plaster, or previously painted surfaces each need different formulations.
For walls with water stains, smoke damage, or tannin bleed, use a stain-blocking primer to stop discoloration from bleeding through your latex topcoat.
Choosing the right primer now will save you time and give your paint a truer, longer-lasting finish.
Surface Type Primer
Walls vary as much as the rooms they enclose, so choose a primer that matches the surface type and condition.
You’ll do surface preparation first, then pick primer based on substrate to get primer benefits like adhesion and uniform finish.
Consider:
- Drywall: high-build latex primer
- Plaster: breathable alkali-resistant primer
- Masonry: masonry primer with mineral bonding
- Previously painted: adhesion-promoting primer
Stain-Blocking Primer
Surface condition and previous coatings dictate which stain-blocking primer you’ll need, since different stains—water, smoke, tannin, or grease—require specific blocking chemistries.
You’ll assess stain types, choose oil- or shellac-based primers for heavy tannin or smoke, and use water-based for mild discoloration.
Primer benefits include adhesion, sealing, and preventing bleed-through so your latex finish stays smooth and uniform.
Dry Time After Primer: When to Paint?
After the primer feels dry to the touch, wait the manufacturer’s recommended recoat time so your latex paint bonds properly.
Check drying conditions and primer types; cooler or humid air slows curing. You’ll know it’s ready when film is firm, not tacky.
Check drying conditions and primer type—cool or humid air slows curing. Ready when the film is firm, not tacky.
- Follow label recoat window
- Test a small patch gently
- Adjust for humidity/temperature
- Use compatible primer types
Repair Drywall or Skim-Coat: How to Decide
Start by evaluating how extensive the damage is—small dents and nail holes need simple repairs, while widespread cracks or uneven texture may need more work.
Next, consider the finish you want: smooth, glossy, or subtle texture will determine whether spot repairs or a full skim-coat are appropriate.
If you want a flawless finish and the surface has multiple imperfections, plan for a skim-coat; otherwise, targeted drywall repairs will save time and money.
Assess Damage Extent
Before you decide between repairing drywall or skim-coating, take a close look at how deep and widespread the damage is so you can pick the most effective fix.
You’ll perform a quick damage assessment and wall inspection to choose repair vs. skim.
Check:
- Hairline cracks and nail pops
- Large holes or gouges
- Surface texture inconsistencies
- Water stains or soft spots
Consider Finish Requirements
When deciding whether to repair drywall or skim-coat, focus on the finish you want and the wall’s current texture: weigh finish types, texture options, color choices, surface conditions, application techniques, lighting effects, paint brands, and wall preparation to match results.
| Option | When to choose |
|---|---|
| Repair drywall | Local damage, retain texture |
| Skim-coat | Large imperfections, smooth finish |
Safely Strip Loose Paint and Flaky Texture
Scrape away loose paint and flaky texture gently, using a wide putty knife or a stiff-bristled scraper held at a low angle so you don’t gouge the wall.
Do a careful wall inspection, follow safety precautions for paint removal, and consider environmental considerations and paint disposal.
Prepare the surface for repainting by removing all unstable bits.
- assess damage
- wear PPE
- contain debris
- label waste
Clean Walls Properly Before Priming and Painting
Since dirt, grease, and dust prevent primer and paint from adhering properly, start by removing all surface contaminants with a dry brush or vacuum.
Then wash walls with a mild detergent solution and rinse thoroughly so the surface is clean and residue-free.
Use targeted wall cleaning techniques, degreaser for kitchens, and a sponge with effective cleaning solutions.
Let walls dry fully before priming.
Fill Holes, Cracks, and Nail Pops Correctly
Start by locating every blemish—holes, hairline cracks, and nail pops—and assess their size so you know which repair method and filler to use.
Use appropriate products for hole filling, crack repair, and nail pop fixes to guarantee surface smoothing and proper wall preparation. Match texture before priming.
- Choose filler by size
- Secure and reset nails
- Apply thin layers
- Feather edges for texture matching
Sand Walls for a Perfectly Smooth Surface
Now that your repairs are dry and any texture’s been matched, sand the patched areas and surrounding wall until everything feels smooth and even.
Use medium-grit then fine-grit paper, keep a light, even pressure, and blend edges.
Start with medium grit, finish with fine; sand lightly and blend edges for a seamless finish.
Vacuum dust, wipe with a damp cloth, and inspect under raking light.
Proper sanding techniques are essential for thorough wall preparation before priming and painting.
Mask Trim, Outlets, and Fixtures Cleanly
Before you paint, mask trim, outlets, and fixtures so paint lines stay crisp and gear stays clean.
Use proper masking techniques for edge precision and trim protection, ensuring outlet safety and fixture coverage during paint application.
Follow these quick steps:
- Clean surfaces first
- Use quality painter’s tape
- Cover fixtures securely
- Remove tape while paint is tacky
Protect Floors and Furniture During Painting
1 simple step to keep your floors and furniture safe is to cover them completely with the right materials and secure them so paint, drips, and foot traffic can’t cause damage.
Use quality drop cloths and floor covering, combine furniture shielding with tape application for edges, gather prep materials, maintain ventilation precautions while painting, and plan a swift cleanup process to protect surfaces and finish.
How to Stir and Thin Latex Paint Correctly
Start by stirring the can thoroughly with a clean, flat stir stick until any settled pigment and binder are fully reincorporated; you want a uniform color and consistency so the paint goes on smoothly.
Use proper stirring techniques and careful thinning methods to maintain coverage.
Follow checklist:
- Stir slowly from bottom up
- Scrape sides and bottom
- Add water sparingly
- Test viscosity before painting
Apply Primer for Even Adhesion
Before priming, you’ll clean, sand, and repair the surface so the primer can grip evenly.
Choose a primer formulated for your wall material and the finish you’re after—stain-blocking or bonding primers work for problem areas.
Apply the primer according to label instructions for drying time and coverage to guarantee consistent adhesion.
Surface Preparation Steps
Applying a quality primer guarantees your latex paint sticks evenly and hides stains or uneven patches, so you get truer color and a smoother finish.
You’ll follow basic surface cleaning and a careful wall inspection before priming. Prep steps focus on adhesion and longevity:
- Remove dust and grease
- Repair holes and cracks
- Sand rough spots smooth
- Wipe down with damp cloth
Primer Selection Tips
Now that you’ve cleaned, repaired, and smoothed the walls, pick a primer that matches the surface and the paint’s job:
stain-blocking primers for nicotine or water stains,
high-adhesion primers for slick or previously painted surfaces,
and mold-resistant primers for damp areas.
Choose primer types by substrate and finish, follow recommended application techniques, apply evenly, sand lightly if needed, and let primer cure before painting.
Cut In Clean Edges Around Trim and Ceilings
Cutting in clean edges around trim and ceilings takes steady hands and the right brush—pick a 2–2.5 inch angled sash brush and load it lightly so paint doesn’t drip.
Use proper cut in techniques for edge precision; work in short strokes and keep a wet edge.
- Tape only when needed
- Rest your wrist often
- Feather paint toward wall
- Check from different angles
Load a Roller Without Splatter
Get your roller and tray ready by removing loose fibers and lining the tray well so paint spreads evenly across the nap.
Pour a moderate amount into the well and roll slowly back and forth to pick up an even coat—don’t overload the roller.
Keep a steady pressure as you work so the paint distributes smoothly without splattering.
Proper Roller Prep
Load the roller evenly to prevent drips and splatter: dip just the nap into the tray well, roll it up the slope to pick up paint, then roll back and forth on the tray’s ridged area until the roller holds a uniform, thin film.
You’ll also focus on roller cleaning and roller maintenance to extend life and performance.
- Remove loose fibers
- Spin out excess
- Store dry and protected
- Inspect nap integrity
Load Even Amounts
1 simple trick makes loading a roller without splatter much easier: dip only the nap into the tray well, roll up the slope to pick up paint, then tamp gently on the ridged area until the roller holds a thin, even film—this minimizes drips and keeps paint off your handles and floor.
Then use steady load techniques and check paint consistency; don’t overfill or squeeze excessively.
Control Paint Distribution
Work deliberately to control how much paint your roller carries so you can cover walls smoothly without splatter.
You’ll manage paint thickness and perfect roller technique by loading slowly, using the tray’s slope, and checking coverage.
Follow these steps:
- Dip roller edge, not center
- Roll on tray grid firmly
- Remove excess in thin passes
- Pause to inspect and adjust
Roll Walls for an Even, Consistent Coat
Start by dipping your roller into the tray and rolling it back and forth to saturate the nap evenly.
Then apply paint in a “W” or “M” pattern on a 4–6 foot section before filling it in to guarantee uniform coverage.
Use proper roller techniques to maintain even pressure, blend edges as you go, and control paint application to avoid streaks and uneven texture.
Keep a Wet Edge to Avoid Lap Marks
Work in overlapping sections so each new pass slightly blends into the still-wet paint.
Keep your roller loaded evenly and maintain a steady paint flow to avoid dry edges.
That way you’ll prevent lap marks and get a uniform finish.
Work In Overlapping Sections
When you paint, overlap each pass slightly so the previous area stays wet—this “wet edge” prevents lap marks and gives a seamless finish.
Work in overlapping sections using short, controlled overlapping strokes for seamless shifts. Move methodically, keeping edges fresh.
Suggestions:
- Start at a corner
- Paint in 3-foot sections
- Blend edges immediately
- Step back and inspect often
Maintain Consistent Paint Flow
Keep a wet edge by maintaining a steady paint flow across the wall so each stroke blends into the next—this prevents lap marks and gives you an even finish.
Keep paint consistency uniform, thin or stir as needed.
Use a controlled application technique: load your roller or brush evenly, work in manageable sections, and overlap wet edges promptly so every pass merges smoothly for a seamless result.
How Many Coats of Latex Paint Do You Need?
Wondering how many coats of latex paint you’ll need? You’ll usually apply two, but adjust by surface and sheen.
Use proper paint application techniques and respect coat drying times to avoid streaks.
- One: primer only for new drywall
- Two: standard coverage for most walls
- Three: deep color or high-traffic areas
- Touch-up: spot coat after full cure
Blend New Paint Into Existing Finishes
To blend new paint into existing finishes, feather your edges and work wet into wet so the shift stays invisible; match sheen, stir old and new thoroughly, and use a light touch with a brush or roller to avoid lap marks.
Use fine blending techniques: load minimally, overlap slightly, step back to check coverage, and blend toward the center until the repair disappears into the existing finishes.
Paint Corners and Tight Spaces Like a Pro
When you paint corners and tight spaces, start with a steady cut-in using a quality angled brush to create a clean edge.
Follow the cut-in by rolling out the area with a small roller to blend the brushstrokes and reach narrow spots.
This combo keeps lines crisp and speeds up the job without missing crevices.
Cut-In Technique
Start by loading your angled brush with a moderate amount of paint, tapping off excess on the tray so you don’t dribble; then steady your hand and paint a neat 2–3 inch strip along the edge where wall meets trim, ceiling, or corner.
Use cut in techniques for edge precision.
Tips:
- Hold brush at 30°
- Work in smooth strokes
- Feather the end
- Keep a wet edge
Use Small Rollers
Reach for a small roller to tackle corners and tight spots where a full-size roller or brush can’t reach, and you’ll save time while getting an even finish.
Use a high-density mini roller for consistent paint application, loading it evenly and rolling with short, controlled strokes.
Blend edges into adjacent areas, maintain a wet edge, and clean rollers promptly to preserve roller technique and results.
Latex Paint Drying Times and How Temperature and Humidity Affect Them
The drying time for latex paint depends mostly on temperature and humidity, so you’ll want to factor those conditions into your schedule; higher temperatures and lower humidity speed drying, while cool, damp air slows it down and can tack on hours or even days.
Consider these points about drying conditions:
- temperature impact: warmer air shortens tack time
- humidity effects: high moisture delays cure
- ideal drying: moderate warmth, low humidity
- ventilation aids consistent results
Speed Up Drying Without Harming the Finish
If you need paint to dry faster without harming the finish, focus on controlling evaporation and airflow rather than overheating or over-drying the surface; increase ventilation, raise room temperature a few degrees, and lower humidity with a dehumidifier or fan while avoiding direct blasts of hot air that can cause cracking or orange peel. Use proven drying techniques and safe paint additives sparingly.
| Tip | Benefit |
|---|---|
| Ventilate | Evaporation |
| Dehumidify | Faster cure |
| Low heat | Prevents defects |
Avoid and Fix Common Brush Marks
Prevent brush marks by using the right brush and technique: load the brush evenly, keep a wet edge, and stroke in long, light passes while maintaining consistent pressure so you don’t leave ridges or overlap marks.
You can correct marks by sanding lightly and reapplying thin coats. Apply proper brush technique during every paint application.
- Inspect for streaks
- Sand high spots
- Thin heavy spots
- Recoat carefully
Stop Bubbling and Blistering in Latex Paint
When heat, moisture, or trapped solvents get under your latex paint, you’ll see bubbles and blisters form on the surface; act quickly to stop them before the film breaks and peeling starts.
Scrape loose areas, sand edges smooth, and allow substrate to dry.
Prime repaired spots to restore paint adhesion, then repaint.
Address underlying moisture sources to prevent recurring surface imperfections.
Correct Roller Stipple and Orange Peel
You’ll learn how to spot roller stipple—those raised lines and texture left by an overloaded or low-quality roller—and tell it apart from orange peel, which looks like a bumpy, dimpled surface.
I’ll show quick fixes to reduce orange peel, like adjusting roller nap, thinning paint slightly, and keeping a wet edge.
With the right roller technique and pressure you’ll get a smoother, more professional finish.
Identifying Roller Stipple
Texture matters: you’ll want to tell the difference between a correct roller stipple and an orange peel because each affects the finish and how light plays across your walls.
You’ll check roller texture and paint application cues:
- Subtle peaks from correct stipple
- Uniform, soft dimpling
- Orange peel’s bumpy, dimpled look
- Light reflection highlights flaws
Reducing Orange Peel
Now that you can spot the difference between a proper roller stipple and an orange peel, you can take steps to reduce that unwanted bumpy finish.
Use a higher-nap roller or back-roll with light pressure, thin coats, and proper thinning per manufacturer instructions.
Sand between coats with fine grit and maintain even speed for consistent paint technique and texture control to achieve a smooth wall finish.
Fix Uneven Coverage and Patchy Areas
If uneven coverage or patchy spots show up after your first coat, don’t panic—there are straightforward fixes that’ll give you a smooth, consistent finish.
Sand light, spot-prime glossy areas, thin and remix paint to avoid patchy texture, then recoat.
Coverage solutions include:
- Feather edges with a brush
- Use even roller pressure
- Work wet edges
- Apply thin, consistent coats
Remove Paint Runs and Drips After Drying
When paint drips or runs dry on your wall, don’t worry—you can remove them cleanly without repainting the whole area.
Gently sand raised edges with fine-grit paper, vacuum dust, then wipe with a damp cloth.
Sand raised edges with fine-grit paper, remove dust, then wipe the area clean with a damp cloth.
For small defects, use paint removal tools or a razor scraper carefully.
Blend edges and apply targeted touch up techniques with thin coats to match texture and sheen.
Repaint High-Traffic Areas for Durability
When you’re touching up high-traffic areas, start by scuff-sanding and cleaning the surface so the new coat bonds well.
Pick a durable latex finish—like satin or semi-gloss—for better wear and easier cleaning.
Repaint those spots promptly to prevent further damage and keep the wall looking fresh.
Prep High-Wear Surfaces
Because high-traffic areas take the brunt of daily wear, you’ll want to prep them thoroughly before repainting to guarantee the new latex coat lasts.
Focus on surface preparation: clean, sand, and repair rough spots so paint adheres. Follow these steps:
- Clean grease and dirt
- Sand glossy patches
- Fill dents and holes
- Prime repaired areas
Use Durable Paint Finish
After you’ve cleaned, sanded, and repaired high-wear spots, pick a paint finish that stands up to constant use.
Choose durable finishes like satin or semi-gloss in hallways, kitchens, and kids’ rooms.
Repaint high-traffic areas more often than low-traffic walls to maintain appearance and paint longevity.
Use proper prep and thin, even coats for the best, long-lasting results.
Apply a Second Coat Without Visible Seams
Overlap each new brush or roller stroke slightly with the previous one and feather the edges to keep the wet edges from drying into seams; this means working across a small section at a time, maintaining a wet edge, and matching pressure and paint load so the finish blends smoothly.
Use these tips for seamless layering and ideal drying:
- Keep coat thin and even
- Work fast within wet edge
- Match texture and pressure
- Monitor drying time
Clean Brushes, Rollers, and Trays Effectively
Right after you finish painting, rinse brushes, rollers, and trays under running water to prevent the latex from drying.
Use warm soapy water and work the bristles or nap until paint comes out clear.
Shake or spin tools dry, reshape brushes, and store them upright or hanging so they keep their form.
Rinse Immediately After Use
Rinse your brushes, rollers, and trays as soon as you finish to prevent dried latex from ruining them—warm water and a little mild soap will remove most paint, while a brush comb or roller scraper helps get paint out of fibers and nap.
Follow quick cleanup techniques and safe paint disposal:
- Flush excess paint into a container
- Scrape rollers thoroughly
- Use a brush comb
- Dry and store properly
Use Warm Soapy Water
After you’ve scraped and drained the excess paint, tackle the remaining residue with warm, soapy water: work brushes and rollers under running water, using your fingers or a brush comb to loosen trapped latex.
Agitate trays and tool handles, rinse until water runs clear, then inspect for leftover film.
These cleaning techniques support proper wall preparation and extend tool life for your next job.
Dry And Store Properly
Hang brushes and roll out excess water before storing so bristles and nap dry evenly and you avoid mildew and misshapen tools.
Rinse thoroughly, spin rollers, and wipe trays. Follow these storage tips to preserve paint longevity and tool shape:
- Hang brushes with clips
- Spin rollers on a pole
- Dry trays upside down
- Label sealed cans and dates
Store Leftover Latex Paint Safely
When you’ve finished a touch-up or project, keep leftover latex paint fresh by sealing and storing it properly so you’ll be able to use it later.
Label cans with date, color, and room. Store upright in a cool, dry place away from direct sunlight and freezing temperatures.
Check for paint expiration before reuse; tighten lids and place a layer of plastic over the can rim for airtight paint storage.
Minimize Odors and Ventilate While Painting
Once your cans are sealed and stored, take steps to keep paint fumes from lingering while you work: open windows and doors to create a cross-breeze, run a box or window fan to pull contaminated air outside, and use low-VOC or zero-VOC latex paints to cut odor at the source.
Follow simple ventilation tips and odor control practices:
- Position fans for exhaust
- Create cross-ventilation
- Work in short sessions
- Use activated charcoal
Inspect a Finished Wall for Professional Quality
After the paint has dried, step back and scrutinize the wall in both natural and artificial light to catch uneven coverage, brush marks, drips, or texture inconsistencies.
Use focused wall inspection techniques: run your hand gently to feel ridges, view from multiple angles, and mark flaws.
You’ll perform a professional quality assessment, note touch-up spots, and plan precise corrections for a flawless finish.
Maintain Painted Walls for Long-Lasting Smoothness
Protect your work by establishing a simple maintenance routine: dust walls weekly with a microfiber cloth, spot-clean scuffs promptly with a mild detergent solution, and keep humidity and sunlight in check to prevent peeling and fading.
Protect your work: dust weekly, spot-clean scuffs, and control humidity and sunlight to prevent peeling and fading.
You’ll extend finish life with quick paint touch ups and smart wall maintenance tips.
- Tackle stains immediately
- Use matching paint for touch ups
- Monitor humidity levels
- Avoid abrasive cleaners
Frequently Asked Questions
Can Latex Paint Be Applied Over Wallpaper Without Removal?
You can, but you shouldn’t always: if wallpaper adhesion’s secure and seams are tight, you can paint, though paint durability may suffer and future removal becomes harder; test adhesion, prime, and use caution to avoid peeling later.
Is Latex Paint Safe to Use in Bathrooms With Poor Ventilation?
Yes — you can use latex paint in poorly ventilated bathrooms, but you’ll want mold-resistant formulations and proper priming; they offer moisture resistance and improved paint durability, so they’ll perform better despite limited airflow.
How Do I Achieve Consistent Color When Mixing Multiple Cans?
Think of blending colors like composing music: you’ll create harmony by tinting all cans together. Mix color mixing batches in one large container, maintain paint consistency by stirring thoroughly, straining, and testing on a sample wall.
Can I Paint Over Glossy Oil-Based Trim With Latex Paint Directly?
You can’t just paint over glossy oil-based trim with latex paint directly; you’ll need to sand or degloss the glossy finish and use a bonding primer so paint adhesion improves and the new latex coat lasts without peeling.
What Disposal Rules Apply to Empty or Partially Used Latex Cans?
Like watering a garden, you’ll treat cans carefully: empty cans go to recycling latex programs, partially used paint must dry or be taken to hazardous waste/paint disposal facilities, and you’ll follow local rules and labels.
Conclusion
Think of your wall like a favorite shirt: one missed stain shows up, but care keeps it fresh. I once sanded and primed a kid’s room, and the smooth finish cut touch-ups by 60% compared with the last job—proof that prep pays. Follow the checklist, pick the right sheen, ventilate, and store leftovers properly. With those steps, you’ll enjoy a durable, even finish that looks sharp and lasts.