How to Use Latex Paint on Furniture for a Smooth Finish
You can get a smooth latex finish on furniture by prepping, priming, and using thin, even coats applied with a synthetic brush, foam pad, or mini-roller; sand glossy spots and fill dents first, then degloss and prime bare wood. Choose water-based or acrylic latex and the proper sheen for wear, thin slightly or add conditioner for flow, and sand lightly between tack-free coats. Follow with a protective topcoat for durability, and keep going to learn detailed tips and fixes.
Quick Steps to a Smooth Latex Finish
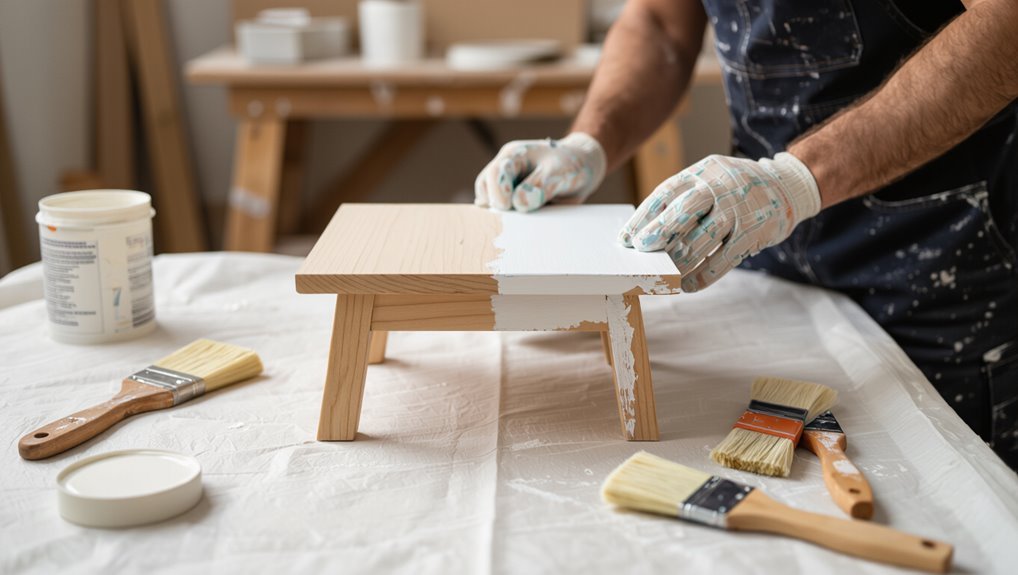
Start by prepping the piece: remove hardware, clean off dust and grease, and sand any glossy areas so the paint will adhere.
Tape edges, fill holes, and prime bare wood.
Choose color selection deliberately, testing swatches under room light.
Use proper paint techniques: thin coats, sanding between layers, and smooth brush or foam roller strokes.
Let each coat fully cure before reassembling.
Choose the Right Latex for Furniture (Water-Based vs Acrylic)
When you’re choosing latex for furniture, you’ll want to compare water-based and acrylic formulas to match your project needs.
Water-based latex dries fast and cleans up easily, while acrylic blends usually offer tougher durability and a smoother finish.
Think about how the piece will be used and what kind of sheen and longevity you need before you paint.
Water-Based vs Acrylic
1 clear choice you’ll face is whether to use water-based or acrylic latex—each has different performance and handling that affect your furniture’s finish.
You’ll like latex paint benefits: easy cleanup, low odor, and quick drying.
Choose water-based for smooth brushing and less yellowing; pick acrylic when you want an acrylic finish comparison that highlights color retention and flexible film without heavy solvents.
Durability And Finish
Now that you’ve weighed brushing ease and color retention, consider how durability and final appearance will affect both daily use and long-term care of your piece.
Choose acrylic for tougher wear and better paint adhesion on high-traffic furniture; pick water-based latex for easier cleanup and a softer sheen on decorative pieces.
Proper priming and topcoat prolong furniture longevity and preserve finish.
Pick the Best Sheen for Durability and Look
Because sheen affects both appearance and wear, picking the right finish is one of the smartest choices you’ll make for painted furniture.
Consider sheen options: flat hides flaws but isn’t as tough; satin balances durability and subtle glow; semi-gloss and gloss resist scuffs and wipe clean easily.
Match finish effects to use and style—high-traffic pieces need harder, shinier sheens; decorative items can be softer.
Gather Tools: Brushes, Rollers, Sprayers, and Supplies
Before you start painting, gather the right brushes, rollers, and sprayer so the finish looks professional.
Use synthetic-bristle brushes for latex, choose roller naps based on the grain and profile, and consider an HVLP or airless sprayer if you want a smooth, fast coat.
Don’t forget basic supplies like drop cloths, painter’s tape, sandpaper, and a good paint tray or cup.
Choosing The Right Brushes
Choosing the right brush makes the job easier and gives you a smoother, more professional finish, so pick tools that match your latex paint and the furniture’s surface.
You’ll choose brush types for detail, flat areas, and trim—synthetic for latex.
Use steady brush techniques: long, even strokes, feather edges, and avoid overloading.
Clean brushes promptly to maintain shape and performance.
Roller Types And Uses
A good roller speeds up large, flat surfaces and helps you get an even coat without brush marks, so pick the right nap and size for your furniture’s texture and contours.
Choose roller materials for latex, match roller sizes to panels and tight spots, learn roller techniques for smooth roller application, and follow simple roller maintenance to clean, store, and replace covers for consistent results.
Sprayer Options And Tips
One or two well-chosen sprayers can cut your painting time dramatically and give an ultra-smooth finish on complex pieces, but you’ll want the right type and settings for latex on furniture.
Choose between HVLP and airless sprayer types; thin latex per manufacturer instructions.
Practice spray pattern, keep consistent distance, and follow sprayer maintenance: clean immediately, inspect seals, and store properly to avoid clogs.
Set Up a Dust-Free Workspace and Ventilation
Before you start painting, clear and seal the workspace so dust can’t settle on wet latex; cover floors and nearby furniture with clean drop cloths and tape seams tightly. Use dust control measures and airflow management: run a HEPA fan, block door gaps, and wear a mask.
| Item | Action |
|---|---|
| Floors | Drop cloths |
| Doors | Seal gaps |
| Air | HEPA fan |
| Dust | Wipe surfaces |
| PPE | Respirator |
Clean, Degloss, and Prep Different Furniture Surfaces
When you’re ready to paint, clean and degloss each piece so the latex adheres evenly: wipe away dirt and grease with a mild detergent or TSP substitute, sand glossy finishes with fine-grit sandpaper or a scuff pad until they dull, then remove dust with a tack cloth or vacuum before priming.
Match cleaning techniques to surface types—wood, laminate, metal—using appropriate cleaners and light sanding for a uniform finish.
Repair Dents, Gouges, and Loose Joints Before Priming
Before you prime, inspect the piece and note any dents, gouges, or gaps so you can choose the right filler.
Use wood filler or epoxy to fill damage, sand smooth, and wipe away dust.
Tighten, glue, or reinforce loose joints so the repair holds under paint and daily use.
Assess And Fill Damage
Since paint only hides flaws, you’ll want to assess and repair dents, gouges, and loose joints first so the finish looks smooth and lasts.
Perform a furniture inspection and damage assessment, choose repair techniques and filling materials, and do proper surface preparation.
Consider finish evaluation, aesthetic considerations, and texture selection to match repairs to the surrounding surface before priming and painting.
Secure And Strengthen Joints
Tighten loose joints and reinforce weak connections so your piece will stay sturdy under paint and use.
Disassemble where needed, clean old glue, and dry-fit parts.
Apply quality wood adhesives and clamps, add joint reinforcements like brackets or dowels for extra strength, then sand filled gaps smooth.
Let adhesives cure fully before priming to prevent movement or cracking under finish.
Prime Correctly for Latex Adhesion and Stain Blocking
When paint won’t stick or stains bleed through, you’ll waste time and finish quality — so prime properly to guarantee latex bonds well and blocks stains.
- Use shellac or stain-blocking primer for tannin-heavy woods; priming techniques matter.
- Sand lightly, then apply thin, even coats; adhesion tips: feather edges.
- Let primer cure fully before topcoat for durable, uniform results.
Sand and Scuff: Grits and Techniques Before Painting
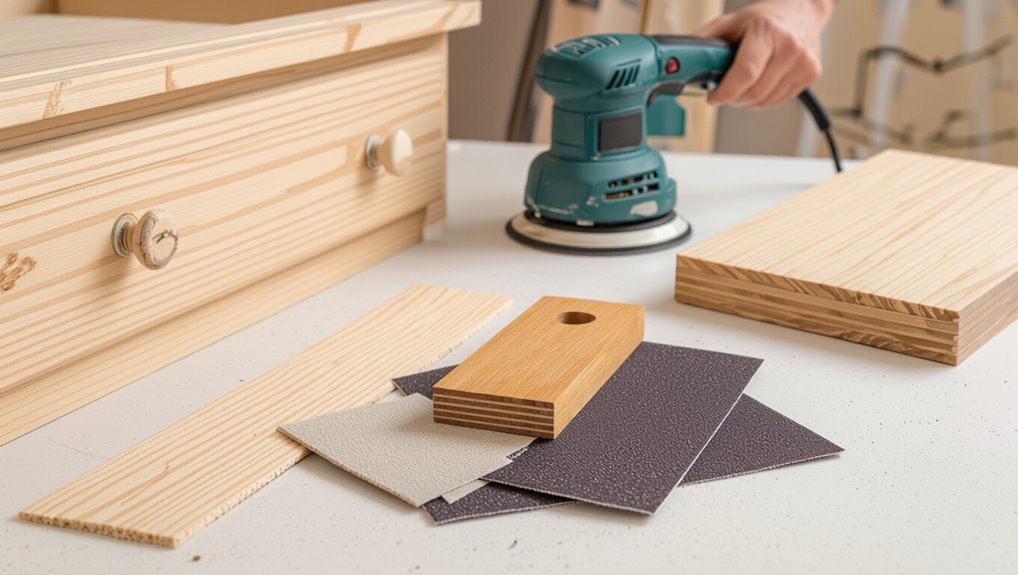
Before you paint, you’ll pick the right sandpaper grit to smooth old finish without gouging the wood.
Use coarser grits to remove finish or rough spots, then switch to finer grits for a smooth surface.
Lightly scuff glossy areas with a scuff pad or fine sandpaper so the latex will grip.
Sandpaper Grit Guide
Start with the right grit and you’ll save time and get a smoother finish: for worn or glossy furniture, begin with 80–120 grit to remove old finish and smooth deep scratches;
follow with 150–180 grit to even the surface; then finish with 220–320 grit to scuff the wood or primer so latex paint bonds properly.
- Choose sandpaper types for coarse removal.
- Use medium grits for leveling.
- Apply fine sanding techniques for bonding.
Scuffing Techniques Overview
Although you’ve already removed old finish and leveled the surface, scuffing is the essential step that helps latex paint adhere evenly to furniture; use fine-grit sand (220–320) or a non-woven scuff pad to dull glossy areas, work with the grain, and keep pressure light and consistent.
| Tool | Use |
|---|---|
| Sandpaper | Light dulling |
| Scuff pad | Even sheen |
| Block | Flat pressure |
| Brush | Detail touch |
You’ll choose scuffing methods and scuffing tools based on surface and detail.
Apply Latex With a High-Quality Brush for Fine Detail
Pick a high-quality synthetic-bristle brush and you’ll get smoother edges, better coverage, and fewer visible strokes when applying latex to furniture.
Pick a quality synthetic-bristle brush for smoother edges, better coverage, and fewer visible strokes with latex.
You’ll control detail application with steady strokes and proper paint load. Use brush techniques that minimize overlap and bristle marks for crisp corners and moulding.
- Thin coats
- Short, controlled strokes
- Light feathering at edges
Use Foam and Mini-Rollers for Ultra-Smooth Coverage
When you want a flawless, brush-free finish, foam pads and mini-rollers give you the smoothest coverage on flat and gently curved furniture surfaces.
You’ll use foam application to lay down thin, even coats and control paint absorption. Mini roller benefits include faster coverage and fewer lap marks.
Follow smooth finish techniques: work wet edges, roll light, and sand between coats for a silky result.
When to Choose Spray Application and Prep for It
If you’re working on intricate pieces or need the fastest, most even finish, spraying is the right choice.
Before you spray, clean, sand, and mask off areas, and thin the latex if your sprayer’s instructions call for it.
Use steady, overlapping passes, keep the nozzle 8–12 inches away, and test on cardboard to dial in pressure and pattern.
When To Spray
Although brushing or rolling works for many pieces, you should choose spray application when you need an ultra-smooth, even finish, fast coverage, or access to detailed crevices that a brush can’t reach.
Use spray techniques in ideal conditions: low humidity, mild temperature, and clean airflow.
- Complex shapes
- Large surfaces
- Time-sensitive projects
Surface Preparation Steps
Before you spray, get the piece clean, smooth, and protected so the finish lays down evenly and bonds well.
Choose spray when you want even coverage on complex profiles or large flat surfaces.
Match sanding techniques to surface types: light deglossing for previously painted, finer grit for bare wood.
Mask hardware, vents, and nearby areas to prevent overspray.
Spray Technique Tips
When you need a smooth, factory-like finish on intricate moldings or large flat planes, choose spray application—it’s faster and lays down a thinner, more even coat than brushing or rolling.
- Test spray pattern on cardboard, adjust nozzle adjustment and distance for even coverage.
- Sand and tack cloth between thin coats to avoid runs.
- Mask surrounding areas, ventilate, and wear protection for safety.
Masking, Ventilation, and Safety for Spray Jobs
Masking off nearby surfaces, ensuring proper ventilation, and following basic safety steps will protect both your project and your health during a spray job.
Use precise masking techniques—tape, paper, and plastic—to cover floors, hardware, and adjacent furniture.
Work in a well-ventilated area or with exhaust fans.
Wear appropriate safety equipment: respirator, goggles, gloves, and long sleeves to minimize exposure and overspray.
Cut In Edges and Avoid Lap Marks Like a Pro
Now that the area’s protected and you’ve got your respirator on, it’s time to cut in clean edges and prevent lap marks.
Use precise cutting techniques and quick edge blending to keep wet edges. Work steadily, feathering each stroke and matching sheen.
Cut in precisely, blend edges quickly, and feather each stroke to maintain a wet edge and even sheen.
- Load brush sparingly.
- Maintain a wet edge.
- Lightly feather overlaps.
Thin Latex Paint and Add Conditioners for Better Flow
If your brush or roller is dragging or leaving visible brushstrokes, thin the latex slightly and add a conditioner to improve flow and open drying time.
You’ll mix small amounts of water or manufacturer-recommended reducer for paint thinning and stir thoroughly.
Add flow enhancers per label, test on scrap, and adjust sparingly to maintain coverage while reducing brush marks for a smoother finish.
Drying Times, Recoat Windows, and When to Sand Between Coats
Because latex dries by evaporation and temperature affects that process, you should check the paint can for recommended recoat windows and then verify conditions on your workpiece—cool, humid, or poorly ventilated spaces will lengthen dry times, while warm, dry, well-ventilated areas speed them up.
- Monitor drying times and paint absorption; wait full recoat windows.
- Lightly sand between coats using fine sanding techniques.
- Remove dust, then recoat only when tack-free to avoid lift.
Topcoats and Protective Clear Finishes for Longevity
1 good clear finish can dramatically extend the life and appearance of your latex-painted furniture, so choose a topcoat that matches the piece’s use and desired sheen.
You’ll pick among topcoat types—polyurethane, polycrylic, and waterborne urethane—and apply protective finishes suited to traffic.
Consider longevity factors like wear, UV exposure, and moisture when selecting clear coatings and follow manufacturer cure times.
Troubleshooting Common Mistakes and Quick Fixes
After sealing your project with a clear finish, you’ll still run into common problems like brush marks, drips, or uneven sheen that can mar the final look.
Even after sealing, brush marks, drips, and uneven sheen can still spoil the finish—here’s how to fix them fast.
You’ll spot common pitfalls and learn quick remedies to fix them fast.
- Sand lightly, recoat thinly to remove brush marks.
- Wet-sand drips, then touch up.
- Use compatible topcoat to even sheen.
Frequently Asked Questions
Can Latex-Painted Furniture Be Used Outdoors Without Special Modification?
Not safely long-term; you’ll need special modification. Untreated latex-painted furniture lacks outdoor durability and can lose paint adhesion from moisture and UV. You should seal, use exterior primer and topcoat, or choose exterior-grade products instead.
Will Latex Paint Harm Upholstery or Fabrics on Glued Furniture Parts?
No, latex paint usually won’t harm upholstery if you use fabric protection and test first; you’ll avoid soaking glued seams and verify adhesive compatibility since some solvents or painting methods can weaken glues or stain fabrics if not properly shielded.
Can I Mix Different Brands of Latex Paint in One Project?
Yes, you can usually mix different brands of latex paint, but you’ll check paint brand compatibility and use proper mixing techniques: test small batches, match sheens and bases, thin slightly if needed, and stir thoroughly for consistent color and finish.
How Do I Remove Latex Paint Stains From Hardwood Floors?
Act quickly: scrape excess paint gently, blot with warm soapy water, then use a plastic scraper and mild solvent or rubbing alcohol for residue. Test first. Finish with hardwood floor care—clean, dry, and refinish spots as needed.
Is Latex Paint Safe Around Pets During and After Application?
Yes — latex paint’s low VOC formulas reduce paint toxicity, but you should keep pets away during painting and drying, ventilate thoroughly, and store supplies securely to protect pet safety until fumes fully dissipate.
Conclusion
You’ll get a smooth latex finish if you work smart: choose the right latex, pick a sheen you like, use good brushes or a sprayer, thin and condition the paint, control dust and ventilate, and sand only when needed before recoating. Coincidentally, the same patience that makes paint level also makes furniture feel like new—so take your time, enjoy the small wins, and you’ll end up with a durable, beautiful piece you’ll be proud to use.