What Breaks Down Latex Paint? Easy Paint Removal Guide
Latex paint breaks down from UV exposure, moisture, temperature swings, and pollution, so you’ll see chalking, fading, cracking, and peeling when binders weaken. Poor prep, old incompatible coatings, mold, abrasion, and impacts also cause loss of adhesion. You can often spot-test by wiping and scraping; small flaws can be repaired but widespread flaking usually needs stripping. Use gentle cleaners, heat, sanding, or eco removers with PPE and proper disposal — keep going to learn specific methods and safety steps.
Should You Remove or Repair Latex Paint?
How do you decide whether to remove or repair latex paint? You weigh damage severity, surface adhesion, and coating history.
If flakes and adhesion fail, remove; if minor cracks or isolated chips, use spot repair techniques to restore finish.
Consider paint longevity: removing lets you prep thoroughly for longer life, while repairs save time but may shorten overall durability.
Quick Test: Failing Latex Paint vs. Just Dirty Surfaces
First wipe a small area with a damp cloth and mild cleaner to check surface cleanliness; if dirt comes off easily, you probably don’t need to remove the paint.
If residue remains or the paint flakes and peels when you press or scrape gently, test paint integrity with a fingernail or scraper to see if it adheres.
Use those two quick checks to decide whether cleaning, spot repair, or full removal is required.
Surface Cleanliness Check
Wondering whether that flaky coating is failing paint or just grimy buildup? You can inspect by wiping a small area with mild cleaning solutions and a microfiber cloth.
If dirt lifts cleanly, it’s surface contamination; if powdery residue or flakes remain, paint failure is likelier.
Use proper surface preparation techniques before repainting or deeper testing to avoid misdiagnosis.
Paint Integrity Test
One simple quick test lets you tell failing latex paint from mere surface grime: wet a small area, scrub gently with a microfiber or soft sponge and mild detergent, then rinse and dry—if powdery residue, flakes, or bare substrate show up, the paint’s failing; if the surface cleans up and the coating stays intact, it was just dirt.
Then document results, note paint adhesion, repeat surface testing elsewhere.
When to Strip Paint : and When to Repaint Instead
Check the surface integrity first—if the substrate is soft, rotted, or heavily damaged, you’ll need to strip down to sound material.
If the paint is just peeling or failing adhesion in patches, spot stripping and repainting can save time and money.
Always weigh the cost versus benefit: full stripping is pricier but worth it for long-term results, while repainting is quicker when the substrate and adhesion are adequate.
Surface Integrity Check
Before you decide to strip paint, inspect the surface for adhesion, rust, rot, structural damage, and deep corrosion—these factors tell you whether removal is necessary or a simple repaint will suffice. Do a surface evaluation and paint analysis to decide. Use the table below for quick checks.
| Issue | Action |
|---|---|
| Minor wear | Repaint |
| Rust | Treat then repaint |
| Rot | Replace |
| Corrosion | Strip and repair |
Adhesion And Peeling
If your surface evaluation flagged adhesion problems or visible peeling, you’ll need to decide whether to strip the paint or simply prep and repaint.
Consider these signs and actions to address adhesion issues and peeling causes:
- Loose flakes over large areas = strip
- Localized lift = scrape and sand
- Moisture stains = fix leak first
- Poor primer = recoat after prep
- Contaminated surface = clean thoroughly
Cost Versus Benefit
Deciding whether to strip paint or repaint comes down to weighing the upfront cost, time, and long-term results against the condition of the surface and your goals.
You should perform a cost analysis comparing labor, materials, disposal, and potential repairs.
Use a benefit evaluation to judge longevity, appearance, and resale value.
If repainting meets goals cheaply and safely, skip stripping.
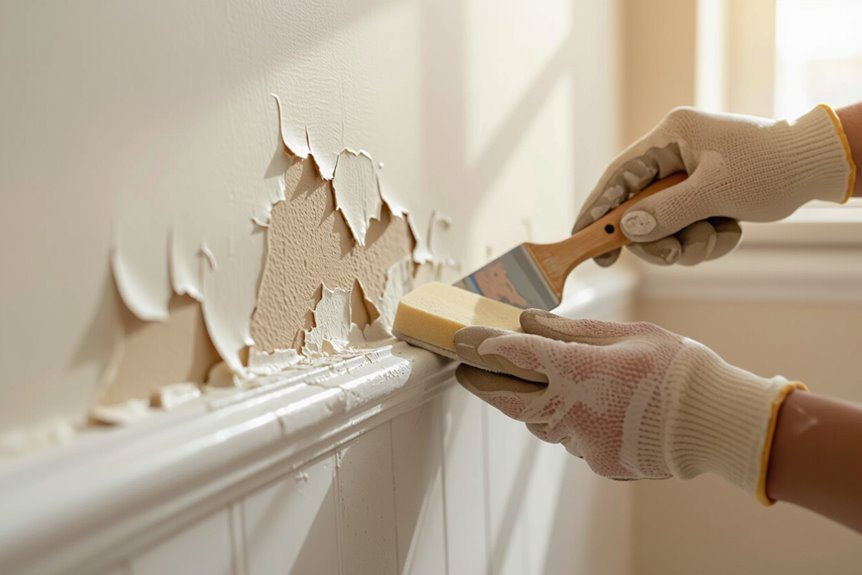
Fast, Safe Ways to Remove Latex Paint From Walls
Start by evaluating the wall’s condition and the paint’s adhesion so you pick the quickest safe method for removal.
Choose technique based on latex paint types and paint application history.
Try gentle options first, then escalate if needed:
- Warm soapy water and scrub
- Heat gun on low, scrape carefully
- Citrus or eco-friendly remover
- Light sanding with fine grit
- Pressure wash for exterior walls
Removing Latex Paint From Furniture and Trim Safely
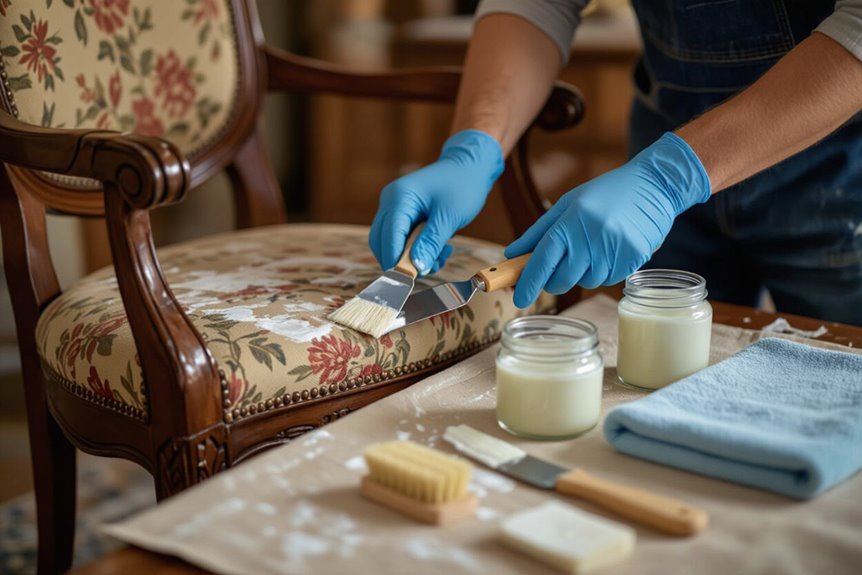
Work carefully when removing latex paint from furniture and trim so you protect delicate profiles, joints, and finishes while getting the job done efficiently. Use gentle techniques, test safe solvents, and prioritize furniture refinishing steps to preserve value. Work in ventilated areas, wear gloves, and remove blobs with a soft scraper.
| Step | Tool | Note |
|---|---|---|
| Test | Solvent | Small area |
| Clean | Cloth | Blot, don’t rub |
| Protect | Tape | Edges only |
Heat Tools, Scraping, and Sanding: Pros and Limits
While heat guns, scrapers, and sanders can speed paint removal, you should match each tool to the surface and finish to avoid damage.
Use proper heat application and heat settings, balance tool efficiency against surface damage, and consider paint thickness and removal timing.
- scraping methods: short strokes, firm pressure
- sanding techniques: low grit first
- tool safety: PPE, ventilation
- assess paint adhesion
- avoid overheating delicate wood
Chemical Strippers for Latex Paint: Types and Safety
If you’re tackling latex paint with chemical strippers, pick a product formulated for water‑based finishes and follow safety precautions closely: many gel and paste strippers cling to vertical surfaces and limit runoff, while solvent‑based liquids work faster on multiple coats but increase fumes and risk.
Check chemical compositions, eco friendly options, application methods, removal efficiency, surface compatibility, drying times, safety precautions, and user experiences before use.
Low‑Effort Options: Pressure Washing and Power Sanding

You can tackle large exterior areas quickly with pressure washing, but start by understanding pressure ratings and choosing the right nozzle for the surface.
For smaller spots or smoother finishes, power sanding gives you more control—pick the right grit and keep the sander moving to avoid gouges.
Both methods cut effort, but follow safety precautions and test a hidden area first.
Pressure Washing Basics
1 simple pass with a pressure washer or a quick session with a power sander can remove loose paint and grime far faster than scraping by hand, but both tools demand the right settings, technique, and safety precautions to avoid damage.
Use pressure washing smartly:
- Surface preparation before you start
- Check water temperature and equipment maintenance
- Practice distance control
- Follow safety precautions
- Make technique adjustments as needed
Choosing The Right Nozzle
Picking the right nozzle makes a big difference in how quickly and cleanly you blast away loose paint or smooth a surface with a power sander.
You’ll choose nozzle types for pressure washing by matching spray patterns to the job: wider fan settings cover large areas gently, narrow cones concentrate force for stubborn spots.
Test on scrap wood and adjust pressure accordingly.
Power Sanding Techniques
When you want to remove paint with minimal elbow grease, combine pressure washing to strip flaking layers and power sanding to level edges and feather changes.
Use power sanding benefits to save time and get smooth results; follow power sanding tips for safety.
- Start with coarse grit
- Work with grain
- Keep moving
- Wear PPE
- Finish with fine grit
Disposal, Ventilation, and PPE Rules During Removal
Because paint removal creates hazardous waste and airborne contaminants, you should plan disposal, ventilation, and PPE before you start so every step stays safe and legal.
Use proper disposal methods for debris and solvents, employ ventilation techniques like exhaust fans and open windows, follow PPE guidelines (respirator, goggles, gloves), and enforce safety precautions: contain dust, label waste, and comply with local regulations.
After Stripping: Prime, Patch, and Prep for Repainting
After you’ve stripped down to bare wood or substrate, inspect the surface for gouges, remaining finish, and uneven areas so you can plan repairs and priming.
Once stripped to bare wood, inspect for gouges, leftover finish, and uneven spots before repairs.
Use targeted priming techniques and efficient patching methods, focusing on thorough surface preparation before you repaint.
Repainting tips:
- Clean and degloss
- Fill gouges and sand smooth
- Choose compatible primer
- Feather edges
- Light tack cloth final wipe
What Latex Paint Is and How It Cures
Most latex paints are waterborne emulsions that blend acrylic or vinyl resins with pigments, additives, and water. They cure primarily by water evaporation and coalescence of the polymer particles into a continuous film.
You’ll learn latex paint properties like flexibility, adhesion, and VOC content. The curing process depends on temperature, humidity, and film thickness, so you’ll control conditions for proper film formation.
How UV Sunlight Breaks Down Latex Paint
When you leave latex paint exposed to sunlight, UV light attacks the polymer chains and slowly weakens the film.
You’ll also see pigments fade or change as photons break their chemical bonds.
That combination makes paint chalky, brittle, and easier to remove.
UV-Induced Polymer Breakdown
Because UV light carries enough energy to break chemical bonds, it slowly attacks the polymer chains in latex paint, causing the binder to lose strength and the surface to chalk, fade, and become brittle.
You’ll notice UV exposure lowers polymer stability and shortens paint longevity. Environmental factors accelerate breakdown.
Consider:
- Surface cracking
- Loss of adhesion
- Increased porosity
- Powdery residue
- Faster weathering
Photodegradation Of Pigments
After the binder starts to break down, the pigments themselves face direct assault from UV radiation and reactive oxygen species, which alters their chemical structure and colorfastness.
You’ll see fading, chalking, and color shifts as UV exposure cleaves chromophores and creates free radicals.
Pigment stability varies—some inorganic pigments resist better than organics—so surface protection or UV absorbers can slow photodegradation.
Why Heat and Temperature Swings Cause Paint to Fail
If you expose painted surfaces to repeated heat and cooling cycles, the coating will expand and contract while the substrate moves at a different rate. That mismatch pulls the paint away, cracks it, or causes blisters.
Repeated thermal cycles make paint and substrate move differently, causing cracking, blisters, and peeling over time.
You’ll notice reduced paint lifespan from thermal expansion and temperature effects. Consider environmental factors and humidity impact on paint durability.
- Heat exposure stresses binders
- Rapid cycles cause cracking
- Edges lift first
- UV plus heat weakens film
- Temperature gradients speed failure
How Moisture and Humidity Cause Peeling and Blistering
While heat and temperature swings pull and crack coatings, moisture works differently: it gets under the film and forces it off the substrate. You’ll see peeling and blistering where moisture effects concentrate, and humidity impact worsens adhesion loss. Address leaks, ventilate, and dry surfaces before repainting to prevent recurrence.
| Sign | Action |
|---|---|
| Blisters | Dry/repair |
| Peeling | Remove/reseal |
What Causes Latex Paint Chalking : How to Spot It
You’ll notice chalking as a faded, powdery film on exterior latex paint that rubs off when you touch it.
It often happens after prolonged UV exposure breaks down the binder, or when the paint never adhered well to the surface in the first place.
Spotting these signs early lets you decide whether cleaning, priming, or removal is needed.
Faded Surface Powdering
When latex paint breaks down under sun, moisture, and age, it can turn into a fine, powdery residue on the surface—a process called chalking that leaves colors washed out and finishes dull.
You’ll notice it by touch and sight; consider chalking prevention and proper surface treatment:
- Rub test
- Water bead test
- Color fading
- Powder transfer
- Texture loss
UV Light Damage
Sun and UV radiation break down latex paint’s binders and pigments, causing the surface to chalk as the film loses cohesion and flakes into a powder you can wipe away.
You’ll notice dull, powdery finish and color loss where UV exposure effects are strongest.
Check for surface powdering and rough texture—signs photodegradation processes have weakened the paint film and reduced its protective qualities.
Poor Paint Adhesion
Paint that won’t stick usually shows it quickly: you’ll see powdery chalk, peeling edges, or sections that rub off with a light touch.
- Poor surface prep undermines paint adhesion.
- Moisture breaks bonds, causing chalking.
- Old paint layers resist new coatings.
- Wrong primer or low-quality paint fails.
- Extreme temperatures alter adhesion factors.
Spot these signs early and strip or recondition surfaces before repainting.
How Poor Surface Prep and Adhesion Failures Start Problems
If you skip proper surface prep or rush adhesion steps, you’ll quickly invite common failures like flaking, blistering, and premature wear.
You’ll leave surface imperfections—dust, oils, or old loose paint—that prevent paint adhesion and shorten coating life.
Address cleaning, sanding, and correct bonding techniques before painting.
Clean and sand thoroughly, and ensure proper bonding techniques before painting to prevent future failures.
Otherwise, moisture and stress exploit weak spots, forcing costly removal and repainting sooner than expected.
Why Incompatible Primers or Old Coatings Cause Failure
Because primers and existing coatings determine how new paint bonds and moves, using the wrong type or painting over aged, brittle layers will quickly undermine your finish.
You must check primer compatibility and coating lifespan before repainting.
- Mismatched chemistry causes peeling
- Old coatings lose flexibility
- Poor adhesion leads to blisters
- Moisture traps accelerate failure
- Adhesive tests reveal trouble
How Abrasive Cleaning and Scrubbing Wear Latex Paint
Scrubbing too hard or using coarse abrasives strips latex’s outer binders and pigments, leaving a dull, rough surface that loses cohesion and chips more easily.
You’ll notice specific wear patterns from abrasive techniques and improper cleaning tools; scrubbing effects accelerate surface damage and reduce paint durability.
Choose gentler cleaning methods to limit abrasion and preserve paint protection while targeting grime without weakening the film.
Which Chemicals and Solvents Dissolve Latex Paint
Abrasive cleaning can physically strip latex paint, but chemical action breaks its binders and softens the film in different ways.
So you’ll want to know which solvents actually dissolve latex. You’ll use proper latex paint solvents and paint removal techniques safely.
Consider common options:
- Water and detergent (for fresh paint)
- Isopropyl alcohol
- Denatured alcohol
- Acetone
- Commercial paint removers
How Mechanical Damage: Impact and Abrasion: Removes Paint
When you hit or rub painted surfaces, impact and abrasion physically break the paint film’s adhesion and cohesion, flaking or wearing it away down to the substrate.
You’ll see chips where impact resistance is low and fine scratches from abrasion effects.
Repeated knocks, cleaning with abrasive pads, or moving furniture accelerates failure, so prevent contact and use tougher coatings or protective barriers to preserve finish.
How Substrate Issues (Wood, Drywall, Metal) Affect Lifespan
Impact and abrasion reveal another major factor in paint longevity: the substrate beneath it. You’ll notice different substrate types change lifespan factors through paint interaction and aging processes.
Consider:
- Wood: moisture impact, swelling, variable prep quality
- Drywall: surface compatibility, weak abrasion resistance
- Metal: rust, environmental effects, adhesion loss
- Old coatings: compromised paint interaction
- Poor prep quality accelerates failure
How Environmental Pollutants, Mold, and Aging Change Finish
You’ll notice airborne pollutants like ozone and sulfur compounds chemically break down binders and pigments, causing chalking and color shift.
Mold feeds on organic binders and trapped moisture, staining and softening the finish until it flakes.
Over time, UV exposure and thermal cycling worsen these effects, so you’ll need different removal and restoration approaches depending on the damage.
Pollutant Chemical Degradation
Because pollutants, mold, and simple aging chemically attack finishes, you’ll see changes that go beyond surface dirt: binders break down, pigments fade or shift, and protective films become brittle or tacky.
You can trace pollutant sources and chemical interactions causing deterioration. Consider these effects:
- Acid rain exposure
- Vehicle exhaust residues
- Industrial solvents
- Salt spray
- Ozone oxidation
Mold And Age Effects
Those chemical attacks often create the right conditions for mold and accelerate age-related breakdowns in finishes. You’ll see mold growth staining, softening, and lifting paint; pollutants speed age related deterioration, cracking binders and fading pigments. Act quickly: clean, dry, and treat with antifungal primer before repainting to restore adhesion and slow further breakdown.
| Issue | Effect |
|---|---|
| Mold growth | Staining, lifting |
| Pollutants | Binder attack |
| Aging | Cracking, fading |
| Fix | Clean + primer |
Frequently Asked Questions
Can Latex Paint Be Removed Without Damaging Wallpaper Underneath?
Yes — imagine peeling a sticker from a treasure map: you’ll proceed gently. You’ll use low-solvent removers, slow scraping, and heat cautiously so latex paint adhesion loosens while you preserve wallpaper protection and avoid tears or stains.
Will Citrus-Based Strippers Harm Painted Metal Surfaces?
Generally no — citrus-based strippers are gentle and won’t usually damage painted metal if you follow citrus safety and test small areas first; check metal compatibility with coatings, avoid prolonged contact, and rinse thoroughly after use.
Can Plants Nearby Be Protected From Paint Removal Chemicals?
Yes — you can protect plants by covering them, rinsing exposed foliage, and using paint protection barriers; choose eco friendly alternatives like water-based strippers or biodegradable citrus formulas, and work upwind to minimize chemical drift and runoff.
How Long After Removal Can Furniture Be Reinstalled in the Room?
Picture furniture placement sketches: you can reinstall after full drying time, usually 24–72 hours depending on ventilation and product. You’ll want to wait until surfaces feel dry and odor’s minimal before moving pieces back in.
Are Biodegradable Strippers Effective on Multiple Paint Layers?
Yes — biodegradable strippers can be effective on multiple layers; you’ll often need longer dwell times, thicker application, and repeat treatments for tougher coatings, but their biodegradable effectiveness makes them safer for indoor and environmentally sensitive projects.
Conclusion
Deciding whether to strip or repair latex paint comes down to damage, adhesion, and substrate—about 60% of DIYers repaint instead of stripping because it’s faster and cheaper. If paint flakes, bubbles, or won’t clean, strip; if it’s just dirty or lightly scuffed, prep and repaint. Use gentle chemical strippers for furniture, heat or sanding for trim, and mechanical methods for stubborn patches. Always test first and protect surrounding surfaces and yourself.