What Double Sided Tape Is Safe for Painted Walls?
You can safely use low‑tack, removable double‑sided tapes—especially foam or fabric varieties or low‑residue acrylics—on painted walls to hold lightweight decor without peeling paint. Match tape thickness to item weight and wall texture, test a small strip first, and clean and dry the surface before applying. Avoid permanent tapes on fresh or low‑cure paint, and remove slowly with heat or a gentle solvent if needed; keep going to learn tips for specific paints, uses, and brands.
Quick Answer: Best Tapes for Painted Walls
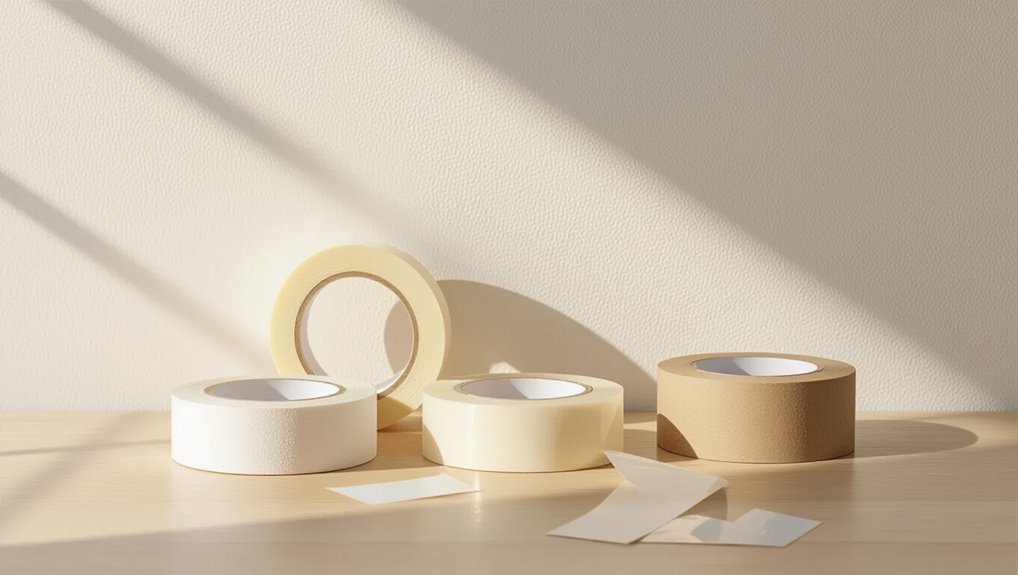
For most painted walls you’ll want a low-tack, yet strong adhesive that holds without peeling paint when removed.
You’ll prefer foam or fabric double-sided tape with moderate tape thickness so it conforms to wall texture.
Opt for foam or fabric double-sided tape with medium thickness to better conform to textured walls.
Test a small strip first; press, wait, then remove slowly.
Choose tapes labeled “removable” or “low residue” and match thickness to both weight and surface irregularity.
Why Paint Type Matters for Tape Choices
Your paint’s finish changes how well tape sticks, with glossy surfaces offering less tooth than matte ones.
You’ll also want to evaluate adhesive chemistry and solvents—some tapes can react with fresh or low-cure paints and lift the finish.
Finally, proper surface preparation and cure time are essential to avoid peeling or residue when you remove the tape.
Paint Finish Effects
Although glossy and matte paints both look great, they behave very differently when you apply double-sided tape: glossy finishes are hard and less porous, so tape tends to stick well but can lift paint when removed.
On the other hand, matte finishes are softer and more porous, which can reduce initial adhesion and increase the risk of residue.
You should match tape selection to paint finish types and surface compatibility.
Adhesion And Solvent
Glossy and matte paints don’t just look different—they interact with tape and solvents in different ways, so you need to think about chemical compatibility as well as surface texture.
You should perform adhesion testing on a small, inconspicuous area to gauge bond and peeling.
Note solvent effects: some adhesives or removers soften or discolor paint, so choose tapes and cleaners rated for your paint type.
Surface Preparation Need
Because paint type affects how a surface accepts adhesive, you should tailor your prep before applying double-sided tape.
First perform a surface assessment to spot gloss, flaking, or texture differences.
Use appropriate cleaning techniques—mild soap and water for latex, solvent for oil-based—then dry fully.
Match tape strength to cured, stable paint to avoid lifting or damage.
How to Choose Removable vs. Permanent Tape
Choosing between removable and permanent double-sided tape comes down to where you’re using it, how long you need the bond, and how much risk you’ll accept for paint damage.
You’ll weigh removable tape benefits like easy removal and lower damage risk against permanent tape drawbacks such as stronger adhesion and possible paint lift.
Match choice to surface type, weight of item, and duration to minimize harm.
Low‑Tack Acrylic Tape : Pros and Uses
When you need a secure hold that won’t pry paint off when removed, low-tack acrylic tape gives you a strong yet forgiving option; it grips painted walls reliably for light to medium items and comes away cleanly in most cases.
You’ll appreciate its balanced adhesive properties and good surface compatibility on smooth, semi-gloss, and satin finishes, ideal for pictures, hooks, and temporary decor.
Foam Mounting Tape for Textured Painted Walls
For textured painted walls you’ll need to clean and dry the area thoroughly and press firmly to seat the foam into crevices before applying.
Check the tape’s load ratings and test with a light object so you don’t exceed its capacity.
When removing, pull slowly and use a gentle adhesive remover or heat to avoid paint damage and ease cleanup.
Surface Preparation Tips
Although textured painted walls can make mounting tricky, you can get reliable adhesion by preparing the surface properly: clean off dust and grease, remove loose paint flakes, and press the foam tape firmly into the highest contact points to maximize bonding.
Choose adhesive types suited for texture, test a small patch, use isopropyl for surface cleaning, and wait until fully dry before mounting.
Load Capacity Limits
Now that you’ve prepped the surface properly, understand how much weight foam mounting tape can actually hold on textured painted walls.
You’ll want realistic expectations: textured paint reduces adhesion, so test small loads first.
Consider tape durability over time and environmental factors before trusting heavy items.
Prioritize secure mounting and check regularly.
- Relief
- Confidence
- Caution
- Pride
Removal And Cleanup
When you’re ready to remove foam mounting tape from textured painted walls, pull slowly and evenly along the wall surface to minimize paint damage and adhesive residue.
If residue remains, warm it gently with a hairdryer to soften adhesive properties, then lift with a plastic scraper.
Test any solvent on an inconspicuous spot.
Match cleanup methods to your wall treatments to avoid finish harm.
Removable Mounting Strips for Painted Walls : How They Work
If you want to hang items without damaging paint, removable mounting strips use pressure-sensitive adhesive paired with a peel-off release that separates cleanly from the wall when you pull a tab.
You’ll press strips to both item and wall; check removable strips for wall compatibility and weight ratings. They release with steady pull, leaving minimal residue.
- Relief
- Confidence
- Joy
- Calm
Painter’s Tape and Temporary Poster Tape Options

You’ll want to weigh tape residue and ease of removal when choosing painter’s tape or temporary poster tape, especially on delicate paint finishes.
Compare adhesive strength—lighter poster tapes peel cleanly but won’t hold heavy items, while stronger painter’s tapes can grip better but might leave residue.
Match the tape to the surface and use: low-tack for finished walls, stronger tape for textured or outdoor surfaces.
Tape Residue And Removal
Tape residue can be frustrating, but knowing which tapes leave less mess and how to remove leftover adhesive makes cleanup quick and damage-free.
You’ll learn tape types and residue effects so you can choose wisely and act fast. Use gentle solvents, warm soapy water, or adhesive removers; test first to protect paint.
- Relief: quick fixes
- Caution: test spots
- Confidence: safe removal
- Satisfaction: spotless walls
Adhesive Strength Comparison
While choosing between painter’s tape and temporary poster tape, focus on how strongly each sticks and how easily it comes off—so you can match the tape to your wall surface and project duration.
You’ll compare adhesive types: low-tack painter’s tape offers brief holding with easy removal, while poster tape trades modest long-term grip for minimal damage.
Consider tape longevity versus required removal care.
Best Uses And Surfaces
When deciding between painter’s tape and temporary poster tape, match each to the surface and duration of your project: you’ll choose based on adhesive types and expected tape durability.
Use painter’s tape for trim, fresh paint, and delicate finishes; use poster tape for lightweight paper on cured walls.
Feel confident—pick the right tape to protect surfaces and avoid stress.
- Painter’s tape
- Temporary poster tape
- Delicate finishes
- Lightweight displays
How to Read Tape Labels: Peel Strength and Tack
Because labels pack technical terms into tiny boxes, you’ll want to know what “peel strength” and “tack” actually mean before you buy—peel strength measures how much force it takes to lift the tape away from a surface, while tack describes how quickly and firmly the adhesive grabs on contact.
Check numeric peel strength ratings and note adhesive tack descriptions to match your painted wall’s fragility and load needs.
How to Test Tape Safely on Painted Walls
Start by cleaning a small, inconspicuous area so dust and oils won’t affect the test.
Apply a short strip of the tape and press it as you’d for the final installation.
Wait the recommended time, then remove the strip and check for paint lift or residue before committing to a larger application.
Clean A Small Area
Pick a small, inconspicuous spot—like the inside of a closet or behind a light switch—and clean it before you test the tape.
Wipe with a mild cleaner, dry fully, and note wall texture because uneven surfaces affect adhesion and tape longevity.
Then consider feelings about potential damage:
- Relief
- Caution
- Curiosity
- Confidence
Apply A Test Piece
If you want to see how the tape will behave, press a small test piece onto the cleaned spot and leave it for 24 hours to check adhesion and any finish changes.
Try different test methods with the tape types you plan to use—low-tack, removable, or foam.
Note adhesion strength, texture interaction, and any immediate surface reaction before wider application.
Check After Removal
After 24 hours, peel your test piece back slowly at a low angle and watch for paint lifting, residue, or surface changes; this gives a clear, immediate measure of whether the tape is safe to use on that finish.
Note how wall texture affected adhesion and any impact on tape longevity.
Then consider your feelings:
- Relief
- Frustration
- Confidence
- Caution
Weight and Size Guidelines for Taped Items
When you’re deciding what to hang with double-sided tape, think regarding both weight and surface area: lighter, flatter items stick far better than bulky or heavy ones.
You should match tape weight rating to item size and weight, distribute strips across the item’s back, and favor multiple small strips over a single chunk.
Test with a short trial before committing to longer displays.
Prep Your Painted Wall Before Applying Tape
You’ve matched tape strength to your item, so next get the wall ready to hold it.
Do a quick wall cleaning with a mild detergent, rinse, and dry.
Perform surface testing with a small tape piece to check adhesion and paint reaction.
Then follow these steps to feel confident:
- Breathe, focus.
- Clean gently.
- Test discreetly.
- Proceed carefully.
Safe Removal Techniques to Avoid Paint Loss
If you want to remove double-sided tape without pulling paint off, go slowly and warm the adhesive first—use a hair dryer on low heat to soften the tape.
Peel back gently at a low angle, and keep the strip close to the wall rather than yanking outward.
Use steady pressure, support surrounding paint with your other hand, and consider dental floss or fishing line to lift adhesive—basic paint preservation techniques and wall surface protection.
If Tape Peels Paint or Leaves Residue : Fixes
Sometimes despite careful removal you’ll find paint lifted or sticky residue left behind; don’t panic—there are quick fixes that can restore the surface.
- Gently warm residue with a hairdryer to loosen adhesive; test surface compatibility.
- Use a soft cloth with mild solvent for stubborn tack—match solvent to paint and tape types.
- Lightly sand and touch up peeled spots.
- Prime before repainting to guarantee adhesion and uniform finish.
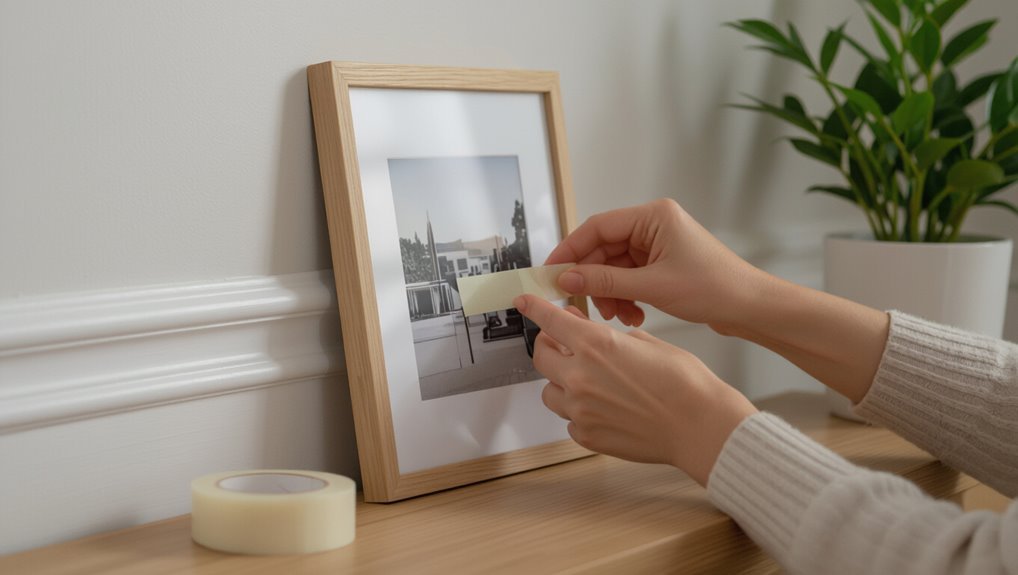
Best Tape Choices by Use Case (Posters, Frames, Decor)
Choosing the right double-sided tape depends on what you’re mounting: lightweight posters, framed art, or decorative accents each call for different stickiness and backing materials.
For poster mounting choose low-tack, residue-free tape.
For frame hanging use higher-strength foam or mounting tape rated for weight.
For decor arrangement favor repositionable adhesive strips that balance hold with wall protection.
Test a small spot first.
Brands to Consider: Quick Pros and Cons
While you weigh options, here’s a quick rundown of popular double-sided tape brands so you can match performance to your project.
You’ll find varied tape types for different wall materials; pick based on weight, removability, and finish.
- 3M: strong, reliable, may pull fragile paint.
- Scotch: gentle, good for posters.
- Gorilla: heavy-duty, risky on soft paint.
- Command: designed for painted walls, removable.
When to Avoid Tape and Use Non‑Damaging Hardware
If your wall surface or paint finish looks fragile, or the item you want to hang is heavier than the tape’s rating, skip adhesive solutions and use non‑damaging hardware instead.
Choose wall‑safe hooks, picture rails, or removable anchors as non damaging hardware and alternative solutions.
Test a small area first, follow weight limits, and prioritize methods that transfer load to studs or rails rather than fragile paint.
Maintenance Tips to Keep Tape Secure on Painted Walls
Routine checks help keep double‑sided tape performing and your paint intact. You’ll extend tape longevity and protect wall compatibility by cleaning surfaces, avoiding humidity, and replacing strips on schedule.
Check edges weekly for peeling and remove buildup gently.
- Clean surface before reapplying.
- Monitor humidity and temperature.
- Replace tape every few months.
- Test small areas first.
Frequently Asked Questions
Can Double Sided Tape Damage Wallpaper Under Painted Trims?
Yes — you can damage wallpaper under painted trims if you use aggressive adhesives; you should prioritize wallpaper protection, choose low-tack options, test first, and perform careful tape removal to avoid tearing, lifting, or paint loss.
Is Double Sided Tape Safe on Recently Painted Walls?
Yes — you can, but proceed carefully: you’ll test small areas for paint compatibility, choose low-tack tape to avoid adhesive residue, wait full cure time, and peel slowly at a low angle to minimize lifting or finish damage.
Can Tape Affect Bathroom or Kitchen Painted Surfaces With Humidity?
Yes — humidity effects can weaken adhesive strength and cause tape to peel or leave residue; you’ll avoid problems by using moisture-rated tapes, testing a small area, and removing tape slowly once surfaces fully cure.
Will Tape Discolor Light‑Colored or Matte Paint Over Time?
Yes — over time tape residue and strong adhesives can discolor light or matte paint and weaken paint adhesion, especially with heat or humidity; you should test a small area and use low‑tack tape meant for delicate surfaces.
Are There Tapes Safe for Painted Baseboards and Moldings?
Yes — you can use low‑tack removable tapes like painter’s tape variants and foam mounting strips; consider adhesive types (removable acrylics, low‑tack rubber) and gentle removal methods (heat, slow peeling, adhesive remover) to protect trim.
Conclusion
You’ve got options that protect your paint—low‑tack acrylics and foam mounting tapes—but the right pick depends on your wall’s finish and how long you need it to hold. Before you stick anything, test a hidden spot and consider removable strips for temporary displays. If you’re unsure, pause: one wrong peel can ruin hours of work. Ready to try? Start with a small sample and watch closely—you might be surprised what holds…