How to Prep a Wall for Paint: Complete Surface Preparation Guide
You’ll get a smooth, durable finish by cleaning, repairing, priming, and protecting each wall before you paint. Start by evaluating damage—cracks, holes, peeling, or stain—and remove dirt, grease, and mildew with appropriate cleaners. Fill holes and sand smooth, scuff glossy areas, then apply the right primer for the surface or stain-blocking needs. Mask trim, remove fixtures, ventilate, and follow drying times. Keep going and you’ll find step-by-step tips, tools, and pro-vs-DIY advice.
What This Guide Covers
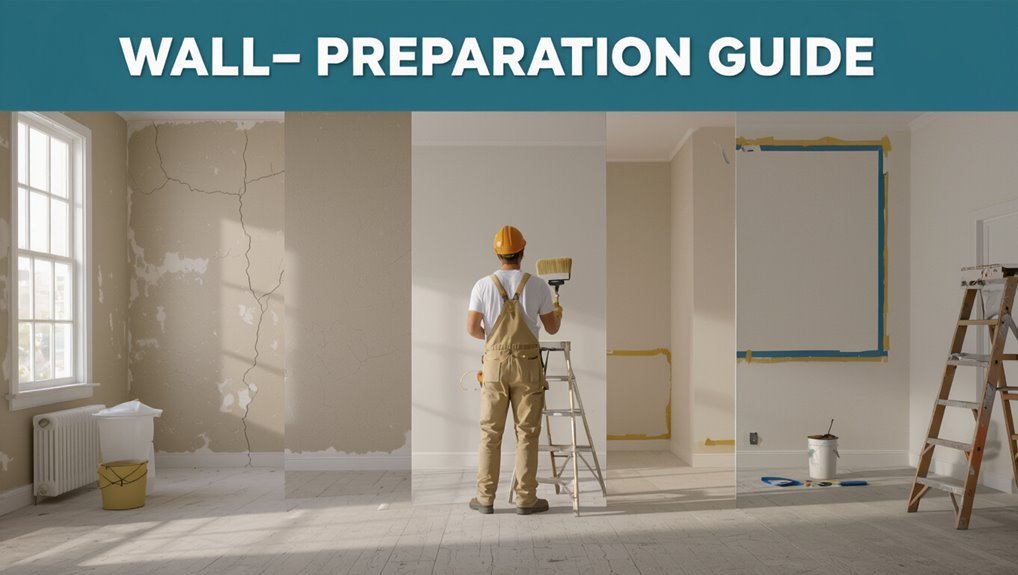
Before you grab a brush, this guide lays out the steps and tools you’ll need to prep interior walls for painting—from cleaning and repairing to priming and protecting trim—so you can get a smooth, lasting finish.
You’ll learn practical wall painting techniques, assess surface texture considerations, choose primers and fillers, mask and protect trim, and follow a clear workflow that saves time and prevents common finish problems.
When to Prep a Wall Before Painting
When should you prep a wall? You prep before painting any time surfaces are dirty, damaged, stained, or textured differently.
Assess wall types—drywall, plaster, masonry, or previously painted surfaces—and choose prepping techniques for cleaning, patching, sanding, or priming.
Prep also matters when changing gloss level, color contrast, or covering repairs. Proper timing prevents adhesion failures and uneven finish.
Tools and Materials to Gather
Before you start, gather the essential prep tools—sandpaper, putty knife, spackle, drop cloths, painter’s tape, and a good vacuum or brush.
You’ll also want a clear paint materials checklist: primer, paint, rollers, brushes, trays, and enough stir sticks and rags.
Having everything ready will save time and prevent interruptions once you begin.
Essential Prep Tools
A handful of reliable tools and materials will make prepping a wall faster and keep your finish professional: drop cloths, painter’s tape, a putty knife and joint compound, sandpaper or a sanding block, a good-quality scraper, spackle, a utility knife, caulk and a caulking gun, a sturdy ladder, and a shop vacuum or tack cloth for dust cleanup.
You’ll gather essential prep tools and must have equipment to repair, sand, clean, and protect surfaces before painting.
Paint Materials Checklist
Gather the right paint materials so you’re not scrambling mid-job: paint (primer and finish), brushes and rollers in appropriate sizes and naps, trays and liners, extension poles, and enough drop cloths and tape to protect floors and trim. Choose paint types and finalize color selection before starting. Keep samples, stir sticks, sandpaper, and a bucket handy.
| Item | Purpose | Tip |
|---|---|---|
| Primer | Seal surface | Use high-quality |
| Finish paint | Color coat | Test swatches |
| Tools | Apply paint | Match brush to nap |
| Protection | Cover floors | Tape edges tightly |
Safety Gear and Ventilation Rules
Start by equipping yourself with the right safety gear and opening windows to keep fresh air moving; you’ll want gloves, safety goggles, a dust mask or N95 respirator for sanding, and, for strong-smelling primers or paints, a respirator with appropriate cartridges.
- Use safety equipment consistently.
- Position fans for cross-ventilation methods.
- Seal off adjoining rooms.
- Dispose of rags safely and monitor air quality.
Assess Wall Condition in Five Minutes
With protective gear on and the room ventilated, take five minutes to inspect the wall for dents, cracks, peeling paint, mold, and signs of moisture so you can prioritize repairs. Use simple wall inspection techniques to note surface damage indicators and plan fixes.
| Area | Issue | Priority |
|---|---|---|
| Upper | Crack | Medium |
| Lower | Peel | High |
| Corner | Stain | Low |
Paint Failures vs. Surface Stains
Before you start sanding or priming, you’ve got to tell paint film failures apart from surface stains.
Paint failures like peeling, blistering, or crazing mean the coating itself has lost adhesion, while surface stains—smoke, water marks, or tannin bleed—are mostly on top and can often be blocked or cleaned.
Identifying which you’re facing tells you whether to strip and recoat or just clean and prime.
Paint Film Failures
When paint peels, blisters, or flakes away from the wall, you’re dealing with a paint film failure—not just a surface stain you can wipe off.
You need to restore paint adhesion and surface integrity before recoating. Inspect, remove loose material, and address underlying causes.
- Scrape and sand to sound substrate
- Clean thoroughly
- Prime exposed areas
- Use compatible topcoat
Surface Staining Causes
Although a dark patch or streak might look like paint failure, surface stains usually sit on top of the finish rather than breaking its bond; you can often remove them without stripping or replastering.
Identify staining sources like smoke, grease, water deposits, or tannins. Clean with appropriate cleaners, rinse, and let dry.
Use sealers, proper ventilation, and stain prevention to avoid recurrence before repainting.
Spotting Hidden Water Damage and Mold
If you suspect water damage or mold, start by scanning surfaces for subtle signs like discoloration, soft spots, bubbling paint, or a musty smell—these often show damage that’s still hidden behind drywall or trim.
Use basic water detection methods and follow mold prevention tips as you inspect:
- Probe soft areas gently
- Look behind baseboards
- Check attic and crawlspaces
- Note recurring stains and odors
When and How to Test for Lead Paint
If your home was built before 1978 or you find flaky, chalky paint, you should test for lead before sanding or scraping.
You can buy a reliable DIY lead test kit or hire a certified inspector for more thorough sampling and XRF testing.
Don’t disturb suspect paint until you get results, and follow professional precautions if tests come back positive.
When To Test
When should you test for lead paint? You should test before renovation, after finding old paint, when children or pregnant people live there, or if local lead regulations require it.
- before sanding or demolition
- after discovering flaking or chalking
- if occupants are vulnerable
- when renovations trigger legal notifications
Use approved testing methods and follow current lead regulations.
How To Test
Having decided to test after finding old paint or before work begins, you should know which methods to use and how to carry them out safely.
Start with EPA-approved test kits for quick screening; confirm positives with a certified professional using XRF or lab analysis.
Follow containment, HEPA cleanup, and assess paint adhesion and surface compatibility before repair or repainting to protect occupants.
Protect Floors, Furniture, and Trim Fast
Start by clearing a path and laying down protection: roll out drop cloths or contractor plastic over floors, move or tightly cover furniture, and tape off baseboards and trim so you can work quickly without worrying about drips or dust.
- Floor protection and paint spill prevention
- Furniture covering and efficient packing
- Trim safeguarding and surface dusting
- Area organization, prep time estimation, safety measures
Masking Windows, Outlets, and Switches
Once your floors, furniture, and trim are secured, protect openings and fixtures before you paint: cover window glass with painter’s tape and plastic sheeting, remove outlet and switch plates, and tape around remaining receptacles with pocketed tape to keep paint out. Use masking techniques and outlet protection for clean edges.
| Item | Tip |
|---|---|
| Windows | Tape edges |
| Outlets | Pocketed tape |
| Switches | Plastic cover |
| Seams | Smooth tape |
Removing Switch Plates, Fixtures, and Hardware
Before you start, turn off the power at the breaker so you don’t risk a shock.
Use a screwdriver to remove switch plates and fixtures carefully, keeping screws and small parts together.
If a fixture feels stuck, stop and check for hidden fasteners instead of forcing it.
Turn Off Power
While you’re getting ready to remove switch plates, fixtures, and hardware, turn off the power at the circuit breaker to keep yourself safe.
Follow power safety and electrical precautions before any handling.
- Locate the correct breaker and switch it off.
- Test outlets with a noncontact tester.
- Label the breaker for later.
- Wear insulated gloves if needed.
Remove Plates Carefully
Carefully remove switch plates, outlet covers, light fixtures, and any wall-mounted hardware so you can paint behind them without leaving ragged edges or paint buildup. Use a screwdriver, label screws and parts, and keep hardware safe while removing outlet covers and detaching light fixtures. Reinstall after paint dries.
| Item | Tool | Tip |
|---|---|---|
| Switch plate | Screwdriver | Label |
| Outlet cover | Screwdriver | Bag screws |
| Light fixture | Pliers | Turn off power |
| Hook | Wrench | Protect finish |
| Thermostat | Torx | Note wiring |
Take Down Trim Without Damage
Remove the trim slowly and methodically so you don’t crack the molding or tear drywall paper.
Use safe trim removal techniques and focus on preventing damage by working patiently. Keep tools and steps simple:
- Score caulk lines first
- Pry with a thin putty knife behind trim
- Use a trim puller for leverage
- Label and store pieces for reinstallation
Cleaning Walls for Paint: Cleaners by Stain
Because different stains need different cleaners, you’ll save time and protect your paint job by matching the solution to the mark—grease calls for a degreaser, mildew needs a bleach-based cleaner, and crayon or pencil responds to a gentle abrasive or magic eraser.
Perform a quick surface assessment, choose cleaner types accordingly, and use targeted cleaning techniques for effective stain removal without damaging drywall or trim.
Removing Grease and Kitchen Grime
Start by spotting where grease builds up—around stoves, range hoods, backsplash edges, and cabinet tops.
You’ll tackle those areas with a degreaser, a mix of warm water and dish soap, or a commercial kitchen cleaner depending on how stubborn the grime is.
Test a small spot first, scrub with a nonabrasive pad, then rinse and dry before painting.
Identify Grease Sources
When prepping walls near the stove, fridge, or oven, scan for common grease sources like splatter zones, exhaust fans, and cooking splashes so you know where to focus cleaning.
Identify kitchen areas and wall surfaces that collect residue, then note spots for targeted cleaning techniques:
- Behind stove and backsplash
- Around exhaust vents and filters
- Beside food prep counters
- Near refrigerator seams and handles
Degreasing Cleaning Methods
Now that you’ve marked greasy hotspots, you’re ready to remove the grime with effective degreasing methods.
Use mild dish soap and warm water for light stains, a trisodium phosphate (TSP) substitute for heavy buildup, or dedicated citrus-based cleaning solutions for sensitive surfaces.
Apply with a sponge, scrub gently, rinse thoroughly, and let dry.
These degreasing techniques guarantee paint adhesion and a clean finish.
Treating Nicotine and Heavy Stains
Because nicotine and other heavy stains soak into paint and drywall, you’ll need stronger cleaners and a methodical approach to get a stable surface for repainting.
Use these steps for nicotine removal and stain sealing:
- Test cleaner on a small area with gloves and ventilation.
- Apply trisodium phosphate or commercial degreaser; rinse thoroughly.
- Dry fully, then spot-prime with a stain-sealing primer.
- Sand lightly before full repainting.
Tack Cloths, Vacuuming, and Dust Control
Start by removing as much loose dust and debris as you can—vacuum trim, corners, and flat surfaces with a brush attachment to prevent grit from ruining your finish.
Use vacuuming techniques that reach crevices, then wipe with tack cloths to pick up fine particles.
Appreciate tack cloths benefits: they leave a clean, dust-free surface so primer and paint adhere evenly and look professional.
Wallpaper: Strip or Paint Over?
If the wallpaper’s peeling or has multiple layers, you’ll want to remove it before painting; intact, well-adhered paper can sometimes be painted over.
Check for seams, bubbles, and water damage to assess whether the surface will hold primer and paint.
After stripping, scrape, sand, and clean the wall so you’ve got a smooth, stable base for priming.
Remove Or Paint Over
1 choice you’ll face when prepping a wall is whether to strip wallpaper or paint right over it, and your decision should hinge on the paper’s condition, the wall surface, and the look you want to achieve.
- If paper peels, remove wallpaper for best adhesion.
- Intact, smooth paper can be painted over.
- Consider long-term paint quality.
- Test a small area first.
Assess Wallpaper Condition
Now that you’ve weighed whether to remove wallpaper or paint over it, take a close look at the paper itself: check for peeling at seams or edges, bubbles, paper lifting from corners, and any texture that could telegraph through paint.
If seams fail or adhesive weakens, plan for wallpaper removal.
Identify wallpaper types—strippable, pasted, or vinyl—to choose tools and effort level before deciding to paint over.
Prep Surface After Stripping
After you strip the wallpaper, inspect the wall for glue residue, tears, and gouges so you know what needs repair before priming.
You’ll remove adhesive residue, repair surface damage, and prep for primer.
Steps:
- Scrape remaining adhesive with a scraper and mild solvent
- Sand rough areas smooth
- Fill holes and gouges with spackle
- Clean dust before priming
How to Strip Wallpaper Step by Step
Start by scoring and softening the paper so it comes off in manageable strips instead of tearing into a mess.
Use a scoring tool, spray diluted remover or steam, and peel gently from seams.
Try wallpaper removal techniques like solvent application or steaming for stubborn areas.
Scrape remaining paste, rinse with clean water, and apply effective adhesive solutions to dissolve residue before final cleaning.
Repairing Nail Holes and Hairline Cracks
Before you paint, you’ll want to fix any small nail holes with spackling so the finish looks smooth.
For hairline cracks, widen them slightly with a putty knife, fill with a flexible filler, and feather the edges.
Once dry, sand lightly and wipe clean so paint adheres evenly.
Filling Small Holes
Grab a putty knife and some lightweight spackle—you’ll be surprised how quickly tiny nail holes and hairline cracks disappear with the right approach.
Use simple filling techniques matched to hole size:
- Clean the hole and remove dust.
- Apply spackle, smooth flush with wall.
- Let dry fully, sand lightly.
- Prime repaired spot before painting for even coverage.
Fixing Hairline Cracks
Small nail holes and tiny cracks are easy to fill, but hairline cracks need a slightly different approach to prevent them from reappearing once painted.
You start with a careful crack assessment, widen and clean the gap, apply flexible filler or caulk, then sand smooth when dry.
Use appropriate repair techniques and primer to guarantee stability before repainting for a lasting finish.
Filling Medium Holes and Dents
Start by cleaning the area and tapping out any loose plaster so your filler will adhere properly.
Choose appropriate filler and tools, apply in thin layers, and sand between coats for smoothness.
Use these concise filling techniques for dent repair:
- Remove dust and debris
- Apply filler with a knife
- Let dry fully before sanding
- Feather edges for invisible finish
Fixing Large Drywall Holes Properly
Repairing large drywall holes takes a few more steps than filling dents, but you can get a seamless result by cutting a clean opening, installing a backing or patch, and securing the new drywall piece before taping and mudding the seams.
You’ll measure, cut a replacement, fasten with screws into hole reinforcement or backing, apply drywall patching tape, skim coat, sand, and prime for paint.
Repairing Plaster Cracks and Lath Damage
Crack the room’s silence by addressing plaster cracks and any underlying lath damage promptly—you’ll prevent further deterioration and make repainting far easier.
- Assess cracks, loose plaster, and needed plaster repair techniques.
- Remove failing plaster and evaluate lath integrity.
- Apply patching plaster, mesh, and proper bonding agents.
- Use lath replacement methods when slats are rotten, then sand and prime before painting.
Repairing Textured Finishes Without Losing Texture
When matching a textured finish, you’ll want to work slowly and build the repair in thin layers so the new material blends with the original surface.
Test your technique on a scrap piece or hidden area first to replicate the pattern and scale.
Use texture preservation techniques: match compound viscosity, layer and stipple with proper tools, and let each coat dry.
Practice reapplying texture to achieve seamless results.
Feathering Joint Compound for Invisible Repairs
You’ll want the right tools and materials—putty knife, joint compound, sanding block, and a clean rag—before you start.
Follow clear feathering technique steps: apply thin coats, taper edges with a wide knife, let each coat dry, and build up only as needed.
Finish by blending and sanding smooth so the repair disappears under primer and paint.
Tools And Materials
Feathering joint compound lets you blend small repairs into the surrounding drywall so they disappear under paint.
Gather tools and materials for neat, invisible fixes after surface cleaning and matching wall textures. You’ll need:
- Feathering joint compound (ready-mixed or powdered)
- 6″ and 12″ taping knives
- Sanding block or sponge (fine grit)
- Primer and clean cloths
Feathering Technique Steps
Start by cleaning and lightly sanding the repair area so the joint compound adheres properly and you can see the edges you need to blend.
Apply thin compound passes with a wide knife, extending each pass beyond the last to feather outward.
Use feathering techniques to taper thickness, keep knife angles shallow, and work wet edges into the surrounding wall, ensuring seamless blending edges.
Blending And Sanding
Blend the compound carefully so the repair disappears into the surrounding wall: let each skim coat dry, then sand lightly with fine-grit paper while keeping the edges feathered down to the original surface so changes are imperceptible.
You’ll use blending techniques and refined sanding methods to finish cleanly.
- Apply thin skim coats
- Sand between coats gently
- Match texture subtly
- Inspect under raking light
Best Sanding Techniques With Minimal Dust
1 smart sanding setup will cut dust and save you time: choose the right grit, attach a vacuum-capable sanding tool or use a sanding block wrapped in a damp cloth, and work methodically in even strokes.
You’ll use sanding techniques that minimize grit jump and debris.
Seal vents, hang plastic, wear a mask, and vacuum as you go for effective dust control and cleaner results.
Preparing Previously Glossy Surfaces
If your walls have a glossy finish, you’ll need to dull the surface and remove contaminants so new paint will stick — not just slather primer over shine and hope.
You’ll address adhesion challenges by cleaning and abrading the glossy surface, then priming properly.
Steps:
- Clean with degreaser
- Sand or scuff with fine grit
- Wipe dust thoroughly
- Apply bonding primer
Handling Metal Surfaces and Rust Spots
Check the metal for how far rust has spread so you know if you can sand it or need to replace the piece.
If rust is surface-level, you’ll remove loose scale, treat the area with a rust converter or rust remover, and sand smooth.
Finish by cleaning the metal and applying a metal primer to stop corrosion before painting.
Assess Rust Extent
When you’re prepping a metal surface, you’ll first want to determine how deep and widespread the rust is so you can choose the right repair method and prevent further corrosion.
You’ll do a quick rust assessment, then plan rust treatment based on severity.
- Inspect surface texture and flaking
- Tap to test for structural weakness
- Mark affected zones
- Photograph for records
Treat And Prime
Now that you’ve mapped out the rusted areas and noted how severe they are, you can begin treating and priming the metal so paint will adhere and corrosion won’t return.
Remove loose rust with a wire brush, sand to bare metal, and apply a rust converter on stubborn spots.
After treating stains, wipe clean, then use a metal-specific primer.
Focus on priming surfaces evenly before painting.
Exterior Masonry: Efflorescence and Stains
Efflorescence and other stains on exterior masonry can undermine paint adhesion and make a fresh job look bad fast, so you should remove them and address their causes before priming.
Efflorescence and stains ruin paint adhesion—clean and fix their causes before priming exterior masonry.
- Use stiff brush and water for basic efflorescence removal.
- Apply masonry cleaner for stubborn mineral deposits.
- Repair leaks and improve drainage for stain prevention.
- Rinse thoroughly and let masonry dry completely before priming.
Treating Mold and Mildew Safely
Start by learning how to spot mold versus mildew so you know what you’re dealing with.
Use proper protective gear and a mild bleach or commercial mold cleaner, following label instructions for safe removal and disposal.
After cleaning, dry the area thoroughly and address any moisture sources before you paint.
Identify Mold And Mildew
If you spot dark, fuzzy patches or musty odors on a wall, you’re likely dealing with mold or mildew and should inspect the area closely; look for discoloration in corners, around windows, near plumbing, and in any place with past water damage.
- Use mold detection techniques like visual checks and moisture meters.
- Note texture and color differences.
- Record affected areas for repair planning.
- Follow mildew prevention tips to stop recurrence.
Safe Removal And Cleanup
Now that you’ve pinpointed mold or mildew locations, you’ll want to remove them safely to protect your health and prevent spread.
Wear gloves, goggles, and an N95 respirator, ventilate the area, and test cleaners on a small patch.
Follow chemical safety instructions, avoid mixing products, scrub with diluted bleach or commercial remover, and bag contaminated materials.
Use proper disposal methods and wash thoroughly.
Solve Recurring Moisture Before Painting
Because moisture will wreck a fresh paint job, you’ll need to find and fix the source before you put any primer or paint on the wall.
Inspect and act decisively:
- Check for leaks and seal plumbing joints.
- Improve drainage solutions around foundations.
- Install or repair moisture barriers in crawlspaces and basements.
- Dry with dehumidifiers and guarantee ventilation before painting.
When to Replace Drywall or Call a Pro
Fixing moisture problems usually stops future damage, but sometimes the drywall has already suffered beyond simple repairs and you’ll need to decide whether to replace it or call a pro.
Inspect for mold, sagging, or crumbling that indicate severe drywall damage.
Seek a professional assessment if structural issues appear.
Compare repair options versus drywall replacement based on cost, time, and long-term reliability.
Choose the Right Primer for the Issue
If your wall has stains, smoke damage, or lingering odor, pick a primer designed to block those specific problems before you paint.
Choose based on surface and issue, knowing primer types offer different primer benefits.
- Oil-based for tannin and smoke blocking
- Shellac for strong odor sealing
- Latex for general adhesion
- Stain-blocking for water marks
Spot-Prime Repairs vs. Full-Wall Priming
When you’ve patched a few small dents or nail holes, spot-priming those repairs is usually enough; but when damage is widespread or the old paint varies in sheen, priming the whole wall gives a uniform base and prevents visible differences after painting.
You’ll weigh spot prime benefits — quicker, less product — against full wall advantages: consistent adhesion, uniform sheen, and fewer retouches later.
Applying Primer: Tools and Technique
You’ll start by picking a primer suited to the surface and the job—stain-blocking, bonding, or latex for drywall.
Use the right tools—brushes for edges, a good nap roller for flats, and a mini-roller or sprayer for textured areas.
Apply thin, even coats with overlapping strokes to guarantee smooth, full coverage.
Choosing The Right Primer
Which primer will give your paint the best foundation? You’ll pick based on surface, stain-blocking needs, and finish.
Understand primer types and primer benefits to match purpose.
- Oil-based: seals stains, smooths porous surfaces
- Latex: fast-drying, easy cleanup
- Shellac: blocks tough stains, strong adhesion
- Bonding: sticks to glossy or slick surfaces
Primer Application Tools
Now that you’ve picked a primer that matches your surface and stain needs, gather the right tools so the coating goes on smoothly and evenly.
Choose quality brushes, rollers, trays, extension poles, and a sprayer if covering large areas. Match tools to primer types and surface texture.
Proper tools highlight primer benefits—adhesion, stain blocking, uniform base—so your paint performs well.
Technique For Smooth Coverage
Start by loading the roller and brush evenly—dip, roll off excess, and work from top to bottom in overlapping “W” or “M” patterns to avoid lap marks and guarantee a uniform film.
Use this smoothing technique and follow these coverage tips:
- Maintain consistent pressure
- Feather edges with light strokes
- Work small sections quickly
- Back-roll for even texture
Sanding Primer and Prepping for Paint
Lightly sand the primer with a fine-grit pad to knock down brush marks, drips, and high spots so your topcoat will lay down smoothly and evenly.
Use gentle sanding techniques, working in overlapping passes and checking primer types for recommended cure times.
Sand gently in overlapping strokes and confirm your primer’s cure time before proceeding.
Wipe dust with a tack cloth, vacuum edges, and inspect for imperfections.
Repair and sand again until the surface is uniformly smooth and dust-free.
Pick Paint-Compatible Caulk
You’ll want caulk that’s labeled paintable so the finish stays smooth and consistent.
Match the caulk type to the surface—use acrylic for drywall and silicone blends for areas that need more flexibility or moisture resistance.
Check the cure time so you give it enough drying before priming and painting.
Choose Paintable Caulk
Because gaps and trim joints will show through paint if you use the wrong product, pick a caulk labeled “paintable” or “paint-compatible.”
You’ll consider caulk types and proper caulk application. Use flexible, paint-friendly formulas. Follow curing times. Keep joints clean and smooth.
- Read labels for “paintable”
- Check cure time
- Apply bead neatly
- Tool before skinning
Match Caulk To Surface
Match the caulk to the surface you’re sealing so the joint stays flexible and paint adheres properly.
Identify substrate—wood, drywall, metal, or trim—and pick compatible caulk types (silicone, acrylic latex, or polyurethane).
Test adhesion on a scrap if unsure.
During caulk application, keep a steady bead, tool it smooth, and remove excess.
Proper match prevents peeling and guarantees an even paint finish.
Check Cure Time
Before you paint, confirm the caulk is fully cured and paint-compatible so your finish won’t peel or tack up.
Check label cure time and ambient conditions, since humidity and temperature affect drying and surface adhesion.
Follow these steps:
- Read manufacturer cure time recommendations
- Wait recommended hours or days
- Test a small painted patch
- Use primer if adhesion seems weak
Caulk Baseboards, Windows, and Crown Molding
Seal gaps around baseboards, windows, and crown molding with paintable caulk to stop drafts, hide cracks, and create a smooth edge for a clean paint line.
For proper caulk application, choose a high-quality, paintable latex or silicone-latex blend—caulk selection matters for flexibility and adhesion.
Cut the tip, apply steady bead, smooth with a wet finger or tool, and wipe excess before it skins.
Masking and Edge Protection for Clean Lines
When you’re ready to protect trim and create crisp paint lines, use quality painter’s tape and paper or plastic drop cloths to mask edges precisely; press tape down firmly and run a putty knife along the edge to prevent bleed-through.
You’ll follow masking techniques for neat results and focus on edge sealing to stop seepage.
- Clean surfaces first
- Align tape carefully
- Smooth edges with tool
- Remove tape warm
Tools and Tips for Cutting In Like a Pro
Cutting in cleanly takes practice and the right tools, so start with a high-quality angled sash brush or a 2–2.5-inch synthetic brush and a steady hand.
Cutting in cleanly demands practice, a quality angled sash brush (2–2.5″), and a steady, confident hand.
Use proper brush selection, steady wrist motion, and a light load of paint.
Practice cutting techniques along corners, windows, and trim.
Keep a slightly damp rag and a steady pace to fix mistakes before paint skins.
Managing Textured Ceilings and Walls
Although textured ceilings and walls add character, they demand a different prep approach than smooth surfaces. You’ll assess damage, clean gently, and decide on repair or skim coating.
Focus on textured wall solutions and ceiling texture management to preserve pattern or smooth it.
- Test a small area first
- Use soft brushes and vacuums
- Patch with matching texture
- Prime appropriately
Weather and Temperature for Exterior Prep
Shifting from indoor texture care to exterior prep, you’ll need to pay close attention to weather and temperature because they directly affect paint adhesion and curing. Plan around weather impact and follow temperature guidelines: avoid freezing nights, high humidity, and direct midday sun. Use this quick guide:
| Condition | Risk | Action |
|---|---|---|
| Cold | Poor cure | Wait |
| Heat | Rapid dry | Shade |
| Humidity | Blushing | Choose day |
| Wind | Debris | Block |
Time and Drying Expectations After Each Step
1. You’ll monitor drying times and humidity impact after each prep task so paint bonds well.
Follow simple waits:
- Cleaned surfaces: allow 30–60 minutes for moisture to dissipate.
- Spackle/patches: 24 hours for small repairs, longer if thick.
- Primer: 2–4 hours before sanding.
- Final wipe: 15–30 minutes, make certain no tackiness remains before painting.
Final Pre-Paint Inspection Checklist
Before you open your paint can, run a quick, methodical inspection so nothing will compromise the finish: check that all repairs are smooth and dry, dust and residue are wiped away, sanded areas are feathered and tack-free, trim and masking are secure, and lighting lets you see any imperfections—if anything’s off, fix it now rather than after paint goes on.
For your final wall assessment, confirm primer coverage, clean edges, secure masking, and an overall even surface as part of pre paint preparation.
Common Prep Errors That Cause Paint to Fail
A tight final inspection won’t save your paint job if you miss common prep mistakes that lead to peeling, blotching, or poor adhesion.
You need to know common misconceptions and respect preparation timelines. Check these frequent failures:
- Painting over dirt or grease
- Skipping primer on repaired spots
- Ignoring moisture and mildew
- Rushing between coats or before curing
Cost-Saving Prep Tips That Don’t Cut Quality
You can cut costs on prep without sacrificing results by prioritizing steps that actually affect adhesion and longevity: clean high-touch areas, spot-sand and feather edges, seal repaired drywall with a quality primer, and fix moisture sources before painting.
Use Budget Friendly Techniques like targeted patching, reuse sandpaper, and buy small amounts of Quality Materials for primers and patching compounds to avoid waste.
When to Hire a Pro vs. DIY for Prep
While smaller fixes—cleaning, spot-sanding, and sealing patches—are easy to tackle yourself, call in a pro when repairs are extensive, the surface has moisture or structural issues, or you need perfect results on visible areas.
Decide based on time, skill, and risk; weigh pro painting against DIY advantages.
Decide by weighing your time, skill, and risks—compare DIY savings against pro reliability and finish.
- safety or structural concerns
- complex moisture or mold
- tight timelines or high finish standards
- budget and learning curve
Printable Room-by-Room Prep Checklist
Start by printing one checklist per room so you’ve got a focused plan for each space: list steps for clearing furniture, protecting floors and trim, removing outlet covers and switches, cleaning surfaces, patching holes, sanding, priming stained areas, and labeling materials.
Use each checklist to note room layout, assign a prep timeline, track needed tools, and check off tasks as you finish, keeping work efficient and organized.
Frequently Asked Questions
Can I Paint Over Wallpaper Adhesive Residue Without Stripping It First?
You shouldn’t paint over wallpaper adhesive residue; you’ll get poor adhesion and visible stains. Instead, remove residue or use adhesion-promoting primers or adhesive alternatives like shellac or bonding primer, or consider full wallpaper removal first.
How Do I Prep Walls in a Mold-Prone Bathroom Long-Term?
Worried about recurring mold? You’ll clean and remove mold, repair leaks, install ventilation, apply a moisture barrier, prime, then use mold resistant paints, keep humidity low, and maintain regular inspections to prevent future growth.
Will New Drywall Need Priming Even if It Looks Smooth?
Yes — you should prime new drywall even if it looks smooth. You’ll protect drywall finishing, seal porous joints, and improve paint adhesion. Choose primer types like drywall primer-sealer or PVA/latex-based primers for best results.
Can I Use Oil-Based Paint Over Water-Based Primer on Trim?
Yes, you can use oil-based paint over a water-based primer on trim, provided the primer is fully cured and labeled for oil based compatibility; choose the proper primer types and sand lightly for best adhesion and finish.
How Should I Prep Walls With Embedded Nicotine Odor Before Painting?
You’ll freshen a “well-lived” wall by washing nicotine removal solution, rinsing, sanding glossy patches, spot-priming stains, then applying a shellac or specialty odor sealing primer before repainting so smells won’t resurface.
Conclusion
Proper prep makes or breaks a paint job — and it’s worth the effort. Did you know 65% of repaint failures trace back to poor surface prep? That’s why you should always clean, sand, patch, and prime before painting. Follow the checklist, use the right tools, and don’t skip safety or ventilation. Whether you DIY or hire a pro, good prep saves money and time and gives you a finish that lasts.