How Do You Paint a Popcorn Ceiling: Step-By-Step Diy Guide
You can paint a popcorn ceiling yourself if you’re comfortable on a ladder and careful with prep. First assess for asbestos (older homes may need testing), clear and cover the room, and tape off fixtures. Prime stained or damp areas, then use a thick-nap roller with light pressure and thin coats to preserve texture, allowing full drying between coats. Wear a mask and ventilate. Keep tools and touch-up supplies handy — continue for step‑by‑step tips and troubleshooting.
Quick Answer: Can You Paint a Popcorn Ceiling Yourself?
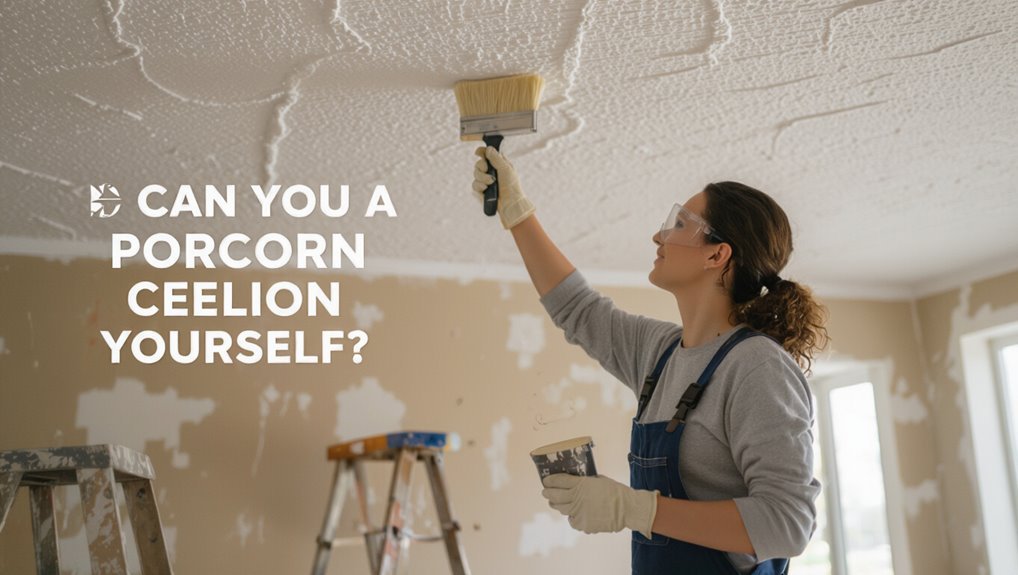
Can you paint a popcorn ceiling yourself? Yes—you can. You’ll enjoy popcorn ceiling benefits like easier texture hiding, and with proper painting techniques you’ll get good results.
You’ll need the right tools, patience, and careful prep to avoid damage or mess. Start with testing a small area, use thick-nap rollers, spray or roll evenly, and apply two thin coats for best coverage.
Who Should DIY vs. Hire a Pro for Popcorn Ceilings
If you’re comfortable on a ladder, have steady hands, and can manage prep and masking, you can probably tackle painting a popcorn ceiling yourself.
Hire a pro if the ceiling has asbestos, extensive damage, or you want a flawless, fast finish without the hassle.
We’ll cover what skills matter and the signs that it’s time to call in an expert.
Skill Level Needed
Painting a popcorn ceiling is a medium-difficulty job you can handle if you’re comfortable with ladders, masking long edges, and working with spray or roller techniques; hire a pro if you’re uneasy on a ladder, unsure about asbestos, or need a perfectly smooth finish.
You’ll want beginner tips for prep, patching, and safe cleanup; tackle advanced techniques only after practice or confidence.
When To Hire
While a confident DIYer can handle most popcorn-ceiling painting projects, you should hire a pro if you’re uncomfortable on ladders, unsure whether the texture contains asbestos, need extensive repairs or smoothing, or want a flawless, contractor-grade finish quickly.
Hire when ceiling texture comparison favors specialized tools, when paint color selection demands expert matching, or when time, safety, or finish quality outweigh DIY savings.
Paint vs. Remove: When to Keep the Popcorn Texture
Sometimes you’ll find that keeping the popcorn texture makes more sense than stripping it out—especially when budget, time, or condition of the ceiling are factors.
Sometimes preserving the popcorn ceiling is wiser—when budget, time, or ceiling condition make removal impractical.
You’ll weigh texture preservation strategies and aesthetic considerations, then decide whether to paint instead of remove.
Consider practical benefits and limits:
- Low cost
- Faster project
- Hides imperfections
- Minimal mess
How to Check Older Popcorn Ceilings for Asbestos
If your home was built or last renovated before the mid-1980s, you’ll want to treat popcorn texture as potentially hazardous.
Look for yellowing, crumbling, or areas disturbed by past work, but remember visual clues aren’t definitive.
The safest route is to get a licensed asbestos inspector to take samples and run lab tests before you paint or disturb the ceiling.
Age And Renovation History
Before you start scraping or painting, find out when the ceiling was installed and whether any renovations disturbed the original texture, because that history determines asbestos risk and testing needs.
Check historical context and renovation trends to gauge likelihood.
Then:
- Review building records.
- Ask previous owners.
- Note major remodel dates.
- Identify contractors involved.
Visual Inspection Signs
1 clear sign you can spot is the age-related wear pattern: older popcorn ceilings often show yellowing, flaking, or a dusty residue where the texture is degrading, and those signs increase the chance the material contains asbestos.
When you do a texture assessment, note crumbly areas, water stains, or patching from past ceiling maintenance; avoid disturbing suspect sections and document locations for further action.
Professional Testing Options
When you suspect an older popcorn ceiling might contain asbestos, hiring a qualified professional for testing is the safest and most reliable option. They’ll take samples, follow strict containment protocols, and send them to an accredited lab so you get definitive results without disturbing the material yourself.
- Seek a licensed asbestos testing firm.
- Request a professional assessment report.
- Confirm lab accreditation and turnaround time.
- Ask about containment and cleanup procedures.
Safety Gear, Masks, and Ventilation for Ceiling Work
Because popcorn ceilings can release dust, loose fibers, and possibly asbestos during scraping or sanding, you’ll want proper safety gear, a high-quality respirator, and good ventilation before you start work.
Wear protective equipment—P100 respirator, disposable coveralls, gloves, and eye protection.
Seal the room with plastic sheeting, use exhaust fans or open windows, and follow safety precautions to minimize exposure and cleanup.
Tools You Need for Painting Popcorn Ceilings
Gather your tools before you climb the ladder so you won’t stop mid-job: you’ll need a few specialty items in addition to standard painting supplies.
You’ll focus on paint techniques that preserve texture and improve ceiling aesthetics.
Essential tools:
- Drop cloths and painter’s tape
- Extension pole with textured-head adapter
- Stiff-bristled brush for edges
- High-quality primer and ceiling paint
Roller, Sprayer, or Brush: Which to Pick for Popcorn Ceilings?
You’ll weigh a roller’s ease and texture-matching against its slower coverage and need for extension poles.
A sprayer covers fast and gets into nooks but can be messy, while a brush gives control for touch-ups and edges.
I’ll compare roller pros and cons and show when a sprayer or brush is the smarter choice.
Roller Pros And Cons
When deciding whether to use a roller, sprayer, or brush on a popcorn ceiling, weigh coverage, texture preservation, cleanup, and cost—each tool has clear trade-offs that affect finish and effort.
- You’ll like roller types that hold thick nap for uneven texture.
- Roller techniques reduce splatter but need steady strokes.
- Rollers preserve texture better than brushes.
- Cleanup is easier than sprayers, but coverage can be slower.
Sprayer Vs Brush
Although a sprayer covers popcorn ceilings fastest, a brush gives you control in tight spots and for touch-ups, so pick based on speed versus precision.
You’ll get sprayer benefits like even texture and quick application for large rooms, while brush advantages shine on edges and repairs.
Use a sprayer for base coats and a brush for detail work to balance efficiency and control.
Choosing the Right Roller Nap for Textured Ceilings
Picking the right roller nap makes the difference between a smooth, even coat and a messy, splattered ceiling—so opt for a nap that holds enough paint to reach into the crevices without leaving excess on the peaks.
Picking the right roller nap ensures smooth, even coverage—hold paint for crevices without overloading peaks for a cleaner ceiling finish.
You’ll match roller types to your ceiling texture and work steadily. Choose:
- 3/8″ for light texture
- 1/2″ for medium
- 3/4″ for heavy
- Foam for touch-ups
Best Paint Types for Popcorn Ceilings
You’ll want to weigh oil-based paint’s durability and stain-blocking abilities against latex’s easier cleanup and faster drying.
Consider flat finishes for hiding imperfections on textured surfaces and eggshell if you want a bit more washability.
I’ll explain the trade-offs so you can pick the best option for your ceiling.
Oil-Based Paint Benefits
When you want a tough, long-lasting finish for a popcorn ceiling, oil-based paints deliver superior adhesion and durability compared with many water-based options.
They resist scuffs and stains better and tend to bond well to older textures.
Use oil-based advantages for enhanced ceiling durability.
Consider:
- Superior adhesion
- Stain resistance
- Smooth finish
- Longer lifespan
Latex Paint Pros
Someone who’s after easy application and quick cleanup will find latex paints hard to beat for popcorn ceilings.
You’ll appreciate latex paint benefits like low odor, fast drying, and easy cleanup with soap and water. Its latex paint durability resists cracking and yellowing, so textured surfaces stay consistent.
Use a quality acrylic-latex formula and proper primer for best adhesion and coverage.
Flat vs. Eggshell
1 clear advantage of flat paint for popcorn ceilings is its ability to hide imperfections, while eggshell offers a slight sheen that’s easier to clean.
You’ll choose based on traffic and lighting: flat finish masks texture; eggshell finish trims upkeep.
Consider these points:
- Hides flaws
- Easier to wipe
- Touch-up visibility
- Light reflection
Primer Choices for Stained or High‑Moisture Popcorn Ceilings
If your popcorn ceiling has water stains or sits in a humid room, pick a primer that blocks stains and resists moisture to guarantee paint adheres and hides discoloration.
Choose between oil‑based stain‑blocking primers, shellac primers for severe staining, or high‑quality water‑based primers with enhanced moisture resistance.
Test adhesion on a small patch, apply per instructions, and allow full cure before topcoating.
Eco‑Friendly Paint Options for Popcorn Ceilings
When you’re aiming to reduce indoor toxins and environmental impact, choosing low‑VOC or zero‑VOC paints for a popcorn ceiling gives you good coverage without the harsh fumes of traditional formulas.
- Pick eco friendly paints with low VOC solutions.
- Consider sustainable options using organic materials.
- Seek natural finishes free of heavy chemicals.
- Choose biodegradable products and certifications for safer air.
How to Protect Floors, Furniture, and Fixtures
Start by clearing the room and covering everything you want to keep intact—floors, furniture, light fixtures, and vents—so paint and dust can’t reach them.
Use heavy-duty drop cloths and taped plastic for reliable floor protection, employ furniture covering and secure edges, and wrap or remove fixtures for fixture safeguarding.
Good room preparation prevents spills and enables straightforward damage prevention.
Preparing the Room: Lighting, Access, and Workspace
Although you’ve protected floors and furniture, you’ll want bright, even lighting, clear access, and a safe workspace before touching paint—set up adjustable work lights to eliminate shadows, arrange ladders for stable reach without blocking exits, and keep a nearby table or cart for tools, brushes, and a trash bin so you don’t have to leave the area mid-job.
- Compare lighting options for even coverage.
- Position ladders for safe access.
- Use a dedicated table for tools.
- Maintain workspace organization and clear walkways.
How to Clean a Popcorn Ceiling Without Damaging Texture
Because popcorn ceilings are fragile, you’ll want to clean them gently to avoid dislodging the texture; use soft, non-abrasive tools and minimal moisture.
Work in small sections, and test a hidden area first to guarantee the surface holds up.
Use mild cleaning solutions diluted in water, a soft-bristle brush or microfiber, and gentle techniques—dab rather than scrub, blot excess moisture, and let areas dry completely before painting.
Repairing Loose or Flaking Popcorn Before Painting
Before you paint, fix any loose or flaking popcorn texture so the finish will look smooth and hold up over time.
Do a careful texture assessment, remove loose bits, and perform flaking repair before priming.
Follow these steps:
- Gently scrape loose texture with a wide blade.
- Vacuum debris and wipe dust.
- Apply bonding primer to edges.
- Reattach or blend replacement texture and sand lightly.
Patching Stains and Water Damage on Popcorn Ceilings
When you spot stains or water damage on a popcorn ceiling, address them promptly to prevent mold and further deterioration; locate the source, fix leaks, and let the area dry completely.
For stain removal, clean with a mild bleach solution, then rinse.
For texture repair, remove loose material, apply matching patch compound, and blend gently so the repaired area matches surrounding texture before priming and painting.
When to Skim‑Coat Popcorn Ceilings (vs. Painting Over)
If the popcorn surface has gouges, flaking areas, or an uneven, lumpy texture, you’ll want to contemplate skim‑coating instead of just painting.
Also skim‑coat when old paint is peeling or new paint won’t stick despite proper prep, because simply painting over failing adhesion won’t fix the problem.
Skim‑coating gives you a smooth, stable base that guarantees a professional-looking finish.
Damage Or Irregular Texture
Not every popcorn ceiling can just be painted over—you’ll want to skim-coat when the texture is damaged, flaking, or uneven enough that paint would highlight flaws instead of hiding them.
Do a quick damage assessment and plan texture repair before you start; skim-coating smooths irregularities and prevents a patchy finish.
- Identify loose texture
- Probe for flaking
- Mark high/low areas
- Estimate skim-coat depth
Paint Adhesion Problems
Because paint only performs well on clean, stable surfaces, you’ll want to skim-coat any popcorn ceiling that shows signs of poor adhesion before rolling on paint.
If you notice peeling, flaking, or loose texture, address adhesion issues immediately.
Proper surface preparation—cleaning, priming, and applying a thin skim coat—creates a stable base so your new paint bonds evenly and lasts longer.
Choosing Paint Sheen for Popcorn Ceilings
1 subtle choice you’ll make when repainting a popcorn ceiling is the paint sheen, because it affects appearance, durability, and how much texture shows—matte hides imperfections best while satin or eggshell adds cleanability but highlights bumps.
Consider sheen options and texture compatibility when choosing.
- Matte: hides flaws.
- Eggshell: slight sheen.
- Satin: easier to clean.
- Flat: minimal reflection.
How to Calculate Paint and Primer Quantities
Start by measuring the ceiling area so you know exactly how much paint and primer you’ll need: multiply the room’s length by its width, add areas of any adjoining spaces, and subtract openings like skylights.
Calculate paint quantity by dividing total square footage by the paint’s stated coverage per gallon. Do the same for primer coverage, and add 10–15% for waste and texture absorption.
How to Tape and Mask Walls, Trim, and Vents
Before you roll or spray, tape and mask every surface you don’t want painted so you get clean lines and avoid touch-ups later.
Use proper taping techniques and quality masking materials to protect walls, trim, vents, and fixtures.
Follow these steps:
- Clean surfaces and choose low‑tack painter’s tape.
- Mask vents with paper and tape.
- Cover trim with plastic sheeting.
- Seal edges firmly.
Cutting In Around Trim and Fixtures (Step‑by‑Step)
Cutting in around trim and fixtures is the precise work that sets a clean edge between your popcorn ceiling and protected surfaces, so move slowly and keep your brush controlled.
Use angled sash brushes and steady cutting techniques to paint a narrow band beside trim, switches, and light fixtures.
Apply trim protection, remove tape before paint skins, and touch up small gaps with a steady hand.
Load a Roller for Textured Popcorn Ceilings
Grab a thick-nap roller designed for textured ceilings and pour your paint into a tray with a deep well so the roller can pick up plenty of paint without drips.
Load evenly, avoid oversaturation, and test a patch for proper textured coverage using a light touch. Use this roller technique to maintain consistency.
- Dip
- Roll out excess
- Test patch
- Re-load
Painting Across vs. With the Popcorn Texture
You’ll need to decide whether to paint across the popcorn texture or follow its contours.
Painting across can speed things up but risks missing crevices, while painting with the texture gives fuller coverage at a slower pace.
Consider your roller choice and patience before you start.
Painting Across Texture
When painting across a popcorn ceiling, you’ll move your brush or roller perpendicular to the texture so peaks and valleys get even coverage without flattening the finish.
You’ll preserve the textured finish and boost ceiling aesthetics by using light pressure, a thick-nap roller, overlap strokes, and work section by section to avoid lap marks.
- Light pressure
- Thick-nap roller
- Overlap strokes
- Sectional work
Painting With Texture
Although painting across the popcorn texture helps fill valleys, painting with the texture—moving your roller or brush along the direction of the peaks—can be better for maintaining the look and preventing damage.
You’ll follow the pattern, use light pressure, and choose a nap suited for textured finishes. This preserves ceiling styles, reduces flaking, and gives an even coat without obliterating the popcorn profile.
Keep Texture Intact While Getting Even Coverage
If you want to preserve the popcorn texture while achieving even coverage, work in small sections and use the right tools—an angled brush for edges and a thick-nap roller for the field—to avoid flattening bumps or leaving thin spots.
Use texture preservation techniques and even coverage strategies as you:
- Lightly roll with short strokes.
- Touch up with stippling.
- Keep paint thin.
- Replace rollers often.
How Many Coats Do Popcorn Ceilings Need?
Start with a primer as your first coat to seal the texture and improve paint adhesion.
Use a full coverage coat that gets paint into the peaks without flattening them.
Finish with a light touch-up coat to even out thin spots and guarantee consistent color.
Primer First Coat
Before you grab your roller, know that most popcorn ceilings need just one coat of primer, though some situations call for two.
You’ll choose primer types based on stains and adhesion, then focus on even primer application to avoid drips and over-saturation.
- Test adhesion first
- Use a nap roller for texture
- Thin coats prevent clumping
- Let full dry time
Covering Texture Peaks
Tackle the texture peaks with light, even passes so you don’t flatten the popcorn or leave bare high points; work methodically across the ceiling, overlapping slightly.
You’ll likely need two thin coats for uniform texture coverage, letting the first dry fully before the second.
Use a thick-nap roller and keep painting tips handy to avoid reworking wet areas and to maintain consistent coverage.
Final Touch-Up Coat
After the two thin coats have dried, take a careful look for missed spots, flattened peaks, or uneven sheen and plan a final touch-up coat to even everything out.
You’ll want targeted touch up techniques to restore texture and uniform color.
- Blend edges gently
- Feather strokes with a small roller
- Spot-prime deep patches
- Inspect under varied light
Drying Times and When to Recoat Popcorn Ceilings
Drying times for popcorn ceilings vary by paint type, room temperature, and humidity, but you’ll typically wait 2–4 hours for latex paint to become touch-dry and 24 hours before recoating for a reliable finish.
Oil-based paints take longer—usually 6–8 hours to touch-dry and up to 48 hours before recoating.
Monitor humidity, air flow, and manufacturer recoat intervals, then test a small area before applying another coat.
Painting Ceilings With Overhead Lights or Fans
Before you start painting, turn off power and remove or cover light fixtures and fan blades to protect them from paint and dust.
You can use plastic bags and painter’s tape for fixtures or take down removable parts to paint around the mounting plate more neatly.
Work with a small brush near fittings and use a steady hand to avoid drips on bulbs or switches.
Protecting Fixtures And Fans
1 simple step will save you a lot of cleanup: turn off power to the light or fan at the breaker and remove any loose parts you can—globes, shades, bulbs, and detachable pull chains—so you’re not painting around them.
Use fixture protection and secure fan coverage before you paint.
- Tape plastic sheeting snugly
- Wrap fan blades separately
- Cover switches and sockets
- Check seals before spraying
Painting Around Light Fittings
When you paint around light fittings or a ceiling fan, work with fixtures still protected and the power off so you can move confidently and avoid accidental splatters.
Remove bulbs, tape edges, and drape the fixture with a disposable bag secured by painter’s tape.
Use a small angled brush to cut in around the light fixture on the popcorn ceiling, feathering paint to blend with rolled areas.
Using a Paint Sprayer on Popcorn Ceilings: Pros and Cons
Although a sprayer can cut your painting time dramatically, it also brings specific risks and preparation steps you won’t face with a roller.
So you’ll want to weigh speed against mess, overspray, and texture loss.
- Control sprayer techniques to avoid clogging and uneven coverage.
- Mask walls and furniture for heavy overspray.
- Consider how spray impacts popcorn texture considerations and depth.
- Test spray pattern on scrap before starting.
Cleaning Paint Splatter and Drips on Textured Surfaces
When you spot small splatters on a popcorn ceiling, start with gentle spot removal using a damp sponge or microfiber cloth to avoid disturbing the texture.
For stubborn drips, let the paint partially dry, then carefully lift excess with a plastic scraper or a soft-bristled brush.
If residue persists, lightly re-moisten and blot instead of rubbing to preserve the popcorn finish.
Gentle Spot Removal
Tackle paint splatters and drips on your popcorn ceiling gently to avoid crushing the texture—start by identifying fresh spots versus dried paint so you can choose the right method.
For spot cleaning with texture preservation, try these steps:
- Dab fresh spots with a damp sponge.
- Peel softened paint with a plastic scraper.
- Use mild detergent for stubborn areas.
- Blot dry, don’t rub.
Tackling Stubborn Drips
If small spots didn’t come off or you’ve got dried drips that refuse to budge, you’ll need firmer, careful techniques to remove them without flattening the popcorn texture.
Work with a razor blade at a shallow angle to lift edges, then dab with a damp sponge and mild detergent.
Use targeted cleanup techniques, sand lightly only if needed, and practice drip prevention to avoid repeats.
Popcorn Ceilings in Kitchens and Bathrooms: Special Tips
Because kitchens and bathrooms have higher humidity, you’ll need to take extra steps before and after painting a popcorn ceiling to prevent peeling and mold.
Follow these focused tips to control kitchen moisture and improve bathroom ventilation for ceiling maintenance and texture longevity:
- Use a mold-resistant primer and paint.
- Run exhaust fans during and after showers/cooking.
- Fix leaks promptly.
- Schedule periodic inspections for damp spots.
Working Near Crown Molding and Popcorn Ceilings
When you’re working near crown molding, tape and drop cloths will protect the trim from splatters and excess paint.
Use a steady hand and a high-quality angled brush to cut in along the ceiling edge without loading the molding.
Take your time on the first few inches so you don’t have to touch up the molding later.
Protecting Crown Molding
Protecting crown molding is simple but requires a steady hand and the right prep: start by masking the molding with painter’s tape and covering nearby surfaces with drop cloths or plastic sheeting to catch any loose popcorn or paint splatter.
You’ll guarantee crown molding paint protection by following these steps:
- Clean molding.
- Apply tape.
- Use edging tool.
- Remove tape carefully.
Cutting In Along Edges
After you’ve masked the crown molding and covered nearby surfaces, cutting in along the edges requires a steady hand and the right tools—an angled sash brush, a small roller, and a good-quality paint with the right consistency.
Use careful masking techniques, paint from ceiling toward molding, and keep a thin, controlled bead.
Work in short sections, maintain edge precision, and blend roller strokes into brushwork for a seamless finish.
Common Mistakes That Ruin a Popcorn Ceiling Paint Job
One common way people botch a popcorn ceiling paint job is by using the wrong tools or technique—rolling too fast, applying heavy coats, or choosing a brush that crushes the texture will leave clumps, drips, and flattened peaks.
You should avoid common mistakes and painting pitfalls by being careful.
- Overloading the roller
- Skipping primer
- Rushing drying time
- Using stiff brushes
How to Touch Up Spots After the Room Is Finished
Even if you followed every step perfectly, small imperfections—missed flecks, flattened tufts, or tiny drips—can show up once furniture’s back in place and the room’s light changes.
Inspect under varied light, gently retexture with a small stipple brush or roller, use thin coats, and feather edges.
Prioritize color matching and keep records of paint formula for quick, seamless touch up techniques.
When to Hire a Pro for Popcorn Ceiling Removal or Repair
If the texture’s damaged, contains asbestos, or your DIY skills don’t match the job’s scope, hire a pro—these situations raise safety, legal, and quality concerns that most homeowners shouldn’t handle alone.
- You need professional advice on testing for asbestos.
- Complex repair techniques exceed your comfort level.
- You want vetted removal options and permits handled.
- Structural or moisture damage requires licensed expertise.
Cost Estimate: DIY vs. Professional for Popcorn Ceilings
Deciding whether to handle a popcorn ceiling yourself or hire a pro comes down to budget, time, and risk tolerance.
You’ll compare DIY Cost—materials, tools, and safety gear—to a Professional Estimate that includes labor, cleanup, and possible repairs.
If asbestos testing or complex repairs are needed, a pro’s estimate often outweighs DIY savings.
Choose based on skill and safety.
Realistic Project Timeline: One‑Day vs. Multi‑Day
One full day can be enough for a small room if you prep thoroughly, use quick-drying paint, and keep repairs minimal.
Larger rooms, textured touch-ups, or ceilings that need patching will stretch the job into two or more days.
- Assess scope and estimate project duration.
- Gather planning essentials and materials.
- Schedule drying and ventilation breaks.
- Divide work: prep, repair, prime, paint.
Troubleshooting Peeling, Flashing, and Uneven Color
When you spot peeling, flashing, or uneven color on a popcorn ceiling, tackle the problem systematically so repairs don’t make things worse: identify loose texture, trace moisture or adhesion issues, and test small areas to confirm whether the problem is surface-level paint failure or deeper damage that needs patching or retexturing.
For peeling solutions, remove loose bits, prime exposed areas, and use flashing remedies like sealing joints; retest for color consistency.
Maintaining Newly Painted Popcorn Ceilings
Keep the ceiling clean and dry to preserve its new finish and texture. You should schedule gentle dusting, spot-clean stains carefully, and control humidity to prevent mold.
For effective ceiling maintenance and texture preservation, follow these steps:
- Vacuum with soft brush attachment monthly.
- Blot stains with mild detergent.
- Use dehumidifier in damp rooms.
- Inspect for damage after storms or renovations.
Updating the Look Without Removing Popcorn Texture
If you like the textured look but want a fresher, more modern ceiling, you can update it without stripping the popcorn by using paint, lighting, and trims that work with the texture.
Choose neutral or bold colors to enhance popcorn ceiling aesthetics.
Pick neutral hues or a bold accent to elevate the textured popcorn ceiling’s visual impact and modernize the room.
Use roller and spray painting techniques for even coverage.
Add recessed lighting or crown molding, and touch up edges for a clean, updated finish.
Frequently Asked Questions
Can Painted Popcorn Ceilings Affect Indoor Air Quality Long-Term?
Yes — you might, pilgrim: if ceiling materials trap moisture or release VOCs from paint, you’ll notice degraded air quality over time; you’ll want low‑VOC products, good ventilation, and regular checks to limit long‑term effects.
Will Painting Popcorn Ceilings Change Home Resale Value?
Yes — painting popcorn ceilings can help modernize appearance and improve popcorn ceiling aesthetics, but its impact on resale value factors is modest; buyers often prefer removal, so painting alone won’t match the value of fully refinished ceilings.
Can I Install Recessed Lighting in a Popcorn Ceiling?
You can, but it’s not a walk in the park: recessed lighting works in popcorn ceilings, though ceiling installation often needs drop boxes, insulation contact fixtures, or removing texture. You’ll want an electrician to avoid surprises.
How Do Humidity Changes Impact Painted Popcorn Texture Over Years?
Humidity changes can weaken adhesive and cause flaking; you’ll see increased cracking, sagging, and paint failure over time. To preserve texture durability, you’ll control moisture, ventilate, and repair spots promptly to prevent long-term damage.
Are There Color Trends That Make Popcorn Ceilings Look Less Dated?
About 68% of buyers prefer neutral ceilings, so you can modernize popcorn with modern color palettes like warm whites, soft greiges, or pale blues; you’ll balance ceiling texture options by pairing matte paint and clean trim for subtler, updated rooms.
Conclusion
You can paint a popcorn ceiling yourself, and knowing the facts eases the fear: if it’s asbestos-free, proper prep, the right primer, and a sprayer or roller make it doable. Don’t kid yourself—if the texture’s damaged or you’re uneasy, hire a pro. Investigate thoroughly, test for asbestos, and weigh effort versus reward. When you decide with clear eyes, you’ll feel relief and pride—your refreshed ceiling proves you faced uncertainty and chose wisely.