How Do You Paint Over Peeling Paint: Step-By-Step Repair and Repaint Guide
You can restore peeling paint by removing loose flakes, repairing damaged substrate, priming exposed areas, and repainting with the right products. Start by scraping and sanding to a firm edge, clean and dry the surface, patch cracks or rotten wood, then prime bare wood or drywall with a suitable primer. Use quality paint and appropriate sheen, apply thin even coats, and control moisture to prevent recurrence. Keep following for a detailed step‑by‑step repair and maintenance plan.
Who This Guide Is For
This guide is for homeowners, renters, and DIYers who want a durable, safe fix for peeling paint—whether you’re tackling a single room, prepping a rental for new tenants, or restoring an older home’s exterior.
You’ll follow a clear Homeowners Guide that helps DIY Enthusiasts identify causes, choose tools, and apply repairs safely.
You’ll learn when to repair, when to replace, and how to finish like a pro.
Can You Paint Over Peeling Paint? Quick Answer
You can only paint over peeling paint after you assess the surface condition to see if the problem is loose paint, moisture, or old failing layers.
If the flakes and underlying causes aren’t addressed, new paint won’t stick and will peel again.
Proper preparation—scraping, sanding, patching, and priming—makes a lasting finish.
Assess Surface Condition
If paint is flaking or bubbling, don’t assume you can just roll over it—assess the surface first to decide whether repair, primer, or full removal is needed.
You’ll perform a thorough surface evaluation and damage identification: tap, scrape, and probe to find loose paint, soft substrate, rust, or mold.
Based on findings, choose repair, spot-priming, or complete stripping before repainting.
Prepare Properly Beforepainting
After you’ve identified loose paint and any underlying damage, get the surface ready so new paint will stick and last.
You’ll focus on paint preparation and thorough surface cleaning before priming. Follow these steps:
- Scrape and sand all loose areas
- Clean dirt, grease, and mildew
- Repair cracks and holes
- Prime exposed substrates
- Allow proper drying time before repainting
Quick Step-By-Step Repair Summary
Gather your tools and tackle the repair in these clear, ordered steps: scrape loose paint, sand edges smooth, clean surface, apply primer to bare areas, fill holes and sand flush, re-clean, and repaint with quality paint.
Follow curing times, remove dust between coats, and finish with appropriate topcoat.
These steps improve peeling prevention and guarantee paint longevity when you maintain proper technique.
How to Evaluate Surface Condition Visually
Start by inspecting the surface for flaking paint and loose edges you can scrape off by hand.
Check for signs of moisture like stains, soft spots, or mildew that could keep paint from adhering.
Run your hand over the area to assess texture—roughness, chalking, or blistering will tell you what prep is needed.
Inspect For Flaking
When you inspect for flaking, look closely for loose, curling, or powdery paint that separates from the substrate; these signs tell you where adhesion has failed and where scraping or stripping will be necessary.
You’ll note patterns suggesting flaking causes and plan peeling prevention.
- loose edges
- bubbling areas
- color changes
- dusting when touched
- gaps at seams
Check For Moisture
Because moisture is the most common culprit behind peeling paint, you should look for visual clues that tell you where water’s getting in and how long it’s been present.
Check for stains, mold, efflorescence, blistering, or darkened areas near windows, roofs, or plumbing—common moisture sources.
Note moisture effects like soft substrate, ongoing drips, or recurring discoloration before repairing and repainting.
Assess Surface Texture
Texture tells you a lot about how a surface will hold new paint, so run your hand and eyes over the area to note roughness, powderiness, flaking, or glossy spots that indicate old finish or contamination.
Use texture analysis and surface evaluation to decide prep:
- Light sanding needed
- Deep scraping required
- Powdery residue present
- Glossy spots to degloss
- Uneven substrate areas
How to Test Paint Adhesion (Tape & Scratch)
Before you start scraping or priming, check how well the existing paint is sticking so you know what prep is needed. Do a quick adhesion testing: use the tape method on several spots and a scratch test with a coin or screwdriver. Record results for surface evaluation and decide whether spot repair or wider prep is required.
| Test | Result |
|---|---|
| Tape method | |
| Scratch test |
When Does Paint Need Full Removal?
If the old paint is blistering, flaking across large areas, or failing the adhesion tests you just did, you’ll need to remove it down to a sound substrate rather than just spot-prime.
If paint is blistering, flaking, or failing adhesion, remove it down to sound substrate before repainting.
You’ll choose paint removal techniques appropriate to material and extent, addressing paint adhesion challenges before repainting.
- Widespread flaking
- Bubbling/blistering
- Loss of adhesion
- Soft or rotten substrate
- Multiple old layers
Safety First: Check for Lead and Asbestos
Once you determine the old paint needs removal, check for lead and asbestos right away—these hazards change how you’ll work and what protective measures or professionals you’ll need.
Hire certified lead testing and asbestos inspection services if your home predates 1978 or shows deteriorated coatings.
Don’t DIY sampling without training; containment, proper disposal, and licensed abatement protect you and your household.
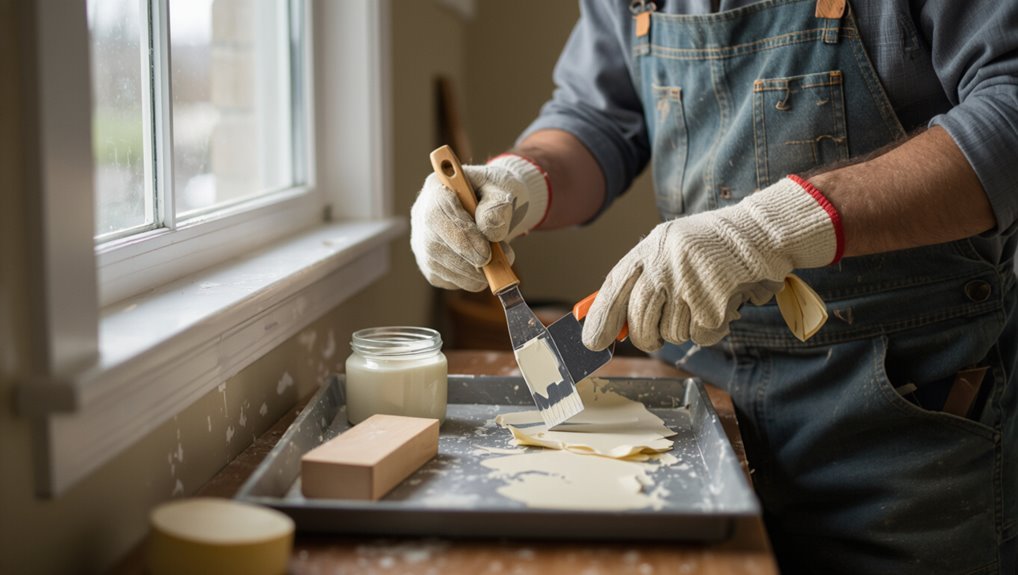
Essential Tools & PPE for Paint Repair
You’ll need a compact kit of tools and PPE to do paint repair safely and effectively: a putty knife and scraper for loose paint, sandpaper or a sanding block (coarse and fine grits), a quality patching compound and spreader, rust-inhibiting primer, and matching finish paint, plus brushes or a small roller.
Use safety gear and essential supplies; keep them organized.
Use essential safety gear and supplies—and keep everything organized for efficient, hazard-free paint repair.
- Respirator or mask
- Safety goggles
- Nitrile gloves
- Drop cloths
- Putty knife set
Materials You’ll Need (Primers, Fillers, Paints)
Now that you’ve got your tools and PPE laid out, pick the right materials to guarantee a lasting repair: a primer matched to the substrate (oil-based for old oil paints, water-based for modern latex), a patching compound or filler for gouges and cracks, rust-inhibiting primer for metal, and a finish paint that matches sheen and color.
Then choose primer types suited to surface porosity and proper paint finishes.
Choosing Paint and Primer for Durability
You’ll want to pick a primer that matches the surface and blocks stains so your new paint sticks and lasts.
Consider paint sheen carefully — satin or semi-gloss stands up to cleaning better than flat in high-traffic areas.
Also look for durability-boosting additives like mildewcides or flexible binders when you need extra protection.
Primer Type Selection
Because the right primer locks down failing edges and bonds new paint to the surface, pick one formulated for your substrate and the conditions it faces.
You’ll match primer features to needs—stain blocking, adhesion, rust inhibition—and plan primer application for proper drying and coverage.
- Adhesion for glossy surfaces
- Stain/sealer for tannins
- Rust-inhibitor for metal
- Elastomeric for masonry
- Fast-dry for humid climates
Paint Sheen Impact
When you pick a sheen, think about how surface durability and maintenance needs will interact with the primer choice and application.
For high-traffic areas, choose a higher sheen to improve paint durability and cleanability; flatter sheens hide imperfections but wear faster.
Match primer sheen compatibility, guarantee proper adhesion, and balance sheen selection with expected cleaning frequency to extend finish life.
Durability-Boosting Additives
After choosing a suitable sheen for wear and cleanability, consider additives that sharpen the durability of both primer and topcoat.
You’ll pick products proven in durability testing to resist abrasion, moisture, and UV, and weigh additive benefits like flex, adhesion, and cure speed to extend paint life.
- abrasion resistance
- moisture blocking
- UV stabilization
- improved adhesion
- faster cure
When to Call a Pro vs. DIY
If the peeling is limited to a few small patches and the underlying surface is sound, you can probably tackle the job yourself; call a pro when the damage is extensive, involves lead paint, or when structural problems are present.
Do a quick DIY assessment: if mold, major adhesion failure, or electrical/plumbing risks appear, seek pro consultation.
Otherwise plan repairs, prep, and repaint confidently.
Preparing the Work Area and Protecting Surfaces
Before you start scraping or sanding, clear the area of clutter so you have room to work and nothing gets damaged.
Lay down drop cloths and move or cover furniture to protect floors and belongings.
Open windows or set up fans and add good lighting so you can work safely and see peeling edges clearly.
Clear The Area
Start by removing furniture, décor, and any loose items from the room so you have a clear, unobstructed workspace; if something’s too big to move, push it to the room’s center and cover it.
For proper area preparation and workspace organization, clear surfaces, unplug electronics, secure cords, label removed items, and set aside tools.
- Clear surfaces
- Unplug electronics
- Secure cords
- Label items
- Set aside tools
Protect Floors And Furniture
Now that the room’s cleared, protect the floors and any remaining furniture to prevent paint drips and dust damage.
Lay secure floor coverings—drop cloths or plastic taped at seams—and use cardboard or cloth over chair legs and tables for furniture protection.
Keep walkways clear, weigh down corners to avoid trips, and remove small items.
Check coverings periodically as you work to catch spills immediately.
Ventilate And Light
Good ventilation and bright, even lighting make the job safer and let you spot peeling edges, dust, and imperfections.
You’ll open windows, run fans, and add task lights to guarantee ventilation importance and maximize natural lighting so you see flaws and dry times.
Protect surfaces and clear clutter before sanding.
- Open windows
- Run exhaust fans
- Use task lights
- Lay drop cloths
- Move furniture
How to Remove Peeling Paint Safely
Protect the area and yourself before you touch the peeling paint: wear a respirator rated for paint dust, gloves, and eye protection, lay down drop cloths, and seal vents and doorways to keep dust contained.
Test for lead if needed, wet the surface to reduce dust, use gentle peeling techniques to lift loose flakes, collect debris in sealed bags, and follow local paint safety disposal rules.
Using a Scraper & Putty Knife Without Gouging
After you’ve removed loose flakes and cleaned the area, it’s time to use a scraper and putty knife to remove remaining peeling paint without gouging the substrate.
Use proper scraper techniques and putty knife tips to work gently, angling tools shallowly and keeping edges sharp.
Work gently with shallow angles and sharp edges—proper scraper and putty knife technique prevents substrate damage.
- Hold blade at 30°
- Use light, even pressure
- Scrape along grain
- Keep tools clean
- Replace nicked blades
Sanding Strategies by Substrate
When sanding different substrates, match your grit and method to the material so you remove loose paint without damaging the surface; choose sanding techniques based on substrate types—softwoods need finer grit, metal and masonry require coarser or specialized abrasives, and painted drywall benefits from gentle block sanding.
| Surface | Feeling |
|---|---|
| Wood | Warm repair |
| Metal | Resolute clean |
| Drywall | Gentle smooth |
Chemical Strippers: When and How to Use Them
If paint’s flaking or multiple stubborn layers won’t sand cleanly, chemical strippers can dissolve old finishes so you can scrape without gouging the substrate.
You’ll choose stripper types by substrate and finish, follow chemical safety, test a small area, apply per instructions, then neutralize and rinse before repainting.
- Select appropriate stripper
- Ventilate and wear PPE
- Test first
- Scrape gently
- Neutralize and clean
Power Tools: Heat Guns & Orbital Sanders Best Practices
Chemical strippers work well on stubborn layers, but power tools like heat guns and orbital sanders speed the process when used properly.
Use heat gun techniques: keep moving, low heat near delicate trim, chip softened paint with a scraper.
Keep the heat gun moving, use low settings on delicate trim, and chip softened paint with a scraper.
For orbital sander maintenance, change pads and clean vents often, check dust collection, and use appropriate grit.
Wear PPE and work in well-ventilated areas.
Cleaning the Substrate After Paint Removal
Scrape and vacuum thoroughly to remove loose debris, dust, and paint chips left after stripping so the new coating can bond properly.
You’ll then use appropriate cleaning techniques for different substrate materials, wiping with a mild detergent, rinsing, and drying completely before priming.
Focus on surface cleanliness to guarantee adhesion.
- Remove dust
- Degrease if needed
- Rinse residue
- Dry fully
- Inspect for contaminants
Repairing Wood: Fill, Replace, and Stabilize Rot
Assess the extent of wood damage before you paint: probe soft spots with an awl, tap for hollow sounds, and mark areas that need filling, reinforcement, or full replacement.
Address wood rot promptly using targeted repair techniques, remove unsalvageable sections, apply epoxy application for wood stabilization, and add moisture barriers and waterproofing solutions to guarantee outdoor durability and long-term wood preservation.
Choosing Wood Fillers and Epoxy Consolidants
When you’re deciding between wood fillers and epoxy consolidants, match the product to the damage: use ready-mix or patching fillers for shallow gouges and cosmetic repairs, and choose epoxy consolidants or two-part epoxy fillers for areas with structural rot or soft, fibrous wood that needs reinforcement.
Pick by hardness, shrinkage, paintability, and cure time; consider wood filler types and epoxy selection.
Choose fillers by hardness, shrinkage, paintability, and cure time—match the product to the repair need.
- Match strength to damage
- Check cure time
- Assess paintability
- Avoid excessive shrinkage
- Follow manufacturer instructions
Repairing Drywall and Plaster: Patches That Hold
Before you start patching, inspect the drywall or plaster to determine whether the damage is surface-level, a crack, or a hole that needs a backing.
Choose durable materials—like setting-type joint compound or high-strength patch kits—based on the size and location of the repair.
If you pick the right products and prep the area properly, the patch will hold under paint and resist future failure.
Assessing Patchable Damage
Although small chips and hairline cracks might seem negligible, you need to judge which flaws will hold a patch and which require replacing or reinforcing the substrate.
Assess damage types, test edges for firmness, and consider patch selection based on size and depth.
Use a simple checklist:
- Surface firmness
- Crack width and depth
- Bulging or delamination
- Moisture or mold presence
- Access for repair tools
Choosing Durable Materials
If you want a patch that lasts, pick materials that match the damage and the surrounding substrate: use setting-type joint compound or gypsum-based patch for deep drywall gouges, and a lime- or gypsum-based plaster patch for historic plaster to avoid bonded failure.
Choose durable materials, reinforce with mesh or tape, sand smooth, prime appropriately, and select compatible paint types for adhesion and longevity.
Feathering Edges for a Seamless Finish
When you feather the edges of repaired areas, you blend the old surface into the new so the patch disappears under paint.
Use a sanding block and light strokes to taper the repair until it smoothly merges into the surrounding wall.
Use feathering techniques for seamless blending, then prime and paint.
Tips:
- Sand progressively finer grit
- Keep strokes light
- Check edges by touch
- Blend joint compound
- Wipe dust before priming
Dealing With Masonry and Stucco Repairs
Inspect your masonry and stucco carefully before you paint: scrape loose material, probe for soft spots, and note cracks or hairline gaps that need filling so your new paint will adhere and last.
Use appropriate masonry techniques: clean surfaces, apply compatible patching mortar or stucco mix, and tool joints smoothly.
For stucco maintenance, cure patches, prime porous areas, and make certain surfaces are fully dry before repainting.
Fixing Metal Surfaces and Preventing Rust
Before you paint metal, you’ll need to remove loose paint and corrosion with a wire brush or sandpaper, then clean the surface of grease and dust.
Treat any bare metal with a rust converter or primer formulated for metal to block further oxidation.
Finally, use rust-inhibiting paints and consider a topcoat for extra protection to keep the metal from returning to its rusty state.
Surface Preparation Steps
Rust and loose scale compromise any paint job, so you’ll need to tackle metal surfaces first: remove flaky paint and corrosion down to bare metal, degrease the area, and neutralize remaining rust so new primer can bond properly.
Ascertain surface cleanliness and check for surface moisture before priming.
- Wire-brush to sound metal
- Sand to smooth edges
- Degrease thoroughly
- Apply rust converter
- Dry completely
Rust Prevention Methods
When you’ve stripped metal down to clean, bare metal, treat it promptly to stop corrosion from returning: apply a rust treatment like a phosphoric acid converter, neutralize residues, rinse, and dry.
Prime with a metal-specific, anti-corrosive primer, then topcoat with appropriate paint.
Maintain corrosion prevention by keeping surfaces dry, touching up chips, and using sealants or rust-inhibiting sprays periodically.
When to Use a Bonding Primer
If your paint is flaking, chalky, or coming off in sheets, reach for a bonding primer before you repaint.
If paint is flaking, chalky, or peeling in sheets, apply a bonding primer before repainting.
You’ll want bonding primer benefits for adhesion, sealing, and uniform finish. Use proper bonding primer application on cleaned, dry surfaces. Apply thin, even coats and let dry fully.
- Improves adhesion
- Seals chalky areas
- Reduces sanding
- Prevents peeling recurrence
- Promotes even topcoat
Priming Techniques for Wood, Metal, Drywall, and Masonry
Start by matching your primer to the surface: wood, metal, drywall, and masonry each need different formulations and prep to lock down peeling paint and give a durable topcoat.
For wood, use stain-blocking, oil- or shellac-based primers; for metal, rust-inhibiting primers; for drywall, drywall-specific or PVA primers; for masonry, masonry or acrylic primers.
Follow priming methods and check substrate compatibility.
How Long to Wait Between Primer and Paint?
You’ll want to check the primer’s recommended drying time before painting so you don’t trap moisture or cause adhesion problems.
Remember environmental conditions like temperature and humidity can lengthen or shorten that wait, and some primers need several hours while others cure overnight.
Also watch the product’s recoat window—painting too soon or too late can both hurt the finish.
Primer Drying Time
Although primer feels dry to the touch in as little as 30 minutes for some products, you should wait the manufacturer’s recommended recoat time—typically 1 to 4 hours for water-based primers and 24 hours for oil-based—so the primer fully cures and bonds before you apply paint.
Use correct primer application techniques and consider primer color choices.
- Follow recoat times
- Test a small area
- Sand lightly if needed
- Clean dust before painting
- Use compatible paint and primer
Environmental Conditions
After you’ve followed the primer’s recoat time and prepared the surface, consider the environment: temperature, humidity, and ventilation all affect how long you should wait before painting.
You should monitor climate effects and local humidity levels: paint cures slower in cold or humid conditions and faster with warmth and airflow.
Adjust wait times accordingly, but follow product specs to guarantee a proper bond and finish.
Recoat Window
If the primer’s label gives a recoat window, follow it closely because that window—usually between 1 hour and 24 hours for most fast- and standard-dry primers—guarantees proper adhesion and prevents issues like fish-eyes or poor coverage.
Painting too soon can trap solvents and cause lifting, while waiting too long lets the surface accumulate dust or lose adhesion, requiring a light scuff before you topcoat.
- Check label recoat window
- Match window coatings type
- Confirm surface is dust-free
- Sand if window lapsed
- Verify paint adhesion before finishing
Selecting Paint Sheen & Formulation for Durability
Choosing the right sheen and formulation makes your repair last: higher sheens (like satin, semi-gloss, or gloss) resist moisture, scuffs, and dirt better than flat finishes.
Durable formulations—such as 100% acrylic for exteriors or stain-blocking, mildew-resistant mixes for bathrooms—give stronger adhesion over previously peeled areas.
Factor in paint longevity and sheen impact; pick tough, washable coatings for high-traffic zones.
Color Selection and Hiding-Power Tips
Pick paint colors with undertones that complement your existing trim and fixtures so the final result looks intentional.
Check the label for high hiding power if you’re covering darker or patchy areas, and be ready to use a primer when coverage is weak.
Always test a small patch first to confirm color and coverage before committing to the whole wall.
Choose Complementary Undertones
When you match undertones instead of just the surface color, you’ll get a cleaner, more uniform finish that hides old flaking and uneven patches.
Use color theory and undertone matching to pick paints that blend with existing layers. Consider warm vs cool, muted vs bright, and lightness.
- Match warm or cool
- Test small patches
- Use sample cards
- Consider adjacent rooms
- Prefer mid-tone primers
Assess Hiding Power
Start by evaluating a paint’s hiding power—the ability to cover old colors, stains, and flaky patches—since it determines how many coats you’ll need and whether a primer is necessary. Choose higher paint opacity for stubborn substrates. Check labels for opacity rating and test samples.
| Attribute | Tip |
|---|---|
| Hiding power | High = fewer coats |
| Opacity rating | Look for >85% |
| Primer need | Low if opaque |
| Coverage | Check sq ft/l |
Test Small Sample Areas
Test small sample areas to see how colors and hiding power perform on your actual surface—apply a few 6×6 inch swatches of both paint and primer over representative peeling spots and let them dry fully.
You’ll test adhesion and evaluate samples for coverage, gloss, and texture before committing.
Consider:
- Inspect dry edges
- Note color shift
- Check touch resistance
- Compare primer vs paint
- Record cure time
Application Methods: Brush, Roller, Sprayer Pros/Cons
You’ve got three main ways to apply paint—brush, roller, and sprayer—and each one trades off speed, finish, and control.
You’ll use brush techniques for edges and detail, enjoy roller advantages for even coverage on walls, and rely on sprayer efficiency for large areas.
Expect application challenges: overspray with sprayers, texture control with rollers, and precision time with brushes.
Brush & Roller Techniques to Avoid Lap Marks
To avoid lap marks, make sure you load your brush or roller with the right amount of paint — not too much, not too little.
Keep your strokes consistent and overlap each pass by about 50% so the edges blend while the paint is still wet.
Work across a single area until it’s uniform before moving on.
Proper Paint Loading
Load your brush or roller evenly and you’ll prevent excess drips and the dreaded lap marks that betray an otherwise smooth job.
Use proper brush techniques and aim for ideal paint consistency so coverage’s even and drying’s uniform. Don’t overload or underload; adjust as needed.
- Dip 1/3 of bristles
- Roll in tray well
- Tap off drips
- Maintain consistent nap
- Reload frequently
Consistent Stroke Overlap
Overlap each stroke deliberately so fresh paint blends seamlessly with slightly dried edges; that controlled overlap is what prevents visible lap marks and keeps sheen uniform.
Use consistent stroke techniques—maintain steady pressure, direction, and speed. Work wet edges and finish sections before edges dry.
The stroke overlap importance means you’ll avoid reworking, minimize texture differences, and achieve a smooth, even finish with brush or roller.
Spraying Basics and Overlap Patterns
When you spray, hold the gun perpendicular to the surface and move at a steady pace so each pass lays down an even coat; this prevents runs and guarantees consistent coverage.
Use proper spraying techniques and overlap tips: keep 30–50% overlap, maintain distance, steady speed, and consistent pattern to avoid thin spots.
- 30–50% overlap
- consistent distance
- steady speed
- uniform pattern
- avoid overspray
How Many Coats You Need and Why
How many coats you need depends largely on the paint’s coverage per coat and the condition of the surface you’re covering.
A smooth, well-prepped surface often needs fewer coats because each layer spreads evenly, while rough or stained areas may soak up more paint and require extra layers.
We’ll go over how coverage rates and surface issues change your coat count so you can plan time and materials accurately.
Coverage Per Coat
Most jobs need at least two coats for reliable coverage and durability: a primer (if you’re dealing with bare wood, stains, or heavily peeling areas) followed by one or two finish coats to build film and hide imperfections.
Consider coverage factors and ideal layering to achieve uniform opacity and protection.
- Thin coats dry evenly
- Allow recommended flash time
- Use correct spread rate
- Sand lightly between coats
- Inspect for thin spots
Surface Condition Impact
Because the condition of the underlying surface directly affects adhesion and film build, you’ll often need more than the minimum number of coats on rough, stained, or previously failing areas.
Assess after thorough surface preparation: porous or patched spots absorb more, so apply an extra primer and one or two finish coats until uniform.
Proper paint adhesion prevents future peeling and reduces recoats.
Drying, Curing, and Weather Considerations for Exteriors
When you’re painting exterior surfaces, paying attention to drying and curing times—and the weather that affects them—is as important as surface prep; paint won’t adhere or harden properly if it dries too quickly, stays damp, or faces temperature extremes.
Drying and curing—and the weather that controls them—matter as much as prep; paint won’t set right in extremes.
You should monitor weather impact and drying times, plan for cure windows, and protect work from unexpected moisture.
- Paint only in recommended temp/humidity
- Avoid direct sun or freezing
- Allow full cure before rain
- Use fast- or slow-dry formulas as needed
- Shelter surfaces during overnight dew
Preventing Blisters, Peeling, and Other Finish Problems
If you want a durable finish, stop blisters and peeling before they start by eliminating the common causes: trapped moisture, incompatible coatings, poor adhesion, and extreme surface temperatures.
Test and strip failing layers, dry substrates fully, use compatible primers and breathable paints, and sand for mechanical key.
For blister prevention and ongoing finish maintenance, inspect annually, fix leaks, and touch small defects promptly to avoid larger repairs.
How to Spot and Fix Runs, Drips, and Brush Marks
As you inspect the surface, look for shiny streaks or raised ridges that signal runs and drips.
Run your hand lightly to feel brush marks and check for heavy paint buildup where strokes overlap.
To fix them, sand smooth, feather the edges, and reapply thin, even coats with proper brush technique.
Identify Paint Runs
Scan the painted surface closely to spot runs, drips, and brush marks before they cure—these flaws stand out as glossy streaks, raised ridges, or uneven texture compared with the surrounding finish.
You’ll correct issues early through careful paint application and proper surface preparation.
- Inspect under raking light
- Feel for ridges with fingertip
- Mark defects lightly
- Sand cured runs smooth
- Clean residue before repainting
Correct Brush Strokes
Start by examining the surface from different angles and under good light so you can spot runs, drips, and obvious brush marks—these show up as glossy streaks, beads of excess paint, or raised ridges that catch the eye.
Sand or scrape defects, feather edges, then recoat using proper brush techniques and slow, even motions.
Maintain stroke consistency and avoid overloading the brush to prevent repeats.
Small Patch Repairs: Quick Touch-Up Steps
Grab a putty knife and a small tub of spackling—repairing tiny peeling spots is quick if you work cleanly and with the right tools.
You’ll sand, fill, smooth, prime, and repaint using proper patch materials and repair techniques to blend repairs invisibly.
- Sand around the peel
- Apply spackle sparingly
- Smooth with knife
- Prime spot
- Feather paint to match
Large-Area Repaint Workflow for Efficiency
When you’re tackling peeling over an entire wall or room, organize a streamlined workflow so each step feeds neatly into the next:
Start by clearing furniture, protect floors, then strip and sand peeling areas using efficient tools like power sanders and paint scrapers.
Sequence priming, caulking, and drying times to avoid downtime.
Roll entire surfaces methodically, inspect and touch up before final cleanup for workflow optimization.
Seasonal Timing: Best Months to Repaint Exteriors
Because exterior paint needs the right temperature and dry conditions to cure properly, you’ll get the best results by scheduling repainting during your region’s mild, low-humidity months—typically late spring through early fall in most climates, but earlier or later depending on local frost dates and rainy seasons.
- Check seasonal trends for rain patterns
- Aim for ideal temperatures day and night
- Avoid high-humidity spells
- Time around frost-free windows
- Monitor extended dry forecasts
Maintenance to Keep Paint From Peeling Again
To keep your fresh paint from peeling again, perform simple, regular maintenance that addresses moisture, surface damage, and fastener issues before they worsen.
You should schedule preventive maintenance and regular inspections, monitor environmental factors and weather considerations, control humidity, use recommended paint quality and paint additives, maintain proper surface preparation and application techniques, and do seasonal checks to catch problems early.
Cost Estimate: DIY vs. Contractor Breakdown
Deciding whether you’ll tackle peeling paint yourself or hire a contractor comes down to time, skill, and budget: DIY saves on labor but often takes longer and risks mistakes, while a pro costs more upfront but delivers efficiency, warranty, and likely better long-term results.
Use cost comparison and budget planning to choose. Consider:
- Materials cost
- Labor hours
- Tool rental
- Disposal fees
- Warranty value
Common Mistakes That Make Paint Peel Faster
If you skip proper prep or rush the job, your fresh paint won’t last long—peeling accelerates when surfaces are dirty, damp, or poorly sanded. You’ll avoid common causes by fixing moisture issues, improving surface preparation, and choosing better paint quality. Don’t use poor application techniques, skip improper cleaning, or ignore insufficient drying between coats.
| Mistake | Effect |
|---|---|
| Dirt | Poor adhesion |
| Moisture | Bubbling |
| Bad primer | Flaking |
| Thick coats | Cracking |
| Low-quality paint | Short life |
Handling Historic or Lead-Based Paint Areas
When working on historic homes, you’ll need to treat any suspect paint as if it contains lead until testing proves otherwise, because improper handling can create hazardous dust and chips.
You should hire certified testers, follow lead safety rules, and favor preservation-minded repairs over aggressive scraping to protect historic preservation goals.
- Test first
- Use containment
- Wet methods only
- HEPA cleanup
- Hire certified pros
Troubleshooting: What to Do If Peeling Returns
Should peeling come back despite your best efforts, don’t panic—you can usually diagnose and fix the cause without redoing the whole job.
Inspect substrate, look for moisture, poor adhesion, or incompatible layers to identify peeling causes.
Fix source (seal leaks, sand to sound edges, prime with appropriate adhesion primer), then repaint with quality products to restore paint durability and monitor for recurrence.
Frequently Asked Questions
Can Peeling Paint Be an Indicator of Underlying Mold or Moisture Beyond Visible Signs?
Yes — peeling paint can signal hidden moisture and potential mold; you should request a mold inspection and moisture assessment, because even without visible growth, trapped dampness can foster spores and structural deterioration if left unchecked.
Will Caulks or Sealants Interfere With Paint Adhesion Later On?
Like a thin skin protecting a bruise, yes—some sealant types can hinder paint adhesion if they’re incompatible or uncured. You’ll test, choose appropriate primers, and use compatible caulks so paint bonds properly and lasts.
Can I Paint Over Chalky Surfaces Without a Bonding Primer?
No, you shouldn’t—chalky texture prevents proper adhesion. You’ll need thorough surface preparation: wash, scrub, sand or strip loose powder, then apply a bonding primer before painting so the finish will stick and last.
How Do Warranties and Paint Manufacturer Guarantees Apply to DIY Repairs?
You’ll often void warranty limitations if you don’t follow manufacturer guidelines; they require approved products, prep, and application. Keep receipts, document steps, and contact the manufacturer before DIY repairs to confirm coverage and avoid disputes.
Are There Eco-Friendly or Low-Voc Stripper and Disposal Options?
About 60% of consumers prefer greener products, so yes—you can use eco friendly strippers and low voc options like citrus or soy-based gels; you’ll collect residue in sealed bags, compost prohibited, and drop hazardous waste at recycling centers.
Conclusion
You’ve patched, sanded, and primed—now step back and watch the wall breathe. Like tending a weathered fence, you’ve replaced loose shingles of paint with a new protective skin. Keep tools close, check seams, and respect old layers beneath. With patience and the right prep, your room won’t just look refreshed; it’ll stand ready for storms. Treat your painted surface like a garden: nurture it, and it’ll reward you.