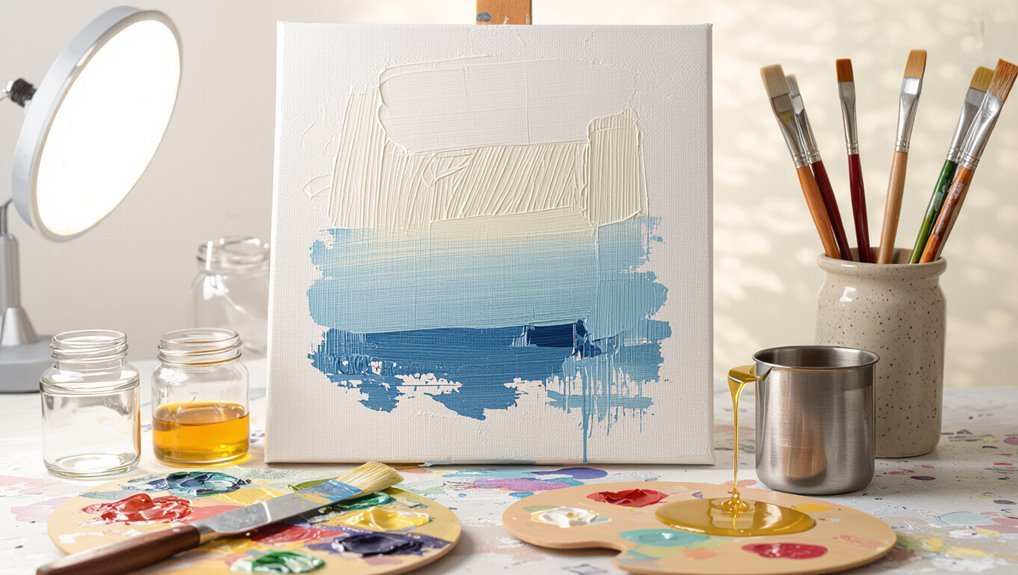
How to Make Oil Based Paint Dry Faster: Proven Drying Hacks
If your oil-based paint is dragging, speed it up by applying thin, even coats and using alkyd or fast-drying linseed blends instead of heavy oil mediums. Add tiny amounts of Japan drier or commercial siccatives per label instructions, raise ambient temperature a bit, and keep humidity around 40–55% with gentle crossflow ventilation. Sand lightly between tacky layers and test adhesion first. Follow these safe, controlled steps and you’ll cut cure time noticeably—keep going for more practical hacks and workflows.
Is Your Oil Paint Drying Too Slowly?
If your oil paint’s taking days or weeks to set, you’re probably dealing with a few common issues that slow drying: thick applications, low-absorbency surfaces, cool or humid conditions, or oil-rich mediums.
You’ll assess drying factors like environmental conditions, paint thickness, humidity levels, and substrate effects.
Technique variations, color choices, and preparation methods also influence drying times, so diagnose precisely.
Fast Action Steps to Speed Oil Paint Drying Now
If you need paint to dry faster, switch to faster-drying mediums like alkyds or add a drying medium designed for oils.
Increase airflow and gently raise the temperature in the room to speed oxidation without harming the paint.
Together these steps’ll considerably shorten drying time for most oil layers.
Use Faster-Drying Mediums
When you want quicker tack-free layers, switch to faster-drying mediums that promote oxidation and film formation; they let you build paint faster without changing your colors.
Use these options to speed drying and explore oil paint alternatives:
- Alkyd mediums for faster skin formation.
- Japan drier in tiny amounts.
- Fast-drying linseed blends.
- Pre-made alkyd paints or mediums.
Improve Airflow And Heat
Because oil paint dries by oxidizing, you can speed that process up by increasing airflow and warmth around your work—place paintings in a well-ventilated room, aim a fan gently across the surface (not directly at wet paint), and raise ambient temperature slightly with a heater or warm light to accelerate solvent evaporation and film formation.
| Tip | Effect |
|---|---|
| air circulation | improves drying |
| heat sources | boost oxidation |
| humidity levels | monitor for balance |
Quick Answer: Safest Fastest Methods
For a quick, safe speed-up, you can add a small amount of fast-drying additive to your oil paint and follow the maker’s instructions.
Increase ventilation and raise the temperature in the work area to help solvents evaporate and promote curing.
Those two steps together give the fastest, safest improvement without compromising finish quality.
Use Fast-Drying Additives
A few reliable additives can cut oil paint drying times dramatically without wrecking your finish: siccatives (drying agents) like cobalt or manganese, alkyd mediums that speed oxidation, and specially formulated fast-dry mediums from reputable brands.
You should use fast drying agents and oil paint additives sparingly.
Consider:
- Cobalt siccative
- Manganese siccative
- Alkyd medium
- Commercial fast-dry medium
Improve Ventilation And Heat
Additives can speed drying, but optimizing your workspace often gives the safest, fastest gains without changing paint chemistry.
You should set a dedicated drying station with proper workspace setup and ventilation systems, use targeted airflow techniques, and balance temperature regulation with humidity control.
Position pieces to avoid disturbed paint layering, monitor the drying environment, and adjust fans or heaters for consistent, even curing.
How Temperature Affects Oil Paint Drying
While temperature won’t change the chemical nature of oil paint, it directly speeds up or slows down the oxidative curing that makes films harden; warmer conditions accelerate the reaction and cooler ones retard it.
Warmer conditions speed oil paint’s oxidative curing; cooler temperatures slow film hardening.
You should monitor temperature fluctuations and heat sources because oil paint chemistry ties to paint viscosity and the curing process, affecting drying rate factors and drying time variability under environmental conditions.
- Keep steady temps
- Avoid spikes
- Use gentle heat
- Track readings
Ideal Humidity for Faster Oil Paint Drying
Because moisture in the air slows the oxidative curing of oil paint, you should aim for moderate humidity—around 40–55%—to keep drying steady without causing surface tackiness or cracking.
Maintain that ideal humidity while ventilating gently and avoiding rapid swings.
Stable, moderate moisture supports ideal drying across layers, reduces dust adhesion, and helps you plan drying times predictably.
Use Heaters Safely to Speed Oil Paint Drying
Controlling humidity helps, but when you need faster surface drying you can use heaters—carefully.
You’ll choose heater types, watch safe placement, and set ideal settings to reduce drying time without hazards. Follow safety precautions and balance energy efficiency.
Steps to follow:
- Select low-heat radiant
- Keep distance
- Use thermostat
- Monitor continuously
Improve Airflow: Ventilation Tricks That Help
If you want oil-based paint to skin over faster, increase steady airflow around the piece so solvents can evaporate more quickly.
Position fans to create gentle crossdrafts, use portable ventilation systems if needed, and orient work in clean drying environments.
Set up gentle crossdrafts with fans or portable ventilation, and place work in a clean, well-oriented drying area.
Keep clutter away and practice good workspace organization so air moves unimpeded.
These airflow techniques speed drying without overheating or stirring dust.
How Ventilation Patterns Change Solvent Evaporation
You’ll notice that the direction of airflow across a painted surface changes how quickly solvents evaporate, with air moving parallel to the surface pulling vapors away more gently than a direct head-on flow.
Setting up strong cross-ventilation—opposite openings that create a steady through-breeze—speeds evaporation by constantly replacing saturated air with drier air.
Position your fans or windows to promote a consistent path of air rather than turbulent pockets that can slow drying.
Airflow Direction Effects
When airflow moves across a fresh oil-based paint surface, it speeds solvent evaporation by carrying away vapor and lowering local humidity.
So orienting vents and fans matters more than just their strength. You’ll use airflow patterns for targeted drying acceleration by directing streamlines along painted planes.
- Aim flow parallel
- Avoid turbulence
- Shield edges
- Gradual ramp-up
Cross-Ventilation Strength
Although stronger cross-ventilation pulls solvent-laden air away faster, its effectiveness depends on the pattern and balance of incoming and outgoing flows.
You should position opposing openings to create steady, even drafts; experiment with window and fan placement to avoid short-circuiting air.
Use targeted cross ventilation techniques and air circulation methods to maintain consistent evaporation without chilling or dust contamination.
Use Dehumidifiers vs. Humidifiers: When to Use Each
Wondering whether to run a dehumidifier or a humidifier while your oil-based paint dries? You’ll choose based on humidity and temperature.
Use dehumidifier settings to lower RH if air’s muggy; run a humidifier if air’s too dry and film won’t form.
Consider:
- Check RH with a meter.
- Aim 40–50% RH.
- Adjust fan speed.
- Monitor drying progress.
Choose Thinner Coats to Cut Drying Time
Keep your layers thin so each coat dries faster and more evenly.
You’ll build coverage with multiple thin coats rather than one heavy one, which traps solvents and slows drying.
Apply successive thin layers once the previous coat is tack-free to speed overall cure time.
Reduce Layer Thickness
Apply thinner coats to speed drying and improve adhesion; oil-based paint cures by oxidation, so less volume dries faster and more evenly.
You should refine application methods and oil paint consistency, adjust drying mediums or drying agents, control moisture and environmental factors, and guarantee surface preparation and paint compatibility to optimize curing processes.
- Feather edges
- Use low-body mixes
- Monitor humidity
- Test adhesion
Multiple Thin Coats
After thinning your application and feathering edges, work in multiple thin coats rather than one heavy layer to cut overall drying time and reduce problems like wrinkling or poor adhesion. You’ll speed curing with multiple applications and smart layering techniques, letting each coat tack before next. Space coats, sand lightly, and monitor humidity for consistent results.
| Step | Action | Benefit |
|---|---|---|
| 1 | Thin coat | Faster dry |
| 2 | Wait tack | Better adhesion |
| 3 | Light sand | Smooth finish |
| 4 | Repeat | Even cure |
How to Thin Oil Paint Correctly and What to Use
Thinning oil paint correctly lets you control flow, drying time, and gloss without weakening the film.
Thin oil paint properly to control flow, drying, and gloss—without compromising film strength.
You’ll use thinning techniques and mixing tips to achieve ideal paint consistency and medium ratios.
Consider best solvents and paint additives sparingly, follow application methods, and observe safety precautions.
- Start small
- Test on scrap
- Wait between coats
- Note cure times
Solvents vs. Painting Mediums: When to Use Which
You’ll want to know that solvents mainly thin paint and speed evaporation, while mediums change handling, gloss, and drying behavior.
Use a solvent when you need faster flow or to clean brushes, and pick a medium when you want to alter drying time or finish without over-thinning.
Knowing each tool’s purpose helps you control drying and final appearance more precisely.
Solvent Purpose Explained
Think of solvents as fast-acting cleaners and painting mediums as performance enhancers: solvents like mineral spirits or turpentine thin paint and speed drying by evaporating, while mediums (linseed oil, alkyds, or commercial blends) alter flow, gloss, drying time, and film strength without simply evaporating away.
You’ll consider:
- solvent types and evaporation rates
- effects on drying times and paint consistency
- solvent interactions with drying conditions
- application techniques and medium comparisons
Mediums: Effects & Uses
Solvents thin paint and speed evaporation, but mediums change how the paint behaves long after the solvent’s gone.
You’ll tweak medium properties to alter paint consistency and drying techniques, balancing pigment choices and application methods.
Use mediums for layering strategies and substrate compatibility, and factor environmental factors into choices.
Pick faster-drying oils or alkyds when speed matters, slower oils for richer blends.
Drying Agents (Siccatives): How They Work
When you add a drying agent (siccative) to oil-based paint, metal salts speed up the chemical reactions that turn wet oil into a solid film, so your paint sets faster without changing how it looks while wet.
You’ll choose siccative types based on drying efficiency and application. Consider:
- Fast-acting
- Moderate
- Slow
- Blends
Safe Dosages for Common Driers (Cobalt, Manganese, Japan Drier)
When you add common driers like cobalt, manganese, or Japan drier, stick to the manufacturer’s recommended concentrations—typically a few tenths of a percent by weight—to avoid over-curing or skinning.
Work in a well-ventilated area, wear gloves and a respirator as needed, and be aware that these compounds can irritate skin and lungs.
Always test a small batch and a sample panel to check drying time and film properties before treating a full load.
Recommended Drier Concentrations
For safe and effective speeding of oil-based paint drying, stick to low, measured doses of metal driers: typically 0.025–0.10% cobalt, 0.05–0.20% manganese, and about 0.5–2.0% Japan drier by weight of the oil phase.
Use recommended drier types and ideal drier ratios, adjust slowly, and test small batches.
- Start low.
- Increase incrementally.
- Record mixes.
- Observe cure times.
Health And Ventilation
Because metal driers are potent chemicals, you should treat them with caution: use only the low concentrations recommended, work in a well-ventilated area, and wear appropriate PPE (gloves and a respirator if solvent vapors are present).
Monitor ventilation quality and air circulation to limit fume exposure and respiratory concerns. Manage solvents, control humidity, prevent fire hazards, and prioritize workspace safety and personal protection to reduce health impacts.
Application And Testing Methods
If you want reliable, safe results with metal driers, start by measuring and testing small, controlled doses before committing them to a full paint batch.
Use clear application techniques, surface preparation, and testing methods to record drying times under varied drying conditions and environmental factors.
Maintain paint consistency and layering techniques.
Test:
- Cobalt low
- Manganese low
- Japan drier low
- Control
When Not to Add Drying Agents
Although drying agents speed up curing, you shouldn’t add them in every situation—especially when working on fine art, antique restoration, or multi-layered finishes where long open times are essential. You’ll need to respect drying agent limitations and avoid excessive additives to preserve texture and adhesion. Choose patience over speed when risk of cracking, discoloration, or compromised aging exists.
| Fear | Loss | Hope |
|---|---|---|
| Crack | Fade | Restore |
| Rush | Regret | Preserve |
| Shorten | Damage | Mend |
| Hurry | Spoil | Endure |
Quick-Dry Alkyd Paints: Best Alternatives
When you need faster drying without the risks of added siccatives, quick-dry alkyd paints offer a reliable alternative — they’re formulated to cure faster than traditional oil paints while keeping similar handling and gloss.
You can choose among quick dry alternatives and alkyd options depending on use:
- Fast-household alkyd
- Long-flow brushable
- High-solids industrial
- Exterior weatherproof
Blend Oil Paint With Alkyd Medium for a Faster Cure
Many artists speed drying by blending a portion of alkyd medium into their oil paints, which accelerates curing without drastically changing handling.
Many artists blend a bit of alkyd into oil paint to speed drying without losing familiar handling.
You’ll enjoy alkyd benefits like faster skin formation and improved flow.
Use measured blending techniques—start 10–30% alkyd, test on a scrap, then adjust for sheen and open time.
Keep layers thin and let each cure before glazing.
Surface Prep That Speeds Oil Paint Drying
Want your oil paint to dry faster from the start? You’ll speed curing with smart surface preparation and improved paint adhesion.
Prep steps:
- Clean surface of grease and dust.
- Lightly sand glossy areas for tooth.
- Remove sanding dust with tack cloth.
- Confirm substrate is dry and stable.
These steps promote even drying and stronger adhesion for quicker, reliable cures.
Primers That Promote Faster Drying and Adhesion
Although primers often seem like just a preparatory step, choosing the right one can markedly speed oil paint drying and improve adhesion by creating a stable, absorbent base and sealing irregularities. Use fast drying primers and adhesion enhancers to cut curing time and boost hold. Compare options:
| Type | Dry Time | Benefit |
|---|---|---|
| Alkyd | Faster | Strong bond |
| Shellac | Fastest | Seals well |
| Acrylic | Moderate | Flexible |
| Zinc | Slow | Corrosion resist |
Pigments and Colors That Dry Faster
You can speed up drying by choosing pigments known for quicker oil absorption and curing, like certain earths and cadmiums.
Stick to fast-drying color families—warm yellows, reds, and some browns—when time is important.
Also check pigment labels for lightfastness and oil compatibility to avoid longevity or drying trade-offs.
Lightfast Pigment Choices
When choosing pigments to speed up drying, pick ones with coarser, denser particles and fewer oily additives—those tend to absorb less oil and form a quicker skin.
You’ll favor lightfast pigments for color durability; your pigment selection should consider drying characteristics.
- Test samples
- Note opacity
- Record drying times
- Prefer single-pigment tubes
Fast-Drying Color Families
Earth tones and certain inorganic pigments tend to dry faster, so prioritize colors like umbers, siennas, ochres, cadmiums, and iron oxides when you need quicker skinning and curing.
For effective color selection, choose fast drying pigments and mix sparingly with slow oils. You’ll speed drying by layering these hues, using lean grounds, and minimizing varnish or glossy mediums that trap oil.
Avoiding Incompatible Primer/Paint Combos
Because primers and topcoats interact chemically, choosing compatible products is essential to getting oil-based paint to dry properly.
You should focus on primer compatibility and paint adhesion, adjust surface preparation and drying conditions, and use simple testing methods before full application.
Follow these application techniques:
- Check labels for compatibility.
- Do a patch adhesion test.
- Control humidity and temperature.
- Sand between coats.
Layering Rules to Prevent Wrinkling and Cracking
When you layer oil-based paint, follow “fat over lean” so each coat has equal or more oil/slow-drying medium than the one beneath it.
Also apply thinner coats over thicker ones—thin over thick—to avoid trapped solvents that cause wrinkling.
Stick to these rules and you’ll cut down on cracking as the paint cures.
Fat Over Lean
Although it seems simple, the fat-over-lean rule is essential: each successive oil-paint layer must contain equal or more oil than the one beneath it so your paint won’t wrinkle, sink, or crack as it cures.
You should manage fat consistency and oil balance with viscosity control and application methods to optimize drying techniques and curing processes across paint layers.
- Thin ground
- Lean midlayer
- Fatter topcoat
- Monitor drying times
Thin Over Thick
After following fat-over-lean, you still need to respect thickness: apply thinner layers over thicker ones to avoid trapped solvents and uneven shrinkage that cause wrinkling or cracking.
You’ll use layering techniques and control paint viscosity during paint application to manage drying challenges.
Consider surface interaction, environmental factors, and paint chemistry so the curing process proceeds predictably, shortening drying time and improving finish quality.
Fat Over Lean: Applying the Rule Safely
Because oil paint layers with more oil dry slower, you should build paintings from lean (less oil) to fat (more oil) to prevent cracking and adhesion issues.
You’ll manage oil viscosity and choose medium selection carefully.
Follow this drying sequence:
- Start with a lean layer.
- Add slightly fatter layers.
- Use minimal drying agents.
- Adjust painting technique to protect paint adhesion.
How to Test Tack and Cure Before Sanding or Recoating
Before you sand or recoat, you’ll want to check whether the paint is tacky or fully cured.
Do a gentle touch-and-dent test by pressing a fingertip in an inconspicuous spot, and use a nail or tape check to confirm the surface won’t lift or stick.
If the paint yields or the tape pulls up residue, wait longer and retest.
Touch And Dent Test
When you need to know whether oil-based paint is ready for sanding or another coat, use a simple touch-and-dent test to check tack and cure.
You’ll use touch techniques and gentle dent detection to assess readiness.
Steps:
- Lightly press with a fingertip.
- Check for tackiness.
- Observe any lasting dent.
- Wait more if surface deforms.
Nail And Tape Check
Grab a strip of painter’s tape and a small finishing nail to run a quick nail-and-tape check that tells you whether the oil-based paint is ready for sanding or a new coat.
Test different nail types and tape options on representative surface types.
Consider drying techniques, environmental factors, paint brands, application methods, tool selection, and drying speeds to adjust project timelines.
Typical Oil Paint Drying Timeline: Day-by-Day
Although drying times can vary with temperature, humidity, and paint thickness, you can expect a predictable day-by-day progression:
- Day 1: tack-free surface; learn how oil paint properties affect feel.
- Days 2–3: surface firms; avoid heavy handling.
- Days 4–7: deeper drying; good time to assess adhesion.
- Weeks 2–6: full cure develops; use proven drying techniques to speed safe handling.
Spot-Drying Techniques for Small Repairs
If you need to speed-dry a small patch so you can retouch or layer quickly, concentrate heat and airflow while protecting surrounding paint and varnish. Use careful spot drying techniques for small repairs and quick fixes: targeted airflow, gentle warmth, and controlled drying aid seamless paint touch ups, blending colors, patching methods, texture matching, repair strategies, color consistency, and seamless transitions.
| Calm | Urgent | Relief |
|---|---|---|
| Focus | Pace | Repair |
| Care | Speed | Finish |
| Blend | Match | Restore |
Use of Infrared Lamps and Heat Guns : Pros and Cons
When you need faster spot drying than airflow and mild warmth can provide, infrared lamps and heat guns offer powerful options that cut curing time dramatically.
You’ll weigh infrared benefits versus heat gun risks, observe safety precautions, and monitor drying speed.
- Efficiency comparison: output vs energy.
- Ideal distance and heat settings.
- Equipment maintenance matters.
- Use controlled bursts, avoid overheating.
Workshop Setup for Fastest Consistent Drying
Because controlling temperature, airflow, and humidity together gives the most consistent results, set up a dedicated space where you can regulate all three variables and keep contaminants away from fresh paint.
Design your workshop layout with a clear drying station, heaters, dehumidifier, and adjustable fans. Use shelving for staged pieces, cover floors, seal vents, and monitor conditions so each coat cures evenly.
Outdoor vs. Indoor Drying: Best Practices
You’ve set up a climate-controlled drying station indoors, but some projects still benefit from outdoor airing — and choosing between the two affects drying speed, finish, and contamination risk.
Balance outdoor conditions vs. indoor environments by matching drying strategies to surface types. Consider weather influences, temperature variations, light exposure, and humidity levels.
- Monitor
- Time
- Protect
- Adjust
Ventilation, PPE, and Solvent Fume Safety
When you’re speeding up oil paint drying, good workshop ventilation is essential to clear solvent fumes and speed evaporation.
Wear appropriate PPE—respirator, gloves, and eye protection—whenever you sand or manipulate wet paint.
Also take steps to reduce solvent exposure, like using low-VOC thinners and keeping fans moving air away from your breathing zone.
Proper Workshop Ventilation
If you’re working with oil-based paints, keep your workshop well ventilated to prevent solvent fumes from accumulating and to help the finish dry faster.
Arrange your workshop layout to promote air circulation and remove vapors. Consider these steps:
- Open cross-ventilation windows.
- Use exhaust fans near painting area.
- Position intake away from fumes.
- Add a circulating fan for consistent flow.
Essential Personal Protective Equipment
Good ventilation helps keep fumes moving out of the workshop, but you still need the right protective gear to keep yourself safe while the paint cures.
You should wear safety gear: protective gloves, respirator masks or dust masks, eye protection, paint suits, and work boots.
Use ventilation hoods where possible, prioritize skin protection, and follow chemical safety guidelines to reduce exposure.
Reducing Solvent Fume Exposure
Although solvents speed up drying, they also release fumes that can harm your lungs and nervous system.
Therefore, you should minimize exposure through ventilation and proper PPE. Choose low-VOC solvent types, monitor air quality, and follow exposure limits and safety regulations.
Use protective gear and optimize workspace setup.
- Local exhaust
- Respirator fit
- Monitoring badges
- Emergency plan
Fire Risks and Flammable Storage When Speeding Drying
When you’re trying to speed up oil paint drying, remember that many accelerants and solvents are highly flammable and can create serious fire hazards if stored or used carelessly.
You should prioritize fire safety: separate flammable materials, use approved storage solutions, practice risk management, maintain safe ventilation, perform regular equipment checks, organize your workspace, and keep emergency preparedness plans and extinguishers accessible.
Common Mistakes That Slow Drying or Ruin the Finish
Many painters unknowingly slow drying or ruin a finish by using too-thick layers, applying incompatible mediums, or skipping proper surface preparation; stick to thin, even passes, follow “fat over lean,” and match solvents and additives to your paint to avoid tacky, wrinkled, or cracked results.
- Control layer thickness and paint application.
- Confirm paint compatibility and drying agents.
- Optimize drying conditions and environmental factors.
- Prioritize surface preparation and curing process for finish preservation.
How to Fix Paint That Wrinkled After Speeding Drying
Speeding up drying can backfire: if layers skin over too fast while the underlying paint stays wet, the surface will wrinkle as solvents try to escape.
For wrinkled repairs, remove loose film with a scraper, sand smooth once dry, and thin subsequent coats.
Pause aggressive drying techniques, allow proper cure, and test small areas so you don’t reintroduce wrinkles.
How to Deal With Tacky Finishes and Sticky Paint
If a finish feels tacky long after it should be dry, don’t panic—you can usually fix it without stripping the whole job.
Do a quick finish evaluation: assess drying time, layer adhesion, paint compatibility, and texture issues.
Quickly evaluate the finish—check drying time, layer adhesion, compatibility, and surface texture before proceeding.
Then try:
- Improve ventilation and warmth.
- Thin top coats and reapply.
- Lightly scuff to remove surface imperfections.
- Use compatible drying agents for finish restoration.
When to Strip and Start Over vs. How to Salvage
When a finish stays tacky or shows adhesion failures after you’ve tried ventilation, thinning, and drying agents, decide quickly whether you can salvage the job or must strip and start over; determine the extent of contamination, solvent incompatibility, number of problem layers, and whether underlying substrates (wood, metal, primer) are compromised. Evaluate surfaces, removing imperfections, reworking layers, stripping paint, salvaging artwork, measuring damage, restoration techniques, project timelines.
| Action | When to use |
|---|---|
| Strip | Severe contamination, failed adhesion |
| Rework | Isolated flaws, intact substrate |
Tools to Monitor and Control Drying Conditions
You’ll want a small set of reliable tools to monitor and control drying conditions: a hygrometer to track humidity, an infrared or surface thermometer to check paint and substrate temperatures, a ventilation meter or anemometer to gauge airflow, and a simple fan or adjustable heater to adjust conditions as needed.
- Use temperature monitoring for consistent heat.
- Prioritize humidity control.
- Organize workspace for ideal drying environment.
- Track paint consistency vs. drying time and application techniques.
Cost vs. Speed: Budget Hacks That Work
Often you can speed up oil-based paint drying without spending much by prioritizing a few low-cost, high-impact hacks. You’ll choose cost effective solutions and time saving techniques: good ventilation, thinner coats, affordable additives, and frugal painting hacks. Balance price vs. performance for savings on supplies.
| Hack | Cost | Benefit |
|---|---|---|
| Ventilation | Low | Faster drying |
| Thin coats | Free | Even cure |
| Additives | Low | Speeds film |
Quick Project Workflows to Minimize Wait Times
If you’re tackling a small oil-based paint job, plan your steps so coats, dry times, and touch-ups overlap efficiently; that way you’re always moving the project forward instead of waiting idle.
Use quick drying techniques and efficient painting methods while sequencing tasks:
- Prep next piece
- Thin next coat
- Rotate work areas
- Inspect and touch-up
This workflow cuts idle time and keeps momentum.
Pro Tips Painters Use to Consistently Cut Drying Time
Those workflow steps keep you moving, but pro painters shave more time by tweaking materials, environment, and technique.
Pros shave hours by tweaking materials, environment, and technique—thin coats, warm airflow, low humidity, and smart drying choices.
You’ll use targeted drying techniques: thin coats, warm airflow, low humidity, and catalytic driers or siccatives sparingly.
Prep surfaces and choose fast-alkyd formulas.
Learn painter secrets like sanding between thin layers and positioning fans for laminar flow so each coat cures predictably without sacrificing finish.
Checklist: Step-by-Step Speed-Dry Plan for Every Project
Start with a simple checklist you can follow every time: prep the surface, pick a fast-alkyd or quick-dry additive, apply thin even coats, control temperature and airflow, and plan sanding and cure times between layers.
Use this checklist for checklist benefits and project organization:
- Inspect & prep
- Choose product/additive
- Apply thin coats, ventilate
- Sand, wait, finish
Frequently Asked Questions
Can Additives Affect Archival Quality or Yellowing Long-Term?
Yes — you’ll risk archival quality and possible yellowing. Different additive types (dryers, solvents, varnishes) have varied long term effects; choose archival-grade, test samples, and follow manufacturers’ recommendations to minimize deterioration and discoloration.
How Does Paint Thickness Impact Drying at Edges Versus Center?
Curious how thickness shifts drying patterns? You’ll find thinner edges dry faster due to greater surface area and heat loss, while thicker center drying lags, trapping solvents and slowing cure, so balance edge drying versus center drying.
Are There Pigments That Cause Excessive Surface Skinning?
Yes — certain pigment types, like some organic and metallic pigments, can promote excessive surface skinning; you’ll need compatible drying agents and careful formulation to avoid rapid surface film while maintaining proper through-dry and paint stability.
Can Metal Substrates Change Drier Effectiveness or Corrosion Risk?
Ye olde yes — you’ll find metal substrates alter drier effectiveness and corrosion risk: metal surface treatments and corrosion inhibitors change absorption, chemistry, and catalytic activity, so you’ll test compatibility, prep surfaces, and adjust drier type or concentration.
Will Varnishing Too Soon Trap Solvents and Cause Later Issues?
Yes — if you varnish too soon you’ll trap solvent evaporation, causing blush, soft finish, or delayed curing; wait until paint’s surface feels dry and solvents have dissipated before varnish application to avoid long-term issues and adhesion problems.
Conclusion
If your oil paint’s dragging its feet, don’t let it sulk—take charge. Use heat, airflow, low humidity, faster-drying mediums, and thin layers to nudge it along, like coaxing flowers open with sunlight. Balance speed with safety so colors stay true and surfaces stay strong. With these tricks and a clear workflow, you’ll cut wait times and keep momentum—turning slow, stubborn paint into a responsive, reliable partner for every project you tackle.