How to Paint a Corner Wall: Professional Techniques Explained
You’ll get crisp corner walls by prepping, choosing the right paint, and using steady cutting-in techniques. Clean, sand, and patch so the surface’s smooth, then prime repaired spots. Use an angled sash brush for corners, pick a roller nap to match texture, and back-roll wet edges to blend. Work from the brightest wall, paint thin coats, and remove tape while paint’s tacky for sharp lines. Keep tools clean and follow safety steps, and you’ll find professional tips ahead.
Quick Step-By-Step for Painting a Corner
Start by prepping the corner: clean the walls, remove loose paint, and lay down drop cloths so you don’t track mess.
Tape edges, cut a crisp line with an angled brush, and roll adjacent panels.
Match corner color by testing swatches under room light.
Test paint swatches in the room’s light to ensure the corner color truly matches before committing.
Work with compatible rollers to respect wall textures, feathering changes for an even finish and minimal overlap.
Prep the Corner: Clean, Sand, Repair
Before you cut in and roll, clean, sand, and repair the corner so your finish lasts and looks professional. You’ll do a quick wall surface inspection, remove dust and grease, sand rough spots, and fill cracks or dents. Prime patched areas. That corner wall preparation prevents peeling and uneven texture.
| Step | Tool | Tip |
|---|---|---|
| Inspect | Light | Mark defects |
| Clean | Cloth | Use degreaser |
| Repair | Putty | Sand smooth |
Choose Paint & Finish for Corner Walls
When choosing paint for a corner wall, pick a formula that suits the room—like washable latex for high-traffic areas or an acrylic for milder wear.
Think about sheen and durability: eggshell or satin hides imperfections but semi-gloss stands up best to cleaning.
Finally, test color samples under the corner’s lighting to see how hues change with shadows and angles.
Paint Type Selection
Choosing the right paint and finish for a corner wall makes a bigger difference than you might think: it affects coverage, durability, and how light behaves where two surfaces meet. You’ll pick between acrylic, latex, or oil based on substrate and moisture. Consider paint finishes and color psychology to guide mood and perception.
| Type | Best for | Notes |
|---|---|---|
| Acrylic | Dry rooms | Fast-dry |
| Latex | Most walls | Easy clean |
| Oil | Trim | Durable finish |
Sheen And Durability
Because corners get more scuffs and grab more light than flat walls, pick a sheen that balances toughness with the look you want: satin or eggshell hides imperfections and cleans well for high-traffic corners, while matte hides texture but sacrifices durability, and semi-gloss gives the hardest finish suited to trim and edges that need frequent wiping.
Consider these durability factors and sheen types:
- Cleanability
- Scratch resistance
- Touch-up ease
Color And Lighting
Although corners catch light differently than flat walls, you can use that to your advantage by picking colors and sheens that work with the room’s lighting and traffic.
Consider color psychology to set mood—warm tones cozy, cool tones calm. Test samples under actual lighting effects at different times.
Use semi-gloss for high-traffic corners, matte for subtle depth, and trim contrasts to define edges.
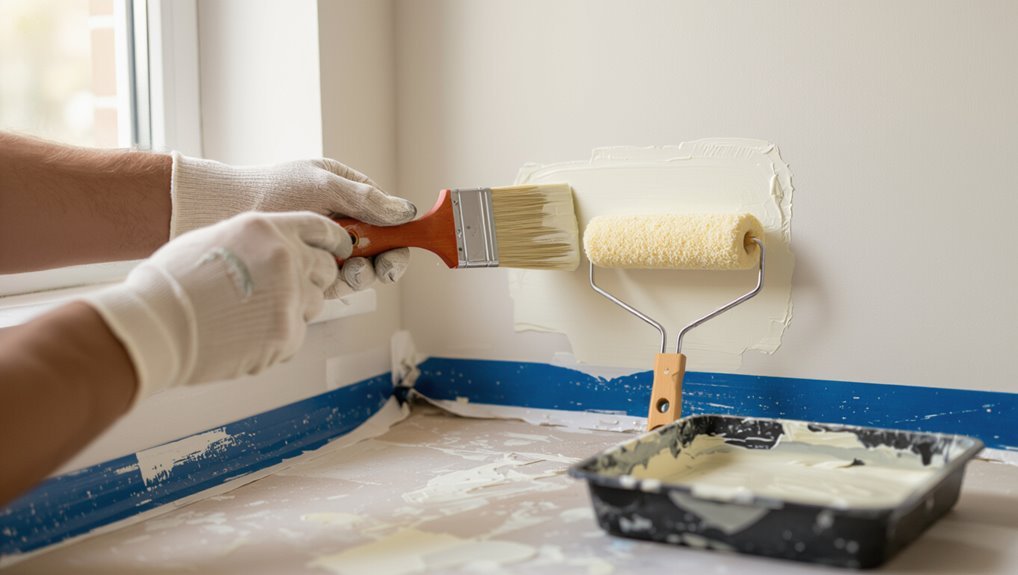
Select Brushes, Rollers, and Tools for Crisp Lines
You’ll get the cleanest corner lines by picking the right brushes, rollers, and tools for the job.
Choose angled sash brushes for cutting in, smooth rollers that match your paint finish, and essentials like painter’s tape, a corner brush, and an edger.
With the proper gear, you’ll cut time and avoid touch-ups.
Choosing The Right Brushes
Choosing the right brushes, rollers, and tools makes the difference between ragged edges and crisp, professional-looking lines.
You’ll pick brush types and brush sizes to match trim, corners, and paint viscosity. Use angled sash brushes for control and synthetic filaments for latex.
Consider ferrule quality and handle comfort.
- Trim
- Corners
- Detail
Selecting Appropriate Rollers
Pick the right roller sleeve and nap length to match your wall texture and paint—short naps (1/4″–3/8″) for smooth surfaces, medium (3/8″–1/2″) for lightly textured walls, and long naps (3/4″–1″) for rough or porous surfaces—to get even coverage without splatter or visible roller marks.
Choose roller types for desired texture effects, consider surface compatibility, and pick sturdy roller handles for consistent paint application.
Essential Painting Tools
When you want crisp lines and even coverage, assemble a small kit of quality brushes, the right roller sleeves, and a few precision tools so you’re ready for any corner or edge.
Focus on paint preparation and tool maintenance: clean brushes, store rollers, and keep edges sharp.
- Angled sash brush
- Smooth nap roller
- Painter’s tape and edger
Prime Corners for Even Coverage and Adhesion
Because corners get more wear and show brush marks, you’ll want to prime them first to guarantee even coverage and better adhesion for your topcoat.
Use a quality paint primer applied with a small brush into the angle, ensuring full corner adhesion.
Let it dry per instructions, sand lightly if needed, then inspect for missed spots before rolling the main coat.
Cut a Clean Corner: No Tape Needed
Get your brush angle right and you’ll control the paint flow into the corner.
Hold the brush so only the outer filaments touch the wall, then feather the edge with light, upward strokes to blend.
With steady hands and small strokes you’ll cut a clean corner without tape.
Brush Angle Control
Tilt your brush so the bristles skim the wall edge and you’ll be able to cut a sharp corner without any tape.
You’ll control angle and pressure to maintain edge clarity, using proper brush techniques for consistent corner coverage.
Practice this sequence:
- Align bristles at 30°.
- Light pressure, steady pull.
- Reload often to avoid blobs.
Feathering The Edge
Feather the paint outward from the corner with light, overlapping strokes so the edge blends into the wall instead of forming a hard line; you’ll keep control by varying pressure and slightly changing the brush angle as you pull.
Use the feathering technique to soften shifts, pause to assess edge blending, and rework any visible ridges with minimal paint and steady, continuous strokes for a seamless finish.
Use Back-Rolling to Blend Two Intersecting Walls
After cutting in along the corner, back-roll the new paint while it’s still wet to blend the two intersecting walls smoothly.
You’ll use the back rolling technique to even texture and blending edges so seams disappear.
Follow a quick sequence:
Follow this quick sequence to blend edges smoothly and make seams disappear with back-rolling.
- Light pressure along the corner
- Overlap strokes by 2–3 inches
- Smooth with long, even passes to merge tones
Which Wall to Paint First: And Why
When deciding which wall to paint first, start with the one that gets the most light so you can match sheen and color as you work; painting the brighter wall first helps you see imperfections and blend the intersecting edge more accurately.
You’ll tackle the adjacent corner wall next, applying painting techniques focused on color selection, wall preparation, tool efficiency, and consistent paint application for seamless results.
Fix Lap Marks, Drips, and Texture Issues
Start by inspecting the painted surface for lap marks, runs, and uneven texture so you can tackle defects before the paint fully cures.
For lap mark prevention and drip control, sand and feather edges, wipe dust, and keep a wet edge.
Focus on texture smoothing and corner touch ups:
- Sand high ridges
- Thin drips and wipe
- Re-roll lightly to blend
When to Use Painter’s Tape: And How to Apply It
If you want crisp, clean lines or need to protect trim, windows, or adjoining walls, use painter’s tape selectively rather than everywhere.
Press tape firmly for precise tape placement along edges, smoothing bubbles.
Press tape firmly along edges, smoothing out bubbles for crisp, precise lines and a clean paint edge.
Paint in thin coats and peel tape while paint’s tacky, not fully dry, for cleaner breaks.
For corners, remove tape slowly at a 45° angle to avoid lifting paint.
Save Time in Rooms With Many Corners
Because rooms with lots of corners can slow you down, plan your approach before you roll—group adjoining corners, pick a consistent sequence, and prep all trim and changes at once so you’re not constantly switching tools or tape.
Use these time saving strategies to stay efficient and apply corner wall techniques consistently:
- Sequence corners
- Batch prep
- Use right tools
Cleanup, Safety, and Storing Leftover Paint
When you finish cutting in and rolling, spend a little extra time on cleanup and safety so your hard work lasts and your space stays hazard-free.
Wipe drips, wash brushes immediately, and use proper cleanup tips to avoid stains.
Follow safety precautions: ventilate, wear gloves, and keep kids/pets away.
Prioritize safety: ventilate the room, wear gloves, and keep children and pets well away from the work area.
Seal cans tightly and label before storing paint in a cool, dry place.
Frequently Asked Questions
Can I Paint Corner Walls in Humid or Cold Weather?
You can paint corner walls in humid or cold weather, but humidity effects and temperature considerations matter: avoid extreme moisture or under-50°F temps, use slow-drying paints or additives, and allow extra drying time for proper adhesion.
How Do I Paint Corners With Existing Wallpaper?
Think of the corner as a book spine: you’ll carefully lift seams, use corner wallpaper techniques to align patterns, trim excess with sharp wallpaper trimming tips, apply adhesive behind edges, press and smooth so seams disappear.
What’s the Best Way to Handle Mold in Corner Seams?
Address mold in corner seams by removing affected material, treating with a mildew cleaner, letting it dry, then applying a mold prevention primer and seam sealing compound; you’ll reinstall or refinish, monitor humidity, and ventilate consistently.
Can I Use Spray Paint for Cutting in Corners?
I tried spraying trim like a barber once, and it worked—yes, you can use spray paint for cutting in corners if you mask carefully. Focus on spray paint techniques, proper corner wall preparation, and light, controlled passes.
How Long Should Painted Corners Cure Before Rehanging Items?
Wait at least 24–48 hours before rehanging items, though full cure time can be 7–30 days depending on paint type and humidity. You’ll avoid damage by waiting longer for heavier or adhesive-mounted pieces.
Conclusion
You’ve learned pro techniques to get sharp, clean corner walls—prep, the right tools, priming, and careful finishing make all the difference. Did you know a single professionally taped corner can cut visible mistakes by about 60% compared with freehand edging? That stat shows how small investments—tape, a good angled brush, and patience—translate to big visual gains. Tackle corners methodically, and your room will look neatly finished and professionally painted.