How to Paint a Wall Stencil for Creative Home Decor
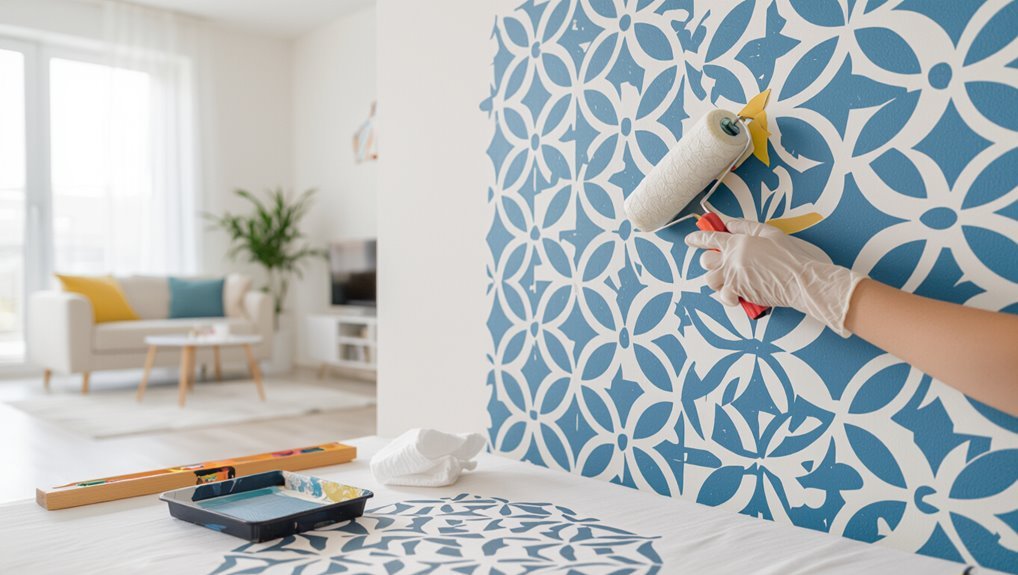
You can quickly transform a room by prepping the wall, securing a level stencil, and applying thin coats with a roller, pouncer, or sponge to avoid bleed and get crisp edges. Test colors and techniques on scrap, align repeats with low-tack tape, and clean the stencil between passes. Repair and prime rough spots first, choose scale and finish to suit the space, and seal high-traffic areas for durability — keep going and you’ll pick up pro tips and troubleshooting next.
Quick Start: Stencil a Wall in 6 Steps
Start by gathering your stencil, paint, roller or stencil brush, painter’s tape, a level, and a paper towel for excess paint.
Prep the wall, position the stencil with tape and level, apply thin coats to avoid bleed, lift and clean before repeating, align for repeatable stencil patterns, and test color combinations on scrap.
Finish with touchups and seal if desired.
Who Should Stencil: Renters, DIYers, and Pros
Anyone—from renters to seasoned pros—can stencil a wall, as long as you pick the right materials and approach for your situation.
You’ll enjoy stenciling benefits like budget-friendly updates and custom accents.
Use DIY techniques for simple patterns, apply rental solutions for removable paints and templates, follow design trends for modern looks, and consider professional tips when tackling complex murals for lasting results.
Stenciling vs. Wallpaper: Which Is Right for You?
Stenciling usually costs less up front and lets you change or touch up sections easily, while wallpaper can be more durable but pricier to install or replace.
You’ll have more design flexibility with stencils since you can customize scale, color, and repeat exactly where you want it.
Think about your budget, how long you need the look to last, and whether you want a one-of-a-kind finish or a uniform patterned wall.
Cost And Durability
When weighing stenciling against wallpaper, you’ll find that upfront costs and long-term durability often determine which option makes sense for your space; stenciling generally costs less in materials and lets you refresh portions without replacing an entire wall, while wallpaper can be pricier to install but often lasts longer and hides imperfections better.
| Option | Highlight |
|---|---|
| Stencil | cost effectiveness |
| Wallpaper | long lasting durability |
| Repair | partial vs full replacement |
| Lifespan | varies by material |
Design Flexibility
Cost and durability shape your choice, but design flexibility often seals the deal.
You can use design inspiration and color psychology to guide stencil techniques and creative layering, tailoring pattern mixing and cultural motifs to seasonal themes.
Stenciling boosts personal expression, adapts to wall textures, and relies on DIY resources, so you’ll tweak looks easily without committing like you’d with wallpaper.
Choose a Stencil Style for Your Room
Think about what the room does and pick a pattern that supports that purpose—calm florals for bedrooms, bold geometrics for active spaces.
Pay attention to scale so the motif feels right at eye level, and decide how often it should repeat to avoid visual clutter.
Test a small section first to confirm the pattern, scale, and repeat work together.
Match Pattern To Purpose
Which mood do you want the room to convey?
You’ll pick stencils that reflect pattern significance and guarantee purpose alignment—calm, energetic, or formal—so the decor supports function.
Choose motifs that match activity and emotional tone, and don’t ignore color and contrast.
- Soothing curves for relaxation
- Bold geometrics for focus
- Classic motifs for elegance
Consider Scale And Repeat
Once you’ve matched motif and mood, consider how scale and repeat will affect the room’s feel.
You’ll weigh scale considerations against room dimensions, use proportion play to achieve design harmony, and set motif spacing for pattern balance.
Plan repeat patterns and stencil layering to control visual impact and maintain aesthetic flow, so the stencil complements rather than overwhelms the space.
Pick Stencil Size and Repeat Pattern for Scale
When deciding on stencil size and how often to repeat the pattern, match the scale to the wall and the room: large motifs suit big, open walls while small repeats work better on narrow or busy walls.
You’ll plan stencil placement and pattern alignment to create rhythm; test a sample strip, adjust spacing, then commit.
- Delight at visible transformation
- Calm from balanced repeats
- Pride in precise execution
Walls That Stencil Well (and Which to Avoid)
Pick walls with smooth, well-prepared surfaces for the best stencil results—you’ll get crisp edges and fewer touch-ups on drywall, plaster, or primed wood than on textured or flaking surfaces.
Consider stencil friendly materials, wall texture considerations, paint adhesion factors, and light reflection effects.
Use color harmony strategies, pattern compatibility tips, wall preparation essentials, and smart stencil placement ideas to guide your choices.
How to Test Your Wall’s Paint Adhesion
Before you stencil, check that the wall is clean — wipe away dust, grease, and loose paint so the adhesive and paint can bond.
Then do a small adhesion test patch in an inconspicuous spot using the same paint and stencil method you’ll use. If the patch peels or flakes after it dries, prep or prime the surface before continuing.
Surface Cleanliness Check
Start by inspecting and cleaning a small area, then perform a simple adhesion test so you know the new stencil paint will stick.
Use surface preparation techniques and gentle wall cleaning solutions to remove dust, grease, and loose flakes. You’ll feel confident when the surface is sound and dry.
- Relief: the room finally looks cared for
- Excitement: stencil ideas feel possible
- Pride: your work will last
Adhesion Test Patch
Try a small adhesion test patch on an inconspicuous spot to confirm the stencil paint will bond to your wall.
Do surface preparation, clean and dry the wall material, then apply test patches to check paint compatibility and paint adhesion across varied wall texture.
If lifting occurs, consider primer application suited to the substrate.
Repeat until adhesion test passes before stenciling.
Measure and Map Your Stencil Layout
Measure the wall in feet and inches, then mark a simple grid so you can map the stencil pattern precisely.
Measure the wall in feet and inches, then draw a simple grid to map your stencil pattern precisely.
You’ll plan spacing for your stencil design, note obstacles like outlets, and guarantee wall preparation hasn’t left uneven areas.
Take photos and label lines so you won’t guess later.
- Excitement for the finished look
- Confidence in a flawless repeat
- Pride in your careful prep
Mark a Grid and Sight Lines for Even Repeats
Once you’ve mapped the overall layout, mark a clear grid and sight lines on the wall so you can align each stencil repeat precisely. Use a level and a chalk line to snap horizontal and vertical reference lines. Then, pencil in the grid intersections where each stencil will sit.
Next, verify grid alignment with measuring techniques. Check each sight line for design symmetry, and adjust marks before painting.
Tools for Wall Stenciling
Gathering the right tools before you begin will make stenciling faster, cleaner, and more accurate. You’ll focus on tool selection, wall prep, and safety precautions while considering stencil types and paint adhesion.
Good project planning reduces errors; design inspiration guides choices, and stencil maintenance keeps templates reusable.
- Pride in a perfect repeat
- Joy at a clean edge
- Confidence in lasting results
Best Paints for Wall Stenciling
You’ll want to choose paints that give crisp edges and good coverage without bleeding under the stencil.
Use acrylic or latex wall paints for easy application and cleanup, and pick a finish—flat, eggshell, or satin—based on how durable and washable you need the design to be.
Test a small sample first to confirm coverage and durability before stenciling the whole wall.
Best Paint Types
Choosing the right paint makes stenciling easier and gives you crisp, long-lasting results.
You’ll pick between acrylic paints, chalk paints, spray paints, texture paints, or eco friendly paints with low VOC options.
Consider premium finishes, paint sheens, color matching, and fast drying options so your patterns stay sharp.
- Excited by vibrant color
- Comforted by safe materials
- Proud of professional results
Finish And Durability
1 key factor after picking your paint is the finish and durability—these determine how the stencil will look over time and how well it resists scuffs, cleaning, and fading.
You should choose finish techniques that match surface compatibility, consider durability factors and wear resistance, use sealing methods and protective coatings, follow maintenance tips, and weigh longevity considerations so your stencil stays crisp and easy to care for.
Color Selection Tips for Depth and Contrast
While selecting colors, think about how light and shadow will work on your stencil: contrast creates clarity, and layered hues add depth.
When choosing colors, consider light and shadow—contrast sharpens, layered hues build depth and clarity.
You’ll use the color wheel to pick contrasting shades, employ layering techniques and varied paint finishes, and choose accent colors for mood impact. Aim for balance so your design feels vivid and intentional.
- Stir curiosity
- Spark warmth
- Evoke calm
How to Thin Paint for Crisp Stencil Edges
After you’ve settled on colors and finishes, get the paint consistency right so those layered hues and shadows stay sharp.
Test small mixes to adjust paint viscosity—add water or medium sparingly for latex, solvent for enamels. Aim for a slightly thicker, flowing cream that won’t run under edges.
For crisp stencil application, use a dry brush or low-pressure roller and minimal paint per pass.
Prepare Stencils: Cutting, Cleaning, and Reinforcing
Start by cutting your stencil cleanly. Then give it a quick inspection and reinforcement so it stays true to shape during painting.
You’ll choose stencil materials wisely, practice stencil techniques, and perform stencil maintenance to boost stencil durability and stencil aesthetics.
Check stencil placement and stencil alignment before each pass to fuel stencil creativity.
- Pride in craft
- Calm focus
- Joyful surprise
Tack Methods: Spray Adhesive vs. Painter’s Tape
When you’re ready to tack a stencil, choose between spray adhesive for edge-hugging hold or painter’s tape for quick, repositionable jobs; each gives different control, cleanup needs, and risk of bleed.
Use spray techniques sparingly for delicate edges and let tack become slightly tacky before applying.
For faster repeats, rely on tape precision, pressing edges firmly and checking alignment between patterns.
Mask Surrounding Areas to Protect Trim
Protect the trim and floors by masking off the areas around your stencil before you paint; tape cleanly along baseboards, crown molding, and window or door casings so paint can’t seep under or drip onto finished surfaces.
Use masking tape for edge sealing and trim protection, preventing paint overspray and messy edges. Be precise, press edges firmly, and remove tape carefully.
- Relief: your room stays pristine
- Confidence: clean, sharp borders
- Pride: flawless finishing
Stencil Techniques: Pounce, Roll, and Sponge
Now you’ll learn the pounce stitching technique, which uses a threaded needle or brush to gently tap paint through the stencil for crisp, controlled lines.
You’ll also compare roller versus sponge application to see which gives you smoother coverage or better texture without bleed.
Try both on a scrap board so you can pick the method that matches your design and paint.
Pounce Stitching Technique
Start by taping your stencil securely and use a pouncer or stiff-bristled brush to dab paint through the stencil in short, controlled motions; this “pouncing” gives you crisp edges and prevents paint from seeping under the stencil.
You’ll love how the pounce technique uses minimal stencil materials and steady rhythm to create precise, repeatable patterns.
- Joy of clean lines
- Calm, rhythmic process
- Pride in handmade detail
Roller Versus Sponge
If you enjoyed the steady rhythm of pouncing, you’ll find rolling and sponging offer different speeds and finishes to suit your project. You’ll choose roller technique for even coverage comparison and faster drying time; sponge application gives varied paint absorption and texture effects. Consider cleanup methods and desired finish styles before deciding.
| Roller | Sponge | Result |
|---|---|---|
| Fast | Variable | Smooth-to-textured |
| Even | Absorbent | Soft edges |
| Low mess | Artistic | Layerable |
Build Opaque Coverage Without Bleeding
1 simple trick to get crisp, opaque stencil coverage is to load your brush or roller sparingly and build thin layers, letting each dry before adding the next.
Use suitable opaque paint types and light stencil adhesive options to steady the template. Work patiently; thin coats prevent seepage and maintain edges.
Choose opaque paints and light adhesive, apply thin, patient coats to prevent seepage and keep crisp stencil edges.
- Pride in precise lines
- Calm from controlled progress
- Joy in polished results
Avoiding Common Bleeding Problems and Fixes
To prevent paint from bleeding under your stencil, keep the paint thin and worked down—thick globs are the main culprit.
Make sure the stencil lays flat by taping edges or using adhesive spray so paint can’t seep under.
If you still get bleed, blot excess paint and touch up crisp edges with a small brush.
Proper Paint Consistency
Getting your paint to the right consistency is the single most important step in preventing stencil bleed.
You’ll want a mix that’s thick enough to sit on the stencil without seeping under the edges yet fluid enough to transfer crisp detail.
Test paint thickness, adjust with medium, and refine application techniques for control.
- Delight at crisp edges
- Relief when fixes work
- Pride in clean repeats
Secure Stencil Edges
Four simple anchoring methods will keep your stencil edges flush against the wall so paint won’t bleed under them. You’ll use stencil edge techniques and securing stencils like low-tack tape, spray adhesive, clips, or weights, then dab lightly with a stippling brush. Fix small bleeds with a damp cloth or touch-up brush immediately.
| Calm | Confident |
|---|---|
| Secure | Joyful |
| Precise | Proud |
| Simple | Creative |
| Clean | Finished |
Make Seamless Stencil Joins
When you align stencil panels, aim for precise registration so the pattern reads as one continuous design rather than disconnected pieces.
You’ll use tight stencil alignment and gentle tapping to create seamless shifts, match motifs carefully, and avoid paint bleed. Check joins before moving on, and re-stamp lightly if needed.
- Delight in the perfect match
- Feel calm with clean edges
- Enjoy the polished result
Tips for Stenciling Corners, Outlets, and Switches
When you stencil near corners, line up the pattern so the edge continues cleanly around the angle.
Use painter’s tape and small masking pads to protect outlets and switches before you stencil.
Take your time with registration and masking so the motifs stay crisp and fixtures stay paint-free.
Aligning Stencil Edges
Corners, outlets, and switches demand a bit more planning than open wall space, so start by dry-fitting your stencil and marking reference points on the wall with a light pencil or removable tape.
Use stencil alignment techniques and edge sealing methods to prevent bleed; hold edges flat, use low-tack tape, and feather paint with a stippling brush.
- Calm pride
- Confident control
- Joyful finish
Masking Around Fixtures
After you’ve got the stencil edges aligned and sealed, focus on protecting fixtures so paint stays only where you want it.
Use masking tape for neat cuts around outlets and switches, checking stencil alignment and edge precision.
Remove plates, mask inner edges, and tape over screws for full fixture coverage.
Work with small brushes or pouncers to guarantee paint protection without smudging.
How to Stencil Over Textured or Bumpy Walls
Although textured walls can seem intimidating, you can still get crisp stencil results by choosing the right tools and technique.
Focus on wall preparation to improve stencil adhesion on bumpy surfaces, use textured techniques like stippling, and control paint application to avoid bleed.
Consider design considerations to simplify patterns and test on scrap before committing.
- Pride in adapting
- Calm from mastery
- Joy in transformation
Use Multiple Colors in One Stencil Design
When you want to add depth and interest, using multiple colors in a single stencil design gives you crisp contrast and layered effects without extra drawing skill. You’ll plan color blending techniques, mask areas, and dry between coats so hues stay distinct. Use precise brushes and low-tack tape to control edges; avoid complex stencil layering methods here.
| Tip | Benefit |
|---|---|
| Masking | Clean edges |
| Drying | Sharp layers |
Layer Stencils for Complex Motifs
If you liked the crisp separation of multiple colors, layering stencils lets you build complex motifs by stacking simple shapes and registering them precisely.
You’ll plan motif combinations, choose varied stencil sizes for pattern alignment, and use layering techniques to add texture variation.
Consider wall types and design inspirations to guide color blending and placement, so your layers feel intentional and striking.
- Pride in your handiwork
- Delight at evolved patterns
- Confidence in precise layers
Mix Custom Color Blends and Fades With Stencils
Start by mixing small test batches of paint so you can dial in subtle shifts without wasting materials; stencils make fades and custom blends reliable if you work in controlled, incremental steps. You’ll use color mixing and paint blending, apply gradient techniques and stencil layering, explore custom palettes and fade changes, and trust color theory for balanced results—embrace artistic freedom.
| Step | Tip |
|---|---|
| 1 | Test |
| 2 | Blend |
| 3 | Layer |
| 4 | Refine |
Stencil a Feature Wall or Accent Band
When planning a feature wall or accent band, you’ll pick a stencil scale that fits the room — large motifs for big walls, smaller repeats for narrow bands.
Measure and mark your layout so the pattern centers and lines up evenly.
Before you start stenciling, clean and prime the surface so paint adheres smoothly and edges stay crisp.
Choosing Pattern Scale
Although a large stencil pattern can energize a whole wall, you’ll want to match scale to the room and purpose: bold, oversized motifs suit a full feature wall in a large, sparsely furnished room, while smaller repeat patterns work better for a narrow accent band or a busy space.
Consider pattern proportion, visual impact, design cohesion, room atmosphere, color harmony, style compatibility, motif selection, aesthetic balance.
- Feel exhilarated by bold scale choices.
- Enjoy serenity with delicate repeats.
- Take pride in cohesive, harmonious design.
Preparing Wall Surface
Before you lay down the stencil, make certain the wall is clean, smooth, and dry so your pattern will sit flat and paint won’t bleed.
Do a wall assessment: note wall texture and repair imperfections with filler, sand smooth.
Use cleaning techniques to remove dust and grease, then apply wall priming suited for paint compatibility to guarantee strong paint adhesion and crisp stencil edges.
Quick Stenciling Patterns for Renters and Temporary Decor
If you’re renting or want decor you can change in an afternoon, quick stenciling patterns give you big impact with minimal commitment; think repeats, borders, and single-row motifs you can remove or repaint easily.
You’ll pick easy patterns and temporary designs that refresh rooms without damage. Apply with light coats, test alignment, and peel or repaint when ready.
- Cozy stripe repeats
- Playful scallop borders
- Minimal dot row accents
How to Scale a Stencil Design Into a Mural
Start by measuring your wall and drawing a light grid so you know exactly where each stencil repeat will sit.
Use the grid to scale sections of your design and keep repeats aligned as you work across the surface.
Check alignment frequently and adjust spacing to maintain a consistent mural pattern.
Measure And Grid
When you’re scaling a stencil into a mural, measure the wall and your stencil design precisely and create a proportional grid so you can transfer every element accurately.
You’ll map wall measurements to your grid layout, label intersecting points, and mark key features for confident painting. Use a pencil or chalk for temporary guides, keeping lines light and erasable.
- Thrill of seeing scale emerge
- Pride in precise marks
- Calm from orderly planning
Repeat And Align
As you move from grid to wall, repeat your stencil units methodically and align each pass to the guide marks so the pattern reads as one cohesive mural. You’ll check stencil alignment, keep consistent spacing, and manage paint load to guarantee crisp edges. Rely on pattern repetition, reference marks, and occasional leveling to scale the design confidently.
| Step | Tip |
|---|---|
| 1 | Mark |
| 2 | Align |
| 3 | Paint |
| 4 | Check |
| 5 | Repeat |
Fix Mistakes, Smudges, and Misalignments
Even a small smudge can ruin a crisp stencil edge, but you can usually fix it quickly without redoing the whole panel.
You’ll focus on fixing smudges, correcting misalignments, paint touch ups, stencil adjustments and pattern alignment while keeping paint consistency and doing stencil cleanup.
Prioritize wall preparation and error prevention to minimize damage repair.
- Frustration eased
- Confidence restored
- Pride reclaimed
When and How to Touch Up After the Paint Dries
Wait at least 24 hours for the stencil paint to fully cure, then inspect the edges and filled areas in good light for any smudges, gaps, or bleed.
For small bleeds or rough edges, gently scrape with a craft knife and touch up with a fine brush; for thin spots, add a light second coat with the stencil removed.
Keep your fixes minimal and let each touch-up dry before judging whether more work is needed.
When To Inspect
1 hour after the paint feels dry to the touch, inspect the stencil closely to catch any bleed, gaps, or uneven edges—use good light and a magnifying glass if needed.
Consider wall condition and paint type; gentle tests reveal adhesion and color match. If you spot issues, mark them for later touch-up.
- Pride at a crisp edge
- Relief when flaws disappear
- Joy in a finished look
Fixes For Common Flaws
Once the paint’s fully dry, you’ll want to address any bleeds, gaps, or uneven edges right away—small flaws are easier to fix than large ones.
Inspect common issues, note design mistakes, and use troubleshooting techniques: gentle sand, correct paint consistency, and precise paint touch ups with a fine brush.
Make stencil adjustments for pattern matching and alignment, and resolve texture challenges from poor wall preparation.
Seal and Protect Stenciled Walls for Longevity
After your stencil is fully dry, you should seal it right away to lock in the design and guard against scuffs, moisture, and fading; choose sealant options and protective finishes that suit traffic.
Follow maintenance tips, and use longevity strategies for wall care. Consider environmental factors and humidity control to aid damage prevention.
- Pride in preserved art
- Calm knowing it’s protected
- Joy in lasting beauty
How to Remove or Repaint Over a Stencil Pattern
If you’re ready to change the look of a stenciled wall, you can either remove the pattern or repaint over it—both are straightforward with the right prep.
For stencil removal techniques, test a small area, use gentle solvent or light sanding, then clean.
For repainting strategies, prime first, apply thin coats, and feather edges for a seamless finish.
Budget-Friendly Stenciling: Materials and Shortcuts
Stenciling on a budget is totally doable with a few smart choices and DIY shortcuts that don’t sacrifice quality.
You’ll use budget stenciling and creative techniques, prioritize stencil supplies and cost effective tools, explore paint alternatives and decorative options, and streamline material sourcing for stencil patterns with easy methods.
- Delight in affordable DIY shortcuts.
- Feel proud using cost effective tools.
- Love creative decorative options.
Time Estimates: How Long Each Stencil Project Takes
Most small stencil projects take between 1 and 3 hours from prep to cleanup, and planning your steps will keep you on schedule.
For larger walls or repeating patterns expect multiple sessions; measure areas, factor drying and touch-ups, and set realistic stencil project timelines.
Knowing average completion times helps you allocate weekend slots, prevent rushes, and finish with crisp, consistent results.
Safety Tips and Ventilation for Indoor Painting
Because paint fumes can build up quickly in enclosed spaces, you should prioritize ventilation and protective gear before you unroll your stencil.
Focus on workspace preparation: open windows, set fans for proper ventilation, and wear safety gear and protective equipment to limit exposure to paint fumes.
Stay mindful of air circulation and take breaks to breathe fresh air.
- Relief
- Confidence
- Calm
Clean and Store Reusable Stencils
After you’ve aired out the room and cleaned your brushes, take time to clean and store your reusable stencils properly so they’ll last for many projects.
You should remove paint with warm soapy water or a gentle solvent, pat dry, and flatten while drying.
For stencil maintenance, label and stack between sheets or hang in a folder. Proper storage prevents warping and extends reuse.
Project Planning Checklist Before You Start
Before you pick up a brush, map out the project so you know what materials, time, and surface prep you’ll need; this prevents surprises and keeps the job efficient.
You’ll plan wall prep, choose stencil types and pattern selection, pick paint techniques, gather design inspiration, and set a clear project timeline to stay focused and calm.
- Excited anticipation
- Confident control
- Proud completion
Photo and Styling Tips to Showcase Your Stenciled Wall
When you finish stenciling, photograph and style the space to highlight the pattern and show how it lives in a room.
Use strong photo composition and angle variations to capture texture emphasis.
Apply styling techniques: choose backdrop selection that enhances color contrasts, control lighting effects for depth, and arrange props with intentional prop arrangement so the stencil reads clearly and feels lived-in.
Common Beginner Mistakes and How to Avoid Them
If you’re new to stenciling, it’s easy to make a few predictable mistakes—too much paint, poor surface prep, and inconsistent pressure—that will blur edges and waste time.
You’ll learn to control paint bleeding, check stencil placement, and prep surfaces. Apply light, layered coats and secure templates to avoid shifts.
- Frustration when lines smudge
- Regret over ruined walls
- Pride after clean results
Where to Find Stencils, Custom Cutters, and Inspiration
Now that you’ve got control over paint and placement, it’s time to pick the right stencil and tools to bring your design to life. Explore online marketplaces, local shops, and DIY resources for stencil sources, custom designs, creative patterns, unique textures, and seasonal themes. Seek design ideas and artistic influences to personalize projects.
| Source | Type | Tips |
|---|---|---|
| Etsy | custom cutter | check reviews |
| Hardware | local shops | touch materials |
| design ideas | save boards | |
| YouTube | DIY resources | watch tutorials |
| Society6 | creative patterns | verify size |
Frequently Asked Questions
Can Stenciling Damage Historic or Lead-Painted Surfaces?
Yes — you can damage historic or lead-painted surfaces if you stencil carelessly. You should use surface protection, test small areas, avoid sanding, and use containment measures so you don’t disturb lead paint or fragile finishes.
How Do I Stencil Outdoors on Exterior Siding or Brick?
Like a breeze, you’ll prep surfaces, tape stencils, and dab—use stencil techniques suited to outdoor materials like exterior acrylics and masonry paint; sand and prime porous siding or brick, seal finished work to protect it.
Can I Stencil Over Wallpaper Safely Without Removing It?
Yes — you can, but it depends on wallpaper types and condition. You’ll use gentle stencil techniques, test adhesion, seal loose seams, use light dabbing, and choose flexible paint to avoid bubbling or peeling for a durable finish.
What’s the Best Way to Stencil Around Built-In Shelving or Cabinets?
Start by masking edges, then pause—visualize crisp patterns hugging corners. You’ll use low-tack tape and a fingertip roller, dabbing light coats to follow shelf edges and cabinet corners, lifting stencil carefully for clean lines.
How Do I Estimate Paint Quantity for Large-Scale Stencil Murals?
You’ll estimate paint quantity by measuring mural area, factoring coverage per gallon and waste, and using a paint calculator to convert square feet to gallons; apply mural techniques like test swatches and multiple thin coats to refine your estimate.
Conclusion
You’ve learned the gentle art of stenciling—a tidy shortcut to charming walls that won’t demand a long-term commitment. Whether you’re easing into weekend projects or polishing a pro portfolio, stencils let you flirt with pattern and color without a full-blown overhaul. Take your time, trust the guide lines, and treat slip-ups as part of the process. In no time you’ll have a room that quietly says you cared enough to make it beautiful.