How to Wash Dried Paint Brushes and Restore Them
You can often save stiff, dried paint brushes by first identifying the paint type, then soaking them in the right solvent—warm soapy water or vinegar for water‑based paints, rubbing alcohol for stubborn acrylic, mineral spirits for oils, and lacquer thinner for lacquer. Gently work and comb the bristles, rinse, reshape, and dry upright. Trim stray hairs and oil wooden handles if needed. Follow these steps and you’ll find tips to restore most brushes and avoid replacements.
Quick Answer: Can Dried Paint Brushes Be Saved?
Wondering whether you can rescue brushes with dried paint? Yes — often you can, depending on paint type and how long it’s dried.
You’ll use targeted solvents, gentle agitation, and patience. For effective brush care and ongoing paint maintenance, assess bristle condition first; flexible bristles and intact ferrules usually respond well.
Severely hardened brushes may be beyond repair.
How This Guide Helps You Restore Dried Brushes
This guide shows you quick assessment steps so you can judge a brush’s condition without guessing.
It then walks you through effective restoration methods tailored to the damage you find.
Quick Assessment Steps
Start by quickly checking bristle condition, ferrule integrity, and how firmly the paint’s bonded—these simple observations tell you whether a brush needs deep soaking, reshaping, or replacement.
Next, note bristle stiffness, split ends, and handle looseness. Match your observations to brush maintenance habits and cleaning frequency to decide if repair is viable or if replacement is more practical.
Effective Restoration Methods
Rescue your dried brushes with targeted methods that match the damage you found during the quick assessment: gentle rinses and mild solvents for sticky paint, longer soaks or heat for harder clumps, and careful reshaping to restore tip alignment.
Use brush maintenance routines, cleaning techniques, restoration tools, and drying methods; prioritize paint removal, bristle care, eco solutions, and solvent alternatives.
- Start with gentle agitation
- Soak per material
- Use combs and picks
- Air-dry upright
Identify Whether Paint Is Water‑Based or Oil‑Based
Wondering whether your dried paint is water‑based or oil‑based? You’ll use simple paint identification techniques: examine sheen, smell, and drying hardness, and try a rubbing test with water and solvent.
A clear paint characteristics overview helps—water‑based softens with water; oil‑based resists water but softens with mineral spirits.
That lets you choose the right cleanup and restoration method for brushes.
Tell Acrylic, Latex, Enamel, Shellac, and Oil Apart
To tell acrylic, latex, enamel, shellac, and oil paints apart, look at their basic characteristics like texture, flexibility, and sheen.
You can also use a solvent compatibility guide—water and mild soap work on acrylic and latex, while mineral spirits or alcohol are needed for oil and shellac, and enamel may need stronger solvents.
Finally, check drying time and finish: fast-drying, plastic-like films usually mean acrylic/latex, glossy hard films suggest enamel or oil, and shellac dries quickly to a brittle, amber finish.
Paint Type Characteristics
Different paint formulas behave in distinct ways, so knowing the traits of acrylic, latex, enamel, shellac, and oil helps you choose the right cleaning method and solvent.
You’ll consider paint adhesion and brush maintenance when evaluating drying, flexibility, and residue.
Identify stubborn binders, fragile filaments, and tacky films to plan restoration.
- Drying speed
- Flexibility
- Residue hardness
- Film tack
Solvent Compatibility Guide
When you’re matching solvents to dried paint, think about chemical compatibility and how each paint’s binder responds: acrylic and latex swell with water or ammonia; enamel and oil need mineral spirits or turpentine; shellac dissolves in denatured alcohol.
Choose solvent types accordingly, test on bristles, and apply progressive cleaning techniques—soak briefly, agitate, rinse—until residue lifts without damaging ferrule or filaments.
Drying And Finish Clues
Although dried paint can look similar at a glance, you can learn to tell acrylic, latex, enamel, shellac, and oil apart by noting how they dry, the finish they leave, and how they react to touch or solvents.
Use drying techniques and finish application clues:
- Acrylic: rapid tacky dry, matte to satin.
- Latex: flexible, chalky finish.
- Enamel: hard, glossy.
- Oil/shellac: slow cure, solvent reactivates.
When a Brush Is Beyond Practical Repair
1 clear sign that a brush is beyond practical repair is when its bristles stay clumped, misshapen, or stuck to the ferrule after every attempt to clean them.
You’ll face restoration challenges like brittle filaments, loosened ferrules, or mold. Accept replacing the tool, but note brush longevity tips: buy quality, clean promptly, and store properly to avoid repeating the loss.
Safety Basics Before Cleaning Brushes
You’ve decided some brushes can’t be saved and will be replaced; before you start cleaning the rest, take a moment to set up safe practices.
You should follow basic safety precautions and organize cleaning equipment at a stable workspace. Keep spills contained, separate solvents from flammables, label containers, and dispose of waste properly.
- Clear, well-lit area
- Spill tray or towels
- Dedicated solvent container
- Waste disposal bag
Protective Gear and Ventilation for Solvent Use
Put on chemical-resistant gloves before you handle solvents to protect your skin.
Make sure you work with good airflow—open windows, run a fan, or use a ventilated area—to avoid inhaling fumes.
If there’s any risk of splashes or strong vapors, wear safety goggles and a suitable respirator.
Wear Chemical-Resistant Gloves
When you work with solvents to revive dried paint brushes, wear chemical-resistant gloves to protect your skin from irritation and absorption of harmful compounds.
Choose glove types based on solvent compatibility and thickness, inspect for tears, and follow safety precautions to avoid contact. Dispose or decontaminate properly.
- Nitrile for many solvents
- Butyl for aggressive chemicals
- Neoprene for general use
- Replace if damaged
Ensure Adequate Airflow
Because solvents release fumes that can irritate your eyes and lungs, make sure you work where fresh air circulates well.
Position a fan or open windows to boost airflow importance, directing fumes away from you.
Keep brushes upright during drying and use covered brush storage for cleaned tools to prevent lingering solvent odor and reduce vapor buildup in your workspace.
Use Eye And Respiratory Protection
If you’re working with solvents to loosen dried paint, wear eye protection and a respirator to prevent irritation and long-term harm—goggles that seal around your eyes stop splashes, and a respirator with organic-vapor cartridges filters solvent fumes better than a cloth mask.
You should also:
- Choose goggles that fit snugly.
- Use cartridges rated for solvents.
- Work with ventilation.
- Keep distance from others for respiratory safety.
Tools and Supplies You Need
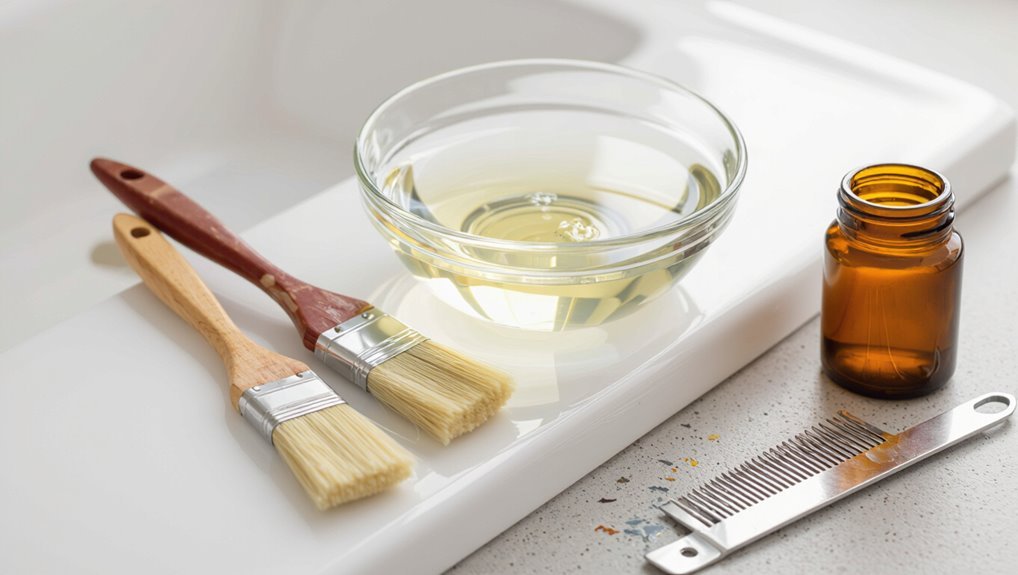
You’ll need a handful of basic items to rescue dried brushes: a solvent or remover matched to your paint type (mineral spirits for oil, paint thinner or brush cleaner), a stiff brush comb or old toothbrush to loosen dried bristles, a container for soaking, disposable rags or paper towels, gloves, and eye protection.
Also grab a gentle soap, a wooden stick for reshaping, and a jar with lid.
Solvent Guide: Water, Soap, Alcohol, Mineral Spirits
If you used water-based paint, start with warm water and a bit of dish soap to loosen dried bristles before rinsing thoroughly.
For oil-based paints you’ll need a stronger solvent—use mineral spirits or turpentine and follow safety precautions like gloves and ventilation.
Rubbing alcohol can help for tacky spots or hybrid paints, but choose the solvent that matches the paint type.
Water-Based Solvent Use
Water, along with common household soaps and a touch of alcohol, will be your first line of defense for cleaning dried paint brushes used with water-based paints.
Adjust water temperature to warm, match cleaning to brush materials, and swish gently to loosen paint. Rinse thoroughly and reshape bristles.
- Warm water aids softening
- Mild soap protects fibers
- Isopropyl alcohol for stubborn spots
- Gentle agitation only
Oil-Solvent Selection
1 practical rule: match the solvent to the paint type and brush construction—oil-based paints call for stronger solvents than water-based ones, and natural-hair brushes tolerate harsher solvents less well.
Choose mineral spirits for heavy oil, alcohol for shellac, mild soap for light cleanup.
Prioritize solvent effectiveness while minimizing damage; that balance preserves brush longevity and restores usable bristles efficiently.
Which Solvent to Use for Each Paint Type
Choosing the right solvent depends on the paint’s chemistry — oil, acrylic, enamel, or lacquer — because each binds differently to bristles and requires a specific remover to soften and dissolve the film.
For solvent selection, check paint compatibility and use the correct chemistry so you won’t damage brushes.
- Oil: mineral spirits or turpentine
- Acrylic: water or specialty acrylic remover
- Enamel: enamel thinner
- Lacquer: lacquer thinner
Non‑Toxic and Eco‑Friendly Solvent Options
You can often avoid harsh chemicals by using household, eco-friendly options to soften and remove dried paint.
Try a vinegar soak with a baking soda scrub for water-based paints, or use vegetable oil to loosen stubborn synthetic or oil-based residues before washing.
For tougher jobs, citrus-based solvents offer a biodegradable, low-toxicity alternative that’s effective and easy to rinse.
Vinegar And Baking Soda
One simple, non‑toxic method uses white vinegar and baking soda to soften and dissolve dried water‑based paint so you can restore brushes without harsh chemicals.
You heat vinegar, soak bristles, then sprinkle baking soda to help lift residue. You’ll rinse and reshape bristles, repeating as needed.
- vinegar benefits: softens paint
- baking soda: gentle abrasive
- repeat soak cycles
- rinse thoroughly
Vegetable Oil Techniques
If you’re looking for a gentle, non‑toxic way to loosen dried water‑based paint, vegetable oils—like olive, canola, or sunflower—work as effective, eco‑friendly solvents that won’t harm bristles.
Apply oil, let it soak, then gently comb and rinse with warm soapy water.
You’ll appreciate vegetable oil benefits: it softens paint, lubricates fibers, and serves as an alternative lubricant before final cleaning.
Citrus-Based Solvents
After softening stubborn paint with vegetable oil, citrus‑based solvents offer a stronger yet still eco‑friendly option for breaking down dried water‑based and some alkyd paints.
You’ll appreciate citrus benefits: natural d-limonene lifts finish, smells mild, and biodegrades faster.
Observe solvent safety: wear gloves, work ventilated, and test on a small area.
- biodegradable
- mild odor
- effective on alkyd
- safe disposal
How Bristle Type Changes Your Cleaning Approach
Because bristle material determines what solvents and scrubbing methods will work, you should match your cleaning approach to the brush type.
Consider bristle flexibility and bristle shapes: stiffer synthetic bristles need firmer scrubbing for paint adherence removal, while soft natural hairs require gentler solvents to preserve bristle durability.
Adjust cleaning frequency and bristle maintenance routines to maximize cleaning efficiency and brush longevity.
Check Ferrules and Handles for Damage
Before you start cleaning, check the ferrule for any rust that could spread to the bristles.
Run your fingers along the handle to feel for splits or soft spots that water could worsen.
If you find damage, repair or replace the brush to avoid wasting effort on a compromised tool.
Inspect Ferrules For Rust
When you pick up a brush, give the metal ferrule and the handle a quick once-over for rust, loose fittings, or cracks; these issues can trap paint, weaken the brush, and make cleaning ineffective.
Inspect ferrules for pitting, flakes, or discoloration as part of ferrule maintenance and rust prevention. If light corrosion appears, remove it and protect the metal.
- Check for flakes
- Probe for looseness
- Look for pitting
- Note discoloration
Check Handles For Splits
Check the handle for splits, cracks, or soft spots that could let paint seep in or cause the brush to break while you’re working.
Perform a quick split inspection along the grain and near the ferrule. If you find damage, sand rough edges, apply wood glue or filler, clamp until set, then seal with varnish.
Good handle care extends brush life.
Pre‑Soak to Soften Dried Paint
Soak the brush to loosen and rehydrate hardened paint before you try to remove it. You’ll gain pre-soak benefits: softened bristles, easier paint removal, and less damage when you work.
Use a gentle solvent or conditioner safe for the brush and material. Monitor time and swish gently.
- Softens bristles
- Reduces scrubbing
- Protects ferrule
- Speeds recovery
Hot Water and Dish Soap Soak for Water‑Based Paints
First, warm a bowl of water to just-hot (not boiling) so you can loosen dried, water‑based paint without damaging bristles.
Add a few drops of dish soap and swish the brush gently to work the soap into the hairs and break up paint.
Rinse under running warm water while splaying the bristles with your fingers to flush out loosened paint.
Warm Water Prep
For water‑based paints, heat a sink or basin with comfortably hot tap water and add a few drops of dish soap to break the paint’s surface tension so it releases from bristles more easily.
You’ll use warm water benefits and simple brush soaking techniques to loosen dried paint before further treatment.
Follow this gentle prep:
- Use comfortably hot, not scalding, water
- Submerge ferrule area first
- Agitate bristles gently
- Short, timed soaks only
Dish Soap Technique
Warm water and a few drops of dish soap will break up dried water‑based paint without harsh chemicals, so start by filling a basin with comfortably hot tap water and mixing in the soap until it’s sudsy.
Submerge the brush, agitate gently, and let it soak 15–30 minutes.
You’ll learn dish soap benefits for loosening paint; this simple dish soap technique ranks high among practical brush cleaning techniques.
Gentle Bristle Rinse
Soak the bristles in hot, soapy water and let gravity and gentle agitation do the work: submerge the brush tip-first, swirl it a few times, then hold it upright to let loosened paint wash away.
You’ll focus on bristle care and proven cleaning techniques to avoid damage and restore flexibility.
- Use hot water, not boiling
- Swirl gently, don’t scrub
- Rinse until clear
- Reshape before drying
Use Rubbing Alcohol for Stubborn Acrylic Residue
Reach for rubbing alcohol when lukewarm water and soap can’t budge stubborn acrylic clumps; it dissolves dried paint quickly and safely without rough scrubbing.
Pour isopropyl alcohol into a jar, soak bristles for a few minutes, then gently work residue out with a comb or fingers.
Rinse, shampoo, and reshape. This paint residue removal tip complements other brush care techniques for lasting tools.
Mineral Spirits Method for Oil‑Based Paints
If you worked through acrylic with rubbing alcohol, you’ll find oil‑based paints need a different approach: mineral spirits break down alkyd and oil binders without wrecking bristles.
You’ll soak, swish, and comb gently to lift dried oil paints. Use gloves and ventilation, then shampoo and reshape bristles for full brush cleaning and restoration techniques.
Soak, swish, and comb gently to lift dried oil—use gloves, ventilate, then shampoo and reshape bristles.
- Soak briefly
- Swish to loosen
- Comb out residue
- Rinse and reshape
When to Use Acetone or Lacquer Thinner
If mineral spirits won’t cut through the dried finish, you’ll need stronger solvents like acetone or lacquer thinner.
Use acetone for fast-drying lacquers and lacquer thinner for tougher industrial coatings—always match the solvent to the paint type.
Work outdoors or in a well‑ventilated area and wear gloves and eye protection because these solvents are highly flammable and toxic.
When Solvents Are Needed
While water and soap handle most cleanup, you’ll need stronger solvents like acetone or lacquer thinner when paint’s fully cured, the bristles are fused, or stubborn film won’t come off with soaking and agitation.
Use solvents sparingly, test compatibility, and consider solvent alternatives if concerned about fumes or damage.
- Test a small area first
- Work in ventilation
- Wear gloves and eye protection
- Dispose of rags safely
Paint Type Compatibility
Because different paints cure to different chemistries, you’ll want to match the solvent to the paint type before you reach for acetone or lacquer thinner. Use paint compatibility basics to decide: acetone for cured epoxies, lacquer thinner for nitro/lacquers, and mineral spirits for oils. Follow brush maintenance tips to test small areas first and avoid damage.
| Paint Type | Solvent | Notes |
|---|---|---|
| Acrylic | Water/alcohol | Softens |
| Oil | Mineral spirits | Cleans |
| Lacquer | Lacquer thinner | Best |
| Epoxy | Acetone | Strong |
| Varnish | Turpentine | Gentle |
Safety And Ventilation
Now that you know which solvents match which paints, pay close attention to safety and ventilation before reaching for acetone or lacquer thinner.
You’ll use proper workspace preparation and protective gear for brush cleaning and paint removal. Respect solvent safety and chemical hazards, and follow tested restoration techniques.
- Open windows and use fans
- Wear gloves and eye protection
- Use respirator if needed
- Keep solvents sealed
Mechanical Loosening: Combing and Agitation
Start by physically loosening the crusted paint with gentle combing and agitation: use a wire brush, brush comb, or even an old fork to work the bristles apart and break up hardened bits, then agitate the brush in solvent or warm, soapy water to dislodge loosened fragments. You’ll comb brush carefully, apply agitation techniques, and monitor paint residue; schedule cleaning frequency for brush maintenance.
| Tool | Action | Tip |
|---|---|---|
| Comb | Separate bristles | Gentle strokes |
| Solvent | Soak briefly | Protect ferrule |
| Water | Agitate | Use warm soap |
Use a Wire Brush, Comb, or Cleaner Tool Safely
Reach for a wire brush, comb, or purpose-made cleaner and work deliberately to avoid damaging bristles or the ferrule: hold the brush by the handle, use short, controlled strokes to tease out dried paint, and keep the tool angled so you never force metal into the bristle tips.
Follow wire brush safety and combing techniques; observe cleaner tool precautions and use proper brush restoration tools.
- Protect ferrule and bristles
- Tap loosened flakes away
- Work from tip to heel
- Wear gloves and eye protection
How to Restore Hardened Bristles Overnight
If brute-force scraping didn’t revive the bristles, you can revive them overnight with a gentle soak that won’t harm the ferrule or handle.
Mix a mild cleaning solution—commercial brush cleaner or diluted white vinegar—with warm water. Submerge bristles, avoiding ferrule, for restoration tips on paint removal.
Rinse, reshape, and air-dry.
These preservation methods support bristle care, brush maintenance, cleaning techniques, and brush longevity.
Quick Rescue Between Coats
When you need a fast fix between coats, give the brush a quick solvent dip to loosen tacky paint.
Gently massage the bristles to work the solvent through without splaying them.
While the bristles are still damp, reshape and recondition the brush so it’s ready for the next pass.
Quick Solvent Dip
Rescue your brush in minutes by giving it a quick solvent dip between coats: briefly submerge the bristles in the appropriate solvent (water for latex, mineral spirits or brush cleaner for oil-based paints), swish gently to loosen tacky paint, then blot or spin the brush dry so it’s ready to reapply without waiting for a full clean.
- Know solvent types for each paint
- Protect ferrule and handle
- Limit dip time to seconds
- Store temporarily in airtight wrap for brush care
Gentle Bristle Massage
Loosen dried paint by gently massaging the bristles with your fingers or a soft brush comb—work from the ferrule outward to avoid splaying.
Use gentle pressure and short strokes, removing flakes and softening tacky areas. Rinse intermittently in solvent or water appropriate to the paint.
This quick bristle care step complements other cleaning techniques and keeps brushes usable between coats without heavy reconditioning.
Recondition While Damp
After you’ve loosened obvious flakes and softened tacky areas, recondition the brush while it’s still damp to keep it ready for the next coat.
Use quick brush maintenance steps and targeted cleaning techniques to preserve shape and performance between sessions.
Lightly comb, reshape, and apply conditioner or mild solvent; blot excess, then store bristles upright to dry.
- Comb bristles
- Reshape tip
- Apply conditioner
- Blot excess
Reshape Bristles and Trim Stray Hairs
Start by gently coaxing the bristles back into their original shape with your fingers or a brush comb. Then inspect for stray hairs that splay or stick out.
After bristle conditioning, reshape with a paper cone or template and let dry flat or hanging. Trim only obvious stray hairs with sharp scissors, maintaining evenness.
This brush maintenance preserves performance and extends life.
Clean Ferrules and Prevent Rust or Loosening
Check the metal ferrule for dried paint and rust buildup, because keeping it clean prevents bristle loss and loosening.
You’ll remove crust with a soft brush, soak in mild solvent briefly, and dry thoroughly to avoid corrosion. Regular ferrule maintenance guarantees secure glue and performance; apply light oil for rust prevention if stored long-term.
- Inspect edges
- Clean crevices
- Dry fully
- Lightly oil
Remove Paint From Handles Without Harming Wood
Start by prepping your work area with drop cloths and good lighting so you can see paint build-up without risking spills.
Use mild, wood-safe solvents like mineral spirits or a dedicated brush cleaner and test a small spot first to avoid stripping the finish.
After removing paint, wipe the handle, let it dry, and apply a light coat of oil or varnish to protect and refresh the wood.
Prep The Brush Area
1 quick pass with the right tools makes removing paint from wooden handles easy without damaging the finish.
Prep your brush area and protect surfaces, combine brush cleaning with good workspace organization, and gather tools before you start.
Keep rags, a soft scraper, mild cleaner, and a container handy.
- Clear surface
- Protective covering
- Tool layout
- Waste bin nearby
Gentle Solvent Choices
When removing dried paint from wooden handles, pick a gentle solvent that softens paint without stripping the finish—options like mild dish soap with warm water, rubbing alcohol, or a citrus-based remover work well and are less likely to harm wood than strong solvents.
Test a small area, work gently with a soft cloth or brush, and consider environmental impact and solvent safety when disposing and ventilating.
Protect And Refinish Wood
Protect and refinish wooden brush handles by removing paint carefully, then sealing and restoring the wood so it stays strong and looks good.
You’ll strip paint with a mild solvent or fine sanding, avoid water soaking, and apply oil or varnish for wood protection and finish restoration.
Restore shape and grip, then buff to shine.
- Use mild solvent
- Sand gently
- Apply oil/varnish
- Buff finish
Deep‑Clean Natural‑Hair Brushes Safely
Natural-hair brushes need gentler care than synthetics, so you’ll use milder solvents, lukewarm water, and careful reshaping to remove dried paint without damaging the bristles.
Start with diluted soap or brush cleaner, soak briefly, gently work bristles with fingers, rinse and repeat as needed.
Begin with diluted soap or brush cleaner, briefly soak, gently work bristles, rinse and repeat as needed.
Pat dry, reshape, and store flat.
These brush maintenance and cleaning techniques preserve loft, flexibility, and lifespan.
Revive Synthetic Brushes Without Melting Them
If you treated your natural‑hair brushes gently, you’ll need a different approach for synthetic ones — they tolerate stronger solvents and heat less well.
You should use gentle solvents, lukewarm water, and careful reshaping to avoid melting synthetic materials while restoring bristle alignment.
Prioritize proper brush care and patience.
- Use mild solvent
- Avoid boiling water
- Rinse thoroughly
- Reshape while damp
When Commercial Brush Restorers Make Sense
When you’re facing brushes with paint that won’t budge after solvents and soaking, commercial brush restorers can save time and salvage expensive tools.
Use them when brushes are high-value, heavily encrusted, or when restoration frequency justifies the cost.
Best for high-value or heavily encrusted brushes—or when you restore often enough to justify the expense.
Follow product instructions, wear gloves, and test on a single brush first.
They complement regular brush maintenance, not replace it.
Using an Ultrasonic Cleaner (Optional)
Ultrasonic cleaners can rescue brushes that soaking alone won’t fully restore by using high-frequency sound waves to dislodge dried paint from between bristles and ferrules.
You place brushes in a mild solvent, run short cycles, and inspect frequently. Ultrasonic cleaning complements regular brush maintenance but isn’t a cure-all.
- Use mild solvent
- Short cycles
- Secure ferrules
- Rinse thoroughly
Household Helpers: Vinegar, Fabric Softener, Etc
Besides specialty solvents, common household items like white vinegar, fabric softener, and even dish soap can help loosen dried paint and soften bristles for easier cleaning. You’ll soak tips in warm vinegar to enjoy vinegar benefits, or a diluted fabric softener mix to relax bristles, then rinse and comb.
| Item | Effect |
|---|---|
| Vinegar | Dissolves residue |
| Fabric softener | Softens bristles |
| Dish soap | Cuts grease |
| Water | Rinse medium |
How Long to Soak Brushes by Paint and Solvent
If you’re dealing with dried paint, match the soak time to the paint type and solvent:
Water-based paints usually loosen in 15–30 minutes with warm soapy water or vinegar, while acrylic and latex that’ve baked on may need several hours or an overnight soak in acetone or denatured alcohol.
Oil-based enamel often requires mineral spirits or paint thinner for a few hours to overnight.
- Note soaking duration per paint
- Pick solvent effectiveness first
- Short soaks for soft residues
- Longer soaks for cured films
Signs Your Cleaning Is Working and When to Stop
When you start rinsing and combing bristles, watch for paint to slough off in flakes or thin ribbons and for the water or solvent to run clear—those are the clearest signs your cleaning is working.
You’ll also feel bristles regain flexibility and see no stubborn color.
Use proper cleaning techniques, follow brush maintenance and restoration tips, and clean painting supplies until performance matches new.
Troubleshooting Persistent Paint Clumps
Although dried paint clumps can feel impossible to remove, you can dislodge and dissolve most of them with the right tools and solvents. Use targeted paint removal techniques and steady scrubbing, then rinse thoroughly.
Follow these brush care tips to avoid recurrence:
- Soft-bristle combing
- Solvent soak timing
- Gentle agitation
- Reshape and air-dry properly
How to Test a Restored Brush on Scrap Material
Pick scrap material that matches the surface and paint type you’ll be using so the test is meaningful.
Run a few controlled strokes to check bristle response and paint flow.
Inspect the coverage for evenness, streaks, or missed spots before you start your main project.
Choose Appropriate Scrap Material
Before you test a restored brush, choose scrap material that matches the paint and surface you’ll be working on so you get realistic feedback.
For accurate scrap selection, consider common material types and textures. Pick pieces that replicate scale, porosity, and finish.
Test on scraps, not project surfaces, to avoid surprises.
- plywood
- primed drywall
- metal panel
- plastic trim
Apply Test Strokes
Start by loading the brush with the same amount of paint you’ll use on the job.
On scrap material, make several controlled strokes—long, short, and edge passes—to check tip shape, flow, and handling.
You’ll confirm brush care success and that cleaning techniques restored flexibility.
Note splaying, shedding, or drag; repeat cleaning if performance still feels off before starting the real work.
Inspect Paint Coverage
Once you’ve made a few test strokes, examine the scrap closely to judge coverage: you want even pigment laydown with no streaks, blotches, or visible gaps where the bristles aren’t carrying paint.
Check edge control, uniformity, and tip responsiveness to confirm paint application and brush maintenance success.
- Smooth, consistent coverage
- No stray hairs or gaps
- Clean edge lines
- Responsive tip action
Prevent Bristle Splaying and Loss After Cleaning
If you want your brushes to keep a fine edge and shed less after cleaning, handle them gently and reshape the bristles while they’re still damp.
Use proper bristle care: comb fibers with a wide-tooth brush, remove trapped paint with targeted cleaning techniques, and avoid twisting.
Store heads upright temporarily and check ferrules for looseness to prevent future splaying and loss.
Drying Restored Brushes Properly
Once your brushes are clean, stand them vertically with the bristles facing up to keep water from seeping into the ferrule.
Make sure each brush has enough space so air can circulate around the bristles for even drying.
Don’t lay brushes flat or hang them bristle-down, as that can warp the shape and loosen the glue.
Position Brushes Vertically
After rinsing and reshaping the bristles, stand your brushes upright with the bristles facing up so water won’t pool at the ferrule and loosen the glue.
You’ll protect the handle and maintain proper brush orientation for longer life. Use vertical storage to keep shapes intact and prevent damage.
- Prevents ferrule water damage
- Keeps bristles aligned
- Saves drying time
- Eases access
Ensure Bristles Airflow
Give each brush plenty of airflow by laying them flat on a clean, dry surface or suspending them so the bristles hang freely, which prevents trapped moisture at the ferrule and speeds drying.
You’ll check bristle care by gently reshaping tips and rotating brushes for even drying.
Maintain airflow importance: avoid crowded piles, keep a dust-free spot, and don’t seal brushes until fully dry.
Short‑Term vs Long‑Term Brush Storage
When you’re not using brushes for a day or two, short‑term storage keeps bristles shaped and paint from hardening; long‑term storage protects the ferrule and handle during weeks or months of inactivity.
You should choose storage based on frequency: short term for frequent use, long term for extended gaps.
Consider these tips:
- Store upright with bristles up for short term
- Wrap loosely in paper
- Use sealed tubes for long term
- Keep dry, cool location
Daily Cleaning Routine to Prevent Drying
Short-term storage habits help, but daily cleaning is what really prevents paint from drying in the bristles; spend a few minutes after each session to keep brushes ready.
You’ll rinse until water runs clear, reshape bristles, and use mild solvent when needed.
Establish daily maintenance and proper cleaning frequency to support brush preservation.
Combine paint storage awareness with consistent brush care to extend usability.
Budget Habits That Extend Brush Life
A few simple, low-cost habits will make your brushes last far longer: rinse thoroughly after each use, store them upright or flat with bristles supported, and rotate between several brushes so none wear out too quickly.
You’ll use brush care, cleaning techniques, and maintenance tips that are budget friendly, frugal practices, and longevity strategies to achieve brush storage and cost savings.
- Rinse promptly
- Use mild soap
- Support bristles
- Rotate brushes
When Replacement Is Cheaper: Cost‑Benefit Guide
Keeping up those budget habits will stretch brush life, but there comes a point where cleaning, repair, or lost painting time cost you more than a new brush.
Assess replacement costs versus repair time: factor labor, reduced performance, and paint waste.
If diminished spring, frayed tips, or recurring clogs shorten brush longevity and slow projects, replace—you’re often better off buying a new, reliable tool.
Eco‑Conscious Disposal of Used Solvents and Residue
When you finish cleaning brushes or thinning paint, don’t just pour leftover solvents and sludge down the drain or into the trash; they’re toxic and can contaminate water, soil, and local wildlife.
Use eco friendly solvents, practice solvent recycling, and follow responsible disposal for paint residue management to support sustainable cleaning practices and green brush care.
Choose eco-friendly solvents, recycle when you can, and dispose of paint residue responsibly to protect water, soil, and wildlife.
- Collect waste in sealed containers
- Label hazardous liquids
- Take to a hazardous waste facility
- Reuse or recycle solvents when possible
Common Mistakes That Ruin Restoration Attempts
If you try to rush or skip key steps, you’ll often make restorations worse instead of better; common errors—like scrubbing dried bristles with wire tools, soaking natural-hair brushes in harsh solvents overnight, or rehabbing paint-saturated brushes without testing solubility first—can permanently deform bristles, dissolve ferrules, or lock paint deeper into the tuft.
| Mistake | Effect | Fix? |
|---|---|---|
| Aggressive scrubbing | Bent bristles | Don’t |
| Wrong solvent | Ferrule corrosion | Test |
| Overnight soak | Hardened tuft | Avoid |
| No testing | Worsened clog | Assess first |
Watch restoration pitfalls and improve brush handling; proceed cautiously.
Tips From Professional Painters
Because pros tackle dried brushes every day, they’ve developed quick, reliable tricks you can copy: follow simple brush maintenance and professional techniques to save time and bristles.
Because pros face dried brushes daily, they’ve honed quick, reliable tricks you can copy to save time and bristles.
- Soak tips briefly in appropriate solvent.
- Tap, not twist, to loosen paint.
- Use a comb to realign bristles.
- Dry flat or hanging to prevent splaying.
Product Recommendations for Keeping Brushes Soft
A few targeted products will keep your brushes soft and ready: a quality brush cleaner or mild solvent for removing dried paint, a glycerin- or fabric-softener–based conditioning solution to restore flexibility, and a fine-toothed brush comb to realign bristles after cleaning.
For brush care, use recommended restoration products and eco friendly options when possible. These cleaning solutions and softening techniques are core maintenance tips for brush preservation and longevity.
At‑A‑Glance: Paint Type → Cleaning Method Chart
Now that you’ve picked cleaners and softeners, use this quick chart to match paint types with the right cleanup method so you can act fast and avoid permanent damage.
Now that you’ve chosen cleaners and softeners, use this quick chart to match paint types with proper cleanup methods.
Follow targeted steps based on paint and drying time; proper brush maintenance and regular cleaning frequency prevent restorations.
Quick reference:
- Water‑based → soak, rinse
- Oil‑based → solvent, conditioner
- Alkyd → mineral spirits
- Enamel → prolonged soak, comb
Quick Checklist: Restore a Brush in 10 Steps
Follow these ten clear steps to bring a dried paint brush back to usable condition without guessing or wasting time. You’ll follow brush care and restoration techniques, use appropriate cleaning products for bristle types and paint types, apply drying methods, use storage solutions, try eco friendly options, and note troubleshooting tips and maintenance tips.
| Step | Action | Focus |
|---|---|---|
| 1 | Soak | cleaning products |
| 2 | Loosen | bristle types |
| 3 | Rinse | paint types |
| 4 | Dry | drying methods |
Next Steps: Test Restored Brushes on a Scrap Surface
Before you tackle a project, test the restored brush on a scrap surface to confirm the bristles respond, the paint flows evenly, and no hardened clumps remain—this quick trial prevents surprises and saves time.
You’ll check brush performance and surface compatibility, adjust technique or thinning if needed, then proceed confidently.
- Stroke consistency
- Edge crispness
- Picked-up debris
- Drying behavior
Frequently Asked Questions
Can I Use Hair Conditioner to Soften Natural-Hair Brushes?
Yes — you can use hair conditioner sparingly to soften natural-hair brushes; you’ll improve bristle maintenance and overall brush care, but avoid heavy oils, rinse thoroughly, and reshape bristles to prevent damage and residue buildup.
Will Dishwasher Detergent Damage Synthetic Bristles?
About 60% of hobbyists report occasional bristle damage; yes, dishwasher detergent can harm synthetic bristles over time. You should avoid harsh detergents, prioritize gentle paint brush maintenance, and use mild soap for proper bristle care.
Can I Restore Brushes Used With Oil-Based Varnish?
Yes — you can restore brushes used with oil-based varnish by using proper cleaning techniques: first remove as much varnish with mineral spirits, then use solvent baths, brush combs, mild detergent, and condition bristles to preserve shape and flexibility.
Is It Safe to Boil Brushes to Remove Paint?
Yes — but you shouldn’t boil brushes indiscriminately; investigating boiling methods reveals risks that’ll alarm you. You’ll damage natural bristles, loosen ferrules, and warp brush materials, so use solvents or professional restoration instead.
How Can I Sterilize Brushes Used With Lead-Based Paint?
You should wear PPE, contain and double-bag brushes, then soak them in a lead-specific commercial decontaminant or a 10% bleach solution, rinse thoroughly, and follow local lead paint safety disposal rules for brush sterilization.
Conclusion
You saved a crusty, useless brush — and you didn’t flinch at the mess. One minute it was stiff, dried paint like iron; the next it’s flexible, responsive, ready to lay down smooth strokes. You’ll still check the bristles, test on scrap wood, and toss what won’t recover, but now you know the difference between miracle and waste. Keep solvent and soap handy, and treat good brushes like the tools they are.