How to Remove Dried Paint From Wood Without Damage
You can remove dried paint from wood without damage by first identifying whether it’s a thin splatter or a raised drip, and testing an inconspicuous spot. Work in a ventilated area with gloves and eye protection, and start with gentle methods—soft scraping with a plastic putty knife, solvent swabs for latex, or fine steel wool for stubborn enamel—always moving with the grain. Sand lightly only if needed, then refinish the spot; keep going below for detailed tips and techniques.
Quick Decision: Splatter vs Full Drip – What to Try First
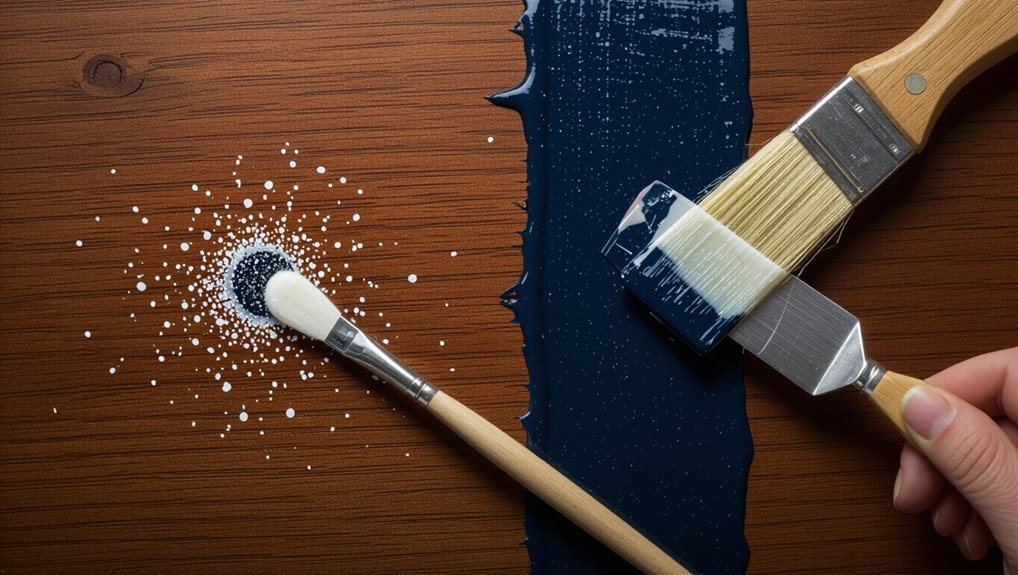
Wondering whether you’ve got a splatter or a full drip? You’ll do a quick splatter assessment: tap the edge, check thickness, and see if paint bridges wood grain.
For thin specks, try gentle paint removal techniques like soft scraping and solvent swabs.
For raised drips, plan careful lifting with a putty knife and targeted solvent—don’t force or sand blindly.
Quick Safety and Prep Steps Before You Start
Before you start, set up a safe, well-ventilated workspace and gather protective gear so you won’t have to stop mid-task.
Put on gloves, eye protection, and a mask; keep a fire extinguisher nearby.
Arrange tools, rags, and solvents for quick access to support workspace organization.
Protect surrounding surfaces with drop cloths and tape, and unplug nearby electronics before you begin.
Test a Small Hidden Patch Safely
Because solvents and scrapers can react differently with various finishes, always try your method on a small, hidden patch first.
Choose an inconspicuous hidden area, clean it, then apply your remover or gentle scraping tool.
Wait for full drying, inspect for discoloration or finish damage, and proceed only if results show no harm.
This safe testing prevents costly mistakes.
Identify the Paint: Latex vs Oil vs Enamel
Now that you’ve tested a hidden spot and confirmed your finish won’t be harmed, identify the paint type so you can choose the right remover and technique.
Use paint identification methods and a quick paint characteristics comparison to decide. Look for sheen, softness with rubbing alcohol, and solvent reaction.
- Latex: softens with alcohol.
- Oil: resists alcohol.
- Enamel: hard, glossy.
Essential Tools for Removing Dried Paint From Wood
You’ll need a compact set of reliable tools to remove dried paint from wood effectively: gloves and eye protection, a variety of scrapers (plastic and metal), medium- and fine-grit sandpaper, a chemical remover or rubbing alcohol for latex, and a set of small brushes and rags to clean residue.
Choose tools that match paint removal techniques and follow wood preservation tips to avoid gouging or over-sanding.
When to Skip Solvents and Use Mechanical Methods
If the solvent’s fumes, toxicity, or potential to damage delicate finish outweigh the benefit, skip chemical treatments and reach for a scraper or sandpaper.
You’ll avoid health risks and warped wood by using mechanical methods on thin finishes, near trim, or in poorly ventilated spaces. Start with gentle scraping and low-grit sanding, increasing aggressiveness only as needed.
When Solvent Risks Outweigh Benefits
When the paint is old, the wood’s finish is fragile, or the space lacks ventilation, skip solvents and choose mechanical methods instead; these situations raise health or damage risks that solvents can worsen.
You’ll do a quick damage assessment, note solvent types that would be risky, and opt for safer tactics.
Prioritize:
- Condition of finish
- Indoor ventilation
- Presence of lead or contaminants
Prefer Scraping And Sanding
Reach for a scraper and sandpaper whenever the finish is delicate, ventilation is poor, or solvents pose health or contamination risks; mechanical removal lets you control pressure and progress without introducing harsh chemicals.
You’ll use precise scraping techniques to lift flakes, then apply progressive sanding methods to blend edges and restore texture.
Work gently, check grain direction, and stop when the paint’s gone.
Remove Dried Latex Paint From Finished Wood
Start by evaluating the finish and the paint: determine whether the wood has a polyurethane, varnish, shellac, or wax finish and whether the dry paint is a water-based latex layer or has solvent-based additives.
For latex paint removal while preserving wood finish care, proceed carefully.
- Test a hidden spot.
- Use warm soapy water and plastic scraper.
- Apply minimal rubbing alcohol, blotting gently.
Remove Dried Oil-Based Paint From Finished Wood
Before you start, check whether the wood’s finish is shellac, lacquer, varnish, or polyurethane so you don’t damage it.
If the finish is compatible, use a solvent like mineral spirits or a commercial paint remover sparingly and test it in an inconspicuous spot.
Work slowly with a soft cloth or cotton swab, wiping away softened paint and stopping if the finish dulls or softens.
Assess Finish Compatibility
While oil-based paint can be stubborn, figuring out whether your wood’s finish can handle solvents or abrasion is the first step you should take.
You’ll identify finish types and run small compatibility tests in hidden spots. Then decide safe removal methods based on results.
- Check finish types visually and by touch.
- Perform solvent compatibility tests discreetly.
- Note reaction and proceed accordingly.
Use Solvent Carefully
Now that you’ve checked how the finish reacts, you can proceed with solvents—but move slowly and deliberately.
Choose solvent types suitable for finished wood (mineral spirits, denatured alcohol, or a commercial remover) and test a hidden spot.
Use small cotton swabs, soft cloths, and gentle application techniques, working in the grain.
Wipe residue promptly, rinse, and let dry before refinishing or sealing.
Remove Paint From Raw or Unfinished Wood
If your wood is raw or unfinished, you’ll need to be gentler and more deliberate when removing dried paint to avoid gouging the surface or raising the grain.
Use soft scraping, gentle solvents tested in an inconspicuous spot, or micro-abrasion with fine steel wool.
Consider raw wood techniques and paint removal alternatives like poultices.
Consider raw-wood techniques and gentler paint-removal methods, such as poultices, to protect fragile surfaces.
- Soft scraper
- Gentle solvent test
- Fine steel wool
Use Soap and Warm Water for Fresh Latex Splatters
If the latex splatter is still wet, grab a bucket, mild dish soap, and a soft cloth for quick prep.
You’ll wet the cloth with warm, soapy water and gently blot or wipe the paint—don’t scrub hard or you’ll damage the finish.
Keep rinsing the cloth and repeating until the spot lifts.
Quick Prep Steps
Start with warm water and a mild dish soap—you’ll loosen fresh latex splatters quickly without harming the finish.
Rinse and dry the area before proceeding. Check surrounding paint types and wood finishes to choose safe tools.
- Test a hidden spot.
- Gather soft cloths and a sponge.
- Protect nearby surfaces with tape and paper.
Gentle Cleaning Technique
1. You’ll mix mild dish soap with warm water, dampen soft cloths, and blot fresh latex splatters gently.
Work from the outer edge inward, applying gentle pressure to lift paint without grinding it into the grain.
Rinse cloths frequently, change solution if it gets dirty, and dry the wood promptly to prevent swelling or stains.
Use Rubbing Alcohol Safely on Wood Finishes
Because rubbing alcohol can dissolve finishes as well as paint, you’ll want to test it first on an inconspicuous spot and use it sparingly.
You’ll apply rubbing alcohol for safe application only after identifying finish types and checking for damage.
Follow these steps:
- Use a cotton swab to spot-test.
- Lightly dab—don’t soak—if finish holds.
- Wipe dry and re-evaluate before proceeding.
When to Use Mineral Spirits or Paint Thinner
If a small amount of dried paint won’t come off with rubbing alcohol or gentle scraping, reach for mineral spirits or a paint thinner—these solvents dissolve oil-based paints and varnishes more effectively than alcohol, but they can also soften certain finishes, so use them cautiously and test an inconspicuous area first.
Choose solvent selection based on finish compatibility, work in ventilation, apply sparingly, blot gently, and wipe residue.
Apply Commercial Paint Removers Safely
Pick a stripper formulated for your wood type and paint—read labels so you get a gel, liquid, or solvent that matches the job.
Test it on a hidden spot to check for grain raising, discoloration, or finish damage before treating visible areas.
After stripping, follow the product instructions to neutralize and thoroughly clean the wood so solvents and residues don’t harm the surface or finish.
Choose The Right Stripper
Choosing the right stripper starts with matching the product to the paint type, the wood’s condition, and your ventilation options.
You’ll compare chemical options and eco friendly alternatives, check label warnings, and pick a low-odor formula if indoors.
Follow PPE and disposal guidance.
- Solvent-based for stubborn layers
- Caustic for thick coatings
- Bio-based for sensitive areas
Test On Hidden Area
Now you’ll want to test a commercial remover on a hidden spot before treating visible areas.
Apply a small amount to an inconspicuous grain or underside for hidden area testing.
Wait the manufacturer’s recommended time, then inspect for discoloration, softening, or finish damage.
If the wood tolerates it, proceed; if not, try a different product or a safe patch alternative.
Neutralize And Cleanse Wood
After the remover has done its work, neutralize the wood promptly to stop the chemical reaction and prevent finish damage—follow the product label for the recommended neutralizer (often a specific solvent, a water rinse, or a diluted baking soda solution).
You’ll cleanse gently, rinse thoroughly, and dry fully to preserve wood care and surface protection.
- Blot residue with recommended neutralizer.
- Rinse with clean water.
- Dry and inspect finish.
Use Heat (Hair Dryer or Heat Gun) Without Scorching Wood
While heat can loosen dried paint quickly, you’ll need to control temperature and distance to avoid scorching the wood; test on an inconspicuous spot first.
Use low heat settings and keep the device moving, holding it several inches away.
Different wood types tolerate heat differently, so monitor color and grain.
Stop if the surface darkens or smells like burning.
Scrape Paint Safely With Scrapers and Blades
Grab the right scraper and work with the grain to lift dried paint without gouging the wood. Choose scraper types suited to contours and finish, and select blade materials that resist nicking.
Hold tools at a low angle, push gently, and change blades when dull. Follow these steps:
- Use a flat metal scraper for trim.
- Try a flexible plastic scraper for delicate areas.
- Keep replacement blades ready.
Use Fine Steel Wool and Abrasive Pads Without Dulling Finish
Once you’ve lifted loose paint with scrapers, switch to fine steel wool or nonwoven abrasive pads to gently smooth remaining spots without harming the finish. Use careful steel wool techniques and thoughtful abrasive pad selection: work with the grain, test in an inconspicuous area, and keep pressure light to avoid dulling.
| Tool | Grit/Grade | Tip |
|---|---|---|
| #0000 steel wool | Ultra-fine | With grain |
| Abrasive pad | Fine | Light pressure |
| Microfiber | N/A | Buff finish |
Sand Selectively to Blend and Repair Finishes
Before you sand, identify the specific areas that need blending or repair so you remove only what’s necessary and preserve the surrounding finish.
You’ll use gentle sanding techniques, light strokes, and fine grit to feather edges for seamless finish blending. Work small, check progress often, and stop when the repaired area matches the surrounding sheen.
- Sand edges
- Use fine grit
- Blend carefully
Remove Paint From Trim, Corners, and Grooves
After feathering the finish with fine sandpaper, turn your attention to trim, corners, and grooves where dried paint often hides and sanding can’t reach.
Use detail tools and gentle scraping methods for precise paint removal, combining targeted solvent application when needed.
Apply corner techniques for tight angles, groove cleaning for channels, and prioritize wood preservation, finish protection, and trim restoration—especially during antique care.
Protect Surrounding Finishes and Hardware
Start by covering nearby finishes and hardware with painter’s tape and drop cloths so you don’t accidentally damage them while removing paint.
Use protective coverings that won’t stick to or lift varnish; check finish compatibility before solvents touch surfaces. Take care around hinges and knobs.
- Tape edges precisely
- Shield hardware with plastic
- Test coverings on hidden area
Touch Up Stain and Finish After Paint Removal
Once the paint’s gone, you’ll want to match the stain color to the surrounding wood so the repair blends in.
Feather the finish edges by lightly sanding and applying thin coats to avoid hard lines.
Finish with a protective topcoat to seal the repair and restore durability.
Match Stain Color
1 key step in restoring wood after paint removal is matching the stain so repaired areas blend with the original finish; you’ll want to test samples on scrap or an inconspicuous spot, compare tones under the same lighting, and adjust stain strength or hue before committing to the whole repair.
Use careful stain matching and color blending to create seamless touch-ups.
- Test tones on scrap.
- Mix small batches.
- Compare wet and dry.
Feather Finish Edges
Feather the finish edges carefully so the repaired area blends seamlessly with the surrounding wood; you’ll want to lightly sand the shift, apply thin coats of stain or finish, and wipe away excess before it dries to avoid hard lines.
Use feathering techniques to taper edges, work a small brush outward, and test finish blending on scrap.
Repeat thin layers until color and sheen match.
Seal With Protective Coat
After you’ve feathered the edges and matched the stain, protect the repaired area with a clear coat to lock in color and guard against future wear.
You’ll choose protective finishes that suit the wood and use thin, even coats. Follow these maintenance tips to extend life.
- Test finish on scrap.
- Apply 2–3 thin coats.
- Lightly sand between coats.
Remove Paint Drips From Antique or Delicate Wood
When restoring antique or delicate wood, you’ll need a gentler approach to remove paint drips without damaging the finish or carving. You’ll test solvents in an inconspicuous spot, use soft tools, and work slowly for antique care and delicate finishes.
| Tool | Action |
|---|---|
| Cotton swab | Light solvent |
| Wooden pick | Lift gently |
| Microfiber | Blot residue |
| Wax stick | Fill tiny gaps |
Common Mistakes That Cause Scratches or Discoloration
Don’t rush into sanding or scrubbing with coarse abrasives, because using them too aggressively can leave permanent scratches in the wood.
Also be careful with solvents and cleaners — the wrong chemical can strip finishes or cause discoloration.
You’ll get better results by testing a mild method in an inconspicuous spot before treating the whole area.
Using Abrasives Too Aggressively
Scrub carefully—using too aggressive an abrasive will leave visible scratches or remove the wood’s finish, making the spot more noticeable than the paint itself.
You should test abrasive types on an inconspicuous area and favor gentle sanding techniques. Don’t press hard or use coarse grits.
- Start with fine grit
- Go with light pressure
- Stop when finish shows
Wrong Solvent Or Cleaner
If you’ve been careful with abrasives, the next big risk is picking the wrong solvent or cleaner—using harsh chemicals can strip finishes, dull the wood, or leave stains that show more than the paint did.
Test cleaning agents on an inconspicuous spot, match solvent strength to paint types, and avoid ammonia or bleach on sensitive finishes.
Work slowly and rinse thoroughly.
Fast Fixes for Small Splatters vs Large Drips
When you’re dealing with dried paint on wood, small splatters and large drips call for different, quicker approaches:
- For splatters cleanup, gently scrape with a plastic razor, then soften with warm soapy water and a cloth.
- For drip removal, pare away excess with a razor, sand lightly with fine grit, then spot-clean with mineral spirits.
- Always test a hidden area first to avoid finish damage.
When to Call a Professional Wood Restorer and How to Choose One
Although small spots you can handle yourself, call a professional wood restorer once paint covers large areas, penetrates grain, or you’re dealing with historic or high-value pieces you can’t risk damaging. Get a professional assessment, compare restoration techniques, check references, insurance, and written estimates before hiring.
| Skill | Experience | Cost |
|---|---|---|
| Stripping | Years | Estimate |
| Repair | Certification | Quote |
| Finish | Portfolio | Timeline |
Frequently Asked Questions
Can Dried Paint Harbor Lead or Other Toxic Residues on Old Wood Surfaces?
Yes — dried paint can contain lead paint and other toxic residues, and it raises health risks. You should assume danger, use proper safety precautions, test older surfaces, and avoid sanding without containment and PPE.
How Long Should I Wait After Removal Before Reapplying Finish or Stain?
You’ll want to play it safe: wait 24–72 hours after removal before reapplication timing, ensuring the wood’s fully dry and residue-free; check finish compatibility with your chosen stain or sealer to avoid adhesion or discoloration problems.
Will Moisture From Removal Methods Warp or Raise Wood Grain Long-Term?
Moisture effects can raise grain temporarily, but you won’t get long-term warping if you dry and clamp properly. You should use wood protection and controlled drying; avoid soaking and reapply protection once fully cured.
Can Painted Wood Exposed to Sunlight Fade Differently After Spot Removal?
Yes — you’ll likely see color variations: sunlight exposure fades surrounding paint differently, so spot removal can reveal less-faded areas that contrast. You’ll want to blend or age the repair so it matches under continued sunlight exposure.
Are There Eco-Friendly Disposal Methods for Paint Scrapings and Solvents?
Yes — you can dispose responsibly: save unusable cans for hazardous waste collection, recycle paint through local recycling paint programs, strain and let solvents evaporate only in ventilated areas, and follow safe disposal guidelines to prevent contamination.
Conclusion
Decide fast for splatters, take your time with drips; test a hidden spot, then proceed; wear gloves, work in ventilation, and protect surrounding surfaces. Match your method to the paint—latex, oil, enamel—and use the right tools for the job. Be gentle on antiques, avoid sandpaper overuse, and stop if the finish changes. Try quick fixes for small spots, follow careful steps for large drips, and call a pro when damage risk outweighs DIY.