How to Get Spray Paint Off Walls Without Damage
Act fast: blot fresh spray paint and don’t rub. Identify your wall—drywall, plaster, brick, wood or wallpaper—then test a mild cleaner in a hidden spot. Wear gloves, goggles and ventilate; protect floors and outlets. Start with soap, water and a microfiber cloth; move to isopropyl alcohol, citrus remover or a commercial graffiti product only after testing. Rinse and repeat gently to avoid abrasion; for large or stubborn stains consider a pro, and keep reading for full steps and surface-specific tips.
Quick: Remove Fresh Spray Paint Now
Start acting quickly: fresh spray paint is far easier to remove than dried paint, so tackle it as soon as you notice the stain.
You’ll blot excess with a clean cloth, test a mild solvent in an inconspicuous spot, and work outward. Use recommended spray paint techniques for minimal damage, rinse often, and repeat until gone.
Quick cleanup prevents staining and simplifies final repairs.
What Kind of Wall Is It? Drywall, Plaster, Brick, Wood, Wallpaper
Before you pick a removal method, identify the wall surface—drywall, plaster, brick, wood, or wallpaper—because each reacts differently to solvents, scrubbing, and moisture. You’ll assess drywall characteristics, follow plaster maintenance tips, respect brick texture, protect wood finishes, and consider wallpaper durability.
| Surface | Risk | Tip |
|---|---|---|
| Drywall | High | Blot, avoid soaking |
| Plaster | Medium | Gentle scrubbing |
| Brick | Low | Use stiff brush |
How Spray Paint Type and Age Affect Removal
What you’re dealing with depends a lot on the paint itself — lacquer, enamel, or acrylic each react differently to removers.
Fresh spray paint usually wipes or softens more easily, while older paint bonds into the surface and may need stronger solvents or gentle sanding.
Knowing the type and how long it’s been on the wall will guide your choice of method and products.
Paint Type Matters
Because spray paints aren’t all made the same, the type and how long it’s been on the wall change how easy you’ll find removal.
You should check paint finishes and pick removal techniques that match solvent resistance and pigmentation.
Consider these quick tips:
- Test on a hidden spot.
- Use gentle solvent for latex.
- Use stronger remover for enamel.
- Rinse and repaint if needed.
Age Changes Removal
As spray paint ages, it bonds more firmly to surfaces and becomes harder to dissolve.
So you’ll find fresh overspray wipes away far more easily than paint that’s been sitting for weeks or months.
Consider age related factors like curing time and UV exposure when choosing removal techniques.
Act quickly on fresh spills, test stronger solvents on older layers, and always spot-check to avoid damage.
Test a Small Patch First (Safe Spot Test)
Before you start, pick an inconspicuous spot—behind furniture or inside a closet—so any damage won’t be obvious.
Test your chosen remover there and let it sit for the recommended time.
Check how the paint and wall finish react before treating the visible area.
Choose An Inconspicuous Area
When you’re about to remove spray paint, always test a small, hidden spot first to make sure your chosen cleaner and method won’t damage the finish or color.
Pick a discreet test location, note color consideration, and proceed cautiously.
- Behind furniture
- Inside a closet
- Baseboard edge
- Ceiling corner
Wait For Paint Reaction
After you’ve tested a hidden spot and picked a cleaner, apply a small dab of the product to the test area and wait a few minutes to observe the reaction.
Watch for discoloration, bubbling or softening that signal chemical reactions affecting the finish or paint adhesion.
If the surface holds, proceed cautiously; if it degrades, choose a gentler method to avoid permanent damage.
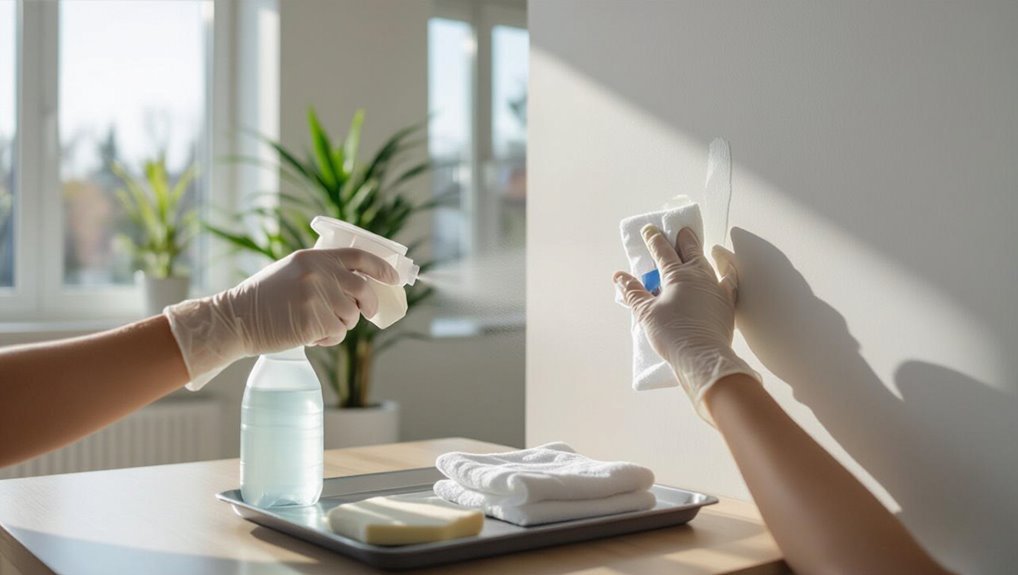
Safety Gear and Protecting the Area
Since spray paint and removal solvents can irritate your skin, eyes, and lungs, equip yourself with proper PPE: chemical-resistant gloves, safety goggles, and an N95 or respirator rated for organic vapors.
Then protect surroundings and airflow:
- Wear safety goggles and protective gloves.
- Lay heavy drop cloths on floors.
- Use ventilation fans or open windows.
- Keep cleaners and rags contained.
Prep: Cover Floors, Vents, and Hardware
Before you start removing spray paint, cover the floor with a drop cloth or plastic sheeting so overspray and drips don’t ruin your flooring.
Tape plastic over vents and electrical outlets to keep paint particles and cleaning solvents out of your HVAC and wiring.
Remove or mask hardware like switch plates and trim so you can work cleanly and avoid extra cleanup.
Protect Floors Thoroughly
Start by laying down durable drop cloths or plastic sheeting that fully cover the floor area you’ll be working in, extending several feet beyond where you’ll spray to catch overspray and errant drips.
Then:
- Move furniture—prioritize furniture relocation to a protected room.
- Use heavy floor coverings beneath high-traffic spots.
- Secure protective sheets with painter’s tape.
- Layer drop cloths where drips may pool.
Seal Vents And Outlets
1. Seal vents and outlets before spraying to protect HVAC and wiring; you’ll preserve ventilation importance while preventing paint intrusion and ensuring outlet protection.
| Step | Material | Tip |
|---|---|---|
| Cover vents | Plastic sheeting | Tape edges |
| Protect outlets | Painter’s tape | Remove plates |
| Check seals | Light press | Replace if loose |
| Ventilate room | Open windows | Use fan |
Fresh Spray Paint: Soap, Water, and Microfibers
If the spray paint is still wet, you can usually lift it with plain soap, water, and a microfiber cloth—work quickly, blotting rather than rubbing to avoid spreading the pigment.
Use gentle soap options, warm water, and microfiber benefits for trapping paint without scratching.
Try:
- Dampen cloth
- Apply soap sparingly
- Blot outward
- Rinse and repeat until removed
Loosen Spray Paint With Isopropyl Alcohol
Grab a clean cloth and pour a small amount of isopropyl alcohol (70% works well) onto it, then gently dab the painted area to loosen the spray paint—don’t rub hard, which can spread the paint or damage the wall finish. Your careful alcohol application shows isopropyl effectiveness; blot, check progress, repeat. Feel relief as color lifts.
| Hope | Relief | Clean |
|---|---|---|
| Calm | Succeed | Bright |
| Try | Steady | Safe |
| Soft | Care | End |
| Done | Proud | Clear |
Use Acetone Safely on Painted and Metal-Coated Walls
When using acetone on painted or metal-coated walls, test a hidden spot first and work in small sections so you can control its powerful solvent action.
You’ll want to check surface compatibility before full acetone application and wear gloves and ventilate.
Follow steps:
- Dab and wait.
- Blot, don’t rub.
- Rinse area.
- Inspect for finish change.
When to Avoid Solvents (Delicate Finishes)
Because some finishes are fragile, you should skip strong solvents on surfaces like chalk paint, antiqued patinas, and hand-applied faux finishes. You’ll assess solvent sensitivity, favor gentler methods, and prioritize finish protection. If in doubt, test hidden spots and call a pro.
| Fragile | Emotional | Urgent |
|---|---|---|
| Chalk paint | Heartache | Protect |
| Patina | Loss | Caution |
| Faux finish | Regret | Pause |
Nylon Scrub Pads: How to Use Without Scratching
If you decide a solvent-free approach is safest for a delicate finish, nylon scrub pads can lift spray paint without chewing into the surface—if you use them properly.
- Test a hidden spot first to practice nylon pad techniques and pressure.
- Work with soft pads and light, circular motions.
- Keep the area wet to reduce friction.
- Stop at first sign of dulling to avoid scratches.
Using Heat and Steam for Stubborn Spots
Since heat can soften many types of spray paint, you can often loosen stubborn spots with a handheld heat source or steam—then gently scrape or blot them away.
Use controlled heat application from a hair dryer or heat gun on low, keeping it moving to avoid damage.
For delicate paint, try the steam method with a cloth-wrapped steamer, then lift softened paint carefully with a plastic scraper.
Citrus-Based Removers for Sensitive Surfaces
When you’re working on sensitive surfaces, citrus-based removers offer a gentler way to break down spray paint without harsh solvents.
You can use them safely, test first, and rinse thoroughly to protect finishes. Citrus benefits include biodegradability and lower fumes; they’re ideal for sensitive surfaces when used carefully.
- Patch-test small area
- Apply with soft cloth
- Let sit briefly
- Rinse and dry
Choosing a Commercial Graffiti Remover
When choosing a commercial graffiti remover, pick formulas labeled safe for your wall’s paint type to avoid damage.
Always test the product on a hidden spot first to check for discoloration or coating loss. If the test shows no harm, proceed with the remover following the manufacturer’s instructions.
Pick Paint-Safe Formulas
If you’re removing spray paint from interior walls, pick a commercial graffiti remover that’s labeled safe for your wall’s finish—latex paint, eggshell, satin, and gloss each tolerate different chemicals.
Choose products with clear finish guidance, consider eco friendly options, and compare with DIY solutions for gentleness.
Recommendations:
- Water-based remover
- Citrus solvent
- Low-VOC formula
- Gel formula for control
Test On Hidden Spot
Why start with a hidden spot? You’ll avoid surprises by testing removers on hidden areas before full use.
Apply a small amount to an inconspicuous patch or alternative surfaces like trim or behind fixtures, wait, then inspect for color loss, bubbling, or texture change.
If it’s safe, proceed; if not, try a gentler product or consult a pro to prevent permanent damage.
Step-by-Step: Applying Commercial Remover Safely
1. You’ll follow safety precautions, work ventilated, and wear gloves and goggles so remover effectiveness isn’t compromised.
Apply small patch, wait, and blot; don’t rub.
- Apply remover sparingly.
- Wait recommended time.
- Blot with microfiber.
- Rinse area and air-dry.
Check results and repeat only as needed, minimizing surface exposure.
Picking a Paint Stripper That Won’t Harm Finish
Once you’ve tested a commercial remover on a small patch and seen how the surface reacts, pick a paint stripper that matches your wall’s finish and material so you don’t cause damage. Choose between eco, solvent, or gel paint stripper options based on finish compatibility, safety, and drying time. Test, wait, and reassess.
| Type | Best for | Caution |
|---|---|---|
| Eco | Sensitive finishes | Slower |
| Solvent | Tough layers | Strong fumes |
| Gel | Vertical surfaces | Residue |
Remove Spray Paint From Latex-Painted Drywall (No Sanding)
First, identify whether the wall paint is latex so you know what cleaners are safe to use.
Try gentle solvents like mild dish soap, rubbing alcohol, or a citrus-based remover on a hidden spot to see if they lift the spray paint without damaging the finish.
Always test in an inconspicuous area and wait for the patch to dry before proceeding.
Assess Paint Type
Before you grab cleaners or scrubbers, identify the paint already on the drywall so you can choose a safe, effective removal method; latex paint behaves differently than oil-based coatings and most household solvents, so what works on wood or metal can damage latex-painted drywall.
- Do a paint identification: look for sheen and age.
- Perform a surface examination for primer layers.
- Test a small, hidden spot.
- Note texture and coat thickness.
Gentle Solvent Options
With the paint type confirmed and a discreet patch tested, you can move on to gentle solvent options that won’t harm latex-painted drywall or require sanding.
Use gentle cleaning solutions like diluted dish soap, isopropyl alcohol (test first), or a melamine sponge.
Consider natural alternatives such as white vinegar or baking soda paste for mild spots.
Work gently, blotting rather than scrubbing, and rinse promptly.
Safe Spot Testing
How will you know a cleaner won’t damage your wall? You perform safe spot testing: try small test methods on hidden patches, wait to dry, and judge finish.
Use patch evaluation to compare sheen and adhesion before proceeding.
- Pick an inconspicuous area
- Apply smallest amount of cleaner
- Wait full dry time
- Inspect for damage or color change
Remove Spray Paint From Plaster and Textured Walls
Though textured and plaster walls hide imperfections, that same uneven surface makes removing spray paint trickier than from smooth drywall. You’ll use gentle plaster techniques and heed texture considerations: test a small area, start with mild detergent, progress to rubbing alcohol or citrus remover, and use soft brushes. If needed, touch up with matching paint.
| Step | Action |
|---|---|
| 1 | Test area |
| 2 | Clean mild |
| 3 | Alcohol/citrus |
| 4 | Soft brush |
| 5 | Touch up |
Treat Spray Paint on Brick and Masonry
If textured plaster gave you a workout, brick and masonry will demand a different approach because porous surfaces soak up paint and hold it fast.
- Test a small area with a masonry-safe remover.
- Use a stiff brush and low-pressure rinse for brick cleaning.
- Repeat gentle treatments; avoid harsh scraping.
- After removal, apply masonry protection to seal and prevent reoccurrence.
Remove Spray Paint From Wood Trim and Baseboards
Start by checking the trim’s finish—painted, stained, or bare wood—so you know how aggressive you can be without causing damage.
Test a safe removal method like a mild detergent, rubbing alcohol, or a gentle solvent in an inconspicuous spot.
Work slowly and stop if the finish softens, then try a less abrasive option or consult a pro.
Assess Trim Finish
Before you decide which removal method to use, check the trim’s finish so you don’t damage it: determine whether the wood is painted, sealed with polyurethane, varnished, or untreated, and note any existing chips or loose edges that could lift when you scrape or clean.
Do a quick trim inspection and confirm finish compatibility before proceeding.
- Identify coating type
- Spot-test discreet area
- Note damaged spots
- Photograph condition
Safe Removal Methods
Tackle spray paint on wood trim and baseboards gently to avoid stripping the original finish—choose methods that match the coating you identified (painted, sealed, varnished, or raw wood). Use eco friendly options like citrus gel, mild solvent, or gentle sanding; test first. Homemade solutions work for small spots; rinse and refinish as needed.
| Method | Use | Notes |
|---|---|---|
| Citrus gel | Varnished | Test |
| Rubbing alcohol | Painted | Spot test |
| Baking soda paste | Raw | Gentle |
| Fine sandpaper | Sealed | Light touch |
| Commercial remover | Stubborn | Follow instructions |
Removing Spray Paint From Wallpaper Without Ruining It
If the wallpaper’s pattern or adhesive matters to you, act carefully—removing spray paint from wallpaper without ruining it requires gentle techniques and patience.
Test in an inconspicuous spot. Use soft tools and mild solutions; consider solvent alternatives if paint’s fresh.
Always test hidden areas first; use soft tools and mild cleaners, resorting to gentle solvents only if paint is still fresh
Try these steps:
- Blot excess gently with a microfiber.
- Test a mild detergent mix.
- Use a poultice for stubborn spots.
- Rinse and dry carefully.
Ceilings and High Spots: Safe Access and Technique
When you’re tackling spray paint on ceilings or high spots, start by setting your ladder on firm, level ground and have a spotter hold it steady.
Use long-handled scrapers and extension tools so you can work without overreaching.
Choose cleaners that won’t drip or stain above you—look for low-splash, ceiling-safe formulas.
Safe Ladder Placement
Start by choosing the right ladder for the job and setting it on firm, level ground so you’ve got a stable base before you climb.
You’ll maintain ladder stability and ladder safety by following these steps:
- Inspect feet, locks, and rungs.
- Angle ladder at 4:1 ratio.
- Tie or brace the top.
- Keep three points of contact and avoid overreaching.
Long-Handled Tools
1 durable, properly chosen long-handled tool lets you reach ceilings and high spots without precarious stretching or unnecessary ladder time. You’ll use long handled scrubbers and extension tools to apply gentle pressure and controlled motion, keeping wall finish intact. Match tool head to surface and change angles instead of climbing.
| Tool type | Best use |
|---|---|
| Scrubber | Smooth paint |
| Brush | Corners |
| Pad | Textured |
Ceiling-Friendly Cleaners
You’ve picked the right long-handled tools; now pair them with cleaners that won’t damage overhead paint or drip onto floors and furniture.
- Test a diluted, eco friendly options spray on a hidden spot.
- Use low‑drip gel removers on a soft applicator.
- Apply gentle solvent with controlled mop motion.
- Try alternative methods like steam or eraser blocks for stubborn specks.
Outdoor Walls vs. Indoor Walls: Different Approaches
Because outdoor and indoor surfaces face different materials, finishes, and exposure, you’ll need distinct techniques and products for each. Use outdoor techniques like pressure washing and bleach-safe removers for masonry; use indoor strategies like mild solvents and gentle scrubbing for painted drywall. Choose protectants and test spots first.
| Surface | Outdoor | Indoor |
|---|---|---|
| Material | Brick/Stucco | Drywall/Plaster |
| Cleaner | Pressure/bleach | Mild solvent |
| Finish care | Sealants | Touch-up paint |
Aerosol Marker and Enamel Spray: What’s Different
You’ll notice aerosol markers and enamel sprays use different binders and solvents, which affects how they bond to surfaces and what removers will work.
Enamel dries harder and more durable than marker ink, so it resists scraping and fades less over time. Those differences make removal trickier for enamel—expect stronger solvents and more effort than for marker tags.
Composition And Solvents
While both aerosol markers and enamel spray cans throw down color fast, they’re built quite differently—and that affects how you’ll remove them.
- Know solvent types: markers use gentler carriers, enamels use stronger solvents.
- Check paint chemistry: pigments, binders change removal.
- Test a hidden spot before treating.
- Use compatible cleaners to avoid surface damage.
Drying And Durability
Although both aerosol markers and enamel spray cans lay down visible color quickly, they dry and bond to surfaces very differently.
You’ll notice markers set fast, often penetrating porous paint, while enamel forms a harder, film-like coat.
Consider drying techniques—heat speeds curing, humidity slows it—and address durability concerns: harder enamels resist scuffs but resist removal, markers stain deeper and need gentler, targeted treatments.
Removal Challenges
Because aerosol markers soak into porous paint and enamel sprays form a hard film on the surface, you’ll face very different removal problems: markers stain deep and require gentler solvents or abrasion to avoid ripping the underlying finish.
On the other hand, enamel resists penetration and often needs stronger solvents or careful mechanical stripping that can damage the wall.
- Assess surface textures.
- Select removal techniques.
- Test a small area.
- Proceed cautiously.
Blending a Cleaned Spot Into Surrounding Paint
After you’ve removed the spray paint, you’ll often see a faint outline or slight sheen difference where the cleaner hit the wall.
Blending that area into the surrounding paint helps it disappear. Match sheen and shade using simple color matching techniques, feather edges with a damp sponge, and apply thin, overlapping strokes.
Test in an inconspicuous spot and let layers dry between applications.
Repair Small Paint Loss Without Repainting Whole Wall
If a small patch of paint came off during cleaning, you don’t need to repaint the whole wall—careful spot repairs can make the area virtually invisible.
Follow simple paint touch ups and wall maintenance steps to match texture and color, feather edges, and seal.
- Clean and sand
- Prime small area
- Apply matched paint
- Feather and blend
Avoiding Ghost Stains and Paint Bleed After Removal
Once you’ve matched paint and blended the patch, you’ll want to prevent faint discoloration or bleed-through that can reveal the repair.
Seal the area with a stain-blocking primer before topcoating to stop ghost stains and paint bleed.
Feather edges of new paint, use thin layers, and let each dry fully.
Inspect under different light to guarantee an invisible finish.
Clean Up, Neutralize Chemicals, and Ventilate
Because solvent fumes and residue can linger, clean-up should be deliberate and fast: open windows, run fans, and remove rags or paper towels to a metal container with a tight lid.
Neutralize chemicals with a mild detergent solution, then rinse. Maintain ventilation while you work and until smells dissipate.
- Wear gloves
- Use diluted cleaner
- Rinse thoroughly
- Air out room
Dispose of Rags and Solvents Responsibly
When you’re done, gather used rags and any leftover solvents into a metal container with a tight-fitting lid so they can’t air-dry and self-ignite.
Label it and store it safely until you can take it to a hazardous-waste drop-off.
Label and securely store it until you can deliver it to a hazardous-waste drop-off.
Don’t toss rags in regular trash.
Ask about solvent recycling or eco-friendly disposal options at local waste facilities to reduce fire risk and environmental harm.
When to Call a Professional Restorer
If the stain covers a large area, involves multiple layers of paint, or has soaked into drywall or plaster, call a professional restorer—trying DIY fixes could make the damage worse.
- You’ll want a professional evaluation to assess structural harm.
- They’ll use advanced restoration techniques safely.
- They prevent costly mistakes and uneven finishes.
- Hire someone licensed and insured for warranties and peace of mind.
Frequently Asked Questions
Will Insurance Cover Professional Spray-Paint Removal Damage Claims?
Yes, you can file damage claims and your insurance policies might cover professional spray-paint removal if vandalism or accidental damage’s included; check your deductible, document evidence, and contact your insurer promptly so they’ll guide next steps.
Can Graffiti Removal Void a Landlord or HOA Agreement?
Yes—you could void lease agreements or HOA rules if you ignore required property maintenance or alter common areas without approval; you’ll need to follow notice, approval, and repair procedures to avoid breach, fines, or legal action.
How Long Before Treated Walls Can Be Repainted Safely?
Ironically, you’ll wait—usually 24 to 72 hours—before repainting; treatment timing depends on products used and drying. You’ll want thorough wall preparation, ensuring surfaces are dry, clean, and lightly sanded so paint adheres well.
Are There Eco-Friendly Disposal Options for Contaminated Wash Water?
Yes — you can use eco friendly alternatives and treat wash water disposal responsibly: collect contaminated wash water, strain solids, neutralize solvents with biodegradable detergents, then take it to hazardous waste or municipal treatment facilities; don’t pour it down drains.
Can Rust Form Under Spray Paint Removal on Metal Trims?
Yes — rust can form under spray paint on metal trims if moisture or corrosion started before removal; you’ll need to clean, dry, and treat with rust remover or primer, then repaint to prevent further rusting and damage.
Conclusion
You’ve done the clean-up like a careful gardener pruning roses—gentle, knowing when to stop. Remember: match your method to the wall, test a hidden patch, and don’t rush chemicals or scrubbing. Protect yourself, ventilate, and neutralize residues so the surface heals, not scars. Bag wastes responsibly, and call a pro if the stain’s stubborn or the surface’s precious. Finish patiently, and your walls will read like a fresh page.