
How to Finish Cabinets With Paint for a Smooth Durable Surface
Decide whether to paint or replace by checking door condition, hinges, and layout; you’ll paint if frames are solid. Identify material—solid wood, veneer, MDF, or laminate—then degrease, sand glossy areas, and repair damage. Prime with a bonding primer, choose acrylic-latex or oil‑alkyd paint in satin or semi‑gloss, and apply with brush for details plus a dense foam roller or spray for flats. Sand lightly between coats and finish with a clear topcoat for durability, and keep going to learn pro tips.
Should You Paint or Replace Cabinets? Quick Decision Guide
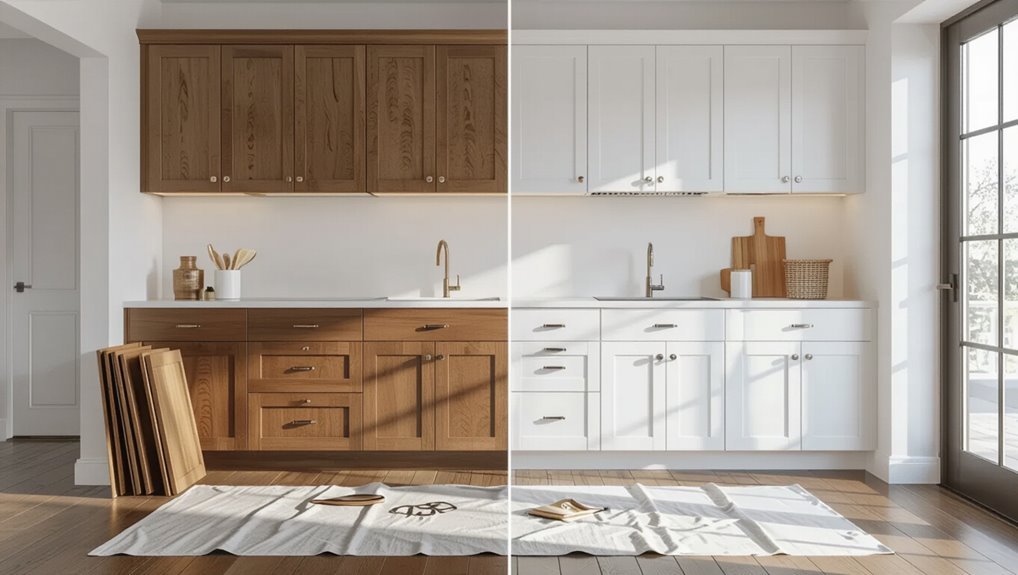
Wondering whether to paint or replace your cabinets? You’ll weigh paint benefits like lower price, quick refresh, and less disruption against replacement costs, durability, and layout changes.
Inspect doors, hinges, and structural damage; if frames are solid and style fits, you’ll likely paint.
If cabinets sag, warp, or you want a new layout, replacement costs may be justified.
Check Cabinet Material: Wood, Veneer, MDF, or Laminate
Before you paint, identify what your cabinets are made of—solid wood, veneer over plywood, MDF, or laminate—as each substrate needs different prep.
Do a small absorption test (drop water or sand a hidden spot) to see how the surface soaks up primer and paint.
Also note any existing coatings like varnish, lacquer, or melamine so you can choose the right deglosser or primer.
Identify Cabinet Substrate
Because the paint process depends on what the cabinet’s made of, you’ll want to identify the substrate first.
Inspect cabinet types—solid wood, veneer, MDF, or laminate—and note surface characteristics like grain, seams, gloss, and edge treatments.
That lets you pick primers, fillers, and sanding approaches suited to each material so paint adheres and finishes evenly without wasted effort.
Test Surface Absorption
Start by doing a simple solvent and water spot test to see how your cabinet’s surface soaks up liquids—this quick check tells you whether you’re dealing with porous wood or a nonporous laminate or factory finish.
Use surface testing to compare solvent reaction and water beading. Record results for an absorption analysis so you’ll choose primers and prep suited to wood, veneer, MDF, or laminate.
Note Existing Coatings
When inspecting your cabinets, identify the existing coating so you can pick the right prep and primer—solid wood, thin veneer, MDF, and laminate all behave differently under paint.
You’ll note gloss, lacquer, or melamine and match coating types to appropriate surface preparation: sanding, deglossing, or using a bonding primer.
This guarantees adhesion, prevents peeling, and guides product choice.
Timeline & Cost: How Long and How Much to Refinish Cabinets
You can expect a typical cabinet refinishing project to take anywhere from a weekend for a small set to one to two weeks for a full kitchen, depending on drying times and complexity.
Costs vary widely—materials and primers are cheap, but labor or hiring pros can be the biggest expense—so get itemized estimates for paint, supplies, and hourly rates.
To save money, you can do prep or painting yourself, reuse hardware, and choose cost-effective finishes that still hold up.
Project Timeframe Estimates
Although cabinet refinishing can seem quick on paper, the total time depends on scope, finish type, and your experience level; simple repainting of a few doors might take a weekend, while a full kitchen refinish with stripping, repairs, and multiple coats can stretch over several days to a week. Plan project duration and estimated hours carefully.
| Task | Typical time |
|---|---|
| Prep | 2–6 hrs |
| Painting | 4–12 hrs |
| Drying | 12–48 hrs |
| Reassembly | 1–4 hrs |
Material And Labor Costs
Project duration directly affects how much you’ll spend, since longer jobs raise labor hours, drying time storage needs, and potential rental costs for tools.
Calculate material and labor costs by listing paint, primer, sandpaper, brushes/rollers, and hardware plus realistic labor estimates.
Factor in overhead like workspace and disposal.
Use clear budget considerations to compare DIY versus hiring pros before committing.
Cost-Saving Strategies
When you plan strategically, you can cut both time and cost when refinishing cabinets by batching tasks, choosing fast-drying products, and limiting scope to high-impact areas.
Prioritize sanding and prep for visible surfaces, use hybrid approaches (partial repainting plus hardware updates), and schedule work around drying times to avoid rushed rework.
Use budget-friendly alternatives and DIY techniques: buy sample-size paint, rent tools, refinish doors off-site, and swap hardware.
Tools & Materials Checklist for a Pro Finish
You’ll need a compact, well-organized kit of tools and materials to get a pro-level cabinet finish: quality brushes and foam rollers, a HVLP or airless sprayer if you’re spraying, sandpaper (80–320 grit) plus sanding blocks or a random-orbit sander, tack cloths, high-quality primer and paint formulated for cabinetry, a sealer or topcoat (polyurethane or water-based varnish), masking tape and drop cloths, fast-drying wood filler, and appropriate safety gear like respirator, gloves, and eye protection.
| Task | Tool |
|---|---|
| Prep | Sandpaper, sanding techniques, tack cloths |
| Paint | Brushes, rollers, sprayer, paint adhesion |
| Finish | Sealer, topcoat, safety gear |
How to Remove Doors, Drawers, and Hardware Efficiently
After gathering your tools, start by labeling and documenting every door, drawer, and piece of hardware so reassembly goes smoothly.
Work systematically: remove doors first, supporting them during hinge removal to avoid damage.
Work systematically: remove doors first, supporting them during hinge removal to prevent damage and ensure smooth reassembly.
Pull drawers and lift out rails or stops.
Bag and tag screws, hinges, and knobs for hardware organization.
Store parts in order and photograph placements to speed reinstallation.
Clean & Degrease Cabinets for Best Paint Adhesion
Before you grab paint, you need to prep the surface so it will actually stick.
Wipe cabinets with a degreaser or trisodium phosphate solution, focusing on edges, hinges, and areas with buildup.
Once the surface is clean and dry, you’ll get better adhesion and a smoother finish.
Surface Prep Essentials
Start by stripping away surface grime and grease so paint can really bond to the cabinets.
You’ll perform a quick surface evaluation to spot loose finish, dents, or filler gaps.
Use targeted prep techniques: sand glossy areas, tighten hardware, and remove dust.
Work methodically, wiping between steps, so primer and paint adhere evenly and deliver a durable, smooth finish.
Degreasing Techniques
Cut grease and grime with a targeted cleaning routine so your primer and paint can bond reliably.
You’ll strip oils using proper degreasing solutions—citrus-based or trisodium phosphate alternatives—wiping with microfiber. Rinse thoroughly, then dry. Test a small area first.
Use neutral cleaning agents afterward to remove residue without harming wood. Proper degreasing prevents adhesion failures and guarantees a smooth, durable finish.
Sanding, Filling & When to Strip or Repair
If your cabinets show dents, gaps, old finish buildup, or flaking paint, you’ll need to assess whether to sand, fill, or strip so the new paint adheres and looks smooth.
Assess dents, gaps, old finish, or flaking paint—decide whether to sand, fill, or strip for smooth adhesion.
Use proper sanding techniques—start coarse, finish fine—to remove gloss and imperfections.
Apply filling methods for gouges and seams, then sand flush.
Strip only when buildup or damage prevents a sound substrate.
Choose the Right Primer for Your Cabinet Type
Because different cabinet materials and finishes interact with primers in different ways, picking the right one matters for adhesion and durability. You’ll match primer types to substrate—oil-based for tannin bleed, shellac for problem stains, waterborne for MDF—checking surface compatibility before priming.
| Material | Primer | Note |
|---|---|---|
| Wood | Oil | Blocks stains |
| MDF | Waterborne | Seals fibers |
| Laminate | Bonding | Promotes adhesion |
Choose Paint Type & Sheen for Durability
Finish quality starts with the right paint and sheen—pick a durable formula (acrylic latex or oil-alkyd) that bonds to your primer and a sheen that stands up to wear, like semi-gloss or satin for cabinets.
Choose for paint durability and easy cleaning. Consider:
- Satin — subtle sheen, hides flaws
- Semi-gloss — tougher, wipes clean
- Oil-alkyd — durable, smooth finish
- Acrylic latex — low-VOC, flexible
Brush, Roller, or Spray: Best Application Methods
Having picked a durable paint and the right sheen, you’ll next choose how to apply it—brush, roller, or spray—since each method affects smoothness, speed, and cleanup.
Use brush techniques for detail and edges, a dense foam roller for flat panels to reduce stipple, or opt for spray advantages when you need the smoothest, fastest finish.
Prep, technique, and consistent strokes matter.
Recoating, Drying Times, and Between‑Coat Sanding Tips
When your first coat feels dry to the touch, don’t assume it’s ready for the next—check the manufacturer’s recoat window and wait the minimum time.
Then lightly sand to guarantee adhesion and remove any dust nibs before applying another thin, even coat.
Follow these concise tips:
- Note drying time considerations precisely.
- Use gentle between coat sanding.
- Apply proper recoating techniques.
- Keep environment clean and temperature stable.
Topcoats & Fixes: Protect Cabinets and Solve Peeling/Marks
Seal your work with the right topcoat to protect cabinets from scratches, moisture, and everyday wear, and to make fixes like peeling or scuff marks much easier to address.
Choose topcoat options—waterborne polyurethane for clarity or acrylic for fast cure—to boost surface protection and finish durability.
For peeling solutions, sand to sound film, feather edges, prime, and recoat; touch up scuffs with a matching thin topcoat.
Frequently Asked Questions
Can I Paint Cabinets Without Removing Doors and Drawers?
Yes — you can, but cabinet preparation matters: you’ll sand, clean, and prime while masking hinges. Choose paint selection wisely for durability and smoothness, using high-quality acrylic or enamel and proper brushes or a sprayer for best results.
How Do I Prevent Paint From Cracking at Hinges and Edges?
Think like a watchmaker: minimize cracking causes by sanding edges, feathering old finish, and deglossing hinges. You’ll prep hinge preparation by loosening hardware, using flexible primer, and applying thin, durable topcoats to prevent stress.
What’s the Best Way to Paint Inside Cabinet Boxes and Shelves?
You’ll clean, sand, and mask for cabinet preparation, then use a high-quality primer. For paint application, roll flat surfaces with a mini roller and brush tight spots, apply thin coats, and dry between layers for durability.
Can I Use Household Paint Thinner to Clean Sprayers and Brushes?
Yes — but be careful. Household paint thinner can work for cleaning techniques and sprayer maintenance, yet it’s harsh; you’ll want proper PPE, ventilation, and to follow manufacturer recommendations to avoid damage and guarantee safe, effective cleanup.
How Long Before Reinstalling Items and Everyday Use After Painting?
You should wait at least 24–48 hours before light use, but full cure time is 7–30 days depending on drying conditions and paint type; avoid heavy use until the finish’s cured and feels hard, not tacky.
Conclusion
You’ve got the roadmap to turn tired cabinets into a smooth, durable showcase. Whether you paint or replace, check materials, gather the right tools, and take the time for prep, proper products, and careful application. Like tuning an instrument before a performance, those small steps make all the difference. Follow drying and sanding routines, choose a tough topcoat, and you’ll enjoy cabinets that look great and stand up to daily use for years.
