
How to Remove Paint From Walls Before Repainting the Right Way
Before repainting, clear the room, ventilate, and wear PPE; then inspect for peeling, blisters, chalking, or moisture to decide whether to recoat, sand, or strip to bare substrate. Test for lead if the home’s pre‑1978 and contain any hazardous waste. Remove loose paint with a scraper, use chemical strippers or heat guns where needed, sand smooth, repair and prime stained or damaged areas, and vacuum and wipe clean—keep going to get detailed steps, safety tips, and a printable checklist.
Quick 6‑Step Workflow to Remove Paint and Prep Walls
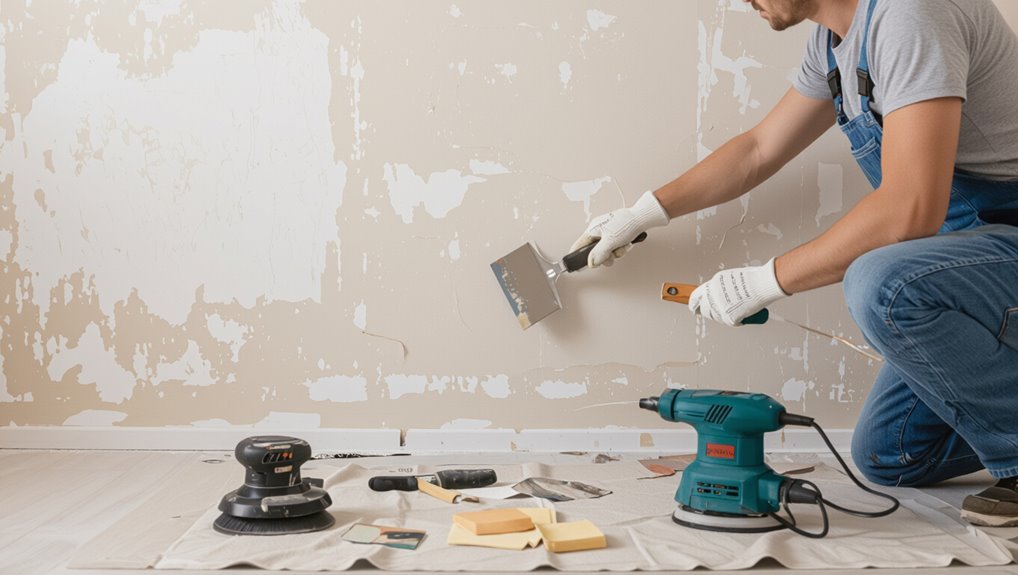
Start by gathering the right tools and planning the work area so you don’t stop midway: clear furniture, lay drop cloths, open windows for ventilation, and choose the removal method (sanding, chemical stripper, heat gun, or scraper) based on paint type and surface.
Then follow a concise six‑step workflow: test, protect, remove, clean, repair, and prime, using proven paint removal techniques and wall preparation tips.
Decide: Recoat, Sand, or Strip Paint?
Before you decide whether to recoat, sand, or strip, assess the paint’s condition, the substrate, and your timeline so you pick the least invasive option that delivers a durable finish.
Check paint type and surface condition, weigh stripping options versus sanding techniques, and choose prep methods that protect wall integrity.
Plan paint removal steps, use proper safety measures, and opt for the method matching longevity and effort.
How to Inspect for Peeling, Blisters, and Chalky Paint
Before you decide how to proceed, walk the room and check for areas where paint is peeling or flaking away from the substrate.
Press gently on suspect spots to spot blisters or bubbles that indicate moisture or poor adhesion.
Rub a fingertip across the surface—if it leaves a powdery residue, the paint is chalking and needs special prep.
Check For Peeling Paint
When you inspect walls for peeling paint, look closely for areas where the paint lifts, forms blisters, or leaves a chalky residue on your fingertips—these signs tell you whether the coating has failed or if underlying moisture or adhesion problems exist.
For peeling assessment, run your fingernail across surfaces; loose flakes or powder mean poor paint adhesion.
Mark and prioritize repairs before repainting.
Identify Blisters And Bubbles
Start by scanning the wall for rounded, raised areas where the paint has lifted from the substrate—those are blisters or bubbles, and they’ll feel slightly springy when you press them with a gloved fingertip.
Note size, location, and moisture signs to infer bubble causes like trapped moisture or heat. Mark affected spots, then follow appropriate blister remedies: puncture, dry, sand, and prime before repainting.
Test For Chalky Residue
How can you tell if paint is chalky? Rub a damp cloth over a small area; white powder means chalky residue.
Try light scraping and a magic eraser for more confirmation. Note where paint flakes or blisters appear.
Record results and choose appropriate residue removal methods—detergent wash, sanding, or a chemical stripper—before priming.
These chalky residue tests prevent adhesion issues.
When to Strip Paint to Bare Plaster or Drywall
Before you decide to strip paint to bare plaster or drywall, assess the paint condition for widespread peeling, multiple layers, or uneven adhesion.
Check for lead paint—if the home was built before 1978, test first and follow safety rules if it’s present.
Finally, evaluate surface integrity: if the substrate is damaged, soft, or heavily patched, stripping to bare plaster or drywall may be the safest route.
Assess Paint Condition
Wondering whether you need to strip paint back to bare plaster or drywall? You inspect paint types and wall surfaces for peeling, bubbling, or multiple layers. If damage’s extensive, strip to sound substrate before repainting. Trust your judgment: prep now saves work later.
| Emotion | Decision | Action |
|---|---|---|
| Concern | Severe damage | Strip |
| Relief | Minor flaws | Repair |
| Certainty | Clean substrate | Repaint |
Check For Lead
Concerned about lead? If your home was built before 1978, test suspect paint for lead paint before sanding or scraping.
Use a certified test kit or pros; don’t assume safe.
Take precautions if lead is detected — containment, wet methods, and HEPA cleanup reduce health risks.
If results are positive, consider professional abatement to avoid contamination and exposure.
Evaluate Surface Integrity
Evaluating the surface integrity tells you whether to strip paint down to bare plaster or drywall: look for deep cracks, widespread bubbling or peeling, loose or powdery substrate, and areas where multiple paint layers have built up or delaminated—conditions that sanding or spot-priming won’t reliably fix.
Perform a focused surface assessment and integrity evaluation; if damage is extensive, strip to substrate, repair, then prime before repainting.
Test for Lead Paint Before You Start
Because older paint can contain hazardous lead, test the surface before you scrape, sand, or strip to protect yourself and others.
You should use certified lead detection methods—home kits for preliminary checks, or a certified inspector for confirmation.
Follow manufacturer instructions, wear PPE, and avoid disturbing paint until results are clear.
Safe testing prevents exposure and informs whether specialized abatement is required.
Containment and Ventilation for Stripping
Before you strip, seal the work area with plastic sheeting and tape to keep dust and chips contained.
Use barriers and negative-pressure tools to control dust spread to the rest of the house.
Open windows, run fans for cross-ventilation, and wear appropriate respiratory protection so fresh air replaces contaminated air.
Seal Work Area
Start by isolating the room: close and seal doors, vents, and openings with plastic sheeting and painter’s tape so dust and fumes don’t spread to the rest of the house. You’ll follow safety precautions and keep workspace organization tight. Keep a fan near a window for ventilation, and use zipper doors for entry.
| Item | Purpose |
|---|---|
| Sheeting | Seal openings |
| Tape | Secure edges |
| Fan | Ventilate |
| Zipper | Access control |
Control Dust Spread
When you strip paint, contain dust by sealing off the work area with overlapping plastic sheeting and taped seams so particles can’t migrate; keep windows or an exhaust fan drawing air out to direct any airborne dust away from living spaces.
Use dust containment methods and dust control techniques to limit spread.
- Close vents
- Create negative pressure
- Wet-sanding minimally
- HEPA vacuum cleanup
Ensure Fresh Air
Although containment keeps dust from spreading, you still need fresh air to dilute fumes and keep the work area safe; set up a ventilation plan that balances airflow with containment.
Open windows, run window fans outward, and use HEPA-filtered air scrubbers. Seal adjacent rooms, direct airflow away from living spaces, and rotate fans as needed.
Follow ventilation techniques and monitor odors for safety.
What PPE to Wear and Why
Because paint removal releases dust, solvents, and chips that can harm your eyes, lungs, and skin, you should gear up with the right PPE before you begin.
Wear safety goggles, protective gloves, a respirator mask, and coveralls to minimize exposure.
Follow this checklist:
- Safety goggles
- Protective gloves
- Respirator mask
- Coveralls
Protecting Floors, Fixtures, and Trim
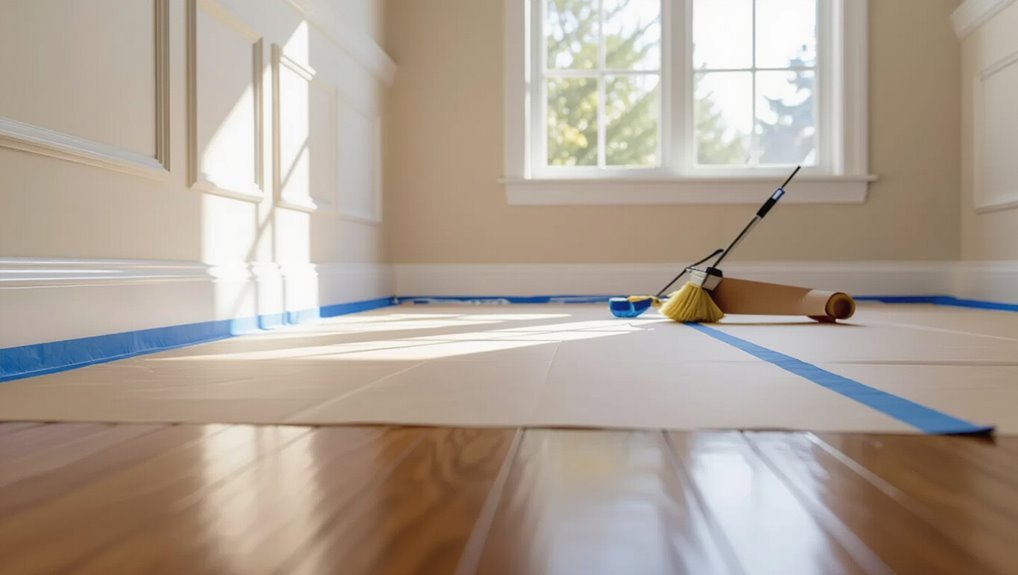
Before you bring out scrapers or solvents, cover floors, fixtures, and trim to prevent stains, gouges, and lingering dust from the job.
Use heavy-duty drop cloths and rosin paper for floor protection, plastic and painter’s tape for precise fixture covering, and foam or tape for trim safeguarding.
Seal edges to guarantee complete area shielding and easy cleanup afterward.
Manual Scraping: Tools and Techniques
With floors and trim protected, you can start manual scraping to remove loose or peeling paint. You’ll use a sturdy putty knife or scraper, sanding block, and wire brush to refine surfaces.
With floors and trim protected, begin manual scraping with a sturdy putty knife, then sand and brush for smooth surfaces.
Focus on even removal for sound substrate and good wall preparation.
- Scraper: thin, angled blade
- Sanding: medium grit, follow grain
- Brush: remove dust
- Patch: fill defects
Using Chemical Strippers Safely
When you use a chemical stripper, pick a product suited to the paint type and surface so you get effective results without unnecessary damage.
Wear gloves, goggles, and long sleeves to protect your skin and eyes from splashes and fumes.
After stripping, follow the label to neutralize residues and dispose of waste safely according to local regulations.
Choose Appropriate Stripper
If you’re tackling paint removal with chemicals, pick a stripper that matches the paint type and your surface—caustic, solvent, and bio-based removers all work differently and demand different precautions.
Assess sheen, substrate, and ventilation. Consider eco friendly options and read brand comparisons for effectiveness and VOCs.
- Test small area
- Follow label directions
- Neutralize residue
- Dispose properly
Protect Skin And Eyes
After you’ve chosen and tested a stripper, protect your skin and eyes before you start applying it. Wear chemical-resistant gloves, long sleeves, and goggles; don’t touch your face. Work with ventilation and have eyewash ready. Follow label instructions for skin protection and eye safety.
| Item | Purpose | Tip |
|---|---|---|
| Gloves | Barrier | Nitrile |
| Goggles | Protect eyes | Sealed |
| Apron | Clothing shield | PVC |
| Eyewash | Emergency | Accessible |
| Ventilation | Fume control | Fans |
Neutralize And Dispose
1 clear step you shouldn’t skip is neutralizing the stripper residue and disposing of it properly; do this before you clean tools or leave the work area.
You’ll follow instructions, use neutralizers or water as directed, and consider eco friendly options. Check local regulations for hazardous waste.
- Neutralize per product label
- Contain residues securely
- Dispose at approved sites
- Clean tools last
Choosing a Paint Stripper for Your Paint Type
Choosing the right paint stripper starts with identifying the paint type on your wall—latex, oil-based, or specialty finishes like enamel or epoxy—because each responds differently to chemical, solvent, or mechanical methods.
Match paint stripper types to the finish: alkaline or solvent for oil, water-based or caustic for latex, and specialty formulations for enamel.
Also consider eco friendly options and necessary safety gear.
Heat Guns and Infrared Paint Removers
When you need fast, controlled paint removal without harsh chemicals, heat guns and infrared paint removers offer two effective options: heat guns soften paint with hot air while infrared tools gently heat underlying layers to loosen coatings without charring the substrate.
You’ll choose based on surface, layer thickness, and required precision; follow safety precautions and proven paint removal techniques.
- Test on scrap
- Use PPE
- Control temperature
- Work slowly
When to Sand Instead of Strip
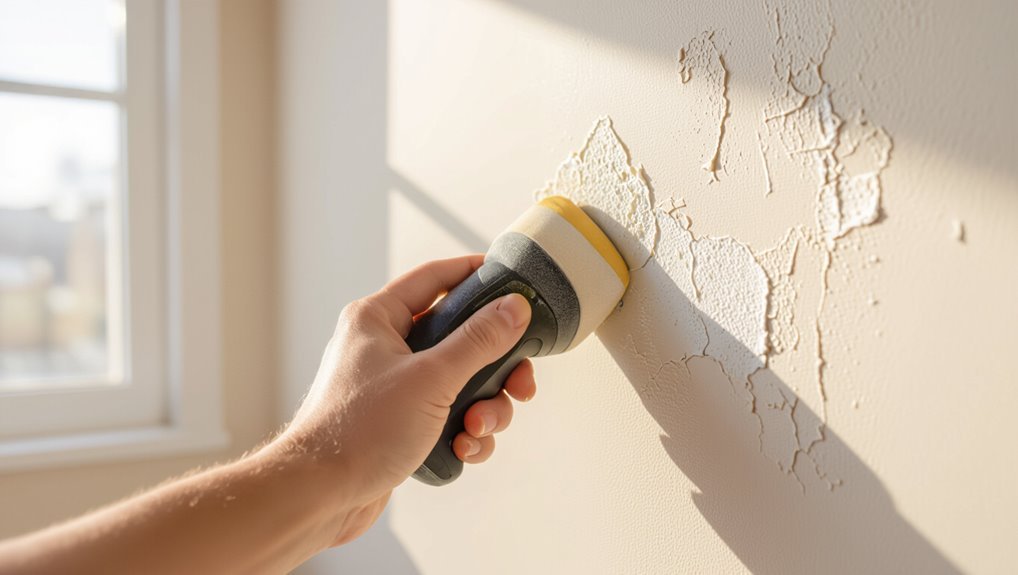
If your goal is to smooth imperfections or remove a few thin layers rather than strip everything back to bare substrate, sanding is often the better choice.
You’ll pick sanding techniques based on paint thickness, surface hardness, and nearby trim. Use appropriate sanding tools for control and dust reduction, work with the grain, and stop when the surface is uniformly feathered for priming and repainting.
Best Sanders and Abrasives for Walls and Trim
Because walls and trim demand different control and finish, you’ll want the right sander and abrasive for each task: pick tools that match sanding techniques and abrasive materials to surface and profile.
Because walls and trim need different control and finish, choose sanders and grits suited to each surface.
Use:
- Orbital sander + 120–150 grit for flat walls.
- Detail sander + 150–220 grit for tight corners.
- Sanding block + 180–220 grit for trim.
- Foam sanding pads for contours and final finish.
Wet Scraping and Solvent Cleaning for Chalky Paint
If the paint rubs off as a powder, you’re dealing with chalky paint and need to test small areas first to see how badly it’s degraded.
Choose a solvent that’s labeled for chalky or weathered paint and spot-test it on an inconspicuous patch to check for softness, lifting, or discoloration.
Work from mild to stronger solvents, rechecking the surface so you don’t damage the substrate.
Assess Paint Chalkiness
Wondering whether that powdery residue on your walls is a paint problem or just surface dirt? You’ll test for paint deterioration by rubbing a damp cloth; persistent residue means chalky surfaces.
Then:
- Wet a small area and rub gently.
- Note color transfer and texture.
- Mark affected zones for treatment.
- Record severity to plan scraping or cleaning.
Choose Appropriate Solvent
How should you pick a solvent for wet scraping and cleaning chalky paint? You’ll match solvent types to surface and paint condition: mild detergent mixes for light chalking, stronger citrus or glycol-based removers for stubborn areas.
Test small patches, wear gloves and ventilation, and prefer eco friendly options when possible to reduce fumes.
Rinse thoroughly and let the wall dry before repainting.
Removing Wallpaper Adhesive and Residue
Scrape off loose paper and then tackle the sticky paste left behind—wallpaper adhesive can prevent new paint from sticking and will show through thin finishes.
Use gentle adhesive removal techniques and test wallpaper residue solutions in a small area. Then clean, rinse, and let dry before priming.
Always test adhesive removers on a small area, then clean, rinse, and fully dry before priming.
- Warm water soak
- Vinegar solution
- Commercial remover
- Scrub with sponge
Removing Multiple Paint Layers and Covering Stains
If you’re dealing with several old paint layers, strip or degloss them first so new coatings will adhere evenly and stains won’t bleed through.
Use a chemical stripper or sanding, then clean and prime stained areas. This surface preparation improves paint adhesion and helps primers block minor discoloration.
Feather edges, remove dust, and choose a stain-blocking primer before repainting for consistent results.
Stain Removal: Tannins, Smoke, and Rust Spots
Start by identifying whether the mark is a tannin bleed, smoke residue, or rust so you can pick the right treatment.
Use targeted cleaners—bleach or oxalic acid for tannins and rust, degreasers or trisodium phosphate for smoke—and test a small spot first.
After cleaning, seal or prime the area and fix the source (moisture, metal contact, or smoking) to prevent recurrence.
Identify Stain Types
Because different stains behave and react to cleaners in distinct ways, you’ll want to identify whether you’re dealing with tannin bleed, smoke residue, or rust before treating the wall.
You’ll examine paint types and stain characteristics to choose prep steps. Check these signs:
- Yellow-brown streaks from wood/tannin.
- Sooty, oily film from smoke.
- Reddish-orange spots from metal rust.
- Faint dye transfer versus surface dirt.
Effective Cleaning Solutions
When you’re tackling tannin, smoke, or rust stains, pick cleaners that target the specific stain chemistry—oxidizers or heavy-duty detergents for tannins, degreasers for smoke residue, and rust removers containing oxalic or citric acid for metal stains—so you don’t damage the paint while treating the spot.
Test small areas, rinse thoroughly, and consider eco friendly solutions or homemade cleaners like diluted vinegar for mild tannins.
Preventing Stain Recurrence
To keep tannin, smoke, and rust stains from coming back, address the source and create conditions that discourage recurrence: seal or replace leaking trim and rusty fixtures, improve ventilation to cut smoke and moisture buildup, and use stain-blocking primers before repainting so tannins and rust can’t bleed through.
- Inspect and fix sources.
- Clean and sand for surface preparation.
- Apply stain-blocking primer.
- Improve ventilation for stain prevention.
Repairing Surface Damage After Paint Removal
After stripping paint, you’ll often find dings, gouges, or uneven texture that need attention before refinishing; address these issues now so your new finish looks smooth and lasts.
Use surface preparation techniques like cleaning, sanding, and priming.
Choose appropriate wall repair methods—fillers for small holes, spot sanding for rough spots, and sealing repairs—then prime repaired areas before repainting.
Skimming and Patching Plaster and Drywall
Smooth over damaged plaster or drywall by skimming and patching to create a seamless surface ready for finish coats.
Smooth damaged plaster or drywall by skimming and patching for a seamless surface ready for finish coats.
You’ll assess cracks and holes, remove loose material, and apply appropriate compounds for plaster repair or drywall patching.
Sand smooth, feather edges, and repeat thin coats until even.
Follow these steps:
- Clean and score edges.
- Apply bonding agent.
- Skim coat thinly.
- Sand and inspect.
Priming Bare or Challenging Surfaces
Before you paint bare or tricky surfaces, test adhesion with a small patch to see how the substrate accepts primer.
Pick a primer formulated for the material—stain-blocking, bonding, or high-alkali resistance as needed.
Prep the area by cleaning, sanding, and sealing edges so the primer can form a proper bond.
Test Surface Adhesion
When you’re dealing with bare drywall, glossy trim, or previously painted surfaces that flake, always test adhesion before you prime the whole wall so you can choose the right prep and primer.
You’ll perform simple adhesion testing to guide surface preparation and avoid failures. Follow these steps:
- Clean a small area.
- Scratch or tape test.
- Note loose or powdery spots.
- Sand and retest.
Choose Appropriate Primer
Now that you’ve checked adhesion and fixed any loose or powdery areas, pick a primer that matches the surface and problem you’re solving.
For bare drywall, previously stained areas, or glossy patches choose from primer types like stain-blocking, bonding, or shellac-based.
Follow manufacturer primer application instructions, apply evenly, and let proper dry time guarantee the topcoat bonds and covers consistently.
Prep For Proper Bonding
If you’re priming bare drywall, patched areas, or tricky substrates like glossy enamel or knotty wood, prep is what makes the primer stick—and last.
You’ll clean, sand, and select bonding agents or specialty primers based on surface preparation.
Follow steps:
- Degrease and rinse.
- Scuff sand glossy areas.
- Spot-fill and sand smooth.
- Apply bonding agents per instructions.
Bonding Primer vs. Stain‑Blocking Primer: When to Use Each
Curious which primer to pick for a tricky wall? You’ll choose bonding primer when adhesion is the issue—peeling, glossy surfaces, or patchy repairs.
Use stain‑blocking primer to seal tannin, smoke, or water marks.
Know primer types and follow application techniques: clean, sand, and apply recommended coats evenly.
Match primer purpose to the defect to avoid bleed‑through or poor adhesion.
Prepping Oil‑Based Paint for New Latex Topcoats
If the wall was painted with oil-based paint, you’ll need to confirm that first by testing for a glossy, hard surface or using a solvent test.
Next, scuff and degloss the surface with sandpaper or a liquid deglosser so the latex can adhere.
Finally, prime with a bonding or oil‑block primer formulated to accept latex topcoats.
Identify Oil-Based Paint
Before you can prep oil-based paint for a new latex topcoat, you need to confirm the existing finish is truly oil-based—look for a hard, glossy feel, check for yellowing with age, and perform a quick solvent test by rubbing a cotton ball dampened with denatured alcohol or lacquer thinner; if the gloss softens or the paint comes off, it’s oil-based and requires specific sanding and priming steps.
- Note paint characteristics: hardness, gloss.
- Use solvent test for identifying finishes.
- Inspect edges, trim, and corners.
- Photograph areas before starting.
Scuff And Degloss Surface
Now that you’ve confirmed the existing finish is oil-based, you’ll need to scuff and degloss the surface so the new latex topcoat will stick.
Use abrasive scuff techniques like 220–320 grit sanding or synthetic mesh pads to dull gloss without cutting through.
Follow degloss methods using liquid sanders or a TSP wash to remove residue and restore adhesion.
Apply Appropriate Primer
Choose a high‑quality bonding primer designed for oil‑to‑latex conversions so your new latex topcoat adheres and lasts.
You’ll select primer types that block stains and sand smoothly. Follow correct primer application for coverage and drying times.
Prep thin, even coats and sand between layers so the latex finish bonds.
- Clean surface
- Pick bonding primer
- Apply thin coats
- Sand, then topcoat
How to Test Adhesion Before Painting
If the existing paint flakes, chalks, or feels slick, you’ll want to test adhesion before you roll on a new coat.
Use a razor to make a small X, press and peel strong tape, and inspect for lifting. Document results and repeat across the wall.
Good adhesion testing guides your surface preparation and tells you whether sanding, priming, or removal is needed.
Cleaning Up Dust, Residue, and Chemical Traces
Before you paint, remove all dust, sanding residue, and any chemical traces so your new coat adheres and looks smooth.
Use wet wiping, vacuuming with a brush attachment, and tack cloths. Prioritize chemical safety when neutralizing residues and ventilate.
- Vacuum surfaces
- Damp-wipe walls
- Use tack cloths
- Neutralize cleaners and ventilate
Safe Disposal of Paint, Stripper Waste, and Rags
1 simple rule will keep you safe: treat leftover paint, stripper residues, and used rags as potentially hazardous and handle them deliberately.
Seal containers, air out rags before disposal or store them in metal cans with lids.
Seal containers, air out rags before disposal, or store them in metal cans with tight lids.
Check local paint recycling options and follow hazardous waste disposal guidelines at community centers.
Never pour liquids down drains; document pickup or drop-off receipts for compliance.
Fixing Delamination, Stains, and Texture Problems
Now that you’ve handled leftover materials safely, turn your attention to the wall itself: delamination, stains, and texture problems each require different fixes but share a methodical approach.
You’ll diagnose delamination causes, identify stain types, and plan texture repair to restore paint adhesion.
- Scrape loose areas.
- Clean stains.
- Patch texture.
- Prime for adhesion.
Save Time in Large Rooms and on High Ceilings
When you’re tackling a large room or high ceilings, work smarter by breaking the job into zones and using tools that extend your reach—like pole sanders, rollers, and a telescoping paint pole—so you avoid constant ladder climbs and repeated setup. Use these large room efficiency and high ceiling techniques to speed prep and reduce fatigue.
| Tool | Benefit |
|---|---|
| Pole sander | Faster sanding |
| Extension roller | Wide coverage |
| Telescoping pole | Safe reach |
| Drop cloths | Protect floors |
| Worklight | Improves visibility |
DIY Costs vs. Hiring a Pro: What to Budget
Although tackling paint removal yourself can save money, you should weigh material and tool costs, time, and skill against a pro’s labor and efficiency before deciding.
- DIY budgeting: tally tool rental, material costs, and hidden expenses.
- Professional estimates: get multiple bids for accurate cost comparison.
- Time investment: calculate hours lost versus billed labor.
- Quality considerations: factor warranty, finish, and rework risk.
When to Hire a Pro or a Lead Abatement Team
Wondering whether you should handle paint removal yourself or call in a pro or certified lead abatement team?
If your home was built before 1978, you’re unsure about contamination, or you spot chipping leaded paint, get a professional assessment.
Hire pros when regulations, complex surfaces, or strict lead safety protocols are required. They’ll protect occupants and guarantee compliant disposal and documentation.
Seasonal and Climate Tips for Stripping & Repainting
If you decide a pro isn’t needed or once a lead-safe contractor finishes their work, you’ll want to plan stripping and repainting around the seasons and local climate to get durable results.
Consider seasonal factors and climate considerations so coatings cure properly and debris stays minimal.
- Choose dry, moderate temps.
- Avoid high humidity.
- Time for dust-free winds.
- Allow extended cure windows.
Printable Tools and Materials Checklist
Checklist essentials help you stay organized and efficient when stripping and repainting; print this one-page tool and materials list so you can tick items off as you gather them.
Include scraper, chemical stripper, heat gun, sandpaper, drop cloths, respirator, gloves, putty knife, primer, and brushes.
Note paint removal techniques and wall preparation tips beside each item for quick reference and safe, efficient workflow.
Frequently Asked Questions
Can I Remove Paint From Textured Concrete or Masonry Surfaces?
Yes—you can remove paint from textured concrete or masonry surfaces. You’ll need appropriate paint removal techniques like chemical strippers, abrasive blasting, or grinders; be careful with textured surfaces to avoid damage and work with proper PPE.
How Long After Stripping Before I Can Repaint in Humid Climates?
You’ll usually wait 24–72 hours in humid climates; humidity effects slow drying times, so use a moisture meter or touch test and extend to 5–7 days for heavy coatings or masonry to guarantee full cure before repainting.
Will Paint Removal Methods Damage Wallpaper Underneath?
Yes—you can damage wallpaper if you use harsh stripping methods; you’ll need gentle solvents or low-temp steam, test first, and prioritize wallpaper preservation to maintain paint adhesion for any new coatings applied afterward.
Can I Reuse Paint Removed From Walls for Touch-Ups?
Yes — but only sometimes. About 30% of leftover paint keeps usable pigment; you’ll need paint recycling steps: strain, mix, label. For touch up techniques, test color match, thin small amounts, and store airtight for short-term use.
Are There Insurance Implications for DIY Lead‑Related Work?
Yes — you might void insurance coverage if DIY lead work causes harm or property damage. You should notify your insurer, follow regulations, use certified contractors when required, and document safety measures to limit lead exposure risks.
