
Why Is My Ceiling Paint Cracking? Causes and How to Fix It Fast
If your ceiling paint is cracking, act fast: clear the area, photograph the damage, and check for leaks or moisture first because water and poor ventilation are the most common causes. Cracks also come from bad surface prep, incompatible primer/paint, temperature swings, or structural movement. For a quick fix, clean, widen hairline cracks, apply flexible filler, prime, and repaint—repair bigger issues like leaks or insulation first. Keep going to learn how to pinpoint the root cause and proper repairs.
Quick Triage: What to Do If Ceiling Paint Cracks Now
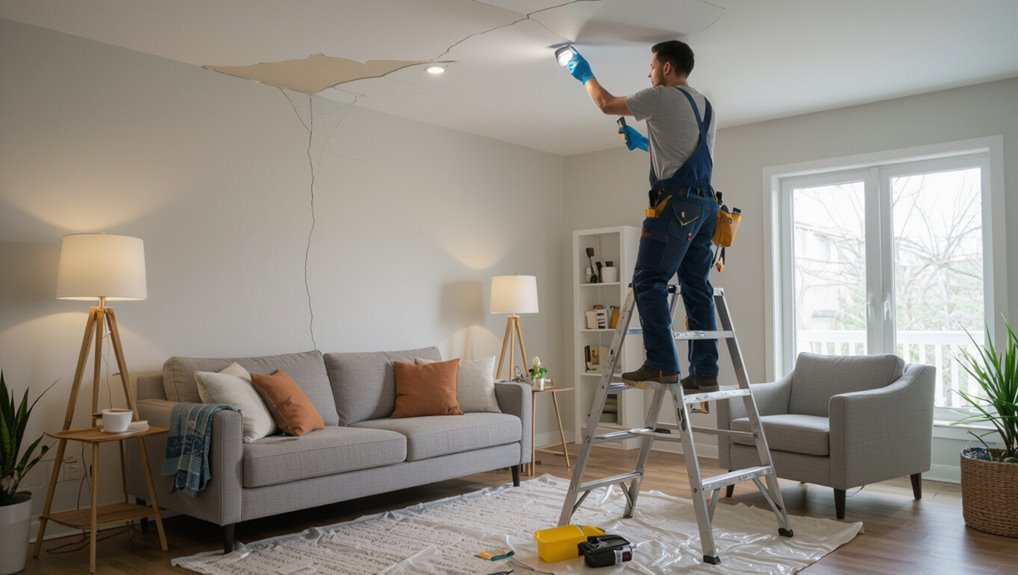
If your ceiling paint is cracking right now, act quickly to prevent further damage: clear the area beneath the crack, spread a drop cloth, and take photos for records or insurance.
Next, perform a focused crack assessment to gauge size and depth.
Contain dust, mark boundaries, and decide immediate repair techniques like sanding, filling with flexible compound, priming, and repainting to stop spread.
Quick Causes Summary: Why Ceiling Paint Cracks
Look first for moisture and leaks, since water stains or a musty smell usually mean the paint lost adhesion.
Also check whether the ceiling was properly prepped—dirt, old gloss, or loose plaster will make new paint crack.
Knowing these two causes will help you decide the next fix.
Moisture And Leaks
Because water undermines paint adhesion, even tiny leaks or prolonged humidity will make your ceiling paint crack and peel.
You should inspect moisture sources like roof damage, plumbing, and poor ventilation.
Use leak detection methods—thermal camera, moisture meter, or visual checks—to pinpoint wet areas.
Fix the leak, dry the substrate thoroughly, and replace compromised paint and drywall to prevent recurring cracking.
Poor Surface Preparation
When you skip cleaning, sanding, or priming, paint won’t bond properly to the ceiling and will crack or flake as the substrate moves or absorbs moisture.
You need to assess surface conditions, remove dirt, loose material, and glossy sheen, then use appropriate painting techniques and primer for the substrate.
Proper prep prevents adhesion failure and extends finish life, saving time and rework.
How to Identify the Damage Type Fast
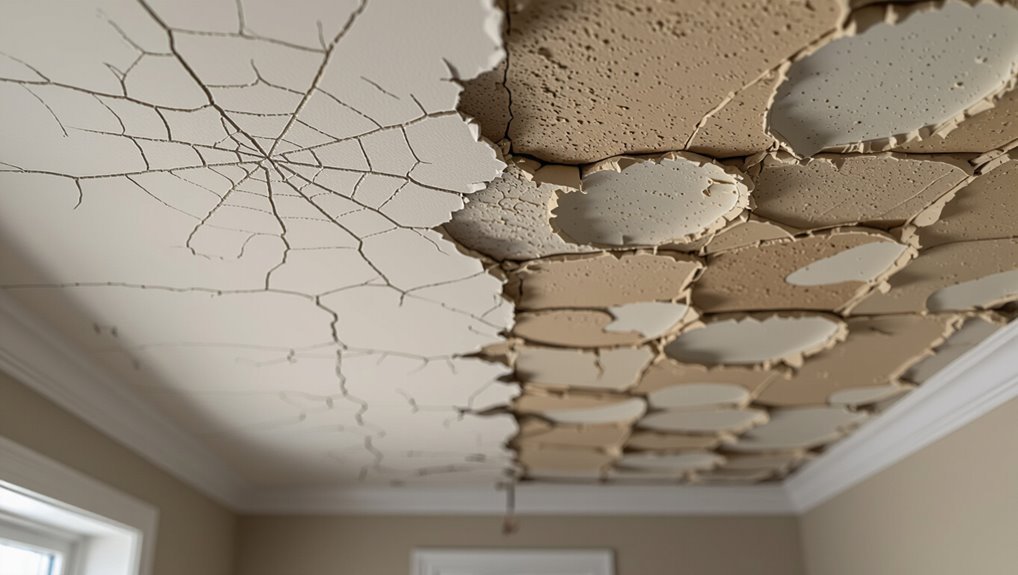
Start by examining the crack pattern—hairline, spiderweb, or long linear splits tell you whether it’s settling, moisture, or a structural issue.
Then run a fingertip over the surface to feel for flaking, chalkiness, or soft spots that indicate adhesion or water damage.
Those two quick checks will point you toward the right fix.
Crack Pattern Inspection
If you scan the ceiling closely, you can tell a lot about what’s causing the paint to crack just by the pattern it makes.
Look for hairline, spiderweb, stair-step or alligator patterns; each points to different causes.
Use simple inspection techniques: trace crack direction, note spacing and depth, check nearby seams and joints.
Record crack types and locations before planning repairs.
Surface Texture Test
After you’ve mapped the crack patterns, use a quick surface texture test to pinpoint whether you’re dealing with paint failure, plaster damage, or substrate movement.
Gently rub a soft cloth over the crack: powdery residue suggests paint failure, rough or crumbly texture signals plaster damage, while shifting, hollow spots indicate substrate movement.
This texture assessment speeds your ceiling evaluation and next repair steps.
Signs of Moisture-Related Paint Failure
How can you tell when moisture’s the culprit behind cracking ceiling paint? Look for discolored patches, soft or spongy drywall, bubbling or flaking where paint adhesion fails, and musty odors.
Use moisture detection tools or a simple probe to confirm elevated dampness. Check nearby bathrooms, plumbing runs, and condensation-prone areas—moisture problems often appear before widespread cracking, so act quickly.
Roof Leaks: Ceiling Symptoms and Detection
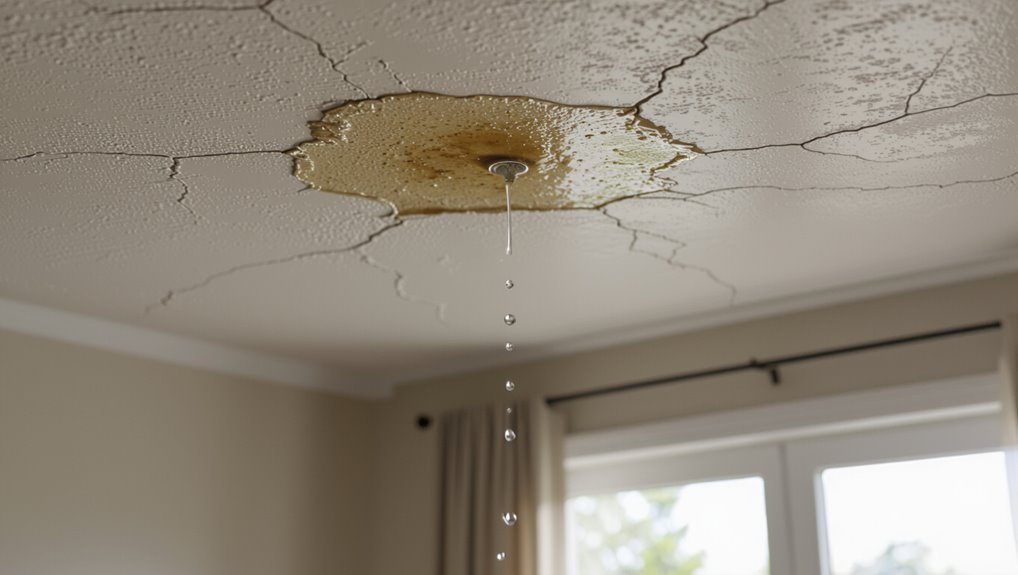
When a roof is leaking, you’ll often see telltale ceiling symptoms before the source on the roof is obvious: sagging or bulging drywall, yellow-brown stains that grow after storms, paint that cracks or blisters in localized patches, and drips or damp spots that reappear with rain.
During a rapid ceiling inspection, note stain patterns, soft spots and timing of leaks to guide leak detection and roof repairs.
Condensation, Ventilation, and Seasonal Humidity
Because warm indoor air holds more moisture, you’ll often see paint cracking or peeling on ceilings where humid air cools and condenses—especially near poorly ventilated attics, bathrooms, and kitchens.
You should address seasonal humidity spikes with dehumidifiers, improve airflow with proper ventilation solutions, and seal attic bypasses.
Routine humidity control prevents recurrent damage and keeps paint adhesion strong.
Plumbing Leaks and Hidden Water Damage Signs
If you spot water stains or brown discoloration on your ceiling, you should suspect a plumbing leak above.
Check around light fixtures and vents—peeling or bubbling paint there often means moisture is collecting near the source.
Catching these signs early lets you fix the leak before more paint and structural damage occurs.
Water Stains And Discoloration
Though it might look like mere cosmetic wear, water stains and discoloration on your ceiling often signal plumbing leaks or hidden water damage that need prompt attention. You should inspect for damp spots, musty odors, and weakened paint adhesion. Catching issues early prevents larger repairs.
| Sign | Action |
|---|---|
| Yellow-brown stains | Trace leak, dry area |
| Soft drywall | Replace, repair source |
Peeling Near Ceiling Fixtures
Water stains often point to leaks, but peeling paint around ceiling fixtures gives a clearer sign that water’s been tracking along wiring or fixtures.
Check fixture placement—leaks often follow junction boxes and recessed cans. Feel for dampness, smell mildew, and inspect attic plumbing.
Repair the source, replace damaged drywall, and consider how lighting effects may mask or reveal ongoing moisture so you can prevent recurrence.
Structural Movement and Settling That Crack Paint
When your home shifts and settles over time, those tiny movements can stress the plaster or drywall and cause paint to crack along seams, corners, and joints.
You should monitor changes with basic settlement analysis to protect structural integrity.
Check for:
- Hairline cracks near beams
- Wider cracks after temperature swings
- Cracks that recur after patching
Address promptly to prevent bigger issues.
Ceiling Joints, Seams, and Tape Failure to Watch For
Check the seams where drywall tape meets the joint compound, because loose tape or failing compound will let paint crack and flake.
You’ll notice hairline splits or bubbling along joints before the damage spreads across the ceiling.
Fixing or replacing failed tape and re-taping joints stops recurrent cracking and gives paint a sound surface to stick to.
Loose Tape Seams
Tape seams along ceiling joints can loosen and show as hairline cracks or gaps where drywall tape has pulled away from the joint compound.
You’ll spot failing tape adhesion and compromised seam integrity.
Fix by removing loose tape, re-taping, and priming before repainting.
Steps:
- Peel and clean the joint.
- Apply fresh tape and compound.
- Sand, prime, paint.
Joint Compound Failure
Although joint compound is meant to bridge seams and hide tape, it can fail over time and cause cracking, crumbling, or separation at ceiling joints. You’ll spot joint compound issues from hairline cracks or sagging tape. Poor joint compound application and moisture cause problems; re-tape, reapply compound correctly, and prime before painting to prevent recurrence.
| Symptom | Fix |
|---|---|
| Cracks | Re-tape |
| Crumble | Remove |
| Separation | Reapply |
| Sagging | Reinforce |
| Moisture | Dry and seal |
Old Plaster vs. Drywall: Spotting Different Crack Patterns
When you’re trying to tell whether cracks come from old plaster or newer drywall, look at the pattern and context:
- Old plaster often shows hairline, spiderweb cracks radiating from lath spots — repair techniques involve patching and re-plastering.
- Drywall differences: straight cracks usually follow seams or joints — tape and mud fixes.
- Check depth and movement to choose proper materials and approach.
Temperature Swings and Thermal Expansion Effects
When seasons change, your ceiling materials expand and contract at different rates, and those temperature swings can stress the paint.
If plaster, drywall, and joint compounds move unevenly from heat or cold, you’ll often see cracking along seams and patches.
Poor insulation or ventilation makes the swings worse, so controlling attic and room temperatures can reduce the problem.
Seasonal Temperature Swings
If your ceiling goes through big temperature swings between seasons, the materials expand and contract at different rates and that movement can crack paint. You’ll notice cracking after temperature fluctuations and seasonal adjustments.
Watch for:
- Fine spiderweb cracks after cold snaps.
- Paint flaking in spring warm-ups.
- New gaps near joints.
Address insulation and stable humidity to reduce recurrence.
Differential Thermal Expansion
Because different ceiling materials expand and contract at different rates, you’ll see paint crack where those materials meet or move, especially during rapid temperature swings. You’ll notice hairline fractures as thermal expansion creates material stress at joints. Address movement with flexible caulk, proper primers, and paint designed for slight flexing.
| Frustration | Hope | Action |
|---|---|---|
| Visible cracks | Repairable | Caulk joints |
| Worry | Relief | Flexible paint |
Insulation And Ventilation
Thermal movement at seams often links to how well your ceiling is insulated and ventilated, since poor insulation lets temperatures swing wildly and increase expansion-and-contraction cycles.
You should check insulation types, ventilation systems, air circulation, humidity control, moisture barriers, draft prevention, temperature regulation, and energy efficiency.
- Seal drafts
- Add moisture barriers
- Improve ventilation systems and insulation types for better air circulation
Poor Surface Prep: Common Mistakes That Cause Cracking
When you skip proper surface prep, paint doesn’t get the grip it needs and will crack sooner than you expect. You should follow preparation tips: surface cleaning, correct paint selection, and proper application techniques. Monitor drying time and environmental factors. Use inspection methods to spot failures and apply repair strategies quickly.
| Issue | Fix |
|---|---|
| Dust | Clean |
| Moisture | Dry |
| Loose | Scrape |
| Contaminants | Degrease |
| Roughness | Sand |
Primer Mistakes: Wrong Type or Skipped Primer
After proper surface prep, the next common culprit is primer—using the wrong type or skipping it altogether will let paint fail faster.
You must match primer types to surface and follow correct primer application.
Consequences include:
- Poor adhesion and early cracking
- Stain bleed-through and uneven finish
- Reduced durability requiring repainting sooner
Choose and apply primer properly to prevent failures.
Paint Compatibility: Oil vs. Latex Problems
If you’ve ever painted over an oil-based coat with latex (or the reverse) without using a proper bonding primer, you’ll likely see cracking, peeling, or flaking as the new layer fails to adhere. You’ll face oil paint issues or latex paint challenges unless you strip, sand, or prime.
| Surface | Fix |
|---|---|
| Oil over latex | Sand + oil primer |
| Latex over oil | Degloss + bonding primer |
| Mixed layers | Strip to sound substrate |
Applying Paint Too Thick or Too Many Coats
Ever wonder why multiple fresh coats still split and flake? You’re likely overdoing paint thickness or ignoring coat limits.
Thick layers can’t dry properly, trapping solvent and causing cracking. Follow a controlled approach:
- Apply thin, even coats.
- Respect manufacturer coat limits and dry times.
- Sand lightly between coats to promote adhesion and prevent buildup.
Painting Over Dirty, Oily, or Flaking Surfaces
If you paint over a ceiling that hasn’t been properly cleaned, the new coating won’t adhere and will likely crack or peel.
Oil and grease residues—common near kitchens or vents—prevent paint from bonding and cause visible failures.
Likewise, if the undercoat is already peeling or flaking, you’ll need to remove and repair it before repainting.
Surface Not Properly Cleaned
When you paint over dust, grease, or loose flakes, the new coating can’t bond properly and will often crack, peel, or blister soon after drying.
You must remove surface contaminants with proper cleaning techniques so paint adheres. Do this:
- Vacuum and wipe with mild detergent.
- Sand loose flakes smooth.
- Rinse, dry, and use a primer before painting.
Oil And Grease Residue
Because oil and grease create a slimy barrier, paint can’t stick to them and will soon crack, peel, or slide off; you need to remove all residue before priming.
You should scrub affected areas with a degreaser or trisodium phosphate substitute to eliminate oil residue and persistent grease buildup.
Rinse, dry thoroughly, then apply a stain-blocking primer to guarantee adhesion and prevent future failure.
Peeling Or Flaking Undercoat
Although it may look like fresh paint, flaking or peeling undercoat means the old layer never bonded and it’ll pull away from your new finish; you need to remove loose material, clean the surface thoroughly, and spot-prime before repainting.
You must assess undercoat quality to restore paint adhesion. Follow these steps:
- Scrape and sand to sound substrate.
- Degrease and wash.
- Spot-prime with bonding primer.
How Old Paint Degrades and When It Fails
As paint ages, its binders break down and the film loses flexibility, so you’ll start seeing fine cracks, flaking, or powdery chalking on the surface.
Track paint lifespan and life expectancy by noting degradation factors and environmental impacts.
Track a paint’s lifespan by noting degradation factors and environmental exposure to gauge life expectancy and wear patterns.
Understand paint chemistry and the aging process to read wear patterns and aging indicators.
Use maintenance tips to extend finish durability and delay failure.
How Cheap Paint Quality Speeds Cracking
Not all paint failures come from age alone; low-quality paints accelerate the same breakdown you just read about.
You’ll notice cheap paint flakes sooner because binders are weak, reducing paint durability and exposing substrates.
Consider cost vs. quality: budget options save now but increase long term effects.
Typical weaknesses:
- Poor adhesion
- Low pigment/binder ratio
- Faster UV/moisture breakdown
Detecting Mold or Mildew Under Cracked Paint
How can you tell if mold or mildew is hiding beneath cracked ceiling paint? Look for musty smell, dark spots, or fuzzy growth at crack edges. Use visual inspection and flashlight checks for mold detection; avoid disturbing suspect areas. For mildew prevention, control humidity and fix leaks promptly.
| Sign | What to check | Action |
|---|---|---|
| Smell | Musty odors | Ventilate |
| Spots | Discoloration | Photograph |
| Texture | Fuzzy feel | Seal/report |
How to Test Ceilings Safely for Moisture and Mold
Wondering whether that damp patch hides more than cosmetic damage? You can perform simple moisture detection and basic mold prevention checks yourself safely.
Follow steps:
- Use a moisture meter on dry days, note high readings.
- Inspect with a bright flashlight and mask for visible mold.
- Ventilate area, dry with fans, and apply a borate-based cleaner if needed.
When to Call a Pro for Structural or Persistent Damage
If you see wide, jagged, or stair-step cracks in your ceiling or walls, you should call a pro because those often signal structural movement.
Also contact a contractor if paint keeps failing in the same area after repairs, since repeated paint failure can mean an underlying issue like moisture or shifting framing.
A professional can diagnose the cause and recommend repairs to prevent further damage.
Visible Structural Cracks
When you see long, jagged cracks running across your ceiling or cracks that widen over time, treat them as potential signs of structural trouble rather than a simple cosmetic issue.
You should note crack types and assess structural integrity, then call a pro if you observe:
- Large, widening fissures
- Misaligned seams or sagging
- New cracks after foundation or roof work
Repeated Paint Failure
Repeated paint failure—peeling, bubbling, or flaking that returns shortly after you repaint—usually signals an underlying problem you shouldn’t ignore. If repairs don’t improve paint durability or ceiling aesthetics, call a pro to inspect moisture, structural movement, or improper substrate prep. They’ll diagnose causes and recommend fixes like vapor barriers, drywall replacement, or specialist coatings.
| Issue | Professional fix |
|---|---|
| Moisture | Seal/ventilate |
| Movement | Structural repair |
| Prep failure | Replace/prime |
| Persistent stains | Specialized coating |
Basic Supplies for DIY Ceiling Repair
Grab a few essential tools and you’ll be ready to tackle most ceiling paint cracks yourself. You’ll need basic ceiling tools and a few repair techniques references.
Have these on hand:
- Putty knife, sanding block, drop cloth.
- Joint compound, primer, matching paint.
- Ladder, safety goggles, paintbrush/roller.
Keep items organized, work safely, and follow simple prep steps before patching.
How to Fix Hairline Ceiling Paint Cracks
Start by cleaning and widening the crack slightly with a putty knife so filler can bond, then dust away loose debris and sand the edges smooth. Apply a thin layer of flexible filler, sand feathered, prime, and repaint for hairline crack repair and ceiling paint restoration.
| Step | Material | Time |
|---|---|---|
| Clean | Putty knife | 5 min |
| Fill | Flexible filler | 10 min |
| Prime | Primer | 15 min |
| Paint | Ceiling paint | 20 min |
Repairing Larger Cracks and Collapsed Plaster
When hairline fixes won’t hold or you’re seeing sections of plaster sag or fall away, you’ll need a more involved repair than simple filler and paint.
You’ll assess damage, secure loose lath, and plan plaster restoration and ceiling reinforcement. Steps might include:
- Remove loose plaster safely.
- Install backing or mesh.
- Reapply bonding coat, skim, and finish before repainting.
Replace Drywall or Patch? A Decision Guide
If the damage is limited to small cracks, dents, or isolated soft spots, you can usually patch and save the drywall; but if joints have pulled away, large sections sag, or moisture has compromised the board, replacing the drywall is the safer, longer-lasting choice.
You’ll weigh drywall types, access, and cost. Use appropriate patch materials, match thickness, and guarantee framing integrity before deciding.
Best Primers and Paints to Prevent Cracking
Once you’ve decided to patch rather than replace drywall, the right primers and paints will keep repairs from reappearing as cracks.
Choose primer types that seal and bridge hairline fissures, then pick paint finishes that resist flexing.
Consider:
- Acrylic bonding primer for adhesion.
- Elastomeric primer for movement.
- Matte or eggshell finish for subtle imperfection hiding and durability.
Correct Painting Technique for Ceilings (Tools & Timing)
Anyone can get smooth, crack-resistant ceilings by using the right tools and timing: use proper ceiling tools, follow timing techniques, choose compatible paint types, and finish with thorough surface preparation.
| Tool | Purpose | Timing |
|---|---|---|
| Roller+extension | Even coverage | Paint when dry and cool |
| Brush | Cut-ins | Start edges first |
| Masking | Protect | After prep, before paint |
Repairing and Matching Textured Ceilings
When you’re fixing a cracked or damaged textured ceiling, matching the existing texture is the key to a seamless repair.
Start by identifying the texture type and gathering the right tools—spray hopper or brush, joint compound, and a texture sample for practice.
Use these ceiling repair techniques to match textured ceiling patterns:
- Test texture on scrap.
- Feather compound edges.
- Paint to blend finish.
Ventilation Fixes to Stop Moisture-Related Cracking
If moisture’s causing your ceiling paint to crack, improving ventilation is one of the most effective fixes you can make—start by identifying the rooms that trap humidity (bathrooms, kitchens, attics) and focus on increasing air exchange, exhaust capacity, and airflow paths so damp air doesn’t linger and weaken paint adhesion. Use ventilation strategies and humidity control:
| Action | Benefit |
|---|---|
| Install/exhaust fans | Quick moisture removal |
| Add vents/windows | Better air exchange |
| Use dehumidifiers | Stable humidity control |
Roof and Plumbing Maintenance to Prevent Leaks
You should regularly inspect your roof for missing shingles, cracked flashing, or other damage that can let water in.
Keep gutters clean and free of debris so water drains away from the roof and walls.
Also check plumbing connections and pipes for leaks or loose fittings that could cause ceiling stains and paint failure.
Inspect Roof For Damage
Because a damaged roof is one of the most common sources of ceiling paint cracking, inspect it regularly for missing shingles, broken flashing, clogged gutters, or soft spots that let water in.
Do a roof inspection and damage assessment to catch leaks early.
Check these signs:
- Missing or curled shingles
- Rusted or loose flashing
- Soft or sagging decking
Maintain Gutters Regularly
When gutters stay clear and fastened, they channel rain away from your roof and prevent the water that leads to ceiling paint cracking. Check them at least twice a year and after heavy storms.
You should schedule routine gutter maintenance, remove debris, tighten hangers, and guarantee downspouts direct water away.
Combine this with a quick roof inspection to catch issues before they become leaks.
Check Plumbing Connections
If plumbing vents, roof flashings, or pipe seals loosen or corrode, they can let water seep into joists and drywall and cause ceiling paint to crack—so check those connections regularly.
You should schedule plumbing inspections and use simple leak detection techniques.
- Inspect vents and flashings.
- Tighten or replace seals.
- Monitor attics for stains and moisture.
Controlling Indoor Humidity to Protect Ceilings
Even though paint naturally expands and contracts with moisture, you can keep your ceiling stable by controlling indoor humidity. Consistent levels prevent the swelling and drying cycles that cause paint to crack and flake.
Use dehumidifiers, exhaust fans, and proper humidity control to maintain 40–50% RH. Improve air circulation with vents and fans, fix leaks promptly, and monitor levels to avoid recurrence.
Prep Checklist Before You Repaint a Ceiling
Before you repaint, you’ll want to clean the ceiling thoroughly—wipe away dust, cobwebs, and any grease so the new paint will adhere.
Have repair and patch materials on hand (spackle, joint compound, sandpaper, and a putty knife) to fill cracks and smooth uneven areas.
Tack each repaired spot before priming to guarantee a uniform finish.
Surface Cleaning Steps
Start by clearing dust, cobwebs, and any loose paint from the ceiling so your new coat can adhere properly.
For surface preparation grab appropriate cleaning materials and follow these steps:
- Vacuum or brush to remove debris.
- Wipe with a mild detergent solution, then rinse.
- Let fully dry before priming.
These steps guarantee a clean, sound base for repainting.
Repair And Patch Materials
While you’ve cleaned the surface, you’ll also need the right repair and patch materials to fix cracks, holes, and any loose texture so your new paint lays smooth and lasts. Use joint compound for crack filling, texture matching tools, patch materials, paint primers to guarantee surface adhesion, and proper repair tools. Choose paint types to match ceiling texture and apply proven repair techniques.
| Item | Purpose | Tip |
|---|---|---|
| Joint compound | Crack filling | Sand smooth |
| Patch materials | Holes/loose texture | Pre-cut patches |
| Paint primers | Surface adhesion | Use stain-blocking |
| Repair tools | Application | Keep spare blades |
Temporary Fixes While Waiting for Professional Repair
If you need to live with cracked ceiling paint until a pro can fix it, take simple steps to limit damage and improve appearance:
Use temporary solutions and emergency repairs after quick ceiling inspections and DIY assessments, focusing on protective measures and immediate actions.
- Patch loose flakes; clean surface.
- Apply paint alternatives like primer or sealer.
- Cover with breathable tarp or plastic.
Cost Estimates: Patch vs. Full Ceiling Redo
When you’re weighing whether to patch cracked ceiling paint or opt for a full redo, consider both immediate costs and long-term value: patching saves money upfront—usually $50–$300 for DIY or small contractor jobs—but may only be a temporary fix.
A full ceiling redo typically runs $500–$3,000 (or more for complex jobs) and addresses underlying issues for a longer-lasting result. You’ll balance cost comparison and repair options.
Common DIY Mistakes That Make Cracking Worse
Because quick fixes often skip the root cause, you can unintentionally make ceiling cracks worse by rushing or using the wrong materials.
You should avoid common DIY errors that undermine crack prevention and ignore proper paint selection.
- Skipping substrate repair
- Applying heavy coats over loose paint
- Using incompatible primers or cheap paint
Follow proper steps, not shortcuts.
Long-Term Maintenance Plan to Keep Ceilings Intact
Although maintenance takes some planning, you can keep ceilings crack-free by following a simple, regular routine that addresses moisture, structural shifts, and finish wear.
Create a maintenance schedule with regular inspections focusing on humidity management, temperature control, and structural integrity.
Use preventive measures like choosing quality paint and compatible ceiling materials, prompt small repairs, and seasonal checks to extend finish life and prevent recurrence.
Troubleshooting Checklist: Identify Cause and Next Steps
Now that you’ve set up a maintenance routine, it’s time to pinpoint what’s actually causing the paint to crack so you can choose the right fix.
Use this checklist to guide your repair and improve crack prevention and surface durability:
Use this checklist to guide repairs, prevent future cracking, and strengthen your painted surfaces.
- Inspect for moisture, leaks, or condensation.
- Check substrate integrity and previous paint adhesion.
- Verify ventilation, temperature swings, and application errors.
Frequently Asked Questions
Can Ceiling Paint Cracking Indicate Asbestos or Lead Paint Hazards?
Like a warning light, cracked ceiling paint can sometimes signal old materials but it doesn’t prove asbestos or lead; you should get asbestos testing and check for lead exposure, since only lab tests confirm hazardous presence.
Will Ceiling Paint Cracking Affect My Home’s Resale Value?
Yes — cracking effects can lower appeal and raise resale considerations; buyers’ll worry about underlying issues, repairs, or hazards. You should fix and document repairs, so you don’t lose negotiating power or reduce your home’s market value.
Can Pets or Pests Cause Ceiling Paint to Crack?
Yes — you can have pet behavior or pest damage causing ceiling paint to crack; pets scratching or climbing and pests nesting or chewing create moisture, movement, or structural harm, so inspect, repair damage, and prevent recurrence.
How Long After Repair Until I Can Repaint the Ceiling?
Want to know? You can repaint after the repair process fully dries—typically 24–72 hours for joint compound, longer for deep repairs. Check drying time on materials, and you’ll avoid trapping moisture or causing new cracks.
Does Seasonal Attic Insulation Removal Cause Paint to Crack?
Yes — removing seasonal insulation can cause paint to crack. You’ll change attic humidity and expose or disturb insulation materials, triggering moisture shifts and temperature swings that stress paint layers, so monitor conditions and re-seal before repainting.
