
How to Remove Sand Paint From Walls Without Destroying the Drywall
You can remove sand paint without wrecking drywall by working slowly with gentle tools and low‑strength softeners. Start by testing a small spot, then use a plastic putty knife, soft sanding sponge, or gentle heat/steam to loosen grit while supporting the paper face with a wide taping knife. Clean residue with water and neutralizer, feather repairs with joint compound, sand lightly, prime, and repaint. Follow safety steps and room prep, and keep going for detailed step‑by‑step methods and tips.
Who This Guide Helps And What It Covers
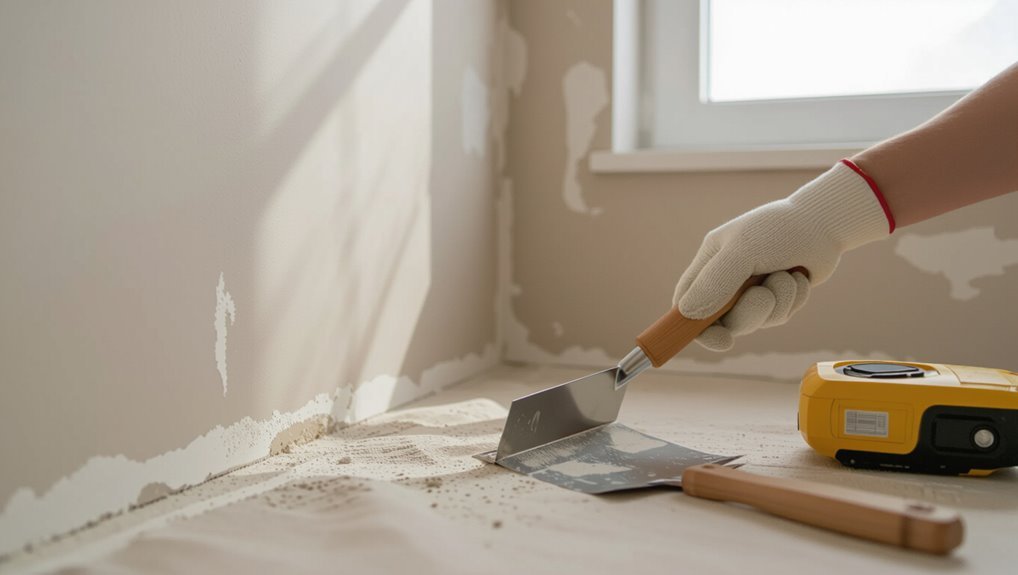
This guide helps homeowners, renters, and DIY painters who’ve discovered gritty, textured paint where smooth walls were expected.
For homeowners, renters, and DIY painters facing unexpectedly gritty walls—clear, practical steps to assess, protect, and restore smooth surfaces.
You’ll learn relevant sand paint history to recognize common blends and why texture was applied.
You’ll also get practical drywall maintenance tips to protect surfaces during removal and preparation.
You won’t need heavy jargon—just clear steps to assess, plan, and act safely.
Quick Answer: Safest Method To Remove Sand Paint From Drywall
Start by evaluating a small, hidden area to determine how firmly the sand texture is bonded and how much underlying drywall will be affected.
For a safe removal, work slowly, use gentle tools, and consider sand paint alternatives if you plan to refinish.
Focus on drywall maintenance to prevent damage.
- Test adhesion first
- Use soft scrapers and sanding
- Patch and prime carefully
Inspecting Sand Paint Adhesion
Start by testing the paint’s bonding strength with a firm press or a gentle scrape using a fingernail or putty knife.
If the sand paint lifts, flakes, or crumbles easily, you’ve got loose areas that need attention before any removal method.
Mark those spots so you can target them during prep and repair.
Check Paint Bonding Strength
Inspect the surface closely to see how well the sand paint is stuck to the wall — look for flaking, bubbling, or areas where the texture lifts when you run your hand or a fingernail over it.
Consider paint adhesion and drying factors as you evaluate. Check these:
- Tap gently to test bond.
- Note soft or brittle spots.
- Photograph areas for reference.
Identify Loose Or Flaking
When you run your hand or a fingernail lightly over the wall, pay attention to any gritty texture that lifts, crumbles, or flakes away—those are clear signs the sand paint isn’t adhering properly.
Move methodically, marking areas of loose paint with a pencil. Note spots with a pronounced flaking texture and prioritize them for removal or patching before any sanding or repainting to prevent further damage.
When To Remove Sand Paint Vs. Cover With A New Finish
Although textured sand paint can add character, you’ll need to decide whether to remove it or simply cover it based on condition, desired outcome, and effort you’re willing to invest.
Consider sand paint alternatives during renovation planning and weigh pros/cons:
- Remove: if damaged or you’re restoring smooth drywall.
- Cover: if texture is sound and you want faster results.
- Hybrid: skim coat then refinish.
Safety Gear You Need For Working On Sand‑Painted Walls
Before you start scraping or sanding sand‑painted walls, get the right protective gear so you don’t inhale dust or chip fragments.
Wear a NIOSH-rated respirator, safety goggles, and disposable coveralls. Use gloves and knee pads for comfort and grip.
Seal the room, ventilate with a fan, and keep a HEPA vacuum nearby.
These safety precautions and protective equipment cut exposure and damage risk.
Tools That Protect The Drywall Paper Face
If you want to strip sand paint without tearing the drywall paper, use tools that skim and support the surface rather than gouge it.
For drywall protection and precise tool selection, choose low‑abrasion, wide contact tools that reduce pressure and prevent tears.
- Plastic putty knife for gentle scraping
- Soft sanding sponge for even abrasion
- Wide drywall taping knife to support paper face
Solvents And Cleaners Safe For Drywall
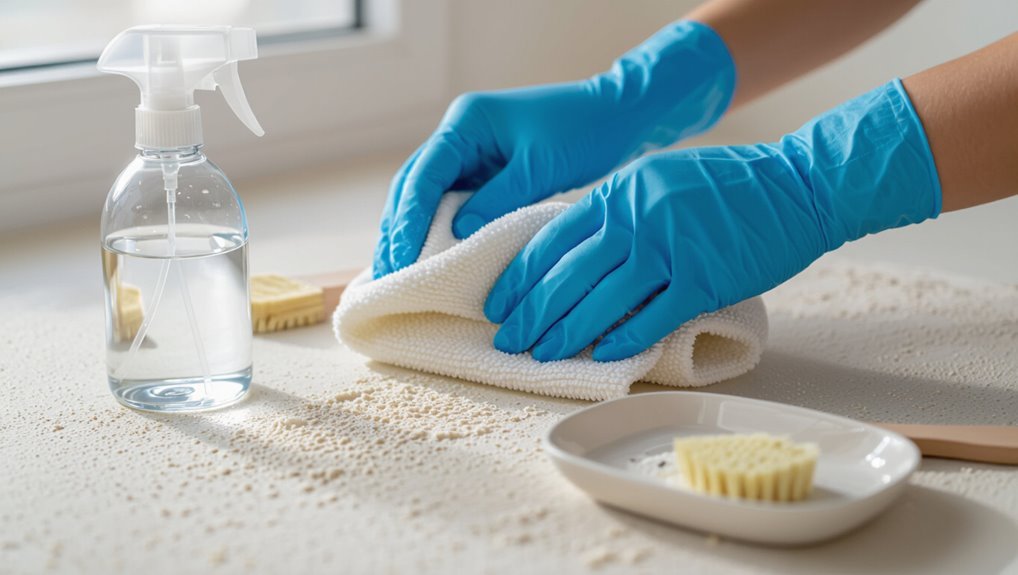
When you’re choosing solvents and cleaners for drywall, pick mild, water‑based products and avoid strong solvents that can dissolve the paper face or weaken joint compound. You should favor pH-neutral cleaners, gentle degreasers, and products with clear paint compatibility notes to protect drywall maintenance.
| Cleaner Type | Strength | Use Case |
|---|---|---|
| Mild detergent | Low | Light soil |
| Water-based remover | Low | Soft paint |
| Isopropyl alcohol | Moderate | Spot cleaning |
| Solvent-based | High | Avoid |
Test A Small Patch Before Full Removal
Before you start stripping the whole wall, pick an inconspicuous spot like behind a trim or near a corner to test.
Try each removal method there—gentle scraper, solvent, or sanding—to see which removes the sand paint without damaging the drywall.
If one method works cleanly, you can proceed with more confidence across the rest of the surface.
Choose An Inconspicuous Spot
Pick a small, hidden area—like inside a closet, behind a baseboard, or the top corner of a doorframe—and try your chosen removal method there first.
For proper spot selection, use an inconspicuous area to confirm safety and appearance.
Test for color change, texture, and adhesion:
- Check paint color match
- Look for drywall damage
- Note cleanup effort
Try Multiple Removal Methods
Start by testing several removal methods on the small patch you chose so you can quickly compare results and avoid surprises. Try alternative methods—soft scraping, gentle solvent, micro-sanding—and note removal efficiency, surface damage, and drying time. Use this quick table to record outcomes and pick the safest approach before full removal.
| Method | Result |
|---|---|
| Soft scrape | |
| Solvent | |
| Micro-sanding |
Softening Sand Paint With Steam Or Heat
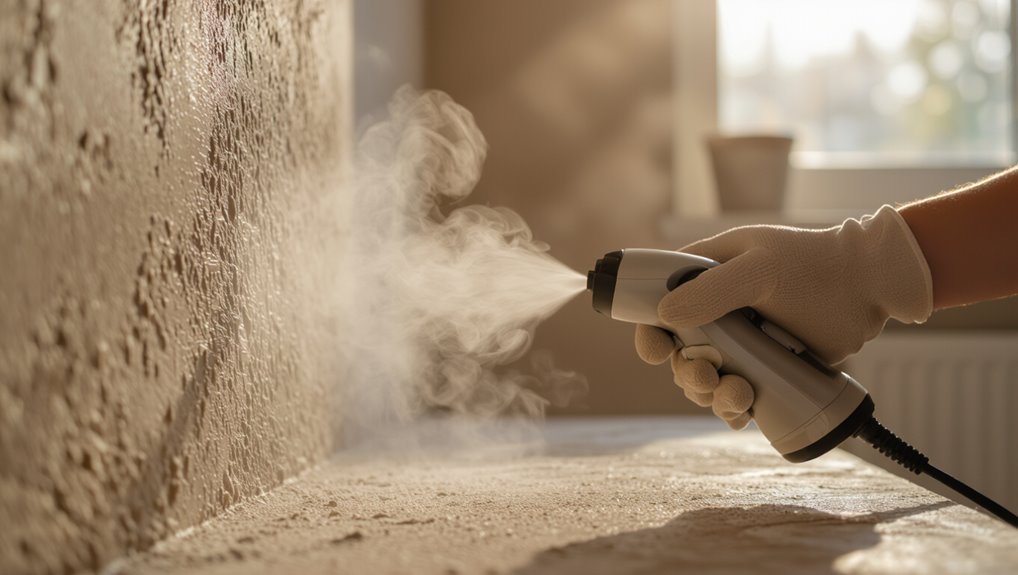
If the sand paint’s texture has hardened, you can soften the grit with controlled steam or heat to make removal much easier; both methods loosen the binder so the particles release from the wall.
You’ll use steam application or gentle heat sources, protect surroundings, and test a small area first.
- keep distance and move steadily
- shield nearby surfaces
- ventilate the room
Lifting Loose Sand With A Soft Scraper And Brush
Gently work a soft plastic scraper across the wall to lift loosened sand particles without gouging the surface, then sweep them away with a natural-bristle brush so you don’t reabrasively grind grit back into the paint. Use soft scraper techniques and brush cleaning methods carefully, keeping strokes light and directional to protect drywall and avoid rubbing residue back into softened paint.
| Tool | Motion | Frequency |
|---|---|---|
| Scraper | Light, angled | Once per pass |
| Brush | Sweep away | After each scrape |
| Vacuum | Gentle nozzle | Final cleanup |
Using Chemical Strippers Gently On Drywall
After you’ve removed loose grit, you can consider chemical strippers for stubborn sand paint spots on drywall, but you’ll need to handle them with care.
You’ll focus on chemical safety and gentle application techniques to protect paper and gypsum.
Follow steps:
- Test a small, hidden area first.
- Use low-strength stripper and short dwell times.
- Wear gloves, goggles, and ventilate well.
Neutralizing And Removing Stripper Residue Safely
Before you start wiping, test a small patch for stripper residue so you know what you’re dealing with.
Pick a neutralizer that’s safe for drywall and follow the product instructions carefully.
Finish by rinsing with clean water and drying the wall completely to prevent damage and guarantee a good surface for repainting.
Test Stripper Residue First
When you’ve applied a paint stripper to sand paint, test any remaining residue in an inconspicuous spot so you can neutralize and remove it safely without damaging the underlying surface.
You’ll check test methods and observe residue effects before treating larger areas.
Try simple checks:
- Dab with damp cloth, note reaction.
- Scratch gently, watch texture.
- Smell for chemical lingering.
Choose Safe Neutralizers
If your spot tests show leftover stripper, you’ll need to neutralize it properly to stop chemical action and protect the wall.
Choose neutralizer types like diluted baking soda, vinegar solutions, or commercial neutralizers designed for paint strippers.
Follow product instructions, wear gloves and eye protection, test a small area, and apply neutralizers only where needed for safe applications to avoid drywall damage.
Rinse And Dry Thoroughly
1–2 thorough rinses will usually remove most neutralizer and stripper residue, so flush the treated area with clean water using a sponge, soft cloth, or low-pressure spray while working from top to bottom.
You’ll use gentle rinse techniques, then apply drying methods to prevent damage and mold:
- Blot excess water with microfiber cloths
- Use fans for airflow
- Keep humidity low until fully dry
When To Sand: And What Grit To Use
Although you’ll want to sand only after paint’s fully dry and any loose grit’s been knocked off, deciding when to start also depends on the texture you want to achieve and the condition of the surface. Use gentle sanding techniques and smart grit selection: start with 120–150 for smoothing, 180–220 for feathering edges, then finish with 320 if needed.
| Stage | Grit | Purpose |
|---|---|---|
| Initial | 120–150 | Remove roughness |
| Mid | 180–220 | Blend edges |
| Finish | 320 | Smooth surface |
Sanding Technique That Avoids Tearing Drywall Paper
Start slow and light: use a sanding block or pole sander with fine-grit paper and keep even, feathering strokes to avoid digging into the paper facing.
You’ll protect the wall using gentle sanding techniques and focus on drywall preservation.
- Keep pressure light and consistent
- Check progress frequently
- Replace paper when clogged
Blending Feathered Edges After Sanding
After sanding, you’ll want to feather the edges so the repair blends smoothly with the surrounding wall.
Use a thin layer of joint compound and work it out in progressively wider strokes to hide any ridges.
Sand very lightly at the end so the surface stays even without tearing the paper.
Feathered Edge Techniques
When you’ve sanded down the rough edges of the sand paint, blending the feathered edges smooths the shift so the repair disappears into the surrounding finish.
Use precise feathering techniques and gentle edge blending so changes vanish.
Tips you’ll follow:
- Work from center outward with light pressure
- Use progressively finer sandpaper
- Check changes under different light angles
Blending Joint Compound
Blend the feathered edges of joint compound by working outward from the repair with a damp sponge or wide drywall knife, keeping light, even pressure so the compound thins gradually into the surrounding wall.
Use precise blending techniques, smoothing joint compound applications until changes vanish. Let each pass blend farther, clean tools between strokes, and check with raking light to guarantee seamless integration before priming and painting.
Sanding With Light Touch
Start sanding lightly, holding the block flat and using long, even strokes to feather the repair into the surrounding wall.
You’ll blend edges with gentle pressure, watch dust buildup, and keep the surface smooth. Good sanding techniques protect texture and save time during drywall maintenance.
- Use light, consistent strokes
- Check progress often
- Wipe dust between passes
Removing Stubborn Sand Particles With A Sponge Wash
Grab a soft sponge and a bucket of warm, soapy water to tackle the stubborn sand particles clinging to the paint; you’ll work gently in small sections, rinsing and re-squeezing the sponge often to avoid grinding grit into the finish. Use a gentle sponge technique for effective sand removal, blotting and lifting residue until surface feels smooth.
| Step | Action | Tip |
|---|---|---|
| 1 | Wet sponge | Avoid scrubbing |
| 2 | Blot area | Rinse sponge |
| 3 | Lift grit | Change water |
| 4 | Inspect finish | Repeat if needed |
| 5 | Dry surface | Use soft cloth |
Using A Razor Or Micro‑Scraper Without Damaging Paper
When you need to lift stuck sand or paint specks without tearing the paper, work slowly and keep the blade at a very shallow angle so it skims the surface rather than slices into it; use light, controlled strokes and check your progress often so you stop before the edge catches.
- Start with a new blade — razor techniques matter.
- Hold scraper flat — micro scraper tips: low pressure.
- Angle slightly and inspect frequently.
How To Use An Orbital Sander Without Cutting Through The Wall
Start with the right grit—use a finer paper to remove texture without gouging.
Keep the sander moving in even, controlled passes and don’t press down hard; let the tool do the work.
Monitor your progress frequently so you can adjust pressure and grit before you cut through the wall.
Select The Right Grit
Although it might be tempting to jump straight to coarse paper, pick a grit that removes the sandy texture without gouging the wall — typically begin with 120–150 grit and step down only if the texture won’t budge.
Use proper grit selection and sanding techniques to preserve drywall.
- Start with 150 for light texture
- Move to 120 for stubborn spots
- Finish with 180–220 for smoothness
Control Pressure And Motion
Gauge your pressure and keep the sander moving in steady, overlapping passes so you remove the sandy paint without cutting into the drywall.
You’ll use light pressure control: let the tool’s weight do the work and avoid holding it in one spot.
Maintain a consistent motion technique—slow, even strokes across the surface—to prevent gouges and guarantee uniform sanding results.
Protecting Seams, Corners, And Trim During Removal
When you begin removing sand paint, take a moment to protect seams, corners, and trim so you don’t damage adjacent surfaces or create extra cleanup.
Use seam protection techniques and corner safeguarding methods to shield vulnerable areas. Prep, cover, and work carefully.
- Apply painter’s tape firmly along seams
- Pad corners with foam or cardboard
- Wrap trim with plastic sheeting and tape
Addressing Textured Patches And Repaired Areas
If you’ve patched or smoothed areas before removing sand paint, inspect those spots closely for texture differences and loose material so you can adjust your technique. Patched areas often bond differently and can flake or sand away unevenly.
Use gentle sanding and feathering, test solvents in inconspicuous spots, and apply appropriate textured patching and repair techniques to blend finishes without overworking the drywall.
Repairing Torn Drywall Paper Without Replacing The Board
Tackle torn drywall paper by cleaning loose fibers, flattening the tear, and stabilizing the area with adhesive so you can repair it without swapping the whole board.
Use careful drywall repair techniques and consider moisture damage prevention.
- Press adhesive under the paper, smoothing gently.
- Apply thin joint compound, feathering edges.
- Sand lightly and prime before repainting.
Filling Shallow Gouges And Divots After Removal
First check how deep and wide each gouge or divot is so you know whether a light skim or a thicker patch is needed.
Choose a patch compound rated for shallow repairs—lightweight spackle or premixed joint compound usually works best.
Apply the right amount, smooth it flush with the wall, and let it dry before sanding and priming.
Assess Damage Extent
Before you reach for filler, take a careful look at each gouge and divot to judge depth, width, and whether the sand paint removed any underlying texture. Shallow blemishes under 1/8 inch usually need only a skim coat, while wider or deeper spots may require layering.
Use damage assessment to pick repair techniques that match severity:
- Small hairline dents: single skim
- Medium depressions: layer and sand
- Large gouges: evaluate backing and reinforcement
Use Appropriate Patchcompound
Choose a patch compound that matches the depth and texture you’re repairing: lightweight spackling works well for hairline dents and shallow divots, while a setting-type joint compound or polymer patch is better for slightly deeper gouges that need multiple layers.
For proper patch compound selection, clean and sand the area, apply thin coats, feather edges, and follow curing times. Focus on neat patch compound application.
Skim‑Coating Small Areas To Restore Smoothness
Grab a clean putty knife and a small bucket of joint compound—skim-coating small areas is the quickest way to erase remaining grit and restore a perfectly smooth surface.
You’ll use skimming techniques and smoothing methods to feather edges and blend patches. Work thin, press firmly, then sand light.
Use skimming and smoothing to feather edges, blend patches, work thin, press firmly, then sand light.
- Feather edges
- Blend into surrounding wall
- Inspect and repeat as needed
Drying And Curing Times For Joint Compound And Skim Coats
Expect joint compound and skim coats to feel dry to the touch in a few hours but to fully cure can take 24–72 hours or longer depending on thickness.
Humidity, temperature, ventilation, and coat thickness all affect how quickly the compound cures, so you’ll want warmer, drier conditions and good airflow for faster results.
For best adhesion and to avoid cracking, let each skim coat fully cure before sanding or repainting, and use a fan or dehumidifier if drying is slow.
Expected Drying Times
While skim coats and joint compound may feel dry to the touch within a few hours, their full drying and curing times vary with thickness, temperature, humidity, and ventilation.
Thin feather coats can be painted in 24 hours under ideal conditions, but multiple-layer applications or cold, humid environments can stretch curing to several days.
- Check drying conditions and adjust ventilation.
- Monitor moisture levels before sanding.
- Wait longer for thicker layers.
Factors Affecting Cure
Because drying and curing depend on more than time alone, you’ll need to take into account several key factors—temperature, humidity, coat thickness, ventilation, and the compound type—when estimating how long joint compound or a skim coat will fully set.
These environmental factors directly change cure time: warmer, drier, and ventilated conditions speed curing, while thick or cold, humid conditions prolong it.
Tips For Proper Curing
Getting your joint compound or skim coat to cure properly takes more than patience—you need the right mix of temperature, humidity control, and application technique to avoid cracks, bubbles, or delayed drying.
Use these curing techniques and focus on moisture control:
- Keep room 55–75°F, ventilate steadily.
- Apply thin coats; sand lightly between layers.
- Allow full dry times listed by manufacturer before painting.
Sanding Repaired Areas For A Seamless Finish
Start by smoothing the repaired area with a medium-grit sandpaper to blend the patch into the surrounding wall; you want the edges feathered so paint won’t reveal a ridge.
Use controlled sanding techniques—light, even strokes and a sanding block—to achieve seamless blending.
Check frequently under good light, switch to fine-grit for final smoothing, and wipe dust before painting.
Primer Choices After Removing Sand Paint
When you’ve removed sand paint and smoothed the surface, choose a primer that matches both the wall material and your topcoat: use a high-build or bonding primer for stubborn textured residues, an oil-based or shellac primer to block stains and tannins, and a water-based primer for quick-drying, low-odor jobs on clean drywall or previously painted areas.
- Select primer types by residue and stain risk.
- Follow proper application techniques for adhesion.
- Test a small area before full coverage.
Best Paint Types To Cover Previously Sanded Walls
After you’ve sanded and primed, pick a paint that matches the room’s use and the surface—use a durable acrylic latex for most interior walls because it balances adhesion, breathability, and ease of cleanup; choose a satin or eggshell finish for living areas to hide minor imperfections, semi-gloss for trim and moisture-prone rooms, and oil-based or enamel paints only where extra hardness or stain resistance is essential.
You’ll want to evaluate paint finish options and texture compatibility: match sheen to wall texture, prioritize washable formulations for high-traffic areas, and test a small patch to confirm adhesion and appearance.
How To Apply Paint To Avoid Re‑Exposing Grit
One clear rule to prevent grit from reappearing is to apply paint in thin, even coats so the binder can fully encapsulate any remaining particles and create a smooth surface.
Apply paint in thin, even coats so the binder fully encapsulates particles for a smooth, grit-free finish.
Follow paint application techniques and surface preparation tips:
- Sand lightly and vacuum before priming.
- Use high-quality primer and allow full cure.
- Roll or spray evenly, keeping coats thin and consistent.
Preventing Flashiness And Texture Show‑Through Under Paint
To prevent flashiness and texture showing through, start by priming high‑texture areas to even out sheen and adhesion.
If bumps persist, sand and apply a thin skim coat before sanding smooth.
For stubborn texture, use a high‑build primer to fill minor irregularities and provide a uniform base for topcoat.
Prime High‑Texture Areas
Start by spotting the rough, sandy patches that are most likely to show through your new paint and prime them first.
You’ll control texture variations and reduce flashiness by choosing the right primer and using consistent application techniques.
- Use a high-build primer on heavy texture.
- Roll with a short-nap roller for even coverage.
- Feather edges to blend into surrounding drywall.
Sandpaper And Skim Coat
After priming high‑texture spots, smooth any remaining grit with sandpaper before applying a skim coat so the new layer sits flat and doesn’t highlight rough areas.
Choose sandpaper grades progressively finer—start 80–120, finish 180–220—to remove peaks without gouging.
Use skim coat techniques: thin, even passes, feather edges, and light sanding between coats so texture won’t show through the final paint.
Use High‑Build Primer
When you want a smooth, even finish over textured or patched areas, use a high‑build primer—it’s formulated to fill minor imperfections and create a uniform surface so your topcoat won’t highlight grit or sheen differences.
You’ll appreciate the high build benefits and improved primer application for hiding texture.
Tips:
- Roll evenly to avoid ridges
- Sand light between coats
- Use 2 coats for best coverage
When To Call A Pro: Major Damage Or Entire‑Room Removal
If the sanding or textured paint has left widespread peeling, deep gouges, or the finish has failed across multiple walls, you should call a pro—this isn’t a small spot clean and will need skilled assessment and likely full-room prep and refinish.
Don’t risk further damage: hire someone for professional assessment when you face major damage or need entire-room removal to guarantee proper repair and warranty.
Cost Comparison: DIY Removal Vs. Hiring A Contractor
You’ll want to compare the cost of DIY materials and tools—sanders, scrapers, fillers, drop cloths—against a contractor’s labor rates.
DIY can save money on hourly labor but may require buying or renting equipment you won’t reuse.
Hiring a pro adds predictable labor costs and expertise that can be worth it for large or tricky jobs.
DIY Materials And Tools
Tackling sand paint removal yourself can save you a lot, but you’ll need to weigh the cost of tools and materials—scrapers, sandpaper, chemical strippers or citrus-based removers, putty knives, drop cloths, respirators, and a good-quality sander—against what a contractor would charge for labor and disposal.
Use DIY Techniques and Material Alternatives to balance expense.
- Basic starter kit: scraper, sandpaper, respirator
- Mid-range: sander, citrus remover, putty knives
- Premium: HEPA vacuum, pro-grade stripper, replacement drywall
Contractor Labor Costs
1 thing to weigh is labor: hiring a contractor typically costs considerably more than DIY, but it buys you speed, expertise, and proper disposal of hazardous waste like lead-contaminated sand paint.
You’ll compare contractor pricing against your time, tools, and risk.
Pros: higher labor efficiency, warranty, safer handling.
Cons: higher upfront cost.
Choose based on budget, timeline, and exposure risk.
Time Estimates For Each Removal Method And Room Size
Because methods and room sizes change the timeline, you should expect a range of durations rather than a single fixed time:
Expect a range of durations—room size and methods determine the timeline, not a single fixed time.
You’ll plan around time estimates tied to paint adhesion and square footage.
Typical ranges:
- Small room (100 sq ft): 1–3 hours with sanding or scraping.
- Medium (200–300 sq ft): 3–6 hours, including prep and cleanup.
- Large/open areas: half to full day, or longer for textured finishes.
Common Mistakes That Damage Drywall And How To Avoid Them
Don’t sand so aggressively that you remove the drywall finish—you’re aiming to smooth bumps, not gouge the surface.
Avoid harsh solvents that can weaken paper facing or strip joint compound; test any cleaner in an inconspicuous spot first.
With gentle sanding and mild, drywall-safe products you’ll prevent needless repairs.
Over-Sanding Drywall Finish
Avoid over-sanding a drywall finish: it can quickly turn a smooth wall into a pitted, uneven surface that’s harder to repair than the original flaw.
You’ll ruin drywall preparation and complicate texture matching if you sand too aggressively.
Prevent damage by:
- Testing a small area first
- Using fine grit and light pressure
- Stopping when imperfections blend
Using Harsh Solvents
If you reach for strong solvents to strip stubborn sand paint, know they can easily eat through drywall paper, dissolve joint compound, and leave stains that won’t take new finish.
You should identify solvent types, test small hidden areas, and use gentle application techniques with minimal dwell time.
Wear protection, ventilate, and stop at the first sign of swelling or softening to avoid irreversible damage.
Working Around Electrical Outlets And Switches Safely
When you’re sanding or repainting near outlets and switches, turn off the power at the circuit breaker and confirm it’s dead with a non-contact voltage tester before you touch anything; this simple step prevents shocks and lets you work confidently around trim and plates.
Follow key steps for Electrical safety, Outlet protection, Switch handling, Wiring precautions, Circuit awareness, Power disconnection, Tool selection, Voltage testing:
- Remove plates, cover wiring.
- Use insulated tools and tape.
- Recheck voltage before finishing.
Protecting Floors And Furniture During Removal
Before you start scraping or washing, cover floors completely with drop cloths or heavy plastic to catch flakes and drips.
If possible, move furniture out of the room; otherwise, wrap pieces in plastic or use furniture pads to protect surfaces.
Secure coverings with tape so they won’t shift while you work.
Cover Floors Completely
1 simple step you shouldn’t skip is covering the floors completely to catch flaky paint, grit, and cleaning runoff.
Use proper floor protection and choose covering methods that resist tears and liquids. Lay protection smoothly, tape seams, and avoid slips.
- Use rosin paper or contractor drop cloths
- Add plastic sheeting for wet work
- Secure edges with low-tack tape
Move Or Shield Furniture
After you’ve sealed the floors, turn your attention to furniture — either move pieces out of the room or cover them thoroughly to keep sanding dust and paint chips off upholstery and finishes.
Use clear furniture protection: plastic sheeting taped loosely, breathable drop cloths, and corner guards.
Plan moving strategies for heavy items—use sliders, enlist help, and clear pathways to prevent scuffs or accidents.
Disposing Of Removed Sand Paint And Chemical Waste
When you remove sand paint and use solvents or strippers, you’ll need to handle the leftover grit, paint chips, and chemical residues as hazardous waste rather than tossing them in regular trash or down drains.
You should:
- Locate eco friendly disposal sites or household hazardous waste events nearby.
- Seal chips and rags in labeled, leakproof containers.
- Follow local regulations for transport and drop‑off.
Health Risks And Testing For Old Sand‑Painted Finishes
Because many older sand‑painted finishes can contain lead, asbestos, or other toxic additives, you should treat them as potentially hazardous until testing proves otherwise.
You should hire a certified tester to check for lead paint and asbestos; DIY kits can miss hazards.
Wear PPE, isolate work areas, and avoid sanding or dry scraping.
Follow local rules for notifications and abatement if tests are positive.
How To Prevent Sand Paint Issues In Future Renovations
If you want future renovations to go smoothly, plan ahead by identifying any sand‑painted surfaces, testing them for hazards, and specifying appropriate removal or encapsulation methods in your project scope; this prevents surprises, keeps workers safe, and avoids costly rework.
- Include preventive maintenance checks in your renovation planning schedule.
- Train crews on safe containment and removal.
- Specify materials and timelines to avoid surprises and extra costs.
Case Study: Single‑Wall Vs. Whole‑Room Sand‑Paint Removal
Although tackling a single sand‑painted wall can seem quicker, you should weigh the tradeoffs: you’ll face single wall considerations like color mismatch, edge feathering, and confined sanding dust.
Removing sand paint from a whole room avoids patchy repairs but increases time, containment, and finish consistency work.
Decide by budget, timeline, and whether you’ll repaint adjacent surfaces for a seamless result.
Troubleshooting: Stubborn Spots, Bleed‑Through, And Texture Ghosts
Once you start stripping or sanding, you’ll likely run into stubborn spots, bleed‑through stains, or faint remnants of the original texture that won’t disappear with a single pass.
Tackle them methodically:
- Test a mild solvent or targeted sanding for stubborn stains.
- Apply stain‑blocking primer as one of your bleed through solutions.
- Feather texture with light skim coats, sanding between layers for smoothness.
Quick Checklist For A Successful Sand Paint Removal Day
1. Gather PPE, drop cloths, and tools; review removal techniques you’ll use. Confirm power is off and vents are closed.
Check surface preparation: clean, dry, and marked problem areas. Plan sections, time blocks, and disposal method.
Keep a bucket, soft brushes, and gentle scrapers handy. Pause to inspect progress frequently to avoid damaging drywall.
Recommended Materials List And Local Pros Lookup Tips
Gather a concise kit before you start: protective gear (N95 mask, safety goggles, disposable coveralls, gloves), drop cloths, soft-bristle brushes, plastic or rubber scrapers, mild solvent or trisodium phosphate (TSP) alternative, a gentle paint remover recommended for textured/sand paints, sanding pads or a sanding sponge (fine grit), clean rags, a bucket, and a HEPA vacuum for dust control.
- Ask neighbors for recommended local pros.
- Use a concise materials guide checklist.
- Verify contractors’ insurance, references, and written estimates.
Frequently Asked Questions
Can Sand Paint Damage Wallpaper Beneath Drywall Paper?
Yes — like a storm stirring dust, sand texture can abrade and embed in wallpaper beneath drywall paper, so you’ll need careful wallpaper protection and gentle removal to avoid tearing, staining, or weakening the paper backing.
Will Mold Grow Under Sand Paint After Partial Removal?
Yes, mold can grow under sand paint after partial removal if moisture remains. You should focus on mold prevention and moisture control, drying surfaces thoroughly, fixing leaks, and using antimicrobial primer before repainting to prevent regrowth.
Can I Reuse Removed Sand Paint as Textured Finish Material?
Can you really reuse removed sand paint as textured material? You can, but you’ll need to screen debris, test adhesion, and adjust binders; use careful removal techniques to collect usable grit and guarantee a stable, safe finish.
Are There Eco‑Friendly Disposable Methods for Sand Paint Residue?
You can use eco friendly alternatives like compostable bags, inert landfill disposal, and recycling centers for grit; disposal methods include vacuuming into sealed biodegradable bags and taking collected residue to hazardous-waste or construction-material recycling points.
How to Document Damage for Insurance or Contractor Claims?
About 75% of claims need photos; start there. You’ll document damage assessment with time‑stamped photos, measurements, and receipts, write a clear inventory, get contractor estimates, and follow your insurer’s claim process step by step.
